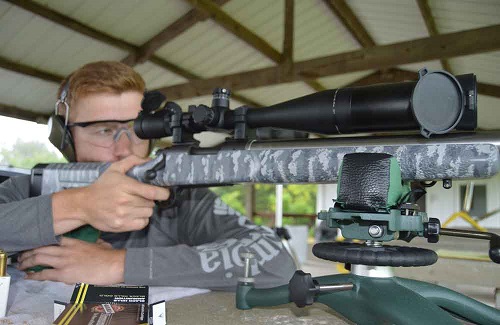
If you’re ready to invest a little money in upgrading your rifle, one of the best things you can buy that will totally transform the way you shoot is a scope.
Not only will a scope improve your range and accuracy, but it will make our beloved sport more competitive and much safer.
But buyer beware.
Not all scopes are created equal! Some scopes are just poorly made, and other scopes are made for various purposes.
For example, the scopes I recommend in my 6.5 Creedmoor guide are solely dedicated for long range shooting.
Do You Need A Riflescope?
But before you buy a riflescope, learn why you should even buy a riflescope in the first place.
Some are built for tactical purposes while other sniper/hunting scopes specialize in longer-range targets.
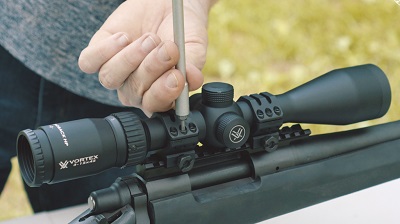
Purchasing a riflescope is only the beginning. You should properly mount and sight in your scope before you ever think about shooting it.
You may be shooting a .22 all the way up to a high-powered rifle, so it’s important that you have the right scope for the job. Be sure to read reviews on the scope you have in mind before purchasing. Reviews (like this Scope for Ruger 10-22 Reviews) can be very helpful in helping you decide how to spend your hard-earned dollars.
A quick pro-tip here is that it’s generally better to have too much scope than not enough. So, if you must err on the side of caution, err in favor of the scope.
I Have A Riflescope… Now What?
Okay, so you’re happy with the scope you’ve purchased, and now you want to get out and shoot, right?
Wrong.
Only after you have properly mounted your riflescope can you sight it. This component is just as important as anything else because it is how you customize the rifle to your own anatomy and mechanics.
Your arm length, eye spacing, and the unique way you hold the rifle are slightly different from everybody else, and these subtle differences can make a big difference downrange.
You might find it is easiest to sight your rifle at a local shooting range. However, if you live far from one but have a lot of land nearby, just make sure you’re shooting in a safe direction where there is no chance of passing hikers, campers, etc.
Make sure you use the same exact brand and weight of bullets that you’ll be using on the hunt. Even the slightest variation can have a significant effect on how the round fires.
The basic idea of sighting is to make sure the bullet hits exactly where you’re aiming. If this doesn’t happen, it is either because of two things:
- You need a refresher on the fundamentals of marksmanship.
- Or the scope isn’t properly sighted.
Assuming it’s number 2, you might be wondering:
How do I properly sight my scope? Keep reading to find out!
-
The N1 Outdoors® “OUTDOORS™” Tee
Price range: $28.99 through $32.99 Select options This product has multiple variants. The options may be chosen on the product page -
N1 Outdoors® “Outdoor Npressions™” Boot Print Tee
Price range: $24.99 through $28.99 Select options This product has multiple variants. The options may be chosen on the product page -
Sale!
N1 Outdoors® “Lumber Mountain” Tee (Various Colors)
$9.00 Select options This product has multiple variants. The options may be chosen on the product page
Step 1: Focus the Reticle
The first thing you need to do is make sure your reticle is in focus.
The reticle is the shape (crosshairs, a singular dot or circle, a triangle, etc.) you see when you look through the scope, and its function is to indicate scale or location of an object.
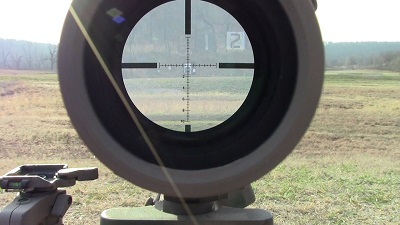
Step 1 of sighting in your riflescope is to be sure you focus the reticle.
Look through the scope to ensure the whole picture is sharp. If it’s blurry, twist the diopter adjustment on the scope, which is typically going to be the end of the scope closest to your eye.
Something to keep in mind is that when shooting is that you will be focusing your naked eyes way downrange, scanning for targets or game, and then you’ll quickly switch to the scope right in your face.
Your eyes take a little time to adjust, so the view through the scope can be a little blurry for a few seconds.
To eliminate this lag, look away from the scope and let your eyes focus on something else at a distance. Stare at it for a few moments, then quickly look through the scope and in the brief moments before your eyes adjust, determine if the picture appears blurry. Keep doing this until the image is sharp and in focus immediately upon looking through the scope.
Step 2: Boresighting
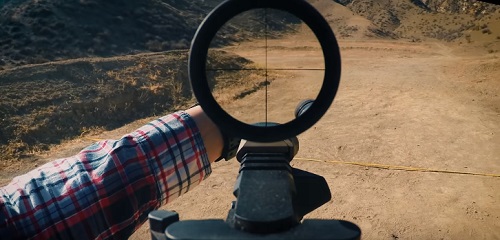
When boresighting your riflescope, be sure that what you’re aiming at down the barrel is the same thing your reticle is aimed at.
Boresighting your rifle first will save a lot of time and ammo.
This will take just a few minutes and will ready your weapon for the fine-tuning we are about to do.
First, securely mount the rifle to aim downrange at a highly visible target 25 yards away. Then, remove the bolt so you can see straight down the barrel at the target.
Look through and aim the barrel center mass. Next, look through the scope to ensure the reticle also lands center mass. You will likely need to adjust the scope’s turrets to achieve this. The turret on top adjusts the scope’s elevation (up and down) and the one on the side adjusts its windage (to the left and right).
Once your reticle is adjusted center mass, replace the bolt and get ready to start shooting.
Pro-tip: There are even specialized zero targets you can use that are gridded to help precisely determine the adjustments you need to make. You’ll see why that might be useful later.
-

N1 Outdoors® HUNT. Mossy Oak Greenleaf & Olive Camo Leather Patch Trucker Hat
$29.99 Select options This product has multiple variants. The options may be chosen on the product page -

N1 Outdoors® Leather Patch Logo Retro Camo Trucker Hat
$29.99 Select options This product has multiple variants. The options may be chosen on the product page -
N1 Outdoors® RodTogs™ Patch Trucker Hat (Mossy Oak Elements Bonefish & Light Grey)
$26.99 Select options This product has multiple variants. The options may be chosen on the product page
Step 3: Fine Tuning
Sighting requires great precision, so make sure the rifle is either mounted or thoroughly supported for this step.
Replace the bolt, insert your high-quality ear protection, and fire three rounds directly at the bullseye of your target at 25 yards. You will probably not hit the bullseye, so focus more at the consistency of the shot group.
If your three shots are really close to each other, but the whole group is about 1 inch south and 2 inches west of the bullseye, you need to adjust the elevation for 1 inch and the windage for 2. It looks complicated, but it’s really simple.
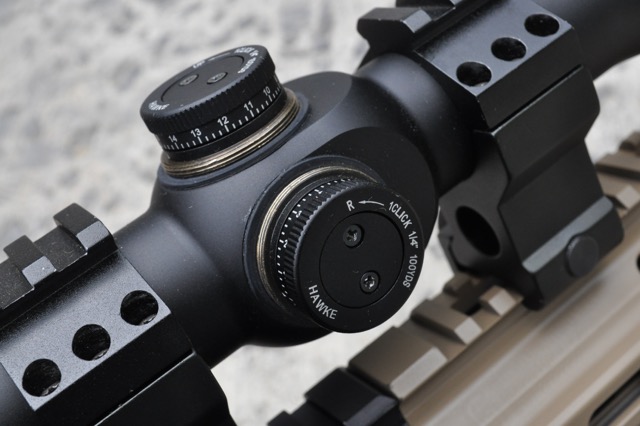
Use your scope turrets to fine tune your riflescope. 1 click typically changes shot location by 1/4 of an inch at 100 yards.
The turrets we were playing with earlier in the article are what we will now use to fine-tune your scope.
But before I go in-depth, here’s a quick primer on elevation and windage adjustments:
Usually one click changes the location of the bullet’s impact by ¼ inch at a target 100 yards away. The way we represent that is “1/4 MOA,” where MOA stands for Minute Of Angle. Four clicks will move the bullethole one inch in the direction indicated.
But, if the target is only 25 yards away, we need to move the dial 4x as many clicks to move the bullethole the same 1 inch. If the target is 200 yards away, conversely, 2 clicks move it 1 inch. Four hundred yards away, 1 click for 1 inch.
So, for the example above, we need to rotate the turret 16 times to elevate 1 inch and another 32 clicks to the right. The turret itself will indicate which direction to turn and the MOA (although most are ¼).
Once your scope is sighted for the target at 25 yards, it is time to extend the range to 100.
Fire another three rounds for your shot group, then determine how far off the bullseye the group is located.
Measure the deviation and adjust your elevation and windage in the same way we just did, bearing in mind that 4 clicks at this distance will equal 1 inch.
Fire another shot group at your 100-yard target, and if they hit where you wanted them to, you have successfully sighted your scope.
NOTE: Be careful not to bump your sight during transport or when pulling your gun up to your treestand. If you do, you could have to repeat the process to get your sight zeroed in again.
Happy Hunting!

