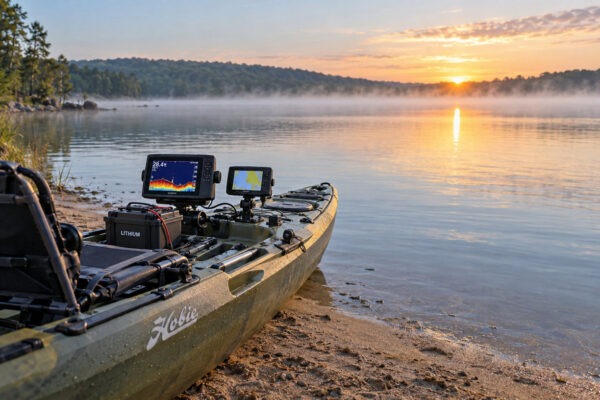
fishing kayak with electronics

How To Upgrade A Fishing Kayak with Electronics | What To Consider for More Effective Time on the Water

Sharp turns in the wind, fog creeping across the surface, and the subtle pull of current. These are moments when small decisions have big effects on a day of kayak fishing.

The truth is, the right electronics can turn guesswork into knowledge, let you fish more efficiently, and add a layer of safety when conditions on the water change fast.

Maybe you’ve found yourself approaching a submerged brush pile just before sunrise. But, without some form of electronic aid, locating the structure and making repeatable casts is challenging, especially if conditions shift or your vantage point is limited.

But, modern fishing kayaks can now incorporate electronics once reserved for larger boats, enabling anglers to use limited space more efficiently and maintain focus on fishing instead of spending time on guesswork. After all, who doesn’t want to catch more fish?

But, understanding how to upgrade your kayak setup with the right electronic tools is essential if your goal is being more productive and having a safer experience on the water.

Pedal vs Paddle Kayaks for Fishing: Which Style Matches Your Needs?

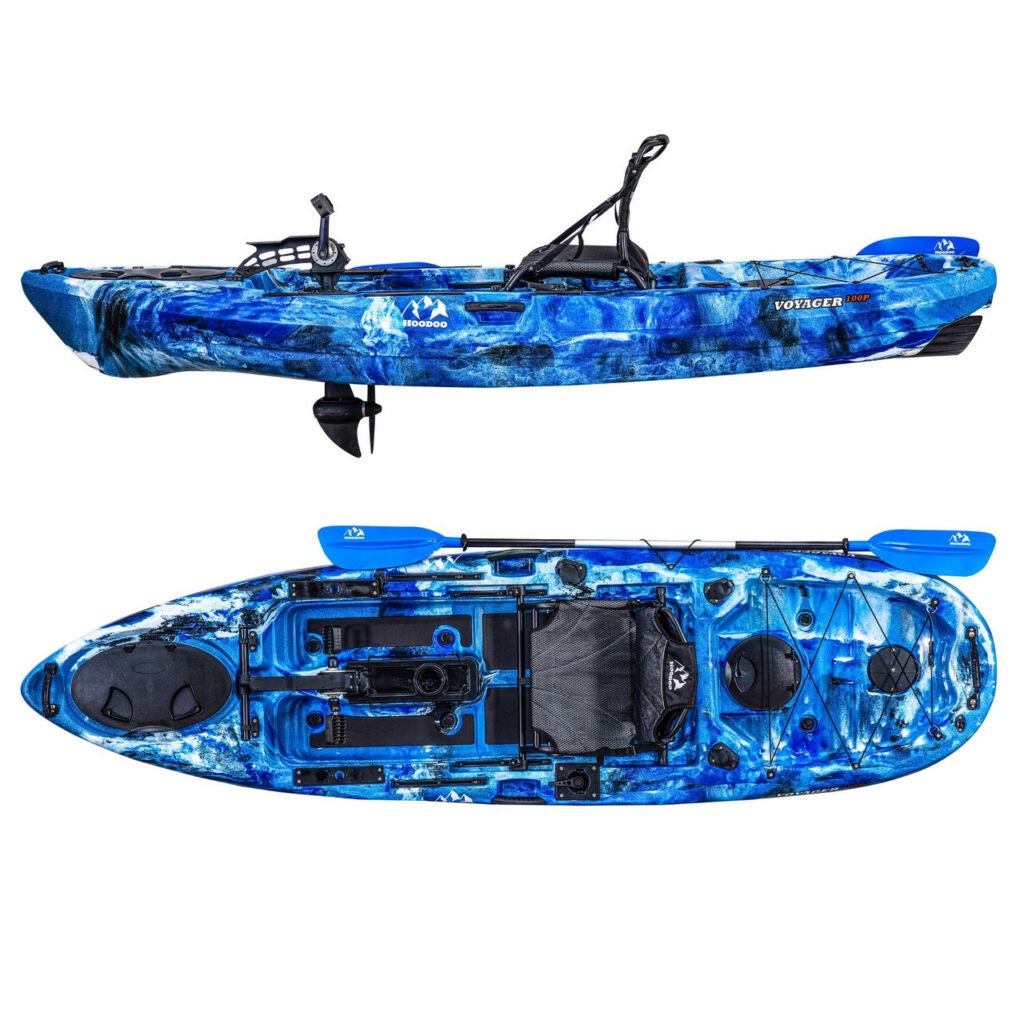
One of the biggest choices kayak anglers face is whether to use a pedal-driven or a paddle-powered kayak, especially when integrating electronics and accessories. Both styles offer advantages and drawbacks that affect the way you fish, rig, and use your equipment.

Stability and Hands-Free Operation
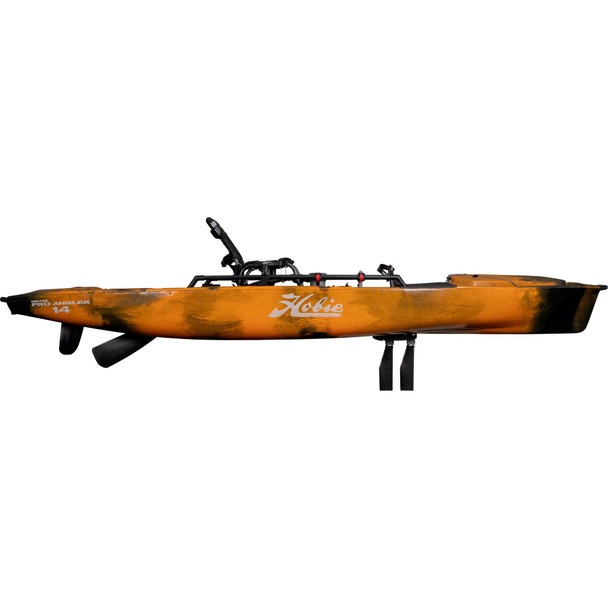
pedal kayak example
paddle kayak example

Shallow Water Performance and Stealth

Paddle kayaks excel in extremely shallow water where pedal drives can snag or require removal. They also glide more quietly, which can be important if your fishing strategy relies on a silent approach. Electronics aside, paddling is generally less likely to spook fish in calm, shallow areas.

Pedal systems, on the other hand, add complexity and may create subtle vibration or noise, which could affect fishing in highly pressured waters, though many anglers consider this a minor trade-off.

Fatigue and Distance

Covering large distances on open reservoirs can lead to fatigue with a paddle kayak, especially in windy or adverse conditions. Meanwhile, pedal drives allow anglers to cruise farther and longer with less upper-body effort, making them particularly well-suited for all-day trips or when frequently switching spots based on what your electronics reveal. If you fish small ponds where the distance from launch to cover is minimal, paddle kayaks remain simple and effective.

Mounting and Rigging for Electronics

Both kayak types can accommodate sonar, GPS, and other devices, but rigging strategies may differ.

Pedal kayaks usually have more deck space and dedicated mounting areas for electronics and battery storage, while paddle kayaks may require more creative solutions to avoid clutter. Whichever you use, mounting electronics where they’re visible but not in the way of paddling or pedaling is critical for comfort and safety.


For reliable performance and convenience, investing in quality mounts and waterproof cabling, along with streamlined storage for batteries and control boxes, will benefit both types—but you may need to pay extra attention to weight distribution and wiring on paddle models where deck space is tighter.

When it comes to maximizing efficiency with electronics, pedal kayaks often have an edge for those who regularly use multiple screens or want to update maps and waypoints on the move. However, paddle kayaks remain the top pick for anglers who prioritize minimal gear, quick launches, and targeting water too shallow for a pedal drive. Carefully weighing these trade-offs, along with factors like transport and storage, will help you select the right platform for your fishing style.

A key consideration for either style is how the right kayak gear enhances your experience. For example, a pedal-driven kayak equipped with side-imaging sonar is ideal for working windy main-lake points, letting you keep moving hands-free while marking brush piles and updating map chips on the fly.

In contrast, a paddle yak with a compact GPS and lightweight battery can be carried into isolated farm ponds and offers stealth for spooky fish. The way you rig and use your electronics, as well as the type of kayak you choose, can directly impact your strategies and results on the water.

Defining Electronics for Kayak Anglers
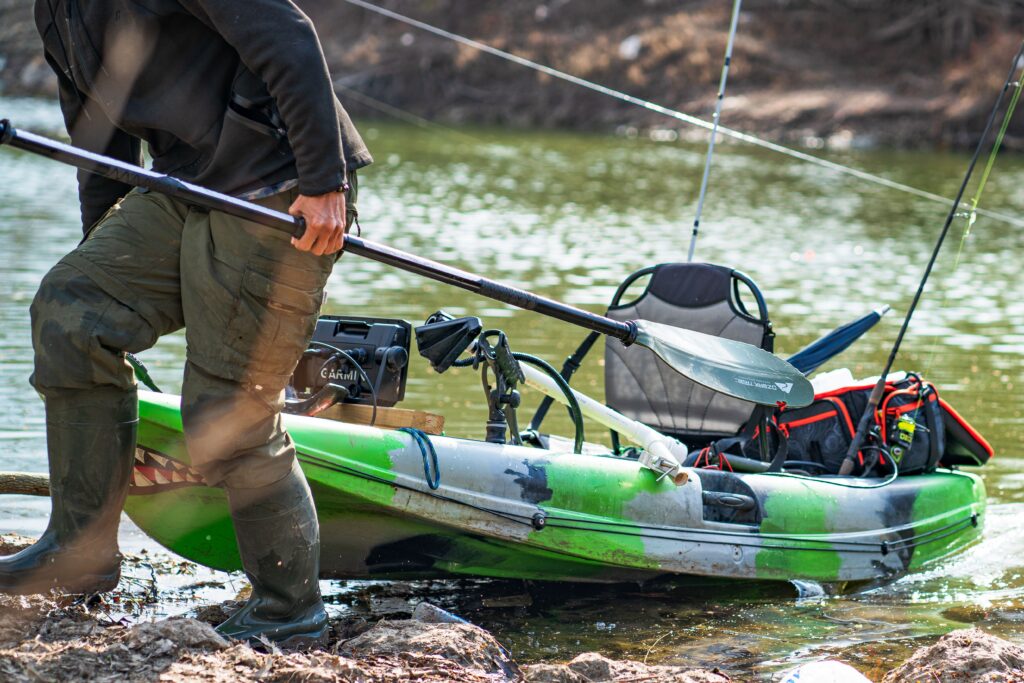
man pulling fishing kayak with electronics
  1. Sonar/fish finders: Units using sound waves to reveal the underwater environment—detecting fish, depth changes, and submerged cover.
  2. Mapping and GPS: Devices showing your position, allowing waypoint marking and route retracing in all visibility and current conditions.
  3. Navigation aids: Extras such as digital compasses, navigation lights, or small cameras for improved awareness and safety.
  4. Power management: Systems including batteries and controls, essential for running gear without weighting down your kayak or risking equipment failure.

Each of these technologies solves a real problem—whether that’s finding elusive fish, navigating in early morning fog, or streamlining your route to make every cast count.

Selecting Sonar for Kayaks: More Than Just Screen Size

When upgrading or adding sonar to your kayak, the size of your unit and the rigging details matter. Most kayak anglers choose screens in the 4-7 inch range to avoid overcrowding. Larger displays provide better visibility, but are heavier, consume more power, and may eat up valuable mounting real estate. So, you need to weigh the tradeoffs here and choose what works best for you.

Transducer placement also makes a difference. Scupper hole mounts are common in many fishing kayaks, though in weedy or rocky areas, sidearm or hull mounts may offer easier access and better protection. Some pedal models include recessed pockets for transducers, while paddle yaks might require aftermarket solutions.
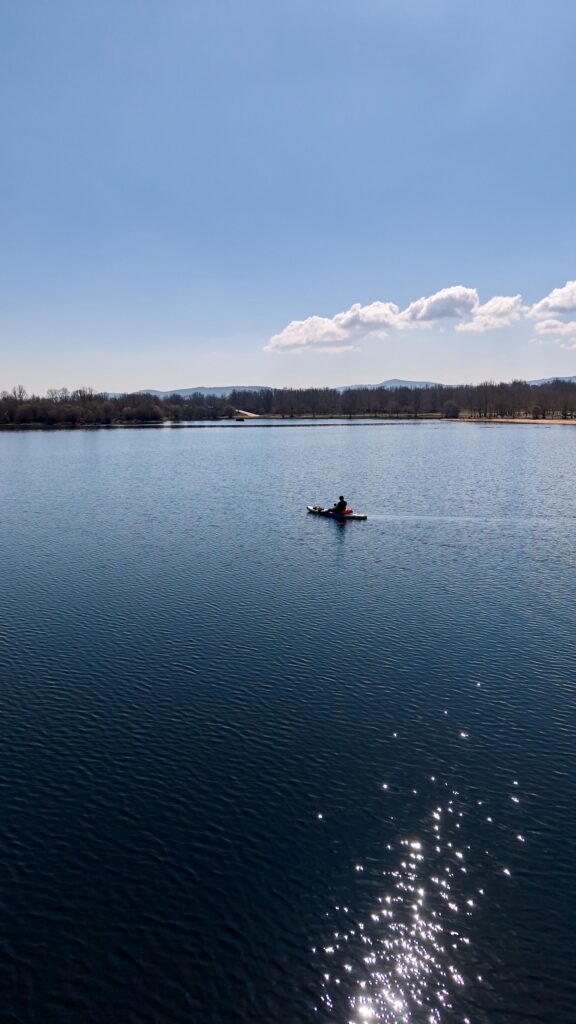
fishing kayak on lake

Mapping and GPS: Precision for Every Boat Size

Mapping and GPS are just as critical for kayak anglers as for boaters in larger boats. The ability to save productive spots or mark underwater obstacles lets you maximize every drift and revisit the most promising locations. Track-back functions—plotting your exact route—are particularly valuable for long reservoir runs or night fishing, helping you return to launch safely or repeat a successful pass even after the wind has shifted your kayak.

Anglers tackling big water rely heavily on mapping to avoid hazards, reach distant structure, and find shoreline exits if a storm approaches. On small waters, GPS ensures you won’t lose your way in dense morning fog or late at night. While basic GPS units suffice for simple navigation, more advanced mapping with depth contours can unlock hidden fishing spots and improve your efficiency by reducing time spent searching blindly.


Mounting and Cable Management for Clutter-Free Fishing

Stable electronic mounting and clean wiring are key for safety and convenience on any kayak. Many anglers opt for gear tracks or custom brackets near the seat—close enough for access, but out of the main paddling or pedaling lanes. Pedal kayaks, with more room and dedicated mounting spots, make it easier to keep batteries and cabling tucked away; paddle kayaks often require slimmer mounts and creative cable routing to minimize snags.

Careful cable management—whether inside the hull or externally—prevents tangled lines and accidental disconnects. Waterproof entry points and cable sleeves or clips help keep water out and hardware secure, especially if you store your or flip your kayak for transport.

Power Systems: Balancing Run Time and Weight

Reliable power keeps electronics functioning on your kayak from first cast to last. Sealed lead-acid batteries are cost-effective, but add noticeable weight, which may matter more on compact paddle kayaks.

Lithium batteries, on the other hand, are lighter and offer longer estimated run times between charges, but involve higher upfront expense.

Your expected fishing duration and electronic load dictate battery specs. High-brightness displays and advanced sonar modes drain power faster, so estimating needs based on typical settings is important.


For instance, a single fish finder on low brightness might run all weekend on a smaller battery, but multiple devices or frequent high-powered mapping will require more capacity. Also, waterproof storage and secure, quick-connect terminals support consistent performance and make setup or breakdown efficient regardless of kayak style.

Fixing Interference and Common Problems

Electrical noise, often from overlapping power and signal cables, can show up on your sonar as false readings or screen flicker. Keeping transducer and battery lines separate, and using ferrite rings if interference persists, typically resolves these issues.

In shallow water, excessive clutter can appear when debris or dense vegetation enters the sonar cone. So, using narrower cone settings and adjusting sensitivity often helps.

Losing bottom lock often points to uneven transducer placement or turbulence hitting the sensor. tightness and alignment, ensure the transducer sits at the correct depth, and check that it has a clear path through undisturbed water. Adjusting its position can help restore a consistent bottom reading.
Weighing The Tradeoffs

When it comes to upgrading your kayak with electronics, start with the type of kayak you’ll be using. Then, weigh the tradeoffs of sonar, mapping, navigation, and power management to get that perfect setup for the style of fishing you’ll be doing. Enjoy your time out on the water, catch fish, and enjoy God’s Creation!
camping on a budget

Camping on a Budget: How to Save Thousands Per Year Without Sacrificing the Experience

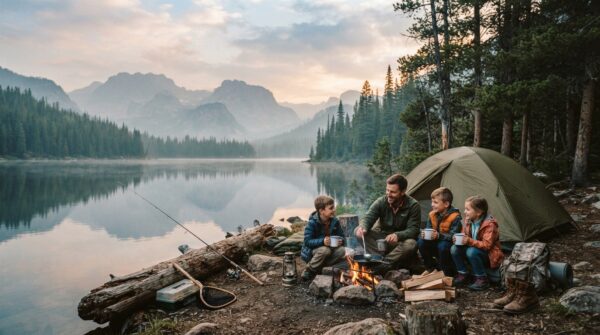
Ask anybody who grew up camping, hunting or fishing what they remember most, and it’s rarely the price tag on the tent and the gear. It’s the first fish your kid reeled in by themselves. It’s the buck that walked out just before last light. It’s the night it rained sideways and everybody laughed about it the next morning.

Those are the moments that matter, and none of them cost extra.

The trouble is, the money side of the outdoors has a way of creeping up on regular folks.

Gear piles up in the garage. Campsite fees climb a little more every season. Licenses, tags, fuel and a few “we’ll just grab something in town” dinners add up fast.

The reality is that nothing feels expensive in the moment, but over a year, a family that gets outside often can easily spend thousands more than it needs to.

Here’s the good news: most of that spending is habit, not necessity. You can cut it way down without giving up a single trip, sunrise or campfire story.

This guide walks through where your outdoor money really goes and how to keep more of it, so you can spend less on stuff and more time making memories.

Where Your Outdoor Money Really Goes

buckets of spending for outdoor travel

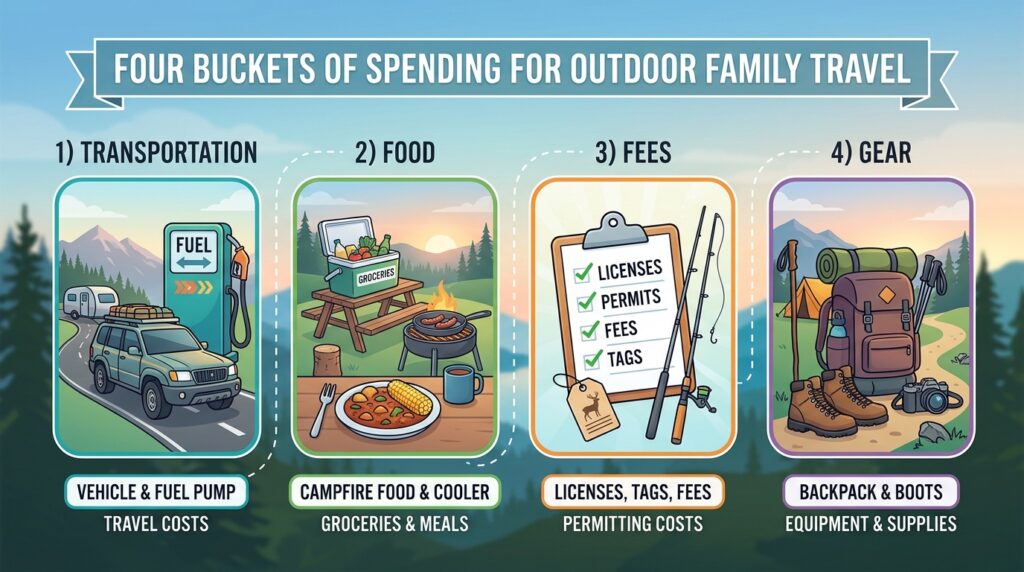
Gear that gets used once or twice. This is the biggest leak. A specialty stove, a second tent “just in case,” camp chairs that never did fit into the truck, a new fishing rod for every species. Each purchase like these seems reasonable on its own. But, together, they can top a thousand dollars before you’ve even figured out how your family likes to camp.

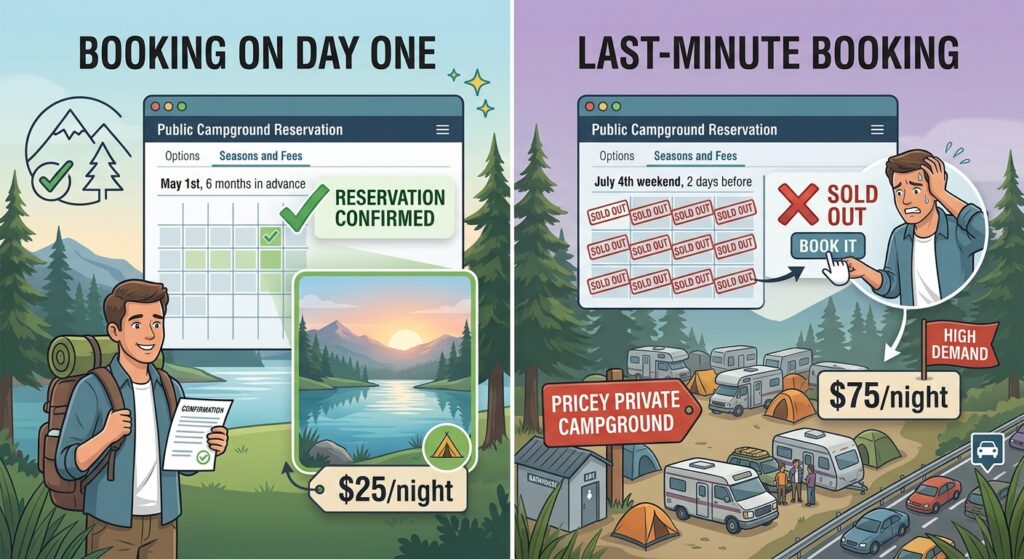
Campsite fees and the booking scramble. Popular parks fill up months ahead. Families who wait often land at private campgrounds charging two or three times as much, plus cancellation and change fees. When you book is a cost all by itself.

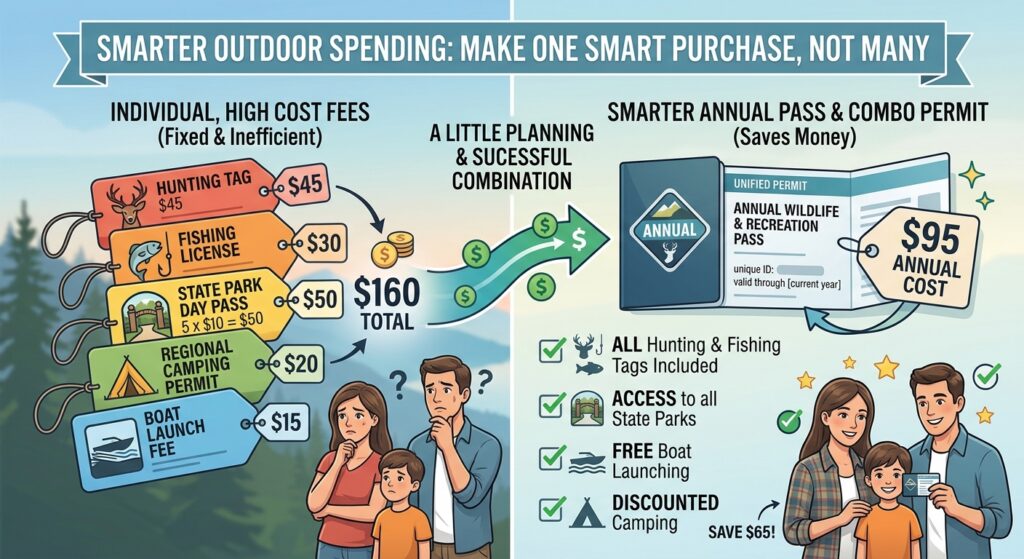
Licenses, passes and access. Hunting and fishing licenses, tags, park entrance fees and day-use permits are easy to forget because they’re paid in small pieces. But, bought one at a time, they cost more than they need to.

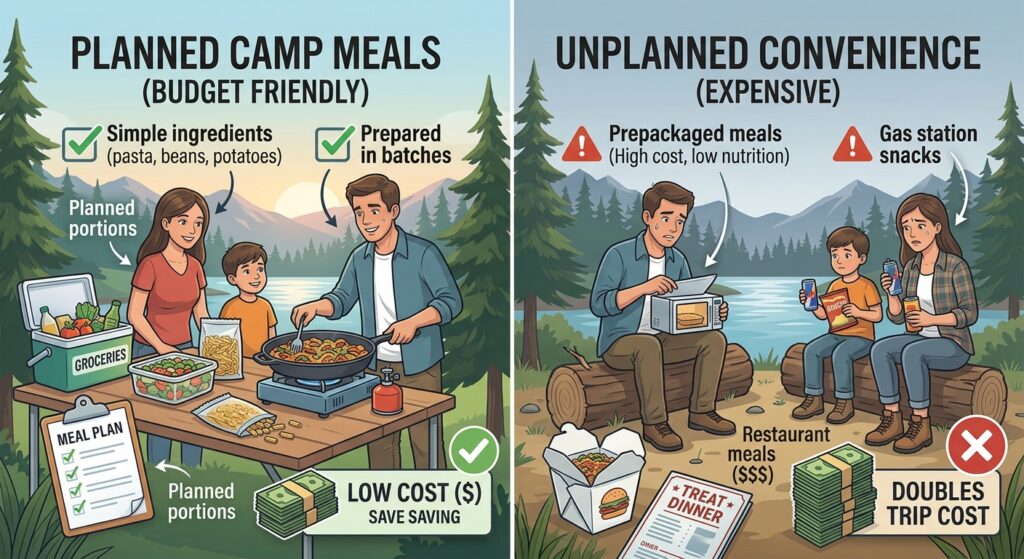
Fuel and food. The drive to the lake or the lease, plus gas station snacks and a dinner in town, can quietly double the cost of a weekend.

So, knowing where the money goes points straight to the first fix, and it starts in the garage.

Gear: Buy for the Trips You Actually Take

The most seasoned outdoorsmen we know own surprisingly little. What they do own, they use constantly, and they take care of it.

Rent or Borrow First, Buy Second

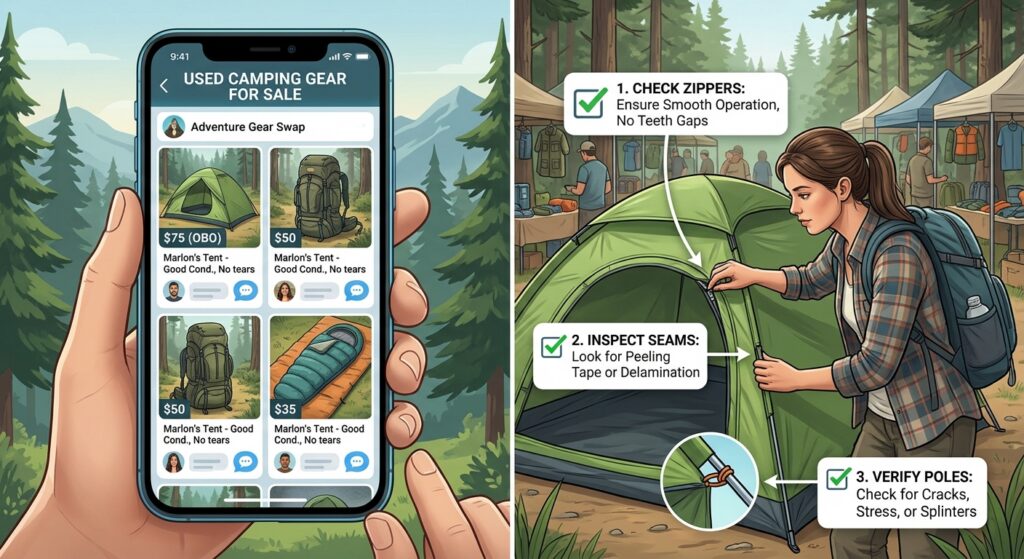
Many outdoor shops and university outing clubs rent tents, sleeping bags and stoves by the weekend. Better yet, ask around to people in your hunting club, church, or even your fishing buddies. Somebody usually has a tent sitting in the attic or garage that their not using. A trip or two with some borrowed gear will show you what you really need. A family that thinks it wants a giant cabin tent might find two smaller ones pack easier and set up faster. That lesson costs a rental fee or a “thank-you,” but not a few hundred dollars.

Shop the Off-Season and Buy Used

Outdoor gear follows the calendar. Camping gear tends to go on sale in late Fall and Winter, and hunting gear often gets marked down once the season is over.

buy used outdoor gear to save money

Buy Gear That Does Double Duty

The same cooler, camp stove, headlamps and layers can serve a family camping trip in June, a fishing weekend in September and deer camp in November. So, before buying anything, ask yourself: will this get used across more than one kind of trip? If the answer is no, it probably belongs on the rent-or-borrow list.

Repair Before You Replace

A torn rain fly or a snapped tent pole is rarely the end of the tent. Patch kits cost a few dollars, and many brands sell replacement poles and parts. A spare reel spool or a re-waterproofed pair of boots stretches your dollar the same way. Learning basic repairs of your outdoor gear is a subtle, but effective, way for you to cut gear costs year after year.

Once you get the garage under control, the next place to save is the trip itself.

Passes, Licenses and Booking Early

Fees and permits feel like a fixed cost. They aren’t. A little planning at the start of the year turns a stack of small charges into one smarter purchase.

Passes That Pay for Themselves

If your family visits federal parks and public lands more than a few times a year, take a hard look at the America the Beautiful pass from the National Park Service. The resident annual pass is $80 and covers entrance and day-use fees for a full year at sites run by the Park Service, Forest Service, Fish & Wildlife Service, Bureau of Land Management, Bureau of Reclamation and Army Corps of Engineers. Two or three visits often cover its price. There’s one catch: it does not cover campsite fees, so be sure to budget for those separately.

Some folks can get one for free. U.S. 4th graders, current military members and their dependents, veterans, Gold Star families and people with permanent disabilities all qualify for free passes, and seniors 62 and up pay $20 a year or $80 for life. Many states sell their own annual state park passes that work the same way for closer-to-home trips.

Bundle Your Hunting and Fishing Licenses

buy licenses together to save money

Buying licenses piecemeal is one of the easiest ways to overpay. Each state sets its own license types, including annual, multi-day, youth and lifetime options, and many wildlife agencies offer combination licenses that bundle hunting and fishing for less than buying each separately. A lifetime license can make real financial sense for a young hunter or angler in the family, since you pay once and skip years of price increases. Youth, senior, veteran and disabled-resident discounts are common too. Take Me Fishing links to every state’s official license site, so compare options there before you renew.

Book Early and Book Public

booking campsites early to save money

Federal campgrounds across the country can be reserved on Recreation.gov, and most campsites open for booking six months before your arrival date. Check the campground’s Seasons and Fees tab, set a reminder and book on day one, and you’ll get the cheaper public site instead of the pricey private one. If you happen to miss booking on day one, you can set an availability alert, or pick a Sunday-through-Thursday trip when sites are easier to get. If plans change, modify or cancel promptly so the site can go to another family.

Free and Low-Cost Places to Camp

Not every great night outside needs a paid campground. Some of the best outdoor moments happen far from a bathhouse.

  • Dispersed camping on public land. National forests allow camping outside developed campgrounds in most areas, usually at no charge. You give up picnic tables, water and toilets, and you pack out your trash. But, you gain quiet, elbow room and a free night. Stay limits and fire rules vary by forest, so be sure to read the USDA Forest Service dispersed camping rules and call the local office before you go.
  • Camp where you hunt or fish. Some state wildlife management areas and lakes allow primitive camping, which puts you right where you want to be at first light without a motel bill. Rules vary a lot by state and property, so be sure to confirm on your wildlife agency’s site.
  • Share a site, split the bill. Many campsites allow two tents or more. Going in with another family or a few buddies cuts the nightly cost in half. And, after all, more people around the fire is never a bad thing.
  • Go off-peak. Weekday nights and shoulder seasons are cheaper and less crowded. Early fall camping with the kids can be some of the best weather of the year.

Lower fees help a lot, but food is where many families quietly overspend. So, let’s take a look at how to decrease those costs next…

Feeding the Crew (Deer and Fish Camp Discounts)

plan your camping meals
  • Plan and prep at home. Groceries are cheaper there, and you have time to think and plan. Chop vegetables, mix pancake dry ingredients and portion snacks into reusable bags before you leave.
  • Go one-pot. Chili, jambalaya, pasta and foil-packet dinners save fuel, dishes and money.
  • Cook what you harvest/catch. A fresh fish fry on the bank or venison cooked over the fire is about as good as camp food gets. And, it’s free protein. Just know your state’s size and bag limits.
  • Make your own ice. Freeze water bottles and jugs at home. They keep the cooler cold and become drinking water as they melt.
  • Stock the camp box. Keep a bin of spices, oil, coffee and cooking basics ready to go so you’re never buying full-size replacements at a lake store marked up prices.

These may seem like small steps, but they create real savings, especially for a family of four or five getting outside a dozen or more nights a year.

Spending less is one side of the equation. The other side is getting more back from the money you do spend. Let’s tackle that next.

Making Your Bank Work for the Trip

Outdoor families spend steadily on gas, groceries, gear, licenses and fees. That steady spending can give something back if it runs through the right accounts.

Earn Reward Points on Spending You Already Do

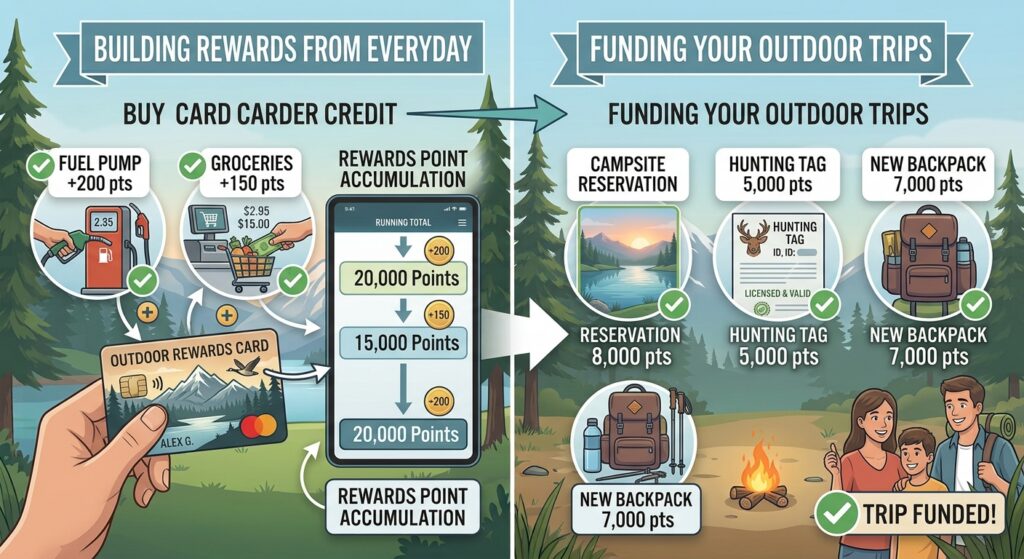
Many banks now let you earn reward points or cash back for everyday banking: debit purchases, direct deposit, higher savings rates. Some membership programs let you earn reward points on routine activities like paying bills on time or saving toward a goal, which is a natural fit for families who already budget for trips.

rewards points redeemed for more outdoor trips

The value here adds up because outdoor costs repeat. Fuel for half a dozen road trips, groceries for a dozen weekends, license renewals and an annual park pass all count. Even a modest return on that spending can cover a few nights of campsite fees, or a box of shells, by the end of the year.

Keeping Rewards From Becoming a Trap

Rewards only help if they don’t change your behavior for the worse. Buying a new tree stand or a fourth rod just to hit a bonus threshold erases the benefit. So does carrying a balance on a rewards card, since interest charges quickly outrun any points you earn. The Consumer Financial Protection Bureau (CFPB) has warned that some rewards programs devalue points or bury conditions in the fine print, and that store-branded cards often carry much higher interest rates. So, be sure to read the terms closely, watch for monthly fees, redeem points regularly, and compare rates with the CFPB’s free Explore Credit Cards tool.

All of these pieces work best when they come together in one simple plan.

Building a Yearly Outdoor Budget

A simple yearly budget ties it all together.

Start with the trips you want to take: family camping weekends, the fishing trip with your buddies, opening weekend of deer season.

Use the chart below to estimate the cost of each, add the once-a-year items, and you have your number. Divide the total by twelve and move that amount into a dedicated savings account or bucket every month.

This does two things. It spreads costs out so no single trip, or a license renewal in the middle of back-to-school season, strains the household budget. It also makes overspending visible. When the outdoor fund runs low in July, you know it, and you can adjust before the bill lands on a credit card.

CategoryWhat to includeYour yearly estimate
Campsites and lodgingNightly fees, reservation and change fees
Passes and licensesPark passes, hunting and fishing licenses, tags
FuelEvery trip’s round-trip drive
FoodGroceries, ice, the occasional meal out
GearReplacements, repairs, one planned upgrade

Review the budget at the end of each season. Note which gear you actually used, which sites were worth the money and which meals got eaten. Those notes make next year cheaper without any extra effort.

Camping On A Budget (Spend Less, Make More Memories)

Camping on a budget doesn’t mean camping with less. The fish still bite, the sunrise is still free, and your kids will remember the stories around the fire long after they’ve forgotten what the tent cost.

Remember, the costs that hurt most are the ones that repeat quietly in the background.

Buy gear with care and make it do double duty. Bundle your licenses and book early. Plan meals at home, use accounts that let you earn reward points, and keep a simple yearly budget. Do those things, and an outdoor life that tends to drift up in cost stays steady, maybe even saving you thousands a year.

The trips stay the same. The memories keep piling up. And the savings grow every season. Now get out there and make some N1 Moments.

woman in red ski jacket holdking ski poles in air

How to Choose a Warm Ski Jacket: 8 Features to Look For

on . Posted in Blog

Finding a ski jacket that actually keeps you comfortable all day makes every run down the slopes more enjoyable. The fact is, not all jackets are engineered for the skiing, and knowing what to look for makes the difference between staying warm and wishing you’d grabbed another layer.

How To Choose The Right Ski Jacket (What To Consider)

So, let’s take a look at some details on how to choose a warm ski jacket and where to buy one.

1. Type of Jacket

Choosing a warm ski jacket starts with knowing the different types available.

An insulated jacket combines warmth, as well as weather protection, in one garment. This can definitely help on those cold resort days, especially if you tend to feel chilly while waiting for friends or riding the lifts.

An uninsulated shell primarily blocks wind and precipitation, allowing you to adjust the warmth beneath as the weather conditions change.

down feather

Synthetic insulation generally retains more of its insulating ability when damp, making it well-suited to wetter climates or for frequent, active use.

Fleece is a synthetic type of insulation that can provide breathable warmth beneath a shell, but most fleece jackets offer limited protection against wind and precipitation on their own.

2. Waterproof Rating

A waterproof rating measures how much water pressure a fabric can withstand before moisture begins to seep through. For example, a “10K” rating means 10,000 millimeters (mm) of hydrostatic head — the pressure represented by a water column of that height under test conditions.

Around 10,000 mm can, in fact, suit many ski resort days, while 15,000-20,000 mm or higher can be helpful in wetter, more demanding conditions. It’s important to keep in mind that these figures are general guidelines, not guarantees. How dry a finished jacket keeps you also depends on its seams, closures, openings, and condition of the jacket.

If a jacket has no numerical rating, the manufacturer’s description of its construction and intended use can still provide useful information. Water-resistant clothing may handle brief, light precipitation, while waterproof construction is better suited to sustained snowfall and wet conditions.

A durable water repellent (DWR) finish helps water bead on the outer fabric. This finish supports performance but is separate from the waterproof barrier underneath.


3. Fill Power and Insulation Weight

Fill power is another term you should be familiar with when choosing a warm ski jacket. It describes how much space a given weight of down occupies under standardized testing conditions. Higher fill power indicates greater loft per unit of weight, not automatically a warmer finished jacket.

Fill weight, or the amount of down used, also matters. A lightly filled jacket with high-fill-power down may provide less warmth than a more generously insulated alternative.

Synthetic insulation is often specified in grams per square meter. Within comparable materials and construction, higher figures generally indicate more insulation. However, different insulation technologies cannot necessarily be compared by that number alone.

Some jackets may also place more insulation around the torso than in the sleeves. Overall warmth depends on these construction choices, your layers, and how the jacket fits.

4. Breathability Rating

Breathability works hand in hand with waterproofing. While waterproofing keeps external moisture out, breathability is what lets built-up sweat and moisture escape, so you don’t get clammy underneath.

Breathability ratings need context because different tests use different measurements. For instance, higher breathability numbers indicate better performance in the Moisture Vapor Transmission Rate Scale, while lower numbers indicate better performance in the Resistance to Evaporative Heat Transfer Scale. Comparisons are most useful when manufacturers use the same method and units.

Your layering choices matter, too. A breathable jacket, for example, can’t fully compensate for wearing more insulation than your activity level requires. Balancing warmth with moisture management helps you stay comfortable during both energetic ski runs and low-energy chairlift rides.


5. Fit and Room to Layer

The right fit accommodates your usual base and mid-layers without compressing insulation or restricting movement. So, to truly test the fit, you should try on a jacket over those types of layers, as opposed to wearing over an everyday t-shirt or button up.

When you’re considering the fit and the room to layer, you want to most closely mirror what you would be wearing on a day you’d actually be wearing the jacket on the slopes. This is going to be far more helpful than if you tried the jacket on while wearing an everyday t-shirt or button up.

In addition, fit also depends on movement. Reaching forward, bending your elbows, and crouching can reveal tight areas. When doing these movements, the hem of the jacket should maintain coverage rather than ride up excessively.

Choose a fit that accommodates the layers you’ll be wearing and allow for unrestricted movement. If you’re going to be snowboarding, a relaxed or oversized fit can work well, provided the cuffs, hem, and other openings can be adjusted to limit drafts and keep snow out.

6. Seam Construction and Taping

Even if a jacket’s fabric has a 20,000 mm waterproof rating, seams can become a weak point for water entry. Sealed seams and technical fabrics are important features that help maintain comfort on the mountain in wet snow and during active skiing.

You may have never thought about it, but the thousands of tiny holes created by sewing needles when making a jacket, give moisture a path through. Manufacturers apply waterproof tape over the seams inside the jacket to block this entry point.

Critically taped seams feature tape only on the most exposed areas, such as the hood, shoulders and chest.

Fully taped seams seal all stitched seams to help prevent water from entering through needle holes. Combined with waterproof fabrics and well-designed closures, they provide stronger protection during sustained snowfall and wet conditions.

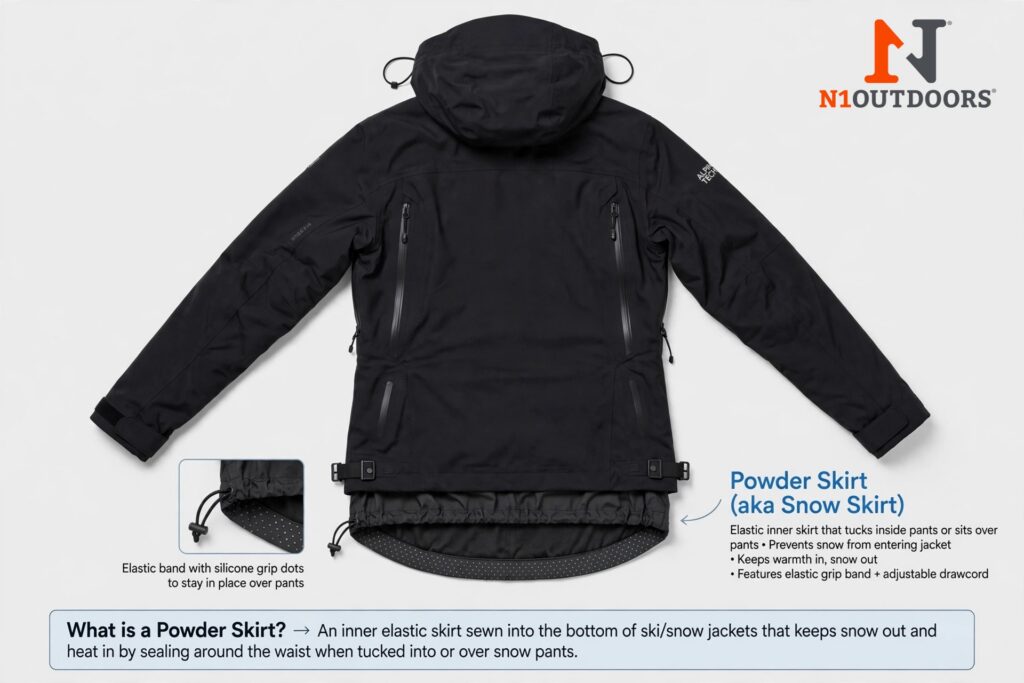
7. Powder Skirt and Ventilation

A powder skirt keeps snow from sneaking in during falls or deep-snow days. This feature sits at the waist inside the jacket and can include snaps or loops that connect to compatible ski pants, creating a sealed system that blocks snow.

what is a powder skirt on ski jacket infgraphic

Ventilation, usually in the form of “pit zips,” lets you cool down quickly without fully unzipping. When working hard on steep terrain, these vents let you dump excess heat.

So, the powder skirt provides protection in deep snow, while ventilation regulates temperature during high-output skiing.

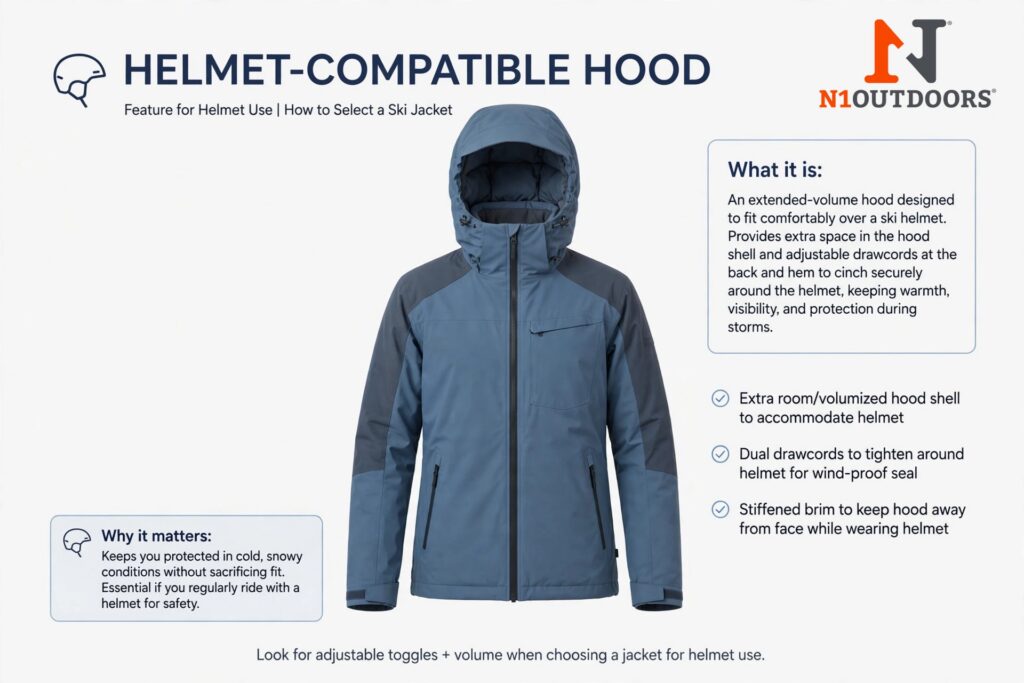
8. Helmet-Compatible Hood

A hood that fits over your ski helmet can make all the difference on a stormy day. Standard winter coat hoods fit over your head, but not over a helmet, leaving you without coverage. A helmet-compatible hood, however, offers a larger cut and includes adjustability features for wind and snow protection.

what is a helmet compatible hood for ski jacket infographic

Ski jackets generally offer two types of hoods — fixed or removable. When choosing between the two, consider whether you prioritize the security of a fixed hood or the versatility of a removable one (for milder, clear-sky days). Whichever you prefer, check that its adjustments are easy to operate while wearing gloves. You want to consider what it will be like to make adjustments in real-time.

3 Leading Retailers to Consider for Warm Ski Jackets

These three options provide good starting points for exploring ski jackets.

1. Buckman’s Ski and Snowboard Shops

Buckmans logo

Buckman’s Ski and Snowboard Shops is a family-owned retailer focused on skiing and snowboarding. Its apparel range features top brands like Patagonia, Obermeyer, The North Face, Spyder and Helly Hansen.

The staff’s expertise covers everyone from beginners to seasoned skiers and snowboarders. If you have questions about choosing a warm ski jacket for your needs, the staff can translate technical details into practical advice for your next day on the slopes.

2. REI

rei logo

REI carries ski jackets across multiple brands, with filters for insulation type, waterproofing and ventilation. These tools can help shoppers narrow their search to the features that matter for their conditions. The shop’s reputation for outdoor expertise and strong customer service makes it a reliable choice for durable winter outerwear.

3. DICK’S Sporting Goods

Dicks sporting goods logo

DICK’S Sporting Goods features a variety of insulated ski jackets from trusted brands. Its selection balances technical performance and style, offering both down and synthetic insulation, weatherproof designs and functional ski features.

The shop also provides in-depth product guides and customer reviews to help shoppers choose the ideal jacket for any winter adventure.


Ski & Snowboard Wall Rack for Garage - Fits Any Board, Wall Mount Holders, Damage-Free Storage, Space-Saving Winter Gear Organizer
$49.99
Buy Now
We earn a commission if you make a purchase, at no additional cost to you.
11/09/2026 06:43 am GMT

Frequently Asked Questions

Here are answers to common questions about choosing and maintaining a warm ski jacket.

Q: Why do I still feel cold and damp even in my waterproof jacket?

A: If your jacket isn’t breathable enough for your activity level, sweat gets trapped and makes your inner layers damp. Moisture against your skin conducts heat away much faster than dry fabric.

Q: Should I buy my ski jacket a size bigger to fit layers underneath?

A: You should buy a size that allows you to comfortably wear your typical base and midlayers without feeling restricted. Most ski jacket manufacturers design with layering in mind.

Q: My jacket says it’s waterproof, but I get wet on stormy days. Why could this be?

A: Dampness may come from perspiration, moisture entering through openings, or leaks at seams and closures. A worn DWR finish can cause the outer fabric to become saturated, but it does not automatically mean the waterproof barrier has failed.

Q: Should I choose a down or a synthetic insulated jacket?

A: Down offers the best warmth-to-weight ratio and packs smaller, but loses insulating power when wet. Synthetic performs better in damp conditions, but is bulkier. If you ski in wet climates, synthetic makes sense. If you ski in cold, dry conditions, down gives more warmth with less weight.

Pick a Ski Jacket That Matches Your Needs

The right jacket comes down to matching these features to your skiing or snowboarding habits and conditions. Speak with a professional when shopping for gear to find the jacket that fits your style and climate. When you nail the fit and features, you’re free to focus on enjoying the mountain.

Be safe (and warm) out on the slopes!