The depth sounders of your grandfather’s generation used echolocation to transform commercial fishing. They leveraged what was then state-of-the-art electrical pulse generation and sound wave emission to pinpoint cod, herring, and sardines. But those gadgets are transistor radios compared to today’s fish finders.
The advent of CHIRP sonar, the boom in mass-produced microchips, and low-cost high-resolution screens not only make fish finders inexpensive enough to keep onboard recreational watercraft but also sensitive enough to pick out individual bass, walleye, snook, and snapper.
Combining high-speed data processors, “live” transducer video, and AI to interpret all that visual evidence, the systems available today provide boaters with a window to the underwater world like never before.
How AI is Making Your Fish Finder Smarter
Artificial intelligence now directs how fish finders decipher and display information, filtering out irrelevant noise and zeroing in on the actual targets you’re looking for. Augmented by sonar precision, sophisticated mapping data, environmental inputs, and historical patterns, AI enables some fish finders to predict where the next productive fishing zone will be.
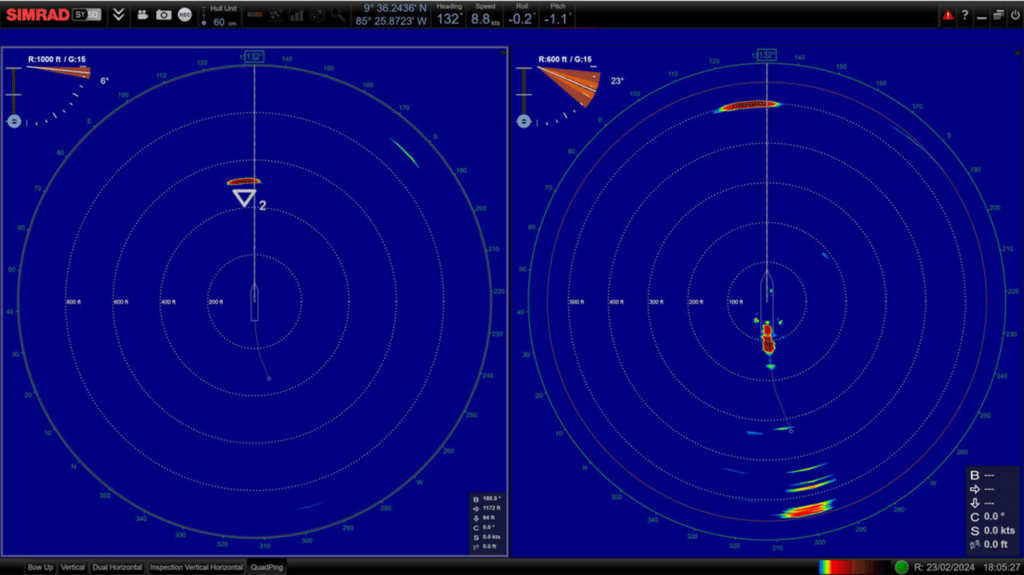
Take for instance Simrad’s Sonar AI. It can almost be considered a virtual assistant living in your fish finder. Instead of having to stare at your MFD’s screen and wait, Simrad’s Sonar AI watches the sonar returns for you. As soon as it identifies a fish, it will automatically drop a special marker for you on your screen and sound an alarm.
And like all other AI models, it continues learning. When you mark a spot on the map, the system makes note of the conditions and environment. Then, when similar patterns present themselves later, the system makes the connection and emits an audio alert. These signals become more accurate as the machine learns which signals represent game fish, bait schools, cover, and water temperature bands.
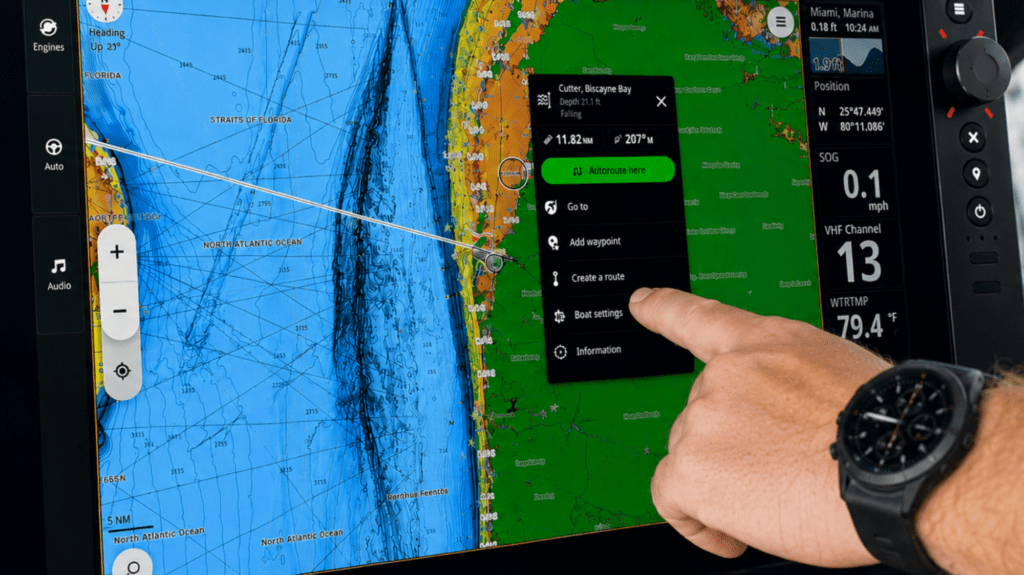
As AI intelligence and onboard computing power continue to grow, AI is expected to play a larger role in sonar interpretation, route planning and environmental awareness.
Faster Processors Mean a Smoother Experience Out on the Water
If you’ve ever used a fish finder that took several seconds to load when you zoomed in on part of a map, you understand how frustrating this can be. One of the biggest advancements in modern fish finders isn’t immediately visible – it’s what’s powering the machine.
Today’s fish finders feature powerful 6-core and 8-core processors, capable of running multiple tasks at the same time, including live sonar, CHIRP sonar, side-scanning, radar overlays, detailed charts, engine data, weather layers and navigation systems… without any lag. Up to seven times faster than older models.
Menus open and respond immediately, charts load up right away, and sonar updates feel real-time. Switching between applications is a breeze. When paired with modern transducers, these processors can interpret detailed sonar information clearly and stably, even at high speeds and deep ranges.
Fishing shirts like you’ve never seen!
-
N1 Outdoors® FISH. Performance UPF 50+ Shirt
Price range: $37.99 through $39.99 -
Put a Hook N1™ UPF 50+ Redfish Performance Fishing Shirt
$15.00 -
N1 Outdoors® Royal Flush™ UPF 45+ Performance Fishing Shirt
$19.00

Next-Gen Sonar: 360-Degree Live Views and Ultra-Wide Beams

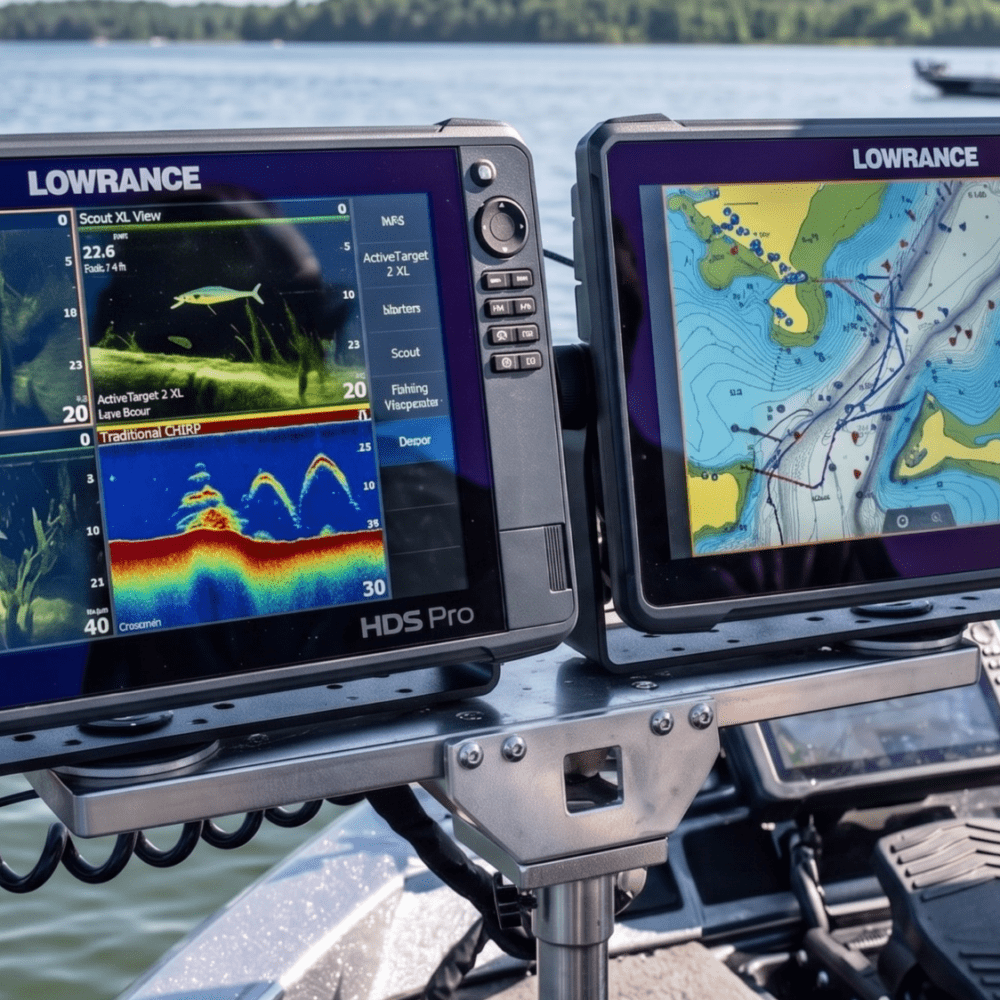
Up until now, live sonar was like a flashlight beam, only allowing you to see where you pointed it. New transducers, such as Lowrance’s ActiveTarget 2 XL, network two HD transducers together, unlocking a 360-degree view. This allows you to have a live, moving video of the entire radius around your boat
Another recent improvement is the elimination of the need for a “black box” in order to get high-definition live sonar. The black box is a large silver processing module inside a dry storage compartment, running heavy power cables to your batteries.
Garmin’s newer transducers eliminate the need for a black box altogether, moving the processing into the transducer itself, and allowing you to plug the transducer directly into the fish finder / MFD and power source. Less battery drain, and less clutter, while providing you with HD images.
Another advancement in transducers is ultra-wide beams, such as Airmar’s 73-degree Ultra-Wide Wave. In the past, most transducers had a narrow, 15-degree cone, covering only a small circle on the bottom. Airmar’s newer transducers shoot a massive 73-degree wide beam, giving fish nowhere to hide.

4K Screens Give You Clearer Information, Even in Difficult Conditions
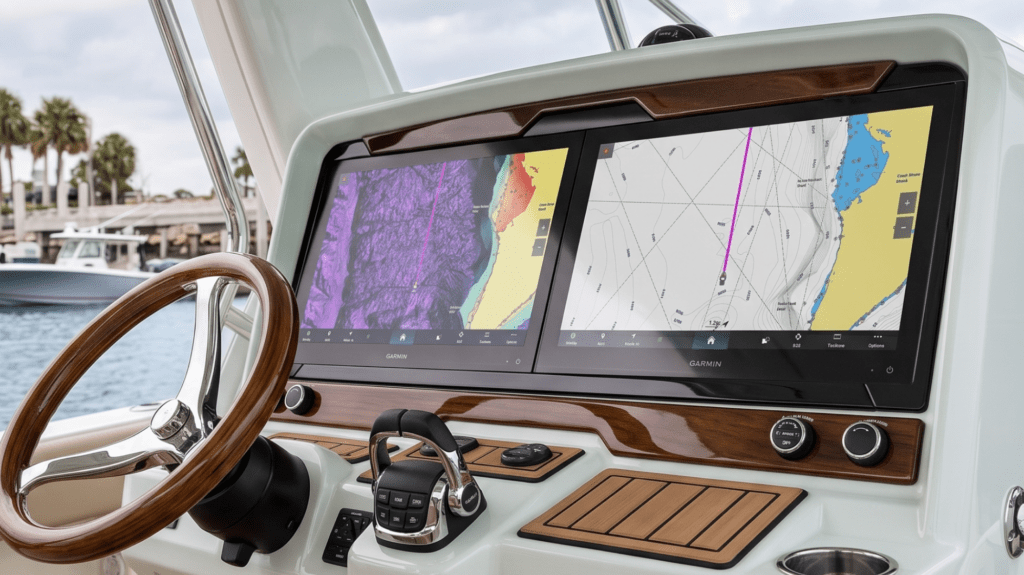
Having a 4K television in your living room has lost some of its novelty, but bringing this crystal clear screen technology to wet, sunny, rainy, or foggy conditions is a much more impressive engineering feat, and one we’ve reached. Now MFDs from major marine brands bring true 4K resolution screens.
With four times the pixels as traditional HD screens, these newer fish finder panels allow you to better differentiate between underwater structures and fish, for instance, being able to easily spot a fish next to a submerged tree branch.
Split screens are now easier to use, with each section clearly displaying the information, even in direct sunlight.

A New Era of Fishfinding

If you’re wanting to spend more of your time catching fish, today’s fish finders have the technology to allow you to do just that.
Newer fish finders and transducers are not just about getting a prettier screen or a couple of new features. This powerful, cutting-edge fishfinding technology allows you to clearly see more of what’s beneath the water and is becoming like your own personal fishing assistant armed with data, learning how you like to fish, and showing you where to find more fish. Your boat’s electronics are now doing the heavy lifting for you, and allowing you to filter out junk data – saving you time, so you can spend more of it catching fish.