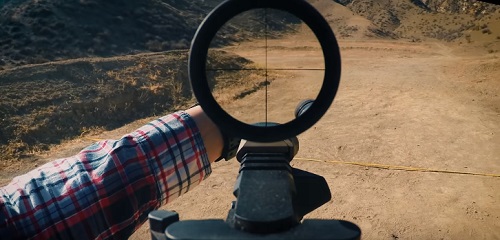
But, how will it perform when I put it through my battery of tests for long-range flight, edge sharpness and edge retention, penetration, and durability? Well, let’s find out!
I was eager to put the Dirt Nap DRT broadhead through all the tests that I do. So, let’s see how the Dirt Nap DRT performed!
The blades are 420J2 stainless steel 0.051 inch thick. They are not replaceable, but they are pretty thick.
The ferrule is made out of 7075 aluminum, which is a pretty stout aluminum. And this comes in 100 and/or 125-grain due to a removable washer that makes up the extra 25 grains.
If you keep the washer on, and you have a 125-grain head. Take it out, and you now have a 100-grain head. So, in a sense, it’s modular.
In the out-of-the-box sharpness test, I give the blades of the head I am testing a stroke from a carbon arrow shaft and then see if the blade can still cut paper (up to 5 strokes of the arrow).
We earn a commission if you make a purchase, at no additional cost to you.
12/22/2024 12:12 am GMT
Durability testing
In the durability test, I shot the DRT into a .22-gauge steel plate (up to five times) to test how well the head would hold up.
Overall, the DRT did relatively well. And the holes themselves, you can see that nice hole, better than a 2-blade would be because you get that crosscut in there as well.
Expandable or fixed blades? Keep Reading!Fixed blade AND mechanical broadheads reviews videos are also further down the page!
Then there are single bevel edges and double bevel edges, chisel tips and cut on contact tips.
There are mechanical heads that deploy from the rear as well as those that deploy over the top.
There are hybrids (both fixed and mechanical in the same head), stainless steels, tool steels, aluminum, and titanium all of various grades and properties.
There are cutting diameters ranging from under one inch to over three inches and total head lengths of under one inch to over three inches and blade thicknesses of .020” to .080”.
And, of course, prices ranging from one dollar per head to one hundred dollars per head… and so much more.
It never ceases to amaze me how creative broadhead manufacturers can get. The trick is knowing which head to use in a certain situation or type of hunt.
So, bow hunters, how in the world do you make sense of it all? All the choices out there can make even an advanced bow hunter feel like a beginner. How do you know which heads are the best choices for you?
We’ll cover a quiver-full of things to consider when choosing broadheads in the article, so if you want to jump straight to your topical interest, you can click the appropriate one below:
While almost any head on the market today can “get the job done” with a good shot, it is still important to make sure you are using the right head for your bow and the game you are pursuing. After all the time, energy, and money you’ve invested in practice and preparation, your broadhead is where the “rubber meets the road.”
Be sure that you choose a broadhead that will fly accurately at your maximum range.
A little research and education can go a long way in making sure you are not disappointed after that hard earned shot. You will notice that I have provided some recommendations throughout this article. This is certainly not an exhaustive list, but I have personally tested each of these heads and found them to be among the best.
Fundamentally, you must keep in mind what really matters in a broadhead. Regardless of the brand and the design, there are several crucial factors that really matter.
Flight
A broadhead should provide you with absolute confidence in its flight. Consider what your maximum range is and make sure you choose a head that will fly accurately at that distance—even with some wind, a racing heart rate, and shooting while a little off balance.
Always make sure your bow is very well tuned (get help from a pro shop if you’re unsure) and you have the correct arrow spine for your bow’s poundage and draw length. Also, make sure the arrow spins true when the head is installed. You can spin it on your hand or on a table to confirm there is zero wobble to it.
Furthermore, the smaller the overall profile of the head, in length and width, the more forgiving it will be in flight. This is why mechanicals are often a good choice for long distance shots.
A broadhead should be be sharp and able to hold that sharpness after impact. How sharp it feels before it hits an animal doesn’t matter nearly as much as how sharp it is after it penetrates that first inch or two of hide, bone, and tissue.
If the edge chips or bends, it will not cut and penetrate effectively. This is why blades should be thick enough, and the steel strong enough, to hold their edge well. Broadheads with higher quality Tool Steels like 41L40, S7, and A2 shine in this arena.
(Some of the most durable heads I’ve ever tested in terms of edge retention are the Valkyrie heads. You can see my tests on this head here).
The ferrule of a broadhead must be able to withstand great force upon impact. I have had multiple heads, both fixed and mechanical, bend or break at the ferrule upon impacting an animal. That almost always spells disaster for a hunt.
Quality materials and solid construction make a big difference. The shorter, thicker, and higher quality the material of the ferrule, the better it will stay in tact. I prefer high quality steel ferrules over titanium and aluminum for this reason.
A broadhead must have sufficient cut size to cause great tissue destruction while still ensuring deep penetration. With any animal I shoot at, my goal is to get as wide of a cut as possible while still providing a good likelihood of a pass through. Two holes will almost always provide a better blood trail than one hole. Given equal penetration, a wider diameter cut will slice through more tissue than a smaller diameter cut.
In the past, I used a head with a cutting diameter of one inch and always got a pass through. However, I knew I could cut more tissue and still get a pass through. So, I increased the size of the cutting diameter of my heads, with great results.
Likewise, I have used a head with a very wide diameter cut and gotten poor penetration and no pass through. Finding that sweet spot between the two extremes is my goal.
A Dead Ringer Broadhead exit wound through three ribs and shoulder blade of a hog.
Match Broadhead To Your Quarry
So, I will even change heads based on what animal I am hunting. If I’m going to be hunting turkey or other smaller animals like javelina, I use a very large cutting mechanical head, because that will cut a lot of tissue and still allow for a pass through. For a bigger animal like a wildebeest or elk, I like to use a smaller diameter cut to make sure I am getting deeper penetration.
I have also found that when it comes to blood trails, cutting diameter is more important than total cut. Allow me to explain with an example:
A four blade head with a one inch cutting diameter will have a “total cut” of two inches. Likewise, a two blade head with a two inch cutting diameter will also have a “total cut” of two inches. However, with all other things equal (penetration and shot placement) the two inch cutting diameter head will typically leave a better blood trail than the one inch cutting diameter head—even though the same amount of tissue is cut.
The reason for this is that a smaller diameter cut is more likely to close up with tissue while the larger diameter cut is more likely to stretch and open up even more. I have seen this proven over and over again.
Another way to understand this principle is to “reduce it to the ridiculous.” Which head would you rather pass through your body: An eight blade head with one inch cutting diameter or a two blade head with an eight inch cutting diameter? Both will cut the same amount of tissue, but I would much rather have a one inch hole go through my body than an eight inch cut go through my body. Well, so would a deer!
Keys: Greater Tissue Cut with Pass Through = Greater Blood Trail Greater Diameter Cut with Pass Through = Even Greater Blood Trail
So before you read any further, keep in mind the fundamental goal in selecting a head: It should fly well, not break, holds its edge, penetrate deeply, and cut a lot of tissue. Strive to find that balance between cutting as much tissue as possible and still providing a good chance at a pass through.
Now let’s examine some of the most important features of broadhead design. The more you understand about each feature, the more effectively you can decide what works best for your set up and your budget.
$26.99Select options
This product has multiple variants. The options may be chosen on the product page
Materials
There are three basic types of metals used in broadheads: aluminum, titanium, and steel. Each has its advantages and disadvantages. Aluminum and titanium are lighter than steel, which is why many heads tend to use them. It is easier for a head to make it to the 100gr weight if aluminum or titanium are used.
Aluminum
Aluminum is not as strong as steel. The best aluminums hardened in the best manner are still only as strong as the weaker steels. And, some aluminums are much weaker than others. The best aluminum for broadheads is 7075, which is quite a bit stronger than 6061.
So, if you are going to consider using a head with aluminum, try to find one made of 7075. One such head, is the Zeus broadhead, from New Era Archery.
If the manufacturer doesn’t say which aluminum is being used, it is probably 6061. That doesn’t mean its “bad” but it does mean that it’s a bit “weaker.”
Titanium is stronger than aluminum. As with aluminum, there are different grades of titanium. Just because a head is said to be made of titanium doesn’t mean it is using the top grade. Typically, if the manufacturer doesn’t state what grade it is, it is probably the weaker grade. While titanium is stronger than aluminum, it is not as strong as many steels. Both titanium and aluminum have less resistance to impact than many steels, so I prefer that a head that at least has a leading tip made of well hardened steel.
Contact Tip vs Chisel Tip heads (post-testing).
Steel
There are many different varieties of steel and they are not all created equal. While steel tends to be stronger than titanium and aluminum, there are significant differences in the various types of steel. When it comes to broadheads, two of the most significant ratings of steel are Rockwell Hardness (the “hardness” of the steel) and Charpy V Notch Scoring (the steel’s resistance to impact).
A steel may be very hard with a high Rockwell Rating, but may be very brittle and break apart or chip easily upon impact with a hard medium. Likewise, a steel can have a lower Rockwell Rating and not break apart, but may bend too easily.
Most steel heads use a 420 stainless steel, hardened to a level that is not too hard and not too soft. From my testing, it is obvious that some manufacturers are more successful at finding that balance than others.
There are also heads that are being made of tool steels and even very high end tool steels, such as 41L40, A2, and S7. With these premium steels, you will find a very high Rockwell hardness as well as a very high Charpy V Notch Score. Such heads will retain their structural integrity and razor edge far more effectively than typical stainless steels. They will cost a lot more money, but they are much more durable as well so they will last a long time.
In many of the tests I have done, I am continually impressed by how well premium tool steels keep their edge. While a typical stainless steel blade may become dull after cutting through 1/2” plywood, a head made of A2 or 41L40 or S7 will still be sticky sharp after cutting though that same board 5 times. That no doubt makes a difference in how well tissue, bones, and veins are cut.
We earn a commission if you make a purchase, at no additional cost to you.
A duller head can often just bend veins over, but a head that is sharp all the way through an animal will effectively cut those veins, producing greater blood letting.
Within steel heads there are also different ways the steel can be formed. Some use MIM (Metal Injected Molding), some are welded together, and some are machined. The machined steels tend to be much stronger than the MIM steels and welded models.
There are also a couple different types of construction of the heads themselves—component heads and single piece heads. Each has their advantages.
Component heads can be made with very tight specifications, as each piece is easier to construct than an entire head. These high specs can enable them to fly extremely well. They are then held together with some sort of interlocking design and bolt.
The best component heads do not use bolts that are load bearing, but rather that interlock, and then held in place by the bolts.
Single piece heads have the advantage of not being put together; they are literally one piece of steel. Thus, they tend to be more durable than component heads. But all single piece heads are not created equal.
As mentioned earlier, if the head is machined out of a single block of steel it will tend to be much stronger than a head that is metal injected molded or welded.
All other things being equal, the thicker a blade is, the stronger it is. The thinner a blade is, the weaker it is. Thin blades may feel sharper out of the package, but they tend to lose that edge and bend or get nicked up more readily than thicker blades. I prefer blades that are at least .035” thick, but again, the thicker the better. When premium tool steels are used, a blade can still be relatively thin and still very strong.
Like most other broadhead topics, this one can lead to a pretty heated debate. In theory, chisel tips are more durable and cut on contact tips penetrate better. You can see this difference by pushing both a cut on contact head and a chisel tip head through a piece of cardboard. It will likely take noticeably less pressure for the cut on contact head to penetrate. However, upon impact with a hard medium like bone, the cut on contact tip is more likely to fold over than the chisel tip.
From my testing, I only prefer a cut on contact head if is either a very thick two blade head made out of premium tool steel or a three blade single piece head, where all three blades come together to form the tip. Otherwise, the cut on contact heads are too likely to fold over. There are some chisel tips that are extremely sharp on their edges, like those of the QAD Exodus, or Wasp Dart for example. Those tend to have penetration closer to a cut on contact head but the strength of a chisel tip.
Many people prefer fixed blade heads over mechanical heads because they are more durable and dependable. There are no moving parts and fewer things to break. Fixed blade heads typically come in either two, three, or four blade models. Let’s briefly examine each of those:
These are a throwback to the proven designs of Native Americans and other similar societies around the world. They are simple, durable, accurate, and penetrate well. Two blade heads can either come in Single Bevel or Double Bevel Designs.
Fixed blade heads typically come in 2, 3, and 4-blade varieties.
A single bevel blade simply means that the edge of a blade is only sharpened on one side. A double bevel blade means that the edge of the blade is sharpened on both sides. There are advantages to each design. Typically, the choice between a single bevel or double bevel edge only comes into play with two blade heads.
We earn a commission if you make a purchase, at no additional cost to you.
12/22/2024 12:59 am GMT
This does a number of significant things. First, it creates a spiral wound channel. I typically find that the entrance hole of a single bevel head is not a slit, but rather a hole. The arrow is already spinning so much and is forced to spin more upon impact, creating a rounded entrance hole in the hide of an animal. The head continues to cut tissue not only in the direction the head is pointing, but also in the direction the head is spinning—thus cutting both inwardly and spirally.
With internal organs, this can have a similar effect to spinning a fork when eating spaghetti, wrapping the noodles around the fork, then cutting them off. A twisting head can twist the organs and then cut them as the head moves forward. I have seen this happen inside an animal many times and the devastation is undeniable.
Second, a single bevel head typically breaches bone very effectively. As the tip of a head enters a bone, the head also twists and causes that bone to split apart and not just get cut. Then the arrow passes through that split in the bone. This is especially significant when hunting very large animals such as Cape Buffalo. If a head cannot effectively breach that bone, penetration will suffer.
A third way the single bevel head works is that due to its twisting inside an animal, it is not likely for the arrow to back out of an animal if there is not a pass through (try pulling one out of a target and you will see what I mean). Often times, heads are sharpened on the back edges to allow the heads to continue to cut tissue in all directions inside of an animal.
Double bevel heads do not have this spiraling effect. However, they can often penetrate more deeply for two reasons: First, they can be sharpened to a finer edge. Secondly, they are only cutting tissue in a forward fashion and not a twisting fashion. They will not typically breach large bone as effectively as a single bevel, they will not create a spiral wound channel, and the arrow can back out of an animal more readily than a single bevel. But, they will penetrate hide and tissue more effectively.
As for which is better, it really does depend on your bow’s set up and your quarry. If you are generating lower kinetic energy and need penetration to be as deep as possible, a double bevel may be a better choice.
We earn a commission if you make a purchase, at no additional cost to you.
If you have a bit more “normal” kinetic energy, or are hunting larger animals with heavier arrows, a single bevel will likely cause more damage to the animal.
From my testing, the only concern I have with two blade fixed heads is the size of the entry and exit holes. If an animal does not expire quickly, you are going to be forced to follow a blood trail.
Smaller diameter cuts do not allow the degree of blood letting that larger cuts do. There may be plenty of damage inside the animal, but the blood trail may be compromised.
Recommended Single Bevel Heads: Bishop Archery (Bridgeport/Pipeline), Cutthroat Broadheads. Recommended Double Bevel Heads: German Kinetics Silver Flame, VPA, Steelforce
Three Blade Heads
There are some great strengths to using a three blade head, as evidenced by their popularity on the market. Three blade heads tend to make more of a “hole” than a slit. This makes the hole more difficult to close up and facilitates better blood letting.
If the heads are a one piece construction with the correct angles, like VPAs or Bishops, you can easily sharpen two blades at a time by laying them flat on a stone and moving them back and forth, then rotating till all the blades are covered.
We earn a commission if you make a purchase, at no additional cost to you.
12/22/2024 12:24 am GMT
Four Blade Heads
Some heads use a four blade design. Most of those have two primary blades, followed by two smaller, “bleeder” blades. Others use four blades that are all the same size, such as Slick Tricks, Wac’ems or Wasps.
From my testing, I have come to prefer a wider cut three blade head over a four blade head with smaller, equal sized blades. That fourth blade does cut more tissue, but it also impedes penetration more, and the hole is not as big as that of a wider cut three blade head.
A wider hole tends to produce a better blood trail than a smaller hole, whether it’s three blades or four. That being said, the four blade design of two larger blades and two bleeders is a very good option. They tend to be more forgiving in flight than a three blade head, all other things equal.
Whether you want a two leading blade cut on contact tip or a chisel tip is another question as well. See the earlier section discussing the pros and cons of these two designs.
Recommended 4 blade Heads: Iron Will, Trophy Taker A-TAC, Slick Trick Magnums, Magnus Black Hornet.
Mechanical Broadheads
Mechanical heads have come a long way in recent years. They have two primary advantages over fixed blade heads: Smaller surface area in flight (which allows them to be more forgiving in flight) and larger cut once the blades are deployed.
For example, even with a very well tuned bow, it would be quite difficult to shoot a fixed blade head with a two inch cutting diameter and have it fly well. But with a mechanical, you can get that two inch cutting diameter in a small, great flying package.
There are two primary styles of mechanical heads based on how the blades deploy upon impact.
We earn a commission if you make a purchase, at no additional cost to you.
12/22/2024 12:40 am GMT
Over the Top Deploying
The first mechanical heads to hit the market worked this way. The blades are on hinges and folds upward toward the tip of the head. They are either held in place by friction or a rubber band.
Upon impact, the blades peel back like a banana would, opening up to their full cutting diameter. They will not open fully until after they have entered the animal, thus the entrance holes are basically the same size as the head in the closed position.
Recommended Over the Top Deploying Mechanicals: Rocket Steelhead, NAP Spitfire, Wasp Jak-Knife, Dead Ringer Trauma, Grim Reaper
Rear Deploying
Mechanical heads (pre-testing). There is no shortage of them to choose from!
In recent years, many heads have begun using various rear deploying mechanisms. With these heads, the blades swing open from the rear and are fully deployed by the time they reach the hide of an animal. Thus the entrance holes are the same size as the fully deployed blades.
Both of these mechanisms have their loyal followings and both can work well on animals. I have successfully taken many animals with both. However, there are some observations worth noting.
With over the top mechanicals, the entrance holes are small but the internal damage is great. They do tend to penetrate more deeply than rear deploying blades, simply because they cut less tissue upon entrance.
If they pass all the way through the animal, the exit hole is the full size of the fully deployed blades. But if they do not pass all the way through, you have a small entrance hole and no exit hole. That spells a big problem for blood trails.
With rear deploying mechs, the entrance hole will be great; it will be the size of the fully deployed heads. But because of that, penetration can be compromised because it has to cut through the hide with that wide cut. However, you can be confident you are going to have at least one big hole. Between these two styles, after all my testing I prefer the rear deploying mechanical heads by a large margin.
$34.00Select options
This product has multiple variants. The options may be chosen on the product page
Recommended Rear Deploying Mechs: Rage Hypodermic and Trypan, NAP Killzone, G5 Deadmeat
Hybrid Broadheads
Several different manufacturers have come out with hybrid heads, which are a combination of both a fixed blade and a mechanical head. There is typically a smaller two blade fixed head followed by a larger cut of mechanical blades.
I have taken a number of animals with these and tested them quite a bit. They certainly have their niche. The only downside is that you will want to make sure you have enough kinetic energy to drive all those blades deeply into an animal. Again, I prefer the rear deploying mechanical blades in a hybrid head. If they are over the top deploying, you will not get a very big entrance hole and an exit hole will be fairly difficult to achieve due to the large cut.
Selecting a broadhead can be a pretty daunting task. And it gets extra confusing when all of your buddies each have their own strong opinions based on their personal experience from the last season. But you owe it to yourself and to the animal to make the most informed decision you can about which head is best for your purposes. Hopefully, this article will help you to make a bit more sense of the options and choices available.
For specifics on other heads that may not be listed in this article, click on the names/brands below:
List Of Broadhead Reviews on N1outdoors.com (Click To Read More!)
Please also check out my YouTube Channel as well, Lusk Archery Adventures, to see videos of broadhead tests and over 50 hunts with those heads as well. And don’t hesitate to contact me with any questions through the channel.
There are a lot of deer sounds and noises I like to hear in the woods. But, there’s one I usually don’t like to hear, especially when I’m walking to my hunting stand. More on that below…
This is the story of some deer sounds that led to a dandy South Carolina archery buck…
It’s unforgettable moments like this one that spurred us on to start the N1 Outdoors brand…
In this article, you’ll hear the following deer vocalizations:
Note: If you are interested in learning what sounds a deer makes, you can listen to the above deer sounds throughout the article as well as at the bottom of the page.
A New Deer Hunting Property
The 2010 deer season in South Carolina held some great memories for me.
We earn a commission if you make a purchase, at no additional cost to you.
The South Carolina archery only season was already over and we were getting some consistent colder weather.
But, the truth is, I really wasn’t disappointed to be hunting with my bow during gun season, because deer hunting just makes me want to say “Bowhunt Oh Yeah!” In fact, I hadn’t even hunted with my rifle since 2009.
It was a chilly, November 18 morning, and the rut was in full swing. I had seen a fair amount of rutting activity, but had not seen any bucks that got me very excited. But, when you love to bowhunt, it’s a great time to be in the woods.
I had parked my truck and was making the walk to my stand on the downwind side of where I would be hunting.
My stand location was in a head of hardwoods that contained several white oaks. I’ve always loved hunting locations that contain white oaks, especially in early fall, as the acorns are falling. But although the deer love them, by now, there weren’t any left for them to enjoy.
Nonetheless, it was a good location on the edge of a fairly large clear cut that the deer would typically transition through on their way to the other side of the property.
There was a gate opening that I needed to walk through to enter the woods where my stand location was.
I had gotten about three steps through the gate, when the head of woods I was about to enter exploded with the sounds of deer blowing. It was still too dark to see, but it sounded like a small army of whitetail had just left the building. I stopped and listened, as the sounds of their escape got farther and farther away.
PRESS PLAY ABOVE TO HEAR WHAT A DEER BLOW / SNORT SOUNDS LIKE… Deer will blow (or snort) to alert other deer of danger. Deer often blow as a result of seeing or smelling something perceived as dangerous. Sometimes deer will blow and stomp to try and get a predator (or person) that they believe is in the area to move and thus reveal their location.(This is not to be confused with a “snort wheeze” sound that a buck makes).It’s important to be as scent-free as possible and pay attention to wind direction when hunting, so you can avoid a blow/snort that ruins your hunt!MORE DEER SOUNDS FURTHER DOWN PAGE!
I was pretty disappointed to say the least.
I had taken such great care in paying attention to wind direction when walking to my stand. Yet, here I was, not even in my stand yet, and the deer already knew where I was.
It was like the deer were leaving the area in slow motion.
Well, there I was (and they knew it). I had that sick feeling that might have made one want to just go back to the truck. But, this was the rut, and I love to hunt whether the deer blow me up or not!
I found my way to my tree and got in my stand, pulled up my bow, and got settled. By now, it was first light but the sun was not yet up.
We earn a commission if you make a purchase, at no additional cost to you.
12/21/2024 11:28 pm GMT
The whitetail doe grunt
After sitting for 10 minutes or so, I thought it might be a good idea to give my grunt call a soft doe grunt. My thinking was, “maybe if they hear this, they’ll think things have settled down and are safe again.”
So, I blew on my grunt call softly, making a “social grunt” noise.
PRESS PLAY ABOVE TO HEAR WHAT A DOE GRUNT SOUNDS LIKE… Does use this sound as a “social grunt” as a way of communicating with each other. It can be a useful call when hunting to attract does closer to your stand or hunting location. MORE DEER SOUNDS FURTHER DOWN PAGE!
A fast appearance
It had probably been only 10 seconds after grunting, that I could see a deer appear about 100 yards away, on the field edge. Even at that distance, I could see his horns and I was interested!
No sooner than he appeared, he began running toward the head of woods I was in. He got to a well traveled path at the edge of the hardwoods and slowed down, turned, and began walking toward me.
By now my heart is racing pretty good, because I can see this deer is a shooter, and I have gone from heartbroken to hopeful in a matter of minutes.
This is where I have to say that the buck walking toward me had one of the better set of antlers I had seen in my area of South Carolina.
In recent years, SCDNR bag limits had been high. Many believe that these high limits, coupled with poor deer management, had resulted in fewer mature bucks in South Carolina.
All I knew was, the age and size of the deer walking toward me was not commonplace in my area.
I had my bow in my hand, but didn’t feel I was going to be able to stand up without messing something up. My archery stance on this deer was going to be… sitting down. I sat and watched him inch closer.
Prior to getting in the tree stand, I had put some estrous scent on a tree limb about 20 yards away. He walked right past it. But, the worst part was that in about 3 more steps, I knew he would be downwind of me, and be gone!
I couldn’t believe I was about to watch the biggest South Carolina buck I had encountered leave my life. But, unfortunately, it was all but over.
Just as I thought this hunt was coming to an end (for the second time in minutes), he stopped, turned around, and walked back to the tree limb where I had put the estrous scent.
I knew this was my chance. So, I quietly went to full draw. I thought, “ok, aim small, miss small.” But, there was just one, really big, problem. I looked through my peep and saw, well nothing. It was still too dark in that head of woods to clearly see the buck.
If this buck would stay for a few minutes, there would be enough light through the trees to see his vitals clearly. But, I knew with chasing does on his mind, he probably wasn’t staying much longer. And, I knew that in that particular location, the wind had a tendency to swirl from time to time.
I can’t remember everything that was racing through my mind at that point, but I know I probably prayed a few fast words. It’s amazing how fast I can get to a prayerful state of mind when a big buck is nearby (amazing and shameful!)
As I was still at full draw, I moved my eye outside of my peep, so that I could see the buck through my site pins.
Then, I slowly looked back through the peep and could see the target… barely.
I released my arrow and he gave the ‘ole donkey kick. He bolted down the draw and out of sight. I sat for two hours, wondering how this whole story was going to end.
The wait and the search
So far that morning, I had heard deer blow and deer run… now, all I wanted to hear was, “wow, that’s a nice buck there in the back of your truck!”
During those two hours, I scanned the ground endlessly, hoping to see a bloody arrow. I saw nothing. Of course, then the doubts set in… “did I make a good shot? How far did he go? Will I ever find him?” It was agonizing.
Finally, I decided to get down and go look. I walked out 20 yards to where I had shot him and I saw my arrow lying on the ground, the arrow shaft and my broadhead half-covered by the forest floor.
I picked it up and immediately got some encouragement… bright pink, frothy blood on my fletches. Things were looking up!
I followed along the faint blood trail. It wasn’t significant, but it was enough to keep me moving to the next spots of blood.
After 150 yards or so, I reached a small creek that ran through the property. I was till intently focused on the ground near my feet, checking for any small clue I could find. The blood trail had stopped.
I looked up and about 30 yards away, in the creek, was the buck. I held both hands high and thanked the Lord for answering my desperate (yet somewhat shallow) prayer.
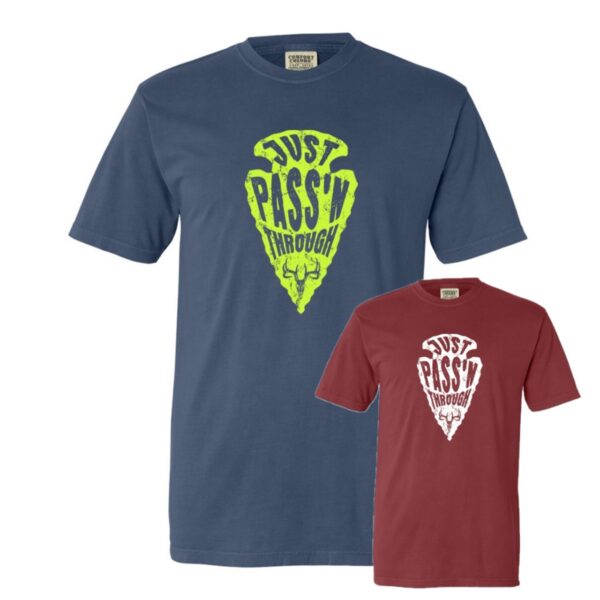
The shot turned out to be a double-lung pass through. (We love pass throughs so much, we even made a shirt about them!)
The morning started with deer blowing up the woods… but it ended with a solid buck down.
The drag
I was by myself with no one to help me drag this deer out. I could either drag him about 200 yards uphill, or try to drag him through the muddy, swampy mess of a creek. So, I chose option 2.
I was able to use the shallow creek as assistance and slide the buck through the area for the long 300 yard trek back to the truck.
A short drive and a few pictures later, I had officially sealed the deal on one of my most memorable N1 Moments.
Looking back, I’m glad for the deer noises I heard that day… the deer blowing, the deer running, and finally, the deer sliding through the creek bed on it’s way to my freezer and my wall.
LISTEN BELOW FOR MORE DOE AND BUCK NOISES…
Buck Grunt Sound
PRESS PLAY ABOVE TO HEAR WHAT A BUCK GRUNT SOUNDS LIKE.Much like a doe grunt, the buck grunt is a noise a buck makes to communicate socially with other bucks in the herd. It can be a useful call for a hunter to get a buck’s attention as an attempt to lure him closer into shooting range.
We earn a commission if you make a purchase, at no additional cost to you.
12/22/2024 12:32 am GMT
Doe Bleat Sound
PRESS PLAY ABOVE TO HEAR WHAT A DOE BLEAT SOUNDS LIKE. Does use bleats to communicate with each other, especially in the presence of their fawns. Fawns will also bleat when in danger, which will often attract adult deer to come looking for the fawn in distress. The bleat is a good deer noise to have in your calling arsenal when hunting, as it can draw does toward your stand location, which can also lure bucks in search of does, especially during the rut.
We earn a commission if you make a purchase, at no additional cost to you.
12/22/2024 01:33 am GMT
Estrus Doe Bleat Sound
PRESS PLAY ABOVE TO HEAR WHAT AN ESTRUS DOE BLEAT SOUNDS LIKE.Does will give estrus bleats to indicate to bucks in the area that they are ready to breed. This is a good deer sound to use when calling during the rut.
Buck Trailing Grunt Sound (Tending Grunt)
PRESS PLAY ABOVE TO HEAR WHAT A TRAILING BUCK GRUNT SOUNDS LIKE.Bucks will use this call when following an estrus doe. This grunt is in short bursts and sometimes is in cadence with each step the buck takes.