I have always thought and even made mention before to other people that if someone could come up with a hiking boot a hunting boot that’s waterproof and had a waterproof upper that wasn’t neoprene on the outside, that was also flexible and comfortable, that the boot could do really well.
Well, I think that boot is finally here… it’s the Alpha Pursuit from the Muck Boot Company!
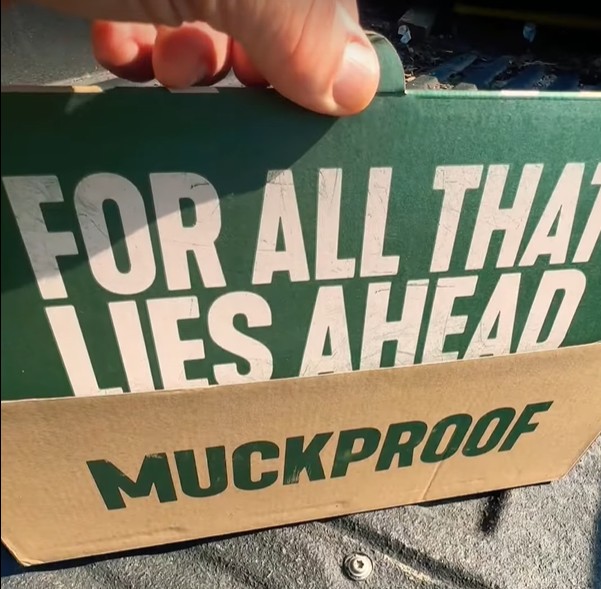
Muck Boots tagline is, “For All That Lies Ahead.” Well, we wanted to see what lie ahead with the Alpha Pursuit boots, so we found out!
Alpha Pursuit Boots From Muck | A Closer Look
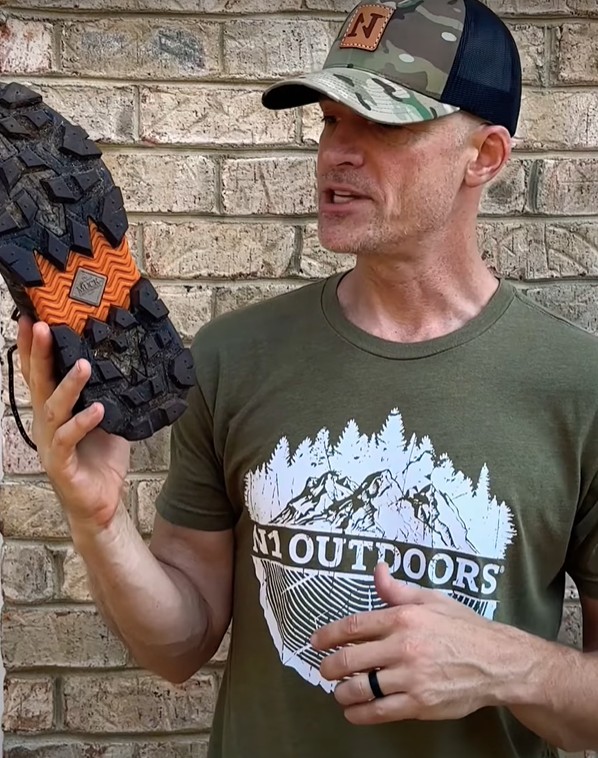
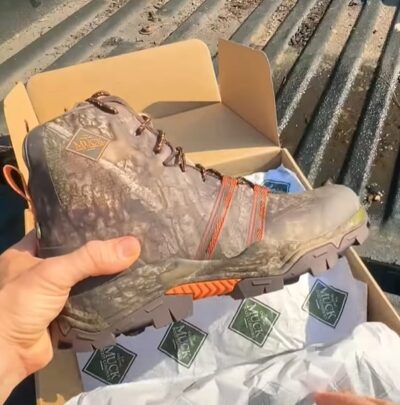
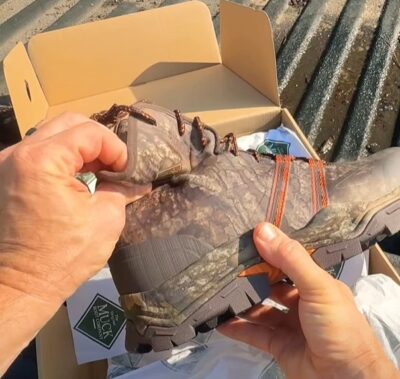
The Alpha Pursuit looked sharp coming out of the box…
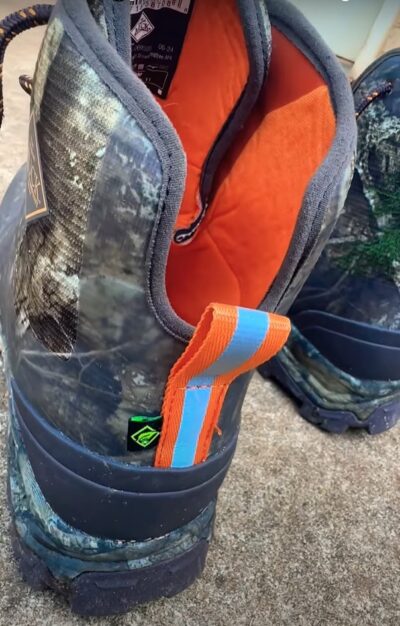
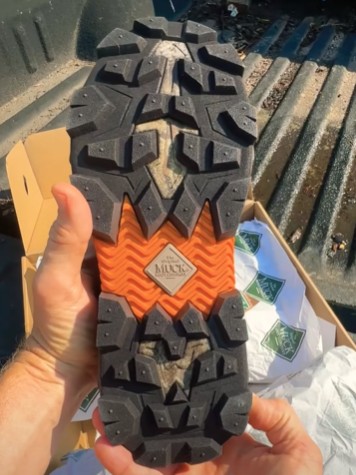
They say this Notch right here helps with Achilles fatigue… where I come from that’s called, “ankle don’t feel good!”
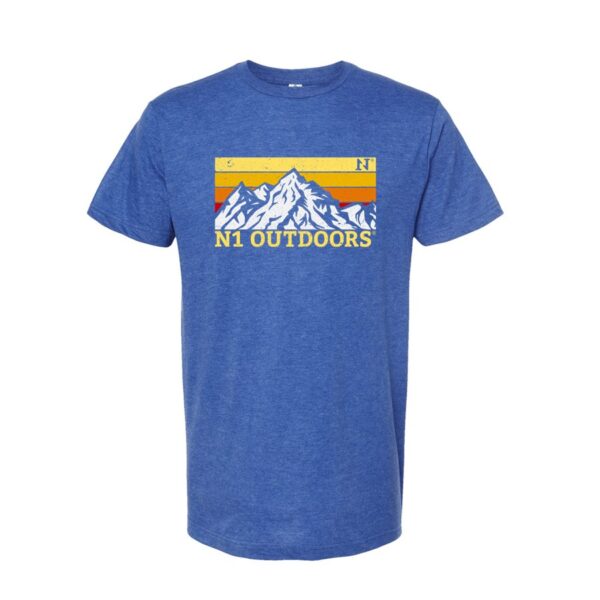
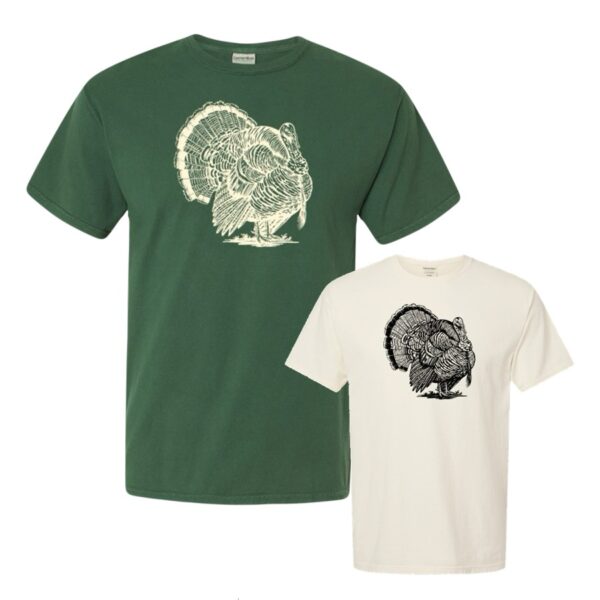
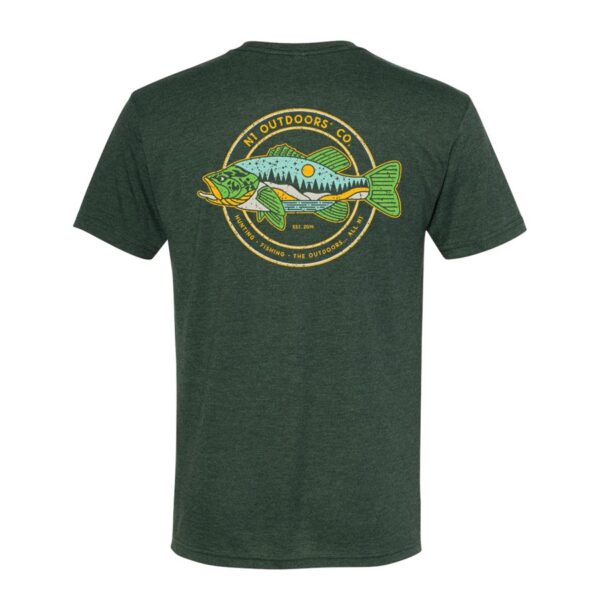
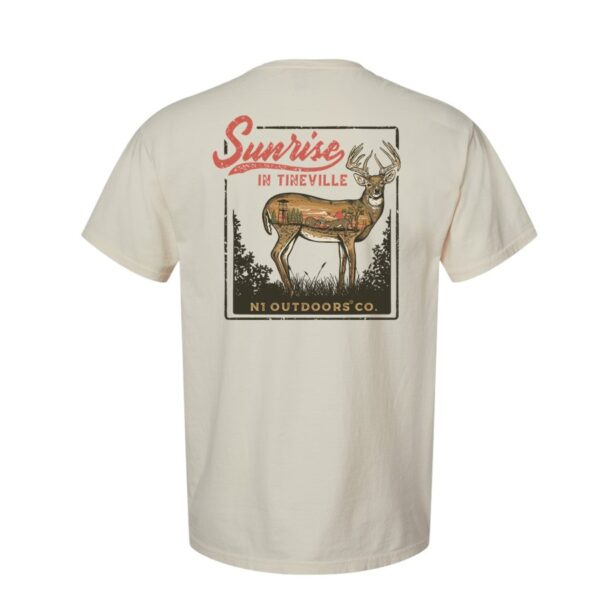
Check out these great hunting and fishing tees from more N1 Outdoors®!
But, the Alpha Pursuit boots have a memory foam insole…
…and the soft, flexible shell is a game-changer as well, as most boots in this category tend to be stiff and inflexible. With these factors, in addition to the achilles cutout, and I’m just telling you, they are comfortable!
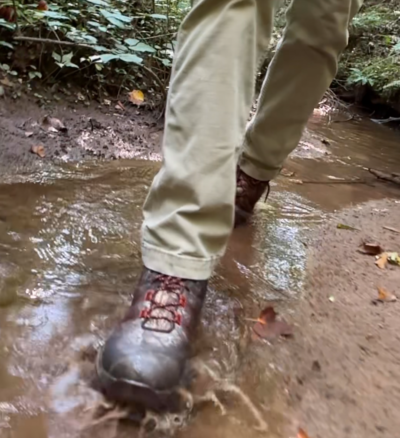
It’s hard to come up with something that’s really new in the boot category. However, the Muck Boot Company has done it with the Alpha Pursuit boots. They are extremely comfortable (thanks to the memory foam and soft outer shell), versatile, and of course, 100% Muck-Proof! We would definitely recommend these boots.
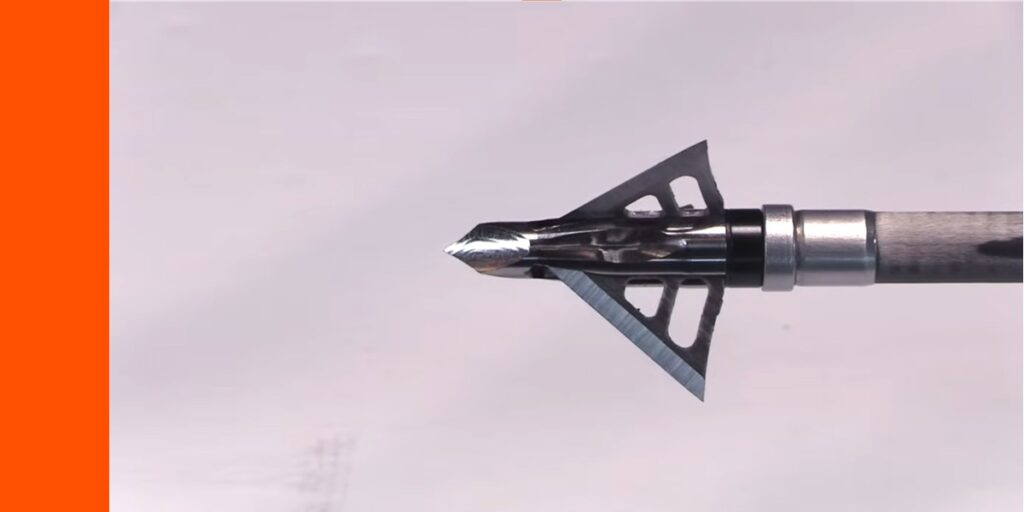
You can’t have too many broadhead tests. So, I’ve got another broadhead that I tested that I want to share with you… it’s a classic head with a twist. It’s the Muzzy Trocar TI 100 grain.
For all the performance testing of the Muzzy Trocar TI 100, I used my Elite Era compound bow. But, for the accuracy testing, I’m using this Killer Instinct SWAT X1 Crossbow, because it eliminates so much human error.
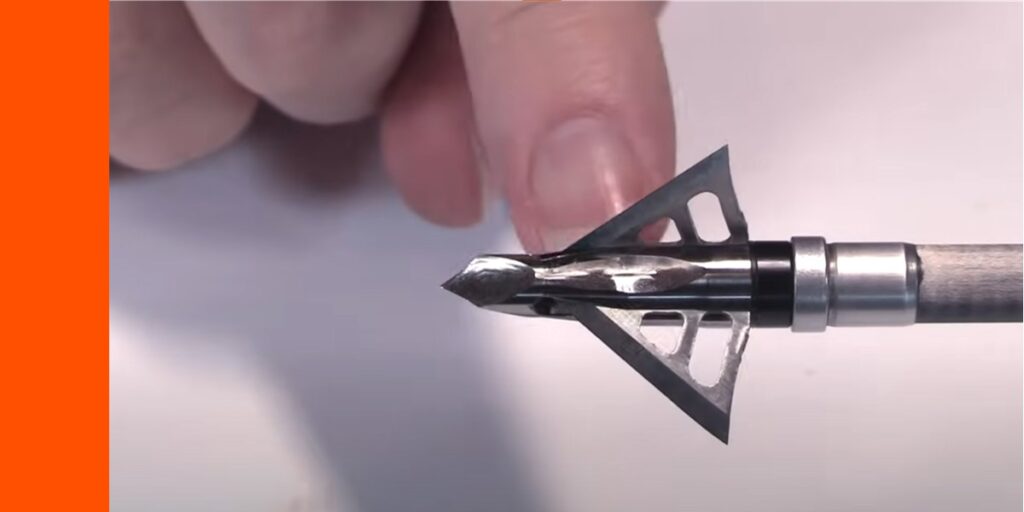
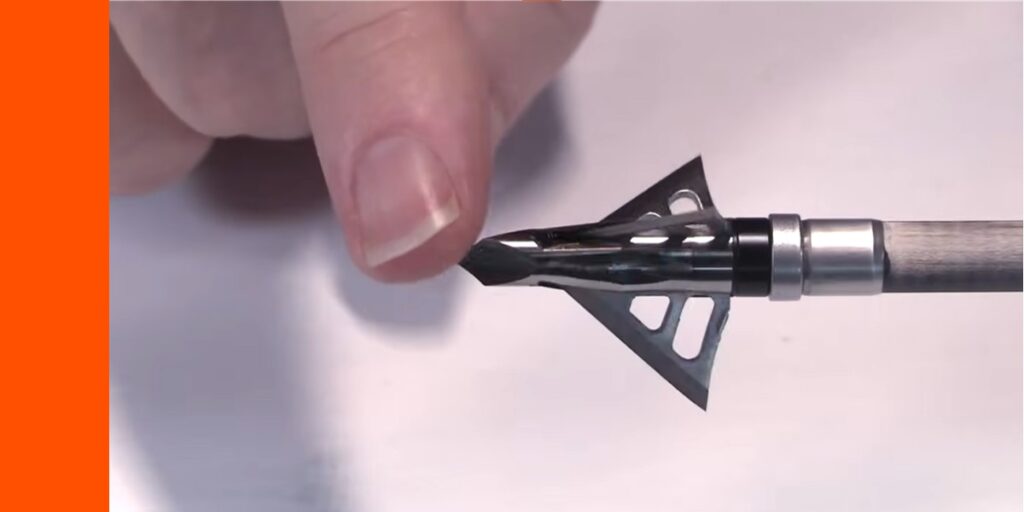
The Muzzy Trocar Ti 100 Grain Broadhead Up Close
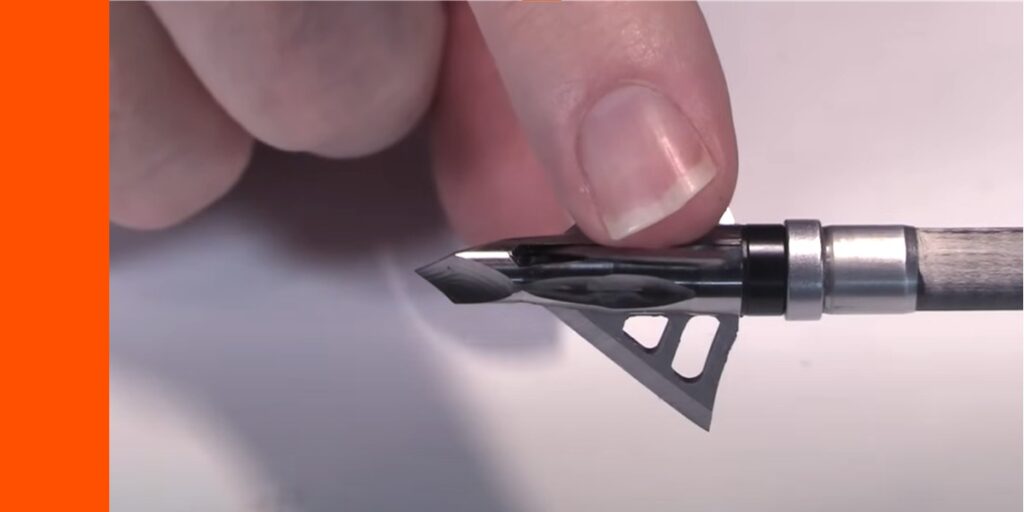
Here’s a good look at this head. It’s just a nice, proven design. It has a lot of cool features. I’ll start with the materials.
It’s got a titanium ferrule, which is lighter than most steel and allows for putting weight into some other parts, even though this is just a 100-grain head.
It also has a nice chiseled tip, which I really like.
And it has a type of threaded retention collar, if you will (I believe it’s aluminum).
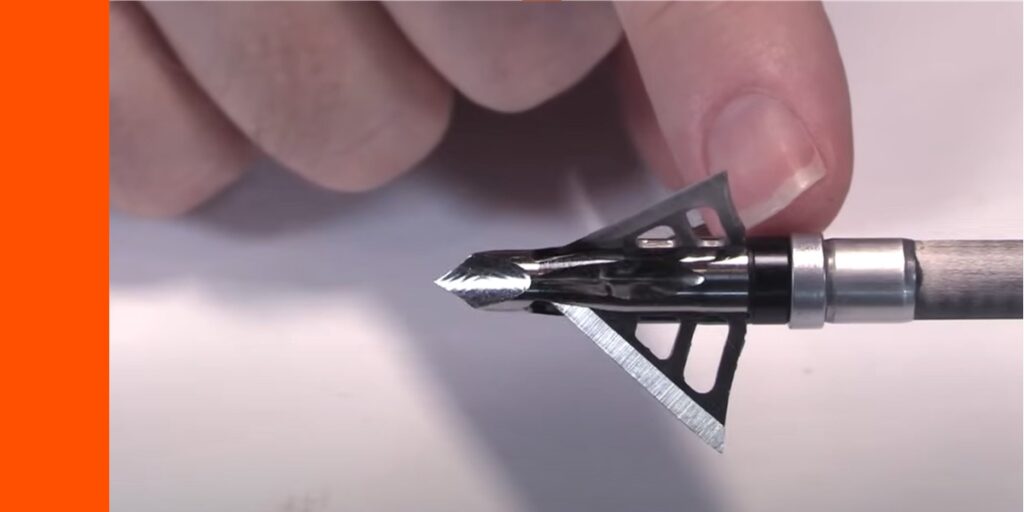
The blades are, of course, stainless steel and a stout 0.0408″ thick, so relatively thick blades there. The cutting diameter is 1.25″, even in this 100-grain model. So, the total cut is 1.875″.
Another cool thing about this head is that the blades are offset, meaning they don’t all just point toward the center of the ferrule. They’re a little offset. What that does is that it creates a really nice rotation, both in flight, as well as within a medium or animal, to make an even more wicked wound channel.
Another neat thing is that you have a choice of whether you want the blades to rotate left or right by changing the offset. Now, you want to make sure, just like with a single bevel head, (though this is a double bevel head), that the blade offset matches your fletching. So, for example, if you have a right helical or right offset fletching, then you’d want to be sure you put the blades in the right rotation position. And, vice-versa if you have a left helical or left offset fletching.
For resharpening, I would use the Stay Sharp Guide Replaceable Blade Kit. That works really well with broadheads like this.
I was really eager to put this head to the test and see how it performed. So, let’s see how it fared in the various tests…
We earn a commission if you make a purchase, at no additional cost to you.
07/22/2026 01:05 am GMT
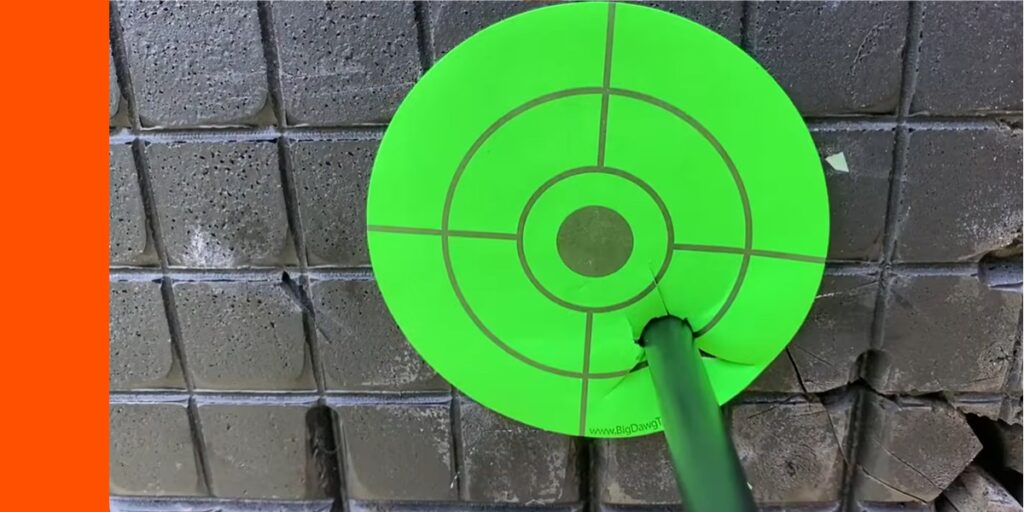
Flight Forgiveness Test
For the flight forgiveness test, I shot one field point and then one broadhead, at 30 yards, out of a Killer Instinct SWAT X1 Crossbow, with a 675 grain Bishop Bolt, at 300 feet per second.
The Trocar got the 9-ring.
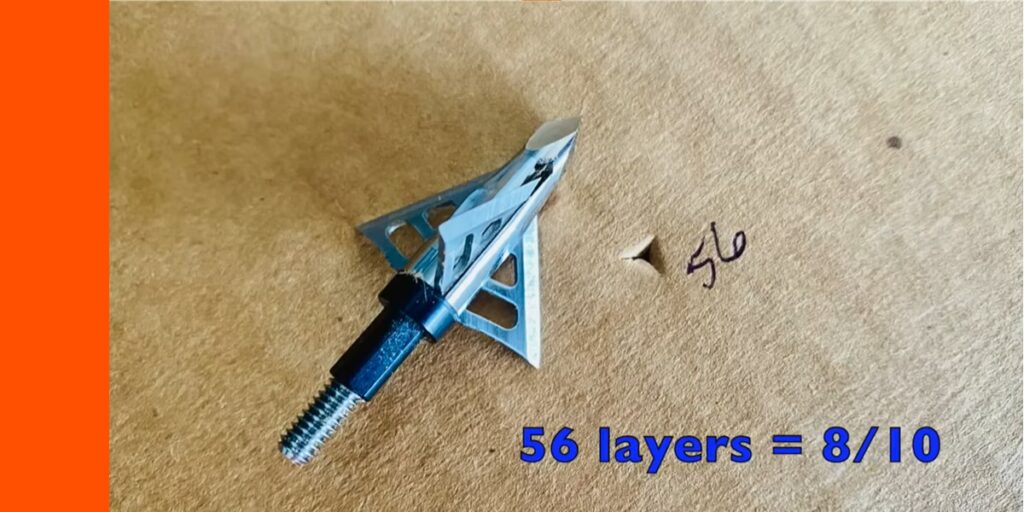
Edge Test #1: Initial Sharpness Test
In this test, I checked how many grams of force it took to to cut copolymer wire.
It took 132 grams of force to cut through the wire, which is a 10 on a 10-point scale, plus a bonus for going under the threshold of 200.
Penetration Test #1: Ballistic Gel and MDF
In this first penetration test, I , shot the head into ballistic gel, fronted by 2/3″ Rubber Foam Mat and 1/2″ 1/2″ MDF.
Durability Test #2: Two Shots Into 22 Gauge Steel Plate
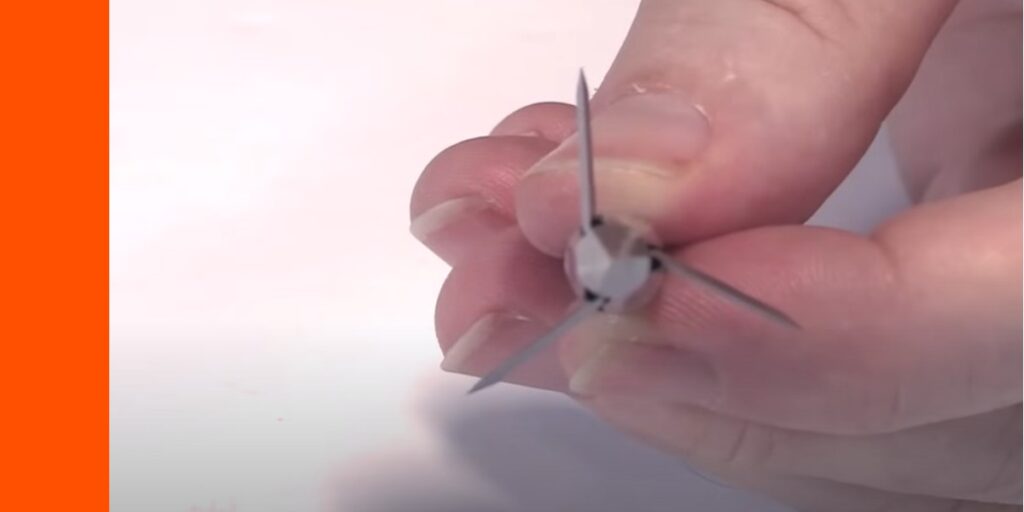
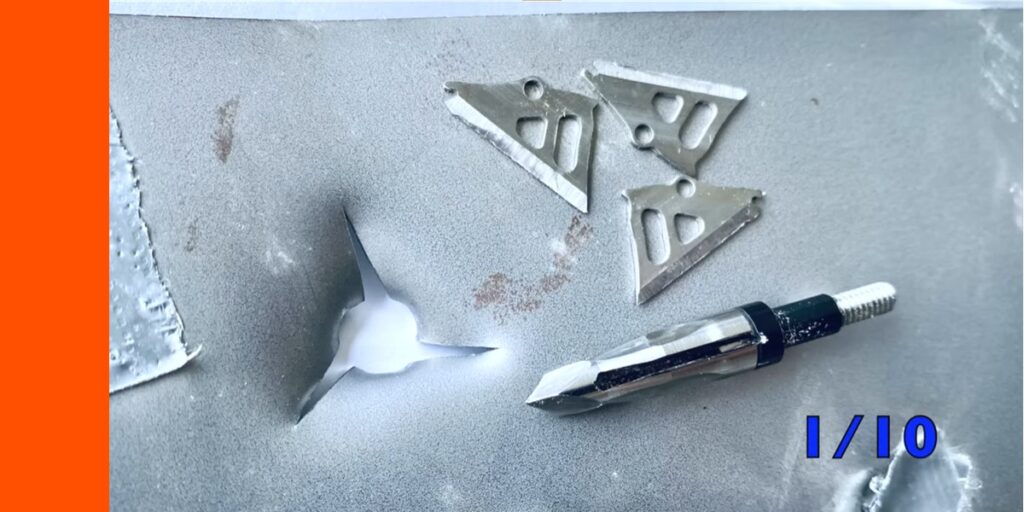
And here is the Muzzy Trocar Ti after just one shot through the steel plate. I didn’t shoot it a second time, because on the very first shot, all the blades came out. And, if you look closely at the base of the ferrule, you can see where the blades have made a little divot back into that retention collar that I feared was a weak point. And, indeed it was, because it backed up just enough to then fall out of the little locking mechanism at the top. So, that’s unfortunate. Now, it did make a nice hole, that you can see here. You can also see that rotation from the offset blades. But, it just lacked the durability to stay together.
Retention Test: Clear Ballistics FBI Gel
It rotated 90 degrees at 12″. Really good rotation.
Durability Test #3: One Shot At Cinder Block
Here is the head after all the durability testing. You saw that the blades all fell out in a steel plate, because this retention collar is just so soft. The blades backed in and cut into it, and then there was nothing to hold them in place. But, I went ahead and shot it into the cinder block like this, and you can see that the ferrule held up well.
So what do you think about the Muzzy Trocar Ti in 100 grains?
Man, there’s a lot of great strengths to this broadhead. It performed well in a lot of different areas, including cut size, blades, and the ability to change the rotation of the blades. Additionally, I love that rotation of the offset blades, the ferrule, and chiseled tip.
But man, I’m concerned about that retention system. When all the blades came out, that was a shocker to me.
Maybe I got a bad batch or something, but that’s just something to keep in mind before you use them. I know shooting them in the steel plate, that’s a pretty big shock, but still, most fixed blade heads breeze through that like butter.
I hope you enjoyed this review. Be sure to check out all the other broadhead reviews.
They don’t give participation trophies for quality hunting boots. After all, if you’re going to spend good money on boots, you want quality, durability and functionality. With a lot of great boots on the market, sometimes it can be hard to decide whether they’re going to be good or bad before spending the money.
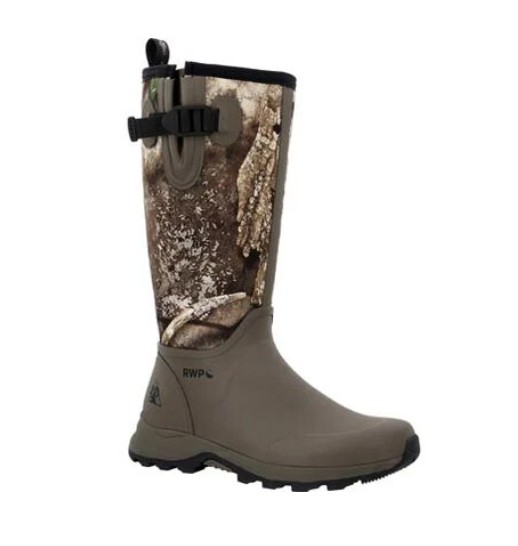
So, let’s take a look at the Trophy Series Tall Hunting Boot from the Rocky Boot Company and see if they are in fact, a trophy!
Trophy Series Tall Hunting Boot Overview
Is the Trophy Series Tall Hunting Boot from the Rocky Boot company a winner? Let’s find out!
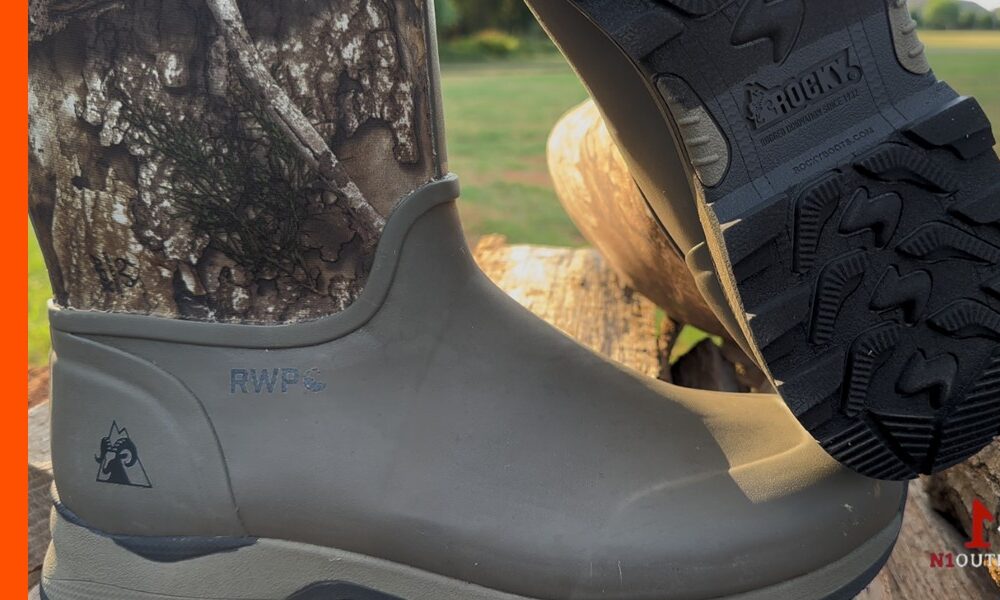
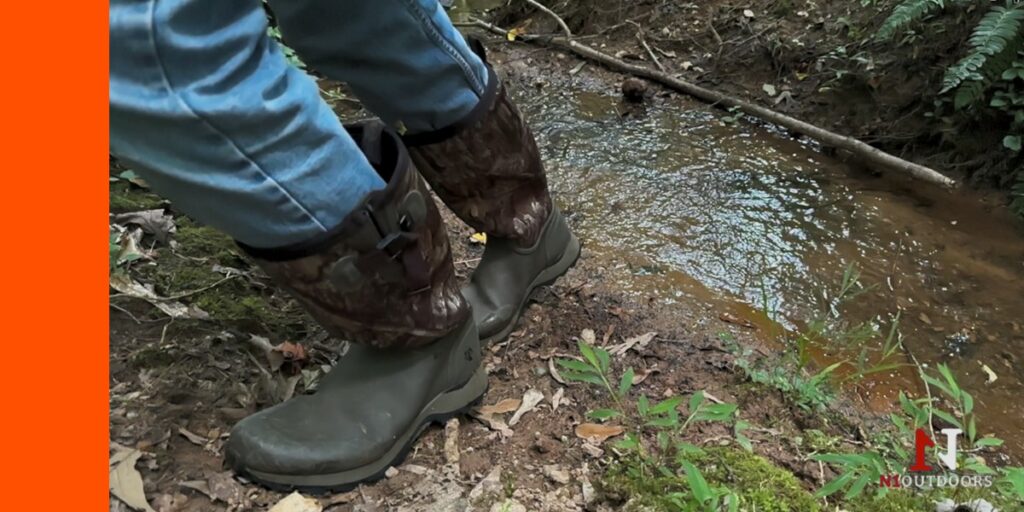
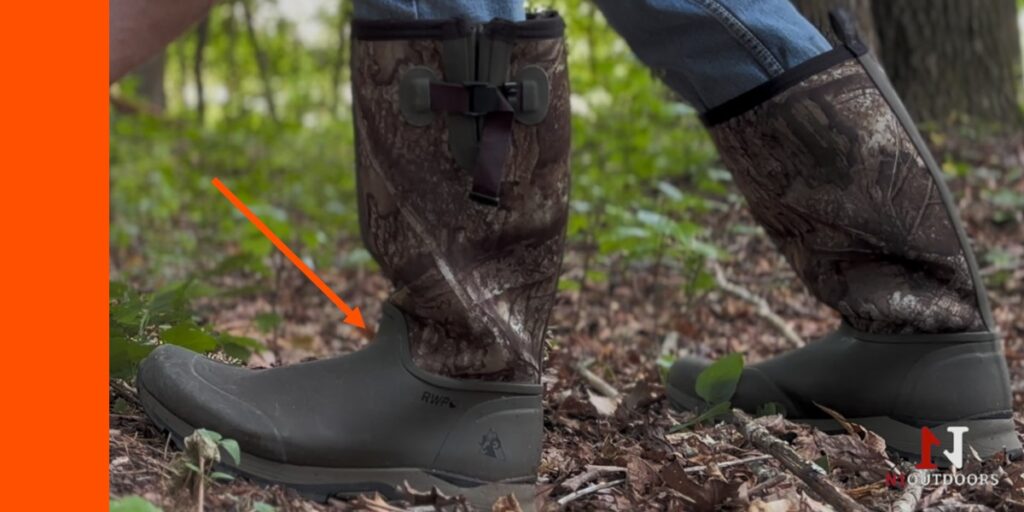
The Trophy Series Tall Rubber Hunting Boot is 14 inches tall, with a durable multi-terrain rubber outsole, designed to provide comfort and performance through swamps and wetlands, keeping you dry and protected when it’s needed most.
The Trophy Series Tall Hunting Boot features a waterproof upper with a three-millimeter neoprene bootie and a guaranteed Rocky Waterproof construction.
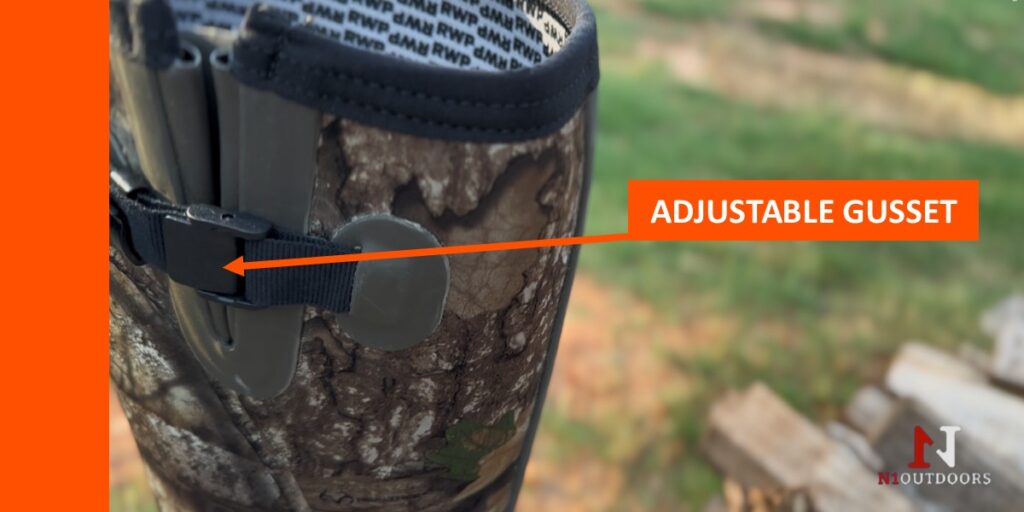
An adjustable gusset provides a comfortable fit around your calf while also allowing easy on and easy off.
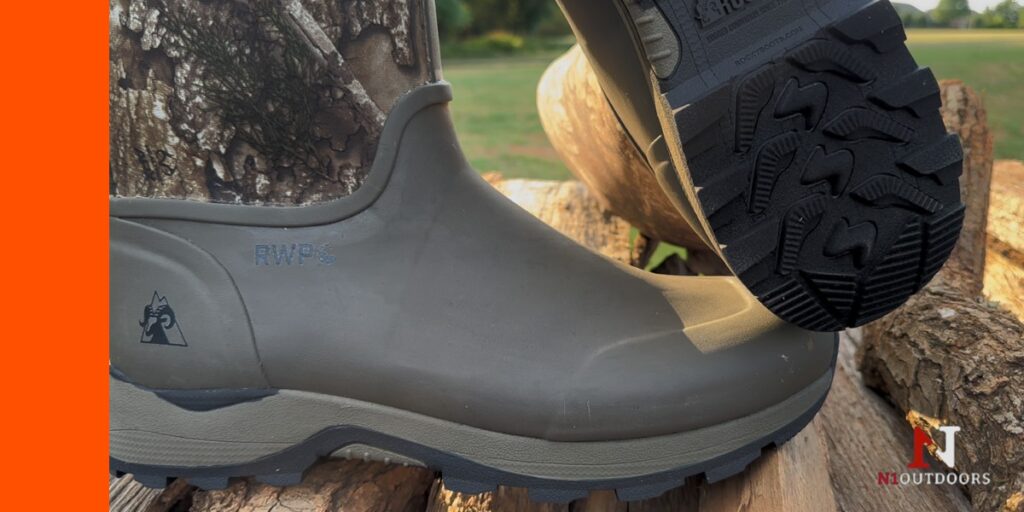
The Trophy Series Tall Boot has a light and flexible cement construction on the outside…
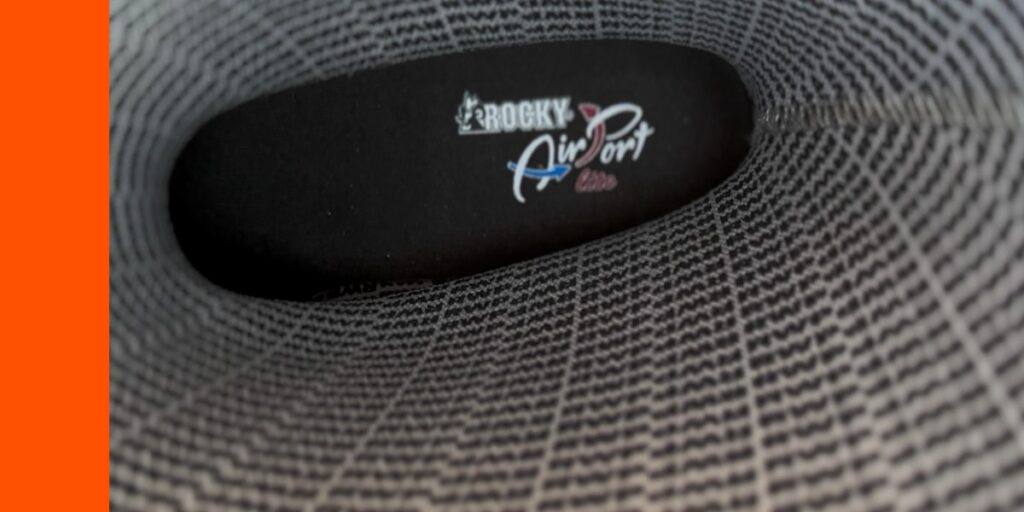
combined with a Rocky® Air-Port Lite® Sponge PU Footbed and Memory Foam on the inside, so you can have all-day comfort.
So, there are two little details about the Trophy Series from Rocky Boot that I really did like.
One is going to seem really simple but it’s the fact that they just fit true to size. Especially when ordering boots online, you worry, “am I going to have to order a size bigger or smaller? Will these really fit?”
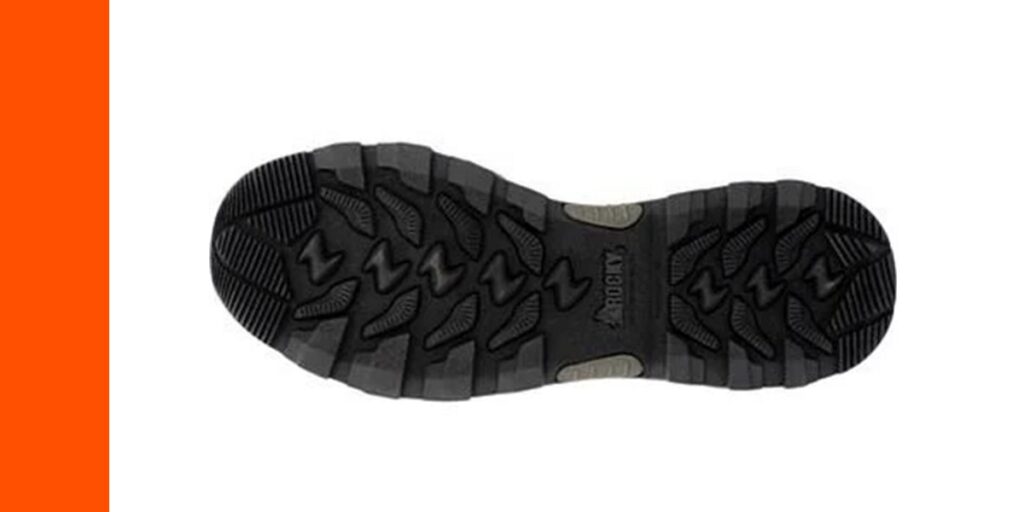
The Trophy Series Tall fit true to size. I wear a size 12, so I ordered a size 12 and they fit perfectly. So, that’s just one little detail that’s a positive about this boot. The other thing is that the traction on these boots is outstanding.
When in the woods, walking up creek banks, etc, there were zero issues with traction. They have great traction!
The the thing I really liked about the traction of the Trophy Series Tall is that it’s not really hard rubber. It actually has some give to it. So, in addition to the footbed being comfortable, the outer sole in the traction has some give to it. So that just makes for a more comfortable day in a set of boots.
Another little positive detail about this boot is the rubber portion of the boot does not come up mid-shin. So, it ends right at the ankle area which may not seem important. But, when you’re in the woods and you’re squatting down or you’re kneeling, that is something that if that rubber portion goes up too high on the shin, then it’s just not comfortable, because it’s not easy to flex your ankle and your leg. This boot isn’t like that, and it makes it much more comfortable while scouting.
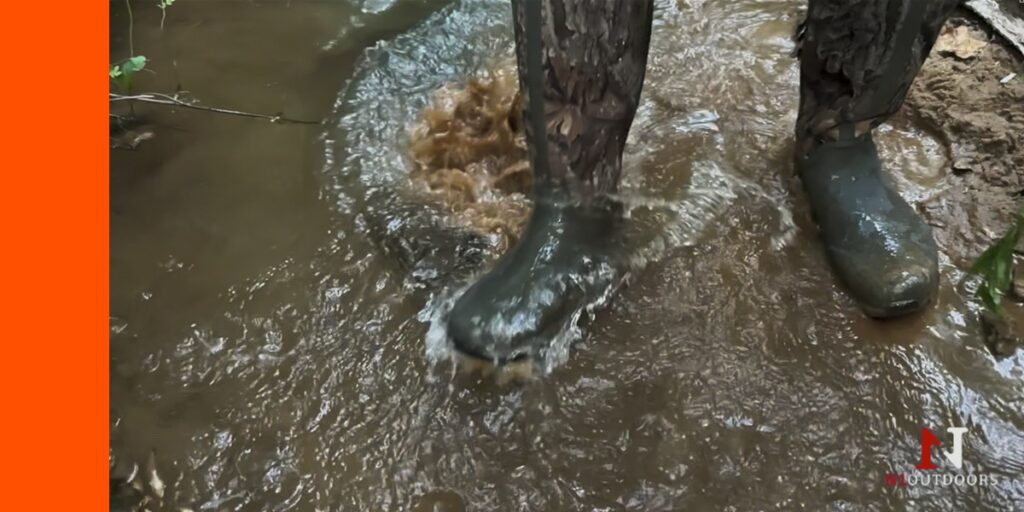
The Trophy Series Rocky Waterproof Construction is legit. No leakage at all.
The Trophy Series Tall Boot is just a great boot for not only scouting, but also doing work outside in the yard, getting some work done on the garden. It’s a great choice for an all-around boot and it’s one that we recommend.
Not only is the Trophy Series Tall Boot a winner in the field, it’s so comfortable, that it can be a go-to in the yard or garden.
We hope you enjoyed our review of the Trophy Series Tall Hunting Boot. Be sure to check out our other outdoor gear reviews as well!