Most people who walk the Manaslu Circuit Trek never once think about what’s swimming underneath them.
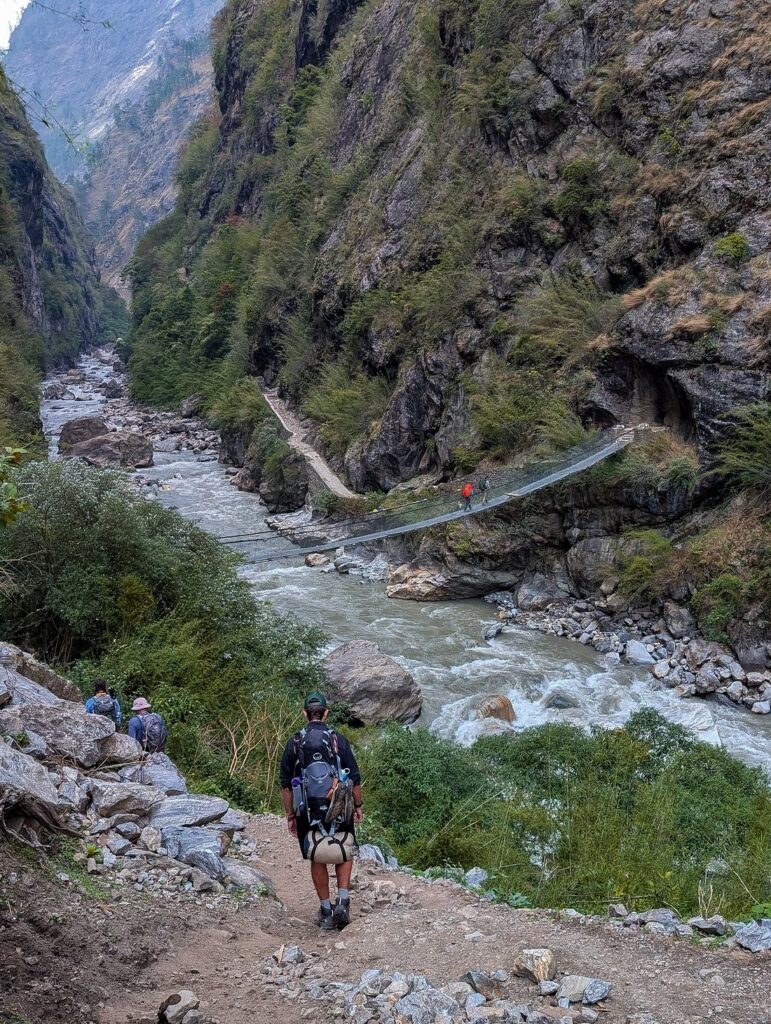
The trail is in the remote Gorkha District of north-central Nepal, northwest of Kathmandu and near the Tibetan border. It follows the Budhi Gandaki almost the whole way north out of Soti Khola, crossing it on suspension bridges a dozen times before the route finally breaks off toward Larkya La. For most trekkers, that river is just scenery; loud, grey green, and something to photograph from a bridge and forget.
But, that would be missing out greatly.
The Budhi Gandaki carries a real spread of fish from the lowlands up past 2,600 meters, and the water changes character almost village by village, which means what’s likely to be on the end of your line changes too.
The Manaslu Circuit Trek crosses many suspension bridges, over water below that holds some little known fishing opportunities.
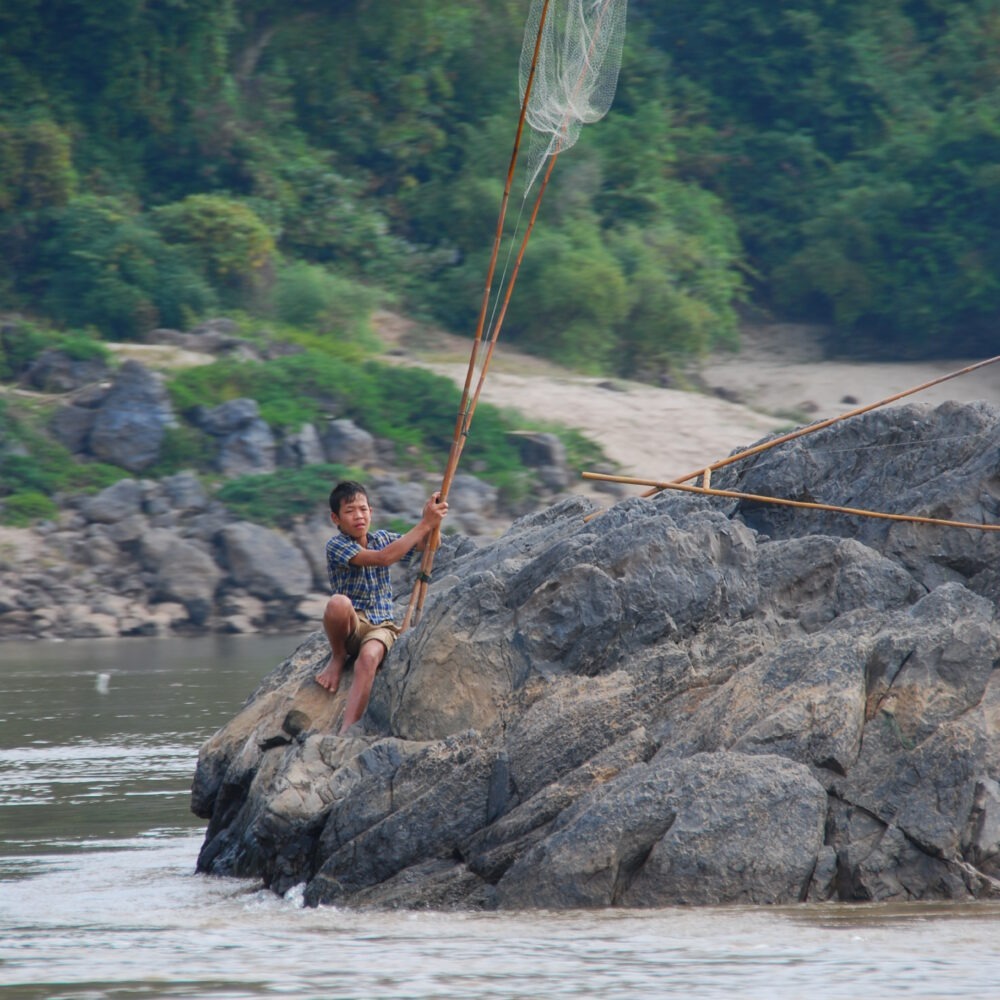
Machha Khola and the Lower River
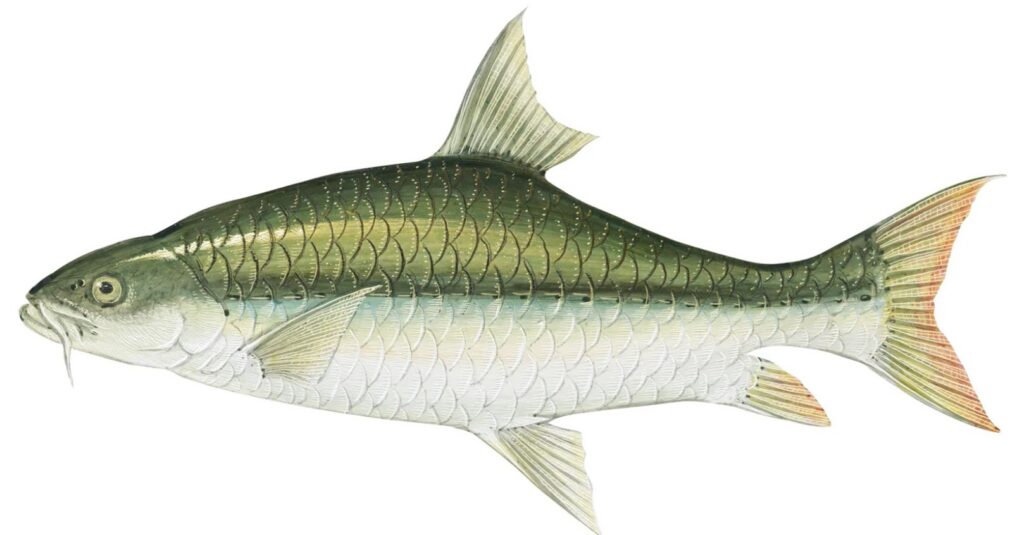
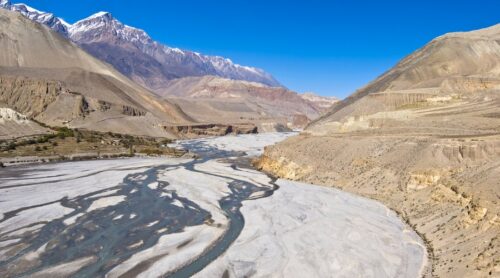
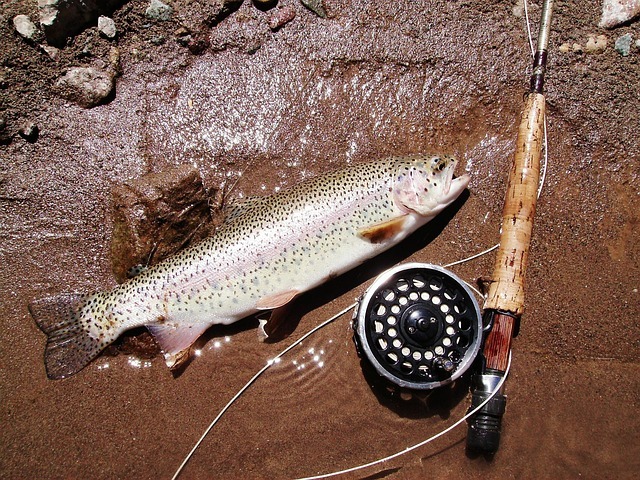
Machha Khola sits low enough, and the river’s still wide and slow enough through there, that this is mahseer water. Locals will tell you the village’s name gives it away. “Machha” means fish, and the pools below town have a reputation for holding them. Catfish and freshwater eel turn up in the slower, deeper stretches as well, especially near where smaller side streams dump into the main channel. This is the warmest, most forgiving water on the whole route, and it’s also the easiest to reach. Most trekkers pass through on day one, often without realizing the river they crossed an hour out of Soti Khola is considered one of the better mahseer stretches in the Manaslu region.
Soti Khola is a great area for mahseer fishing. (photo credit: Encyclopaedia Britannica)
Jagat and the Gorge Water
By the time the river reaches Jagat, the valley has tightened up considerably. The Budhi Gandaki here runs faster and colder, squeezed through a narrower gorge with less of the slow, sandy-bottomed water that mahseer prefer. This is the rough transition zone; you’ll still find mahseer in pockets, but snow trout, known locally as asala, start showing up more consistently as the elevation climbs and the temperature drops. The fishing here is more difficult, as is the wading. The current isn’t forgiving if you’re not paying attention. It’s also one of the more visually dramatic stretches, with the trail cut directly into rock above the water in places.
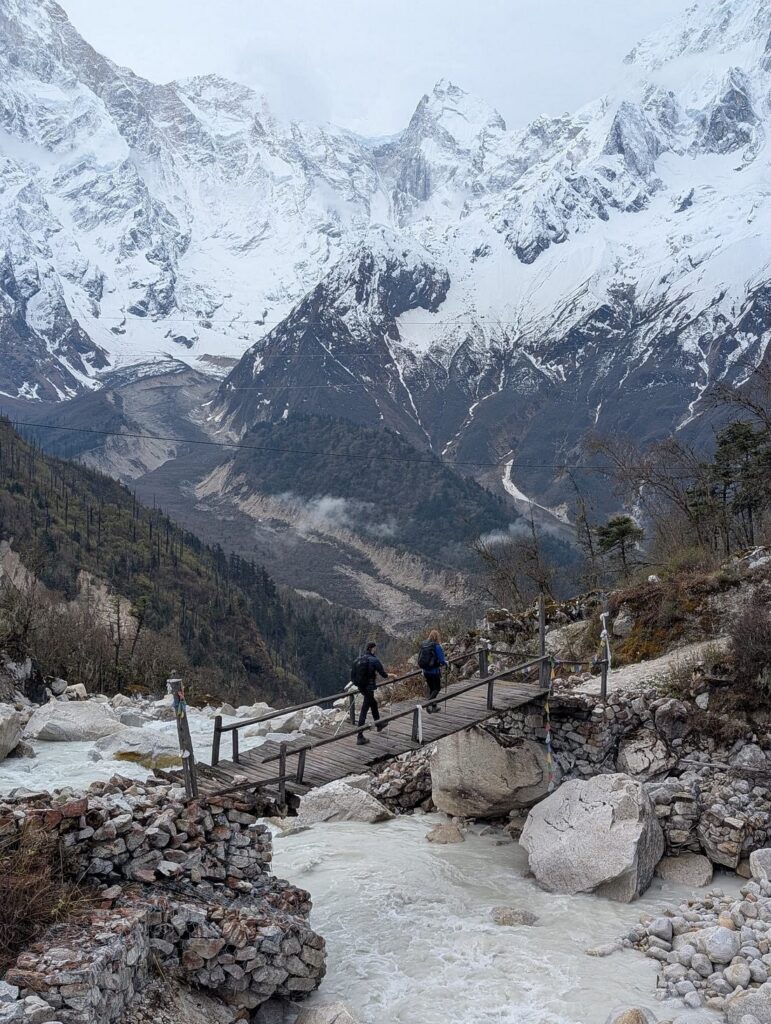
Glacial melt from the higher elevations feed portions of the Budhi Gandaki river.
Past Deng, the lowland species mostly fall away. The water’s noticeably colder by now, fed more directly by glacial melt than by the warmer tributaries lower down, and asala becomes the fish you’re actually targeting rather than something you stumble into. Snow trout in this stretch tend to hold in the slack water behind boulders and in the deeper pools where the current breaks, which is true of most fast Himalayan rivers. Find the seam between fast and slow water, and that’s usually where the fish are sitting. The river through here is narrower than it is down at Machha Khola, but it hasn’t lost any of its force.
Namrung and the High Water
Namrung marks a real shift, not just in elevation, but also in how the river behaves. The Budhi Gandaki splits and braids more here, and several smaller streams feed in from side valleys, each one worth a look if you’ve got the time to wander off the main trail for an hour.
The water’s cold enough by this point that asala are the only realistic target, and they’re smaller and warier than what you’ll find lower down. These fish have spent their whole lives in thin, fast, oxygen-rich water, and they don’t sit still for long. Past Namrung, the trail and the river start to separate as the route climbs toward Lho and Samagaon. Serious fishing more or less ends here, with the upper valley rivers running too cold and too thin to hold much of anything.
We earn a commission if you make a purchase, at no additional cost to you.
07/04/2026 08:02 pm GMT
What This Means for a Trip
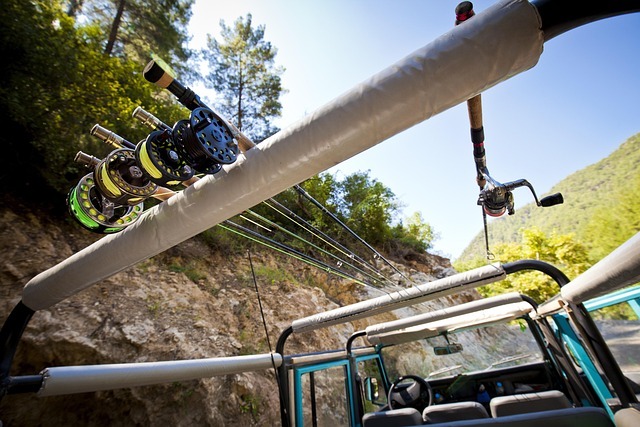
None of this requires a separate trip. The Manaslu Circuit Trek already follows the river for the first several days. This means a rod, a handful of flies or lures, and maybe an extra hour at the end of a trekking day is really all it takes to fish four completely different stretches of water on one walk.
The Budhi Gandaki isn’t going to show up on anyone’s list of the world’s great fisheries, and it shouldn’t. What it offers instead is something harder to plan for, four or five days of genuinely different water, run by a river most anglers will only ever cross on a swinging bridge, on a trail that was never built with fishing in mind.
Permits matter here, as fishing in Nepal’s rivers generally requires a license. And, inside the Manaslu Conservation Area, there are additional rules worth checking before you go. It’s worth sorting that out in Kathmandu rather than assuming you can fish wherever the trail happens to cross the river. Locals along the route fish with hand lines and net traps more often than rods, and most are happy to point out where they’ve had luck if you ask.
For anyone walking the Manaslu Circuit Trek with a rod tucked into their pack, that’s not a bad trade at all.
For anyone picking up a fly rod for the first time, Summer removes a lot of the usual guesswork. Warmer conditions keep the setup simple. Longer days leave more room to practice, and frequent surface activity makes it easier to see what’s working.
Southerners don’t have to look far — the Southern Appalachians, from north Georgia through western North Carolina and into Tennessee, offer some of the best beginner trout water in the country, with wild brook trout streams and stocked tailwaters within a few hours of most major cities in the region.
From there to the Rockies, July and August deliver the classic dry-fly scene people picture when they think about the sport: trout sipping insects off the surface while you stand in a river that looks like it belongs on a postcard.
This guide breaks down exactly what gear beginners actually need to get on the water this Summer, from starter rod and reel combos to flies that match peak-season hatches.
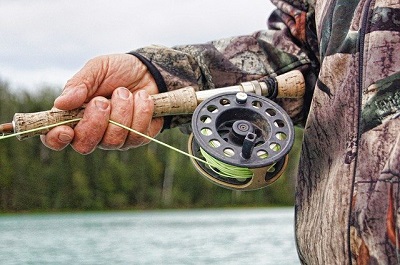
The Core Setup: Rod, Reel, and Line
Every fly fishing setup starts with three components that work together as a system: the rod, the reel, and the line. Get them matched correctly and casting becomes significantly easier to learn.
The 5-Weight Rod
For summer trout fishing across most of North America, a 5-weight rod between 8’6″ and 9′ handles the vast majority of situations a beginner will encounter. The “5-weight” designation refers to the line weight the rod is designed to cast—more on that in a moment. Nine feet has become the standard length because it provides enough reach for most casting situations without being unwieldy for someone still learning the mechanics.
Modern entry-level graphite rods perform remarkably well. Most come as four-piece designs that break down for easy transport and storage—perfect for the trunk of a car or checked luggage.
The action (how the rod bends when loaded) is important, though beginners don’t need to overthink it. Medium or medium-fast action rods are the most forgiving and easiest to learn on. Avoid fast-action rods marketed for distance casting—they require timing and technique that beginners haven’t developed yet.
We earn a commission if you make a purchase, at no additional cost to you.
07/05/2026 03:04 am GMT
The Reel
For most beginner trout fishing situations, the reel primarily functions as a line holder, which means beginners don’t need to overthink this component. Any mid-arbor or large-arbor reel in the appropriate weight range (a 5-weight rod pairs with a size 5/6 reel) will do the job. Look for models with a disc drag system rather than a click-and-pawl—disc drags are smoother and easier to adjust.
Quality has improved dramatically at every price point. Reels that cost $100 to $150 now feature sealed drags and machined aluminum construction that used to be reserved for premium models. With basic care, they’ll provide reliable performance for years to come.
The Fly Line
This is where beginners often go wrong, and it’s the most important component for learning to cast well. The fly line does the work in fly fishing—its weight loads the rod and carries the nearly weightless fly to the target. A mismatched or low-quality line makes everything harder.
For summer trout fishing, a weight-forward floating line matched to the rod weight (5-weight rod = 5-weight line) is the only choice that makes sense. Weight-forward tapers have more mass concentrated in the front section, which helps beginners generate the line speed needed for decent casts with less effort.
Budget lines work fine for practicing in the yard, but stepping up to a mid-tier line ($90-$130 range) from manufacturers like Rio or Scientific Anglers makes an enormous difference in how smoothly the line shoots through the guides and how it behaves on the water. The upgrade pays for itself in reduced frustration during the learning curve.
We earn a commission if you make a purchase, at no additional cost to you.
07/05/2026 03:04 am GMT
Flies: What Actually Works in Summer
Fly selection intimidates beginners more than it should. Walk into any fly shop and you’ll see thousands of patterns in bins organized by categories that mean nothing if you’re new. The reality: a dozen patterns cover 90% of summer trout fishing situations.
Dry Flies for Surface Action
July and August are prime dry-fly season across most trout water. Mayflies, caddis, and terrestrial insects (grasshoppers, ants, beetles) dominate summer hatches, and trout feed aggressively on the surface when conditions are right.
Start with these patterns in multiple sizes:
– Parachute Adams (sizes 14-18): imitates a wide range of mayflies
– Elk Hair Caddis (sizes 14-18): the universal caddis pattern
– Chubby Chernobyl or similar foam hopper (sizes 10-14): for grasshopper season
– Parachute Ant (sizes 14-18): simple, effective, and trout love them
The “parachute” style (with a visible white post) makes these flies easy to track on the water—critical for beginners who struggle to see their fly amid the surface texture and glare.
Nymphs for Below the Surface
Trout do most of their feeding below the surface, even during summer. Nymphs imitate the immature stages of aquatic insects drifting in the current. They’re less visually exciting than dry flies, but they catch more fish.
Streamers imitate baitfish, leeches, and other larger prey. They’re fished with an active retrieve (short strips of line) rather than a dead drift. Streamers catch bigger fish and work well in faster water where nymphs and dry flies are harder to manage.
Beginner-friendly streamers:
– Woolly Bugger (sizes 6-10) in black, olive, or brown
– Zonker (sizes 6-10): rabbit fur creates lifelike movement
Buy flies in multiples. Losing flies to trees, rocks, and fish is part of the learning process. Having three of each pattern means you’re not sidelined the first time a trout breaks off your best producer.
Leaders and Tippet: The Invisible Connection
Leaders and tippet connect the fly line to the fly. They’re tapered (thicker at the fly line end, thinner at the fly) to transfer casting energy efficiently and make the final presentation look natural to the fish.
Leaders come in various lengths and taper designs. For summer trout fishing, a 9-foot leader tapered to 4X or 5X handles most situations. Buy pre-made knotless leaders to start—they’re inexpensive and eliminate one variable while learning.
Tippet is the section you tie to the end of the leader to replace what’s lost as you change flies throughout the day. A spool each of 4X, 5X, and 6X tippet covers the range from larger dry flies (4X) down to smaller nymphs and midges (5X, 6X). If you plan to fish streamers, add a spool of 2X — streamers attract bigger, more aggressive fish and are cast with more force, so the lighter stuff will let you down.
We earn a commission if you make a purchase, at no additional cost to you.
07/05/2026 03:04 am GMT
Essential Accessories
A handful of small tools and accessories makes the difference between a smooth day and a frustrating one.
Nippers
A pair of small scissors or nippers cuts tippet and trimming tag ends from knots. The ones that clip onto a zinger or retractor (so they’re always accessible) are worth the extra few dollars.
Forceps or Hemostats
Hemostats and clamp-style tools remove hooks from fish mouths without handling the fish excessively. They also work for crushing barbs on hooks before fishing—barbless hooks cause less damage and release fish faster.
Floatant
Dry fly floatant keeps flies riding high on the surface. Gel or paste formulations work better than liquids for beginners. Apply it before the fly hits the water, not after it’s already waterlogged.
Strike Indicators
These visible markers suspend nymphs at the right depth and signal when a fish takes the fly. Yarn indicators are easy to adjust and gentle on leaders. Many beginners fish nymphs under an indicator all day and catch plenty of trout while they’re still learning dry-fly presentation.
Fly Box
One medium-sized fly box holds everything a beginner needs for a day on the water. Boxes with slotted foam or ripple foam keep flies organized and prevent hooks from tangling. Waterproof models protect flies from moisture and rust.
Tippet Holder
A simple tippet holder keeps multiple spools organized and accessible. Models that attach to a vest or pack eliminate the “which spool is which” fumbling mid-stream.
Summer fishing means lighter gear and more clothing options than any other season. The essentials still matter, though.
Waders and Boots
Lightweight stockingfoot waders paired with wading boots give access to more water and keep you fishing all day comfortably. Breathable waders have replaced neoprene for warm-weather fishing—they’re cooler, lighter, and dry faster.
For true summer conditions, wet wading (shorts or convertible pants with wading boots) works perfectly. The water is warm enough that getting wet doesn’t matter. Purpose-built wet wading shoes with quick-drying uppers and rubber soles or legally permitted felt soles provide traction without the bulk of full wading boots.
Sun Protection
A wide-brimmed hat, long-sleeve sun shirt with UPF rating, and polarized sunglasses are non-negotiable. Trout water is exposed, and the summer sun reflected off the water compounds UV exposure. Polarized lenses also let you see into the water to spot fish, structure, and wading hazards.
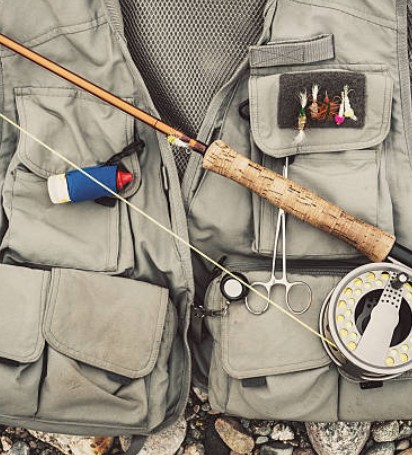
Fishing Vest or Pack
A vest or chest pack carries everything you need without requiring a backpack. Vests have fallen out of favor with younger anglers, but they distribute weight well and keep tools accessible. Chest packs (worn around the neck) offer a more modern alternative with similar organization.
Where to Fish: Finding Water Near You
Every state fisheries agency maintains online resources showing public access points for rivers and lakes. Many states also stock trout in easily accessible urban waters during the summer months specifically to provide opportunities for new anglers.
Look for:
– Designated public fishing areas with parking and clear access
– Rivers or streams with fishable water within walking distance of the parking area
– Water that doesn’t require wading across private land to reach
– Spots where you can see other anglers fishing (not to crowd them, but to confirm you’re in the right place)
Local fly shops—if you have one nearby—maintain fishing reports and can point you toward beginner-friendly water. Most shops appreciate someone walking in and asking “I’m brand new, where can I catch my first trout?” That question makes their job easier than trying to help the person who pretends to know more than they do.
Why Summer Simplifies the Starter Kit
For beginners, summer removes a lot of the usual guesswork from fly fishing. Warmer conditions mean new anglers can keep the setup simple, spend more time practicing, and focus on learning how the rod, line, leader, and fly work together.
Summer is the season when the sport of fly fishing is easiest to understand visually. Many hatches happen during daylight hours, fish are often feeding near the surface, and dry-fly fishing lets beginners watch the full sequence unfold: the cast, the drift, the rise, and the adjustment needed on the next attempt.
Summer is the ideal time to build a first kit around practical essentials rather than specialty gear. The right starter setup should help a beginner get on the water, cast comfortably, match common seasonal conditions, and avoid buying equipment they do not actually need yet.
Final Thoughts: Just Start
Perfect knowledge doesn’t exist. Perfect gear doesn’t exist. Perfect conditions don’t exist. What exists is water with fish in it and a summer season that won’t last forever.
Buy the basics. Learn the fundamentals. Drive to the nearest trout stream with public access. Rig up the rod and just start casting. You’ll tangle your line, put flies in trees, and spook fish with clumsy wading. But everyone does all of that in the beginning.
There are lists available that help make the fly fishing gear buying process less confusing. For example, Trident Fly Fishing’s beginner gear list organizes the essentials into a practical starting point.
The destination doesn’t really matter… At some point—with luck and perseverance—a trout will eat your fly. The rod will bend. Your heart will race. And the whole thing will click.
Adventure trips into the great outdoors often begin long before sunrise. Hunters may be driving to a private land or public land hunting spot. Anglers may be towing a boat toward a quiet launch, and campers may be heading down unfamiliar roads with gear packed tight. In cities and towns where rail traffic is part of daily movement, those same travel habits can bring outdoor enthusiasts close to busy crossings before they ever reach the woods, water, or trail.
Why Railroad Crossing Safety Matters for Outdoor Travelers
Railroad crossings deserve the same attention to detail as weather, road conditions, and gear checks. A missed signal, a rushed turn, or a moment of distraction near the tracks can lead to life-changing consequences. This is especially true for travelers moving between urban rail corridors and rural outdoor destinations, where crossings may look very different from one road to the next.
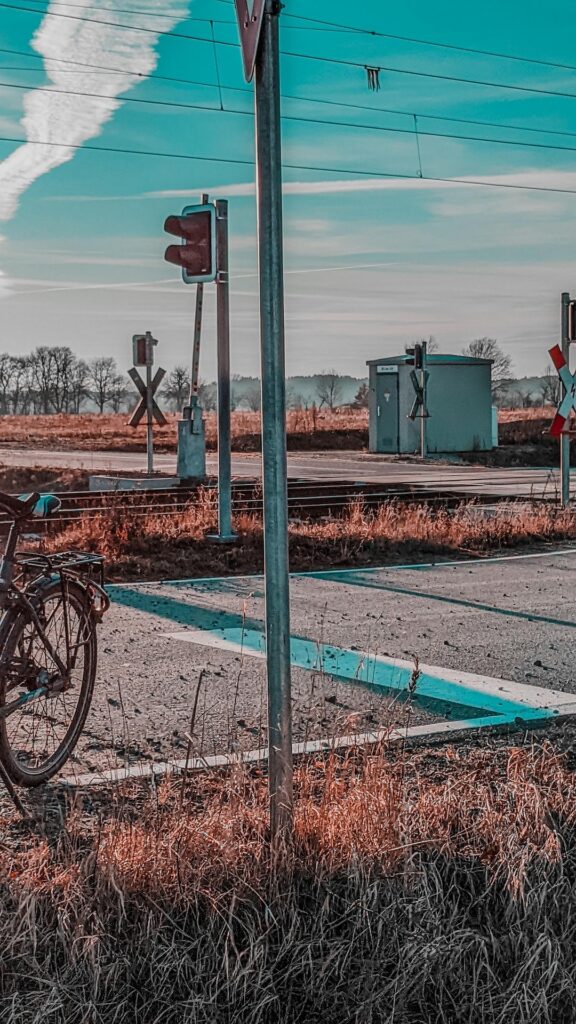
Some crossings have gates, flashing lights, and clear markings. Others may have only signs, limited lighting, or poor visibility because of trees, curves, hills, or bad weather. The safest approach is simple: treat every railroad crossing as active, slow down before reaching the tracks, and assume a train could arrive at any time.
Why Hunters, Anglers, Campers, and Hikers Face Higher Risks Near Railroad Crossings
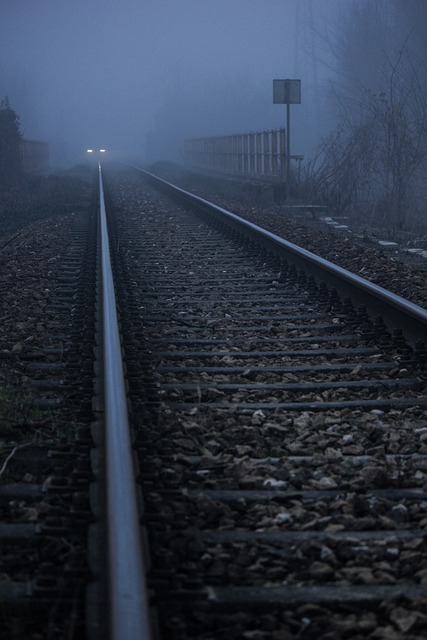
Many outdoor enthusiasts leave home in the early morning, when visibility is low and fatigue can affect reaction time. These conditions can make crossings more dangerous, especially on unfamiliar rural roads.
Additionally, hunters and anglers frequently tow boats, utility trailers, campers, or ATVs. Extra weight changes braking distance and limits how quickly a vehicle can move across tracks. A driver who misjudges the distance or speed of an approaching train may not have enough time to react safely.
Backroads leading to fishing areas, hunting property, and campsites can also include passive crossings. These may not have flashing lights or gates. Instead, drivers may only see a crossbuck sign or pavement marking before reaching the tracks. In wooded areas or farmland, visibility may be limited by trees, curves, tall grass, or uneven terrain.
Navigation apps can create another hazard. Looking down for even a few seconds near a railroad crossing can prevent a driver from noticing warning lights, train horns, or approaching rail traffic. Fog, rain, snow, and ice can further reduce visibility and increase stopping distance.
Rushing to arrive before sunrise can also lead to risky decisions. Some travelers try to beat crossing gates or move too quickly through unfamiliar intersections because they are focused on reaching a trailhead, boat launch, or hunting spot before daylight. The reality is that railroad crossings require patience and full attention regardless of how empty the road may appear.
Warning Signs Every Outdoor Traveler Should Understand
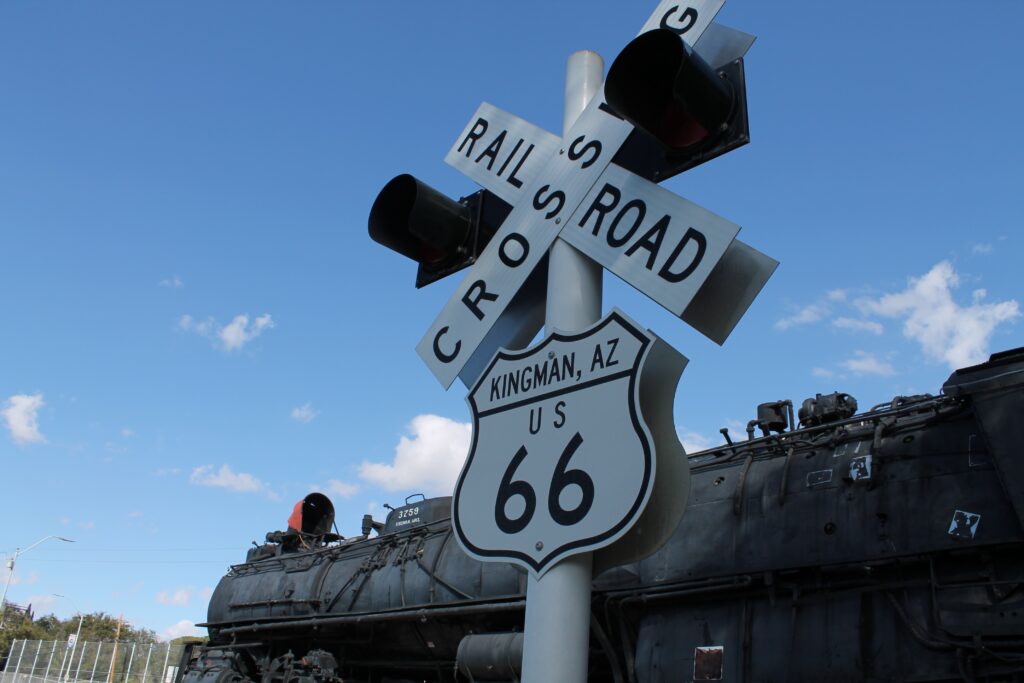
Many railroad crossing accidents happen because drivers fail to recognize or properly respond to warning signs. Outdoor travelers who spend time on rural roads should understand what these signals mean before heading out on a trip.
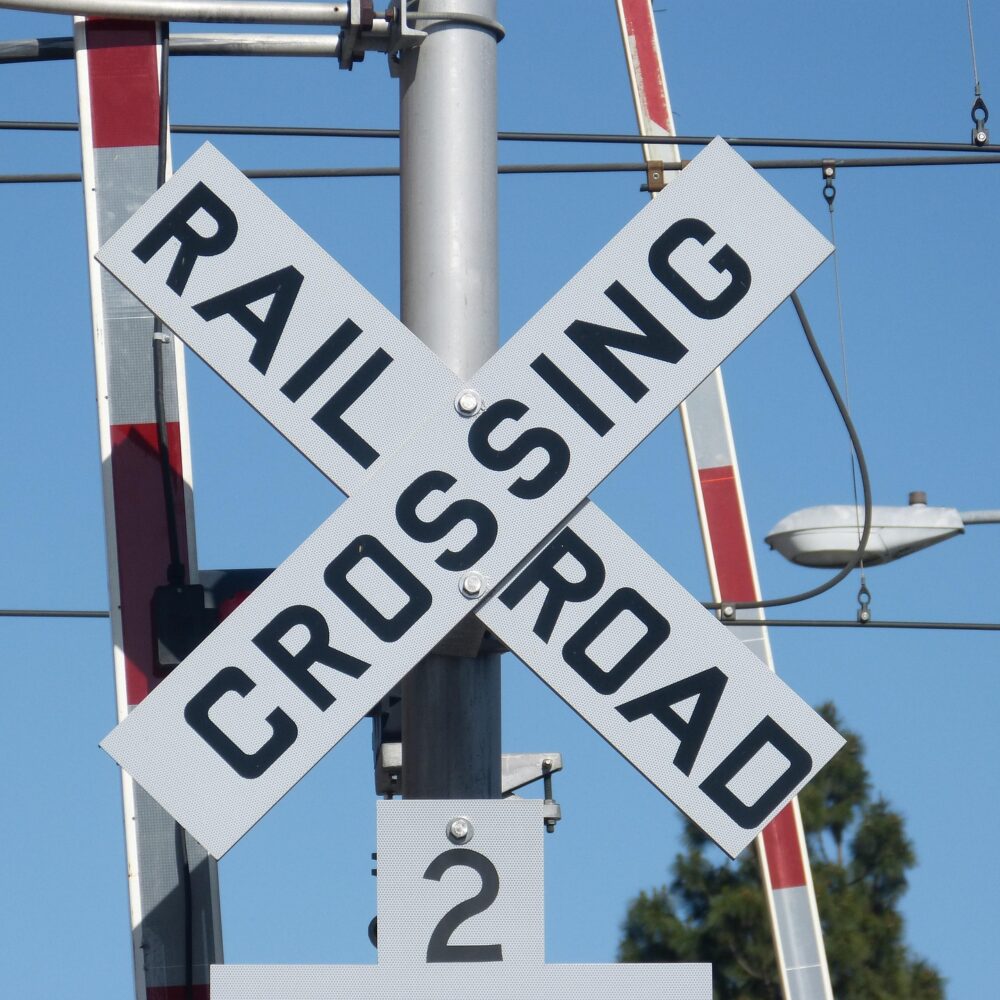
The most common railroad crossing sign is the crossbuck. This white X-shaped sign marks the location where railroad tracks cross the road. Drivers should treat it as a warning to slow down, look both ways, and prepare to stop if necessary.
The most common railroad crossing sign is the crossbuck. This white X-shaped sign marks the location where railroad tracks cross the road. Drivers should treat it as a warning to slow down, look both ways, and prepare to stop if necessary.
Some crossings include flashing red lights and crossing gates. When lights begin flashing, it means a train is approaching. Drivers should stop immediately and remain behind the marked line until the train has passed and the signals stop. Trying to drive around lowered gates is extremely dangerous and illegal in many states.
Outdoor travelers may also encounter multiple-track crossings. After one train clears the crossing, another may still be approaching on a separate track. Drivers should wait until all tracks are fully clear before moving forward.
Pavement markings, stop lines, bells, and electronic warning systems can also help drivers recognize a crossing in advance. During rain, snow, or low-light conditions, these warnings may be harder to see or hear, which makes reducing speed even more important.
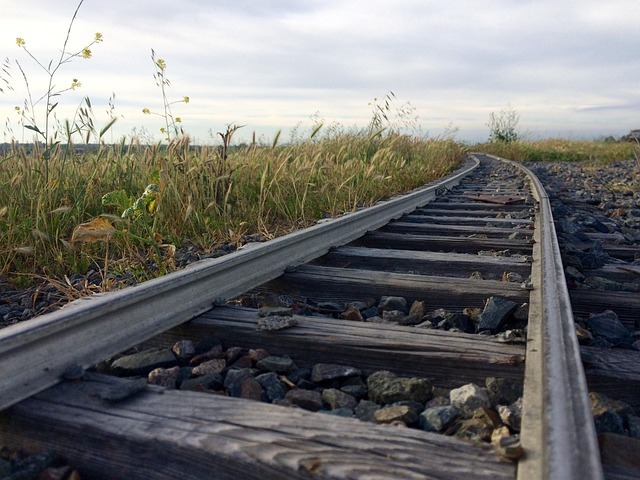
Tracks that appear unused may still carry active rail traffic. Freight trains can operate at any hour, and some trains move more quietly than people expect.
Safe Driving Habits When Approaching Railroad Tracks
Drivers heading toward outdoor destinations should approach every railroad crossing with caution, even when the area appears quiet or isolated. Trains move faster than many people realize, and their stopping distance is far longer than that of passenger vehicles.
Reducing speed before reaching the tracks gives drivers more time to react to warning lights, gates, or an approaching train. This becomes especially important when towing campers, boats, or utility trailers because heavier loads require greater stopping distance.
At crossings without gates or flashing lights, it is important to stop if visibility is limited. Rolling down the windows can help drivers hear train horns or track vibrations that may not be noticeable inside the vehicle.
Distractions should also be kept to a minimum near railroad tracks. Adjusting GPS directions, checking phones, eating, or searching for gear can take attention away from warning signs during critical moments.
Travelers driving through rail-heavy regions should remain especially alert because of the higher volume of train activity compared to many smaller towns and rural communities. Serious collisions in these areas can lead to catastrophic injuries, long-term medical complications, and difficult legal questions involving rail operators, crossing equipment, and roadway conditions. If you were heading to a rural part of Illinois through a big city like Chicago, you would simply want to see Chicago in your rearview, not dialing 911 and a Chicago train accident lawyer due to a railway accident.
We earn a commission if you make a purchase, at no additional cost to you.
07/05/2026 07:06 am GMT
What To Do Immediately After a Railroad Crossing Accident
In the extremely unfortunate event of a railroad crossing accident, the first priority is getting away from immediate danger. If the vehicle is on or near the tracks and it is possible to move safely, everyone should exit and get clear of the crossing. Tracks can remain dangerous after the first impact because another train may be approaching.
Call 911 as soon as possible. Emergency responders can secure the scene, provide medical care, and contact the proper rail authorities. Even if injuries seem minor, medical evaluation is important because pain, head injuries, back injuries, and internal trauma may not be obvious right away.
Anyone involved should document the scene when it is safe to do so. Photos and videos can help show the position of the vehicle, damage, crossing gates, signal lights, weather conditions, road markings, blocked views, and nearby signs. These details may become important later if questions arise about how the accident happened.
Parents should always keep children and pets away from railroad crossings and rail-adjacent trails. Curiosity, headphones, distractions, and uneven terrain can reduce awareness near active tracks. Maintaining a safe distance is one of the simplest ways to prevent serious injuries.
Witness information can also be valuable. Names, phone numbers, and brief statements from people who saw the collision may help clarify whether signals were working, whether gates lowered properly, or whether visibility was limited.
Extra Railroad Safety Tips for Hikers and Campers
Railroad safety applies to more than drivers. Hikers, campers, anglers, and outdoor photographers can also place themselves at risk when traveling near tracks, bridges, or rail corridors.
Always avoid walking directly on railroad tracks. Tracks, ties, and surrounding gravel can become slippery or unstable, especially after rain or during cold weather. Trains may also approach more quietly than expected, particularly in open outdoor areas where sound carries differently.
Outdoor adventurers should never use railroad bridges or tunnels as shortcuts. These structures are designed for trains, not pedestrians, and many leave little room to escape if a train approaches unexpectedly. Even bridges that appear abandoned may still carry active rail traffic.
Fishing areas near tracks can also create additional danger. Some rivers, creeks, and waterfront access points are located close to rail corridors, particularly near industrial areas and older transportation routes around larger cities. Campers and anglers should stay alert to warning signs and avoid setting up equipment too close to active tracks.
Anyone walking near roads or crossings during low-light conditions should wear reflective or brightly colored clothing whenever possible. Flashlights and headlamps can help improve visibility for both pedestrians and drivers.
Planning Safer Outdoor Routes Before You Travel
A safer outdoor trip begins before the vehicle leaves the driveway. Reviewing the route in advance can help travelers identify railroad crossings, rural intersections, gravel roads, and areas where visibility may be limited.
Outdoor travelers should look for major crossings near trailheads, boat launches, campsites, hunting leases, and public land access points. When a route includes several crossings, it may be worth choosing a slightly longer path with better lighting, clearer signs, or active gates.
Attention to the weather should also be part of the travel plan. Fog, heavy rain, snow, and ice can make railroad crossings harder to see and can increase stopping distance. Drivers towing boats, campers, or gear trailers should allow extra room to slow down before tracks.
Sharing travel plans with someone at home is also a smart habit, especially when heading into remote areas. A simple route, destination, and expected return time can help others respond faster if something goes wrong.
Emergency supplies should be easy to reach rather than buried under gear. A flashlight, reflective vest, first-aid kit, phone charger, water, and basic tools can make a difference after a roadside emergency. Packing reliable survival essentials can also help outdoor travelers stay prepared when delays, breakdowns, or accidents happen far from help.
Railroad crossings should be treated as part of the overall travel plan. Again, the same care that goes into checking weather, gear, maps, and licenses should also apply to every road and crossing along the way.
Railroad Crossing Safety and Awareness Should Be Part of Every Outdoor Trip
According to published crossing accident statistics, railroad collisions continue to cause serious injuries and fatalities across both urban and rural areas every year. Outdoor lovers who regularly drive unfamiliar roads should understand that even remote crossings can present substantial danger when visibility, weather, or distractions become factors.
Railroad crossings should be part of every outdoor traveler’s safety plan. Whether the trip leads to a hunting lease, fishing spot, campsite, hiking trail, or remote cabin, the roads along the way can carry risks that deserve full attention.
Slowing down near tracks, watching for warning signs, avoiding distractions, and planning safer routes can reduce the chance of a serious accident. These habits matter even more when traveling in the dark, towing equipment, or driving through unfamiliar areas.
Outdoor safety begins long before reaching the destination. By treating railroad crossings with caution and respecting the power of trains, travelers can help protect themselves, their passengers, and everyone sharing the road.