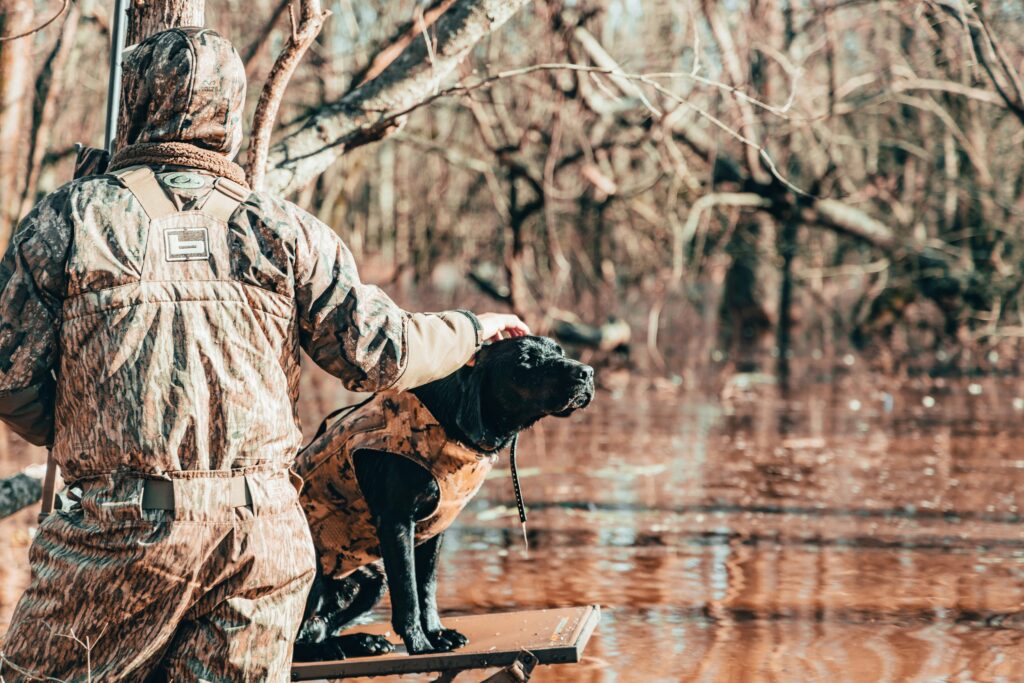
Hunting in cold weather can be exhilarating. On one hand, you’re likely to be wide awake! But, the cold presents challenges as well, especially when it comes to keeping your extremities warm.
Your feet and toes, in particular, are susceptible to the cold, which can quickly turn an enjoyable hunting trip into an uncomfortable experience.
How To Keep Feet And Toes Warm When Hunting Cold Weather
The hunting weather might be cold, but that doesn’t mean your feet have to be… check out the tips below to keep your feet and toes warm!
Let’s cover 10 ten tips to help you keep your feet and toes warm and cozy during those frosty outings in the field:
1. Choose the Right Footwear
Wet feet are cold feet. So, proper footwear is essential when hunting in cold weather. Opt for insulated hunting boots that are rated for the temperatures you expect to encounter in the field. Look for materials like Thinsulate or Gore-Tex that offer both insulation and waterproofing.
2. Layer Your Socks
Wear moisture-wicking liner socks made of materials like merino wool or synthetic blends. Follow these with a pair of thick, insulating wool socks. This layering system helps keep moisture away from your skin and provides added warmth.
We earn a commission if you make a purchase, at no additional cost to you.
02/06/2026 03:01 pm GMT
3. Avoid Cotton
Cotton socks should be avoided, as they retain moisture and can make your feet feel colder. Stick to wool or synthetic materials that wick away moisture from your skin, and retain warmth even when damp.
Disposable toe warmers can be a lifesaver in extremely cold conditions. Simply activate them and place them in your boots before heading out. They provide hours of warmth and can make a significant difference.
We earn a commission if you make a purchase, at no additional cost to you.
02/06/2026 07:01 am GMT
Keeping your fee dry in wet and cold conditions can be the difference between enjoying and simply enduring a hunt.
5. Keep Your Feet Dry
Moisture is your enemy in cold weather. If your feet sweat, change your socks to keep them dry. Consider bringing an extra pair of socks to change into during the day.
6. Warm-Up Exercises
Good circulation is key to warmth. So, before putting on your boots, do some simple exercises to get the blood flowing to your feet. This can include calf raises, ankle rotations, and wiggling your toes to promote circulation.
7. Insulate from the Ground
Standing on cold ground can quickly sap the warmth from your feet. Use insulated boot insoles or invest in a pair of insulated boot blankets to provide an extra barrier between your feet and the cold earth.
We earn a commission if you make a purchase, at no additional cost to you.
02/06/2026 01:01 pm GMT
8. Avoid Tight Boots
While snug boots are necessary for good support, overly tight boots can restrict blood flow, leading to colder feet. Ensure your boots fit well with enough room for proper circulation.
9. Bring Hot Drinks
A thermos of hot tea, coffee, or soup can warm you from the inside out. Sipping on a warm beverage can help maintain your body temperature and keep your extremities warm.
Throughout your hunt, take breaks to check on the condition of your feet. If they start to feel uncomfortably cold, it’s essential to address the issue promptly. This might mean changing socks, using toe warmers, or simply taking a moment to move your feet and body around to warm up.
Your feet can be warm, even when the weather is not, but keeping feet free from moisture is key.
Bonus Tip: Properly Dry Your Boots
At the end of the day, make sure your boots are thoroughly dried. Remove the insoles and any liners to allow air circulation. Wet boots not only lead to discomfort but can also contribute to frostbite.
By following these tips and being proactive about foot care, you can enjoy your outdoor adventures to the fullest, even when the temperatures drop.
Whether you’re tracking game in the snow-covered woods or waiting patiently in a frosty blind, warm feet will keep you focused on the hunt rather than the chill. So, gear up, stay warm, and make the most of your cold weather hunting experiences!
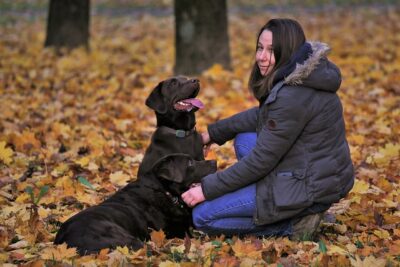
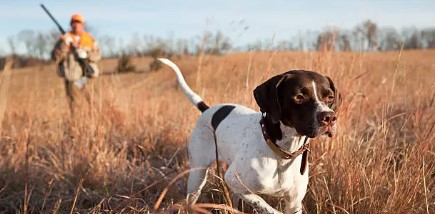
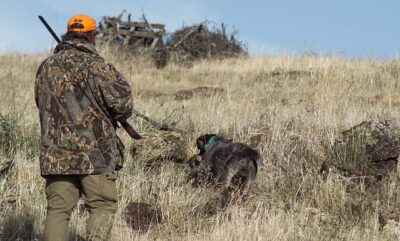
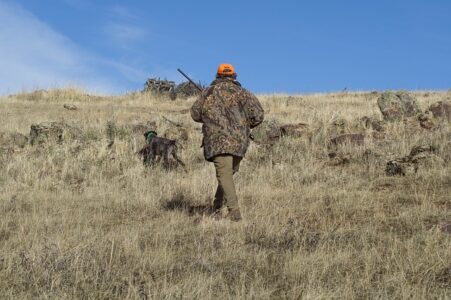
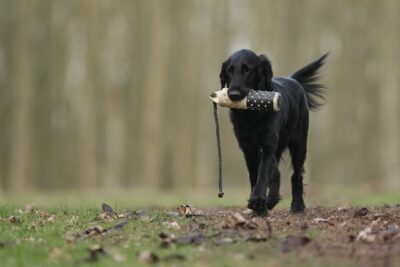
When it comes to bird hunting, few partnerships are as essential as that between a skilled hunter and a well-trained bird hunting dog. These loyal companions can turn a good hunting day into an exceptional one, enhancing safety, efficiency, and the overall experience in the field.
Want your bird dog to stand out amongst the crowd? There are some aspects of bird dog training you should familiarize yourself and your dog with… read on!
In this comprehensive guide, we’ll delve into the intricacies of training bird hunting dogs, from selecting the right breed to mastering specialized techniques.
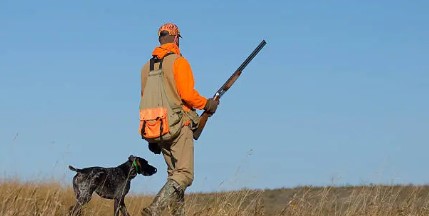
How To Train Your Bird Dog
There are several key components to training a successful bird dogs. So, let’s cover some bird dog hunting tips!
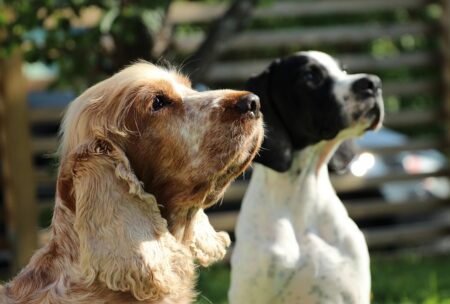
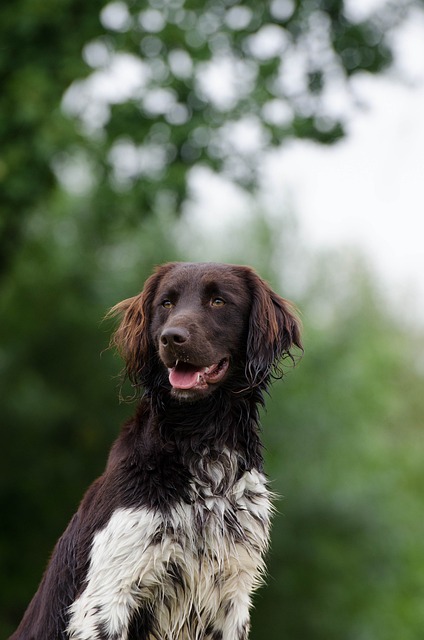
Understanding The Types Of Bird Hunting Dog Breeds
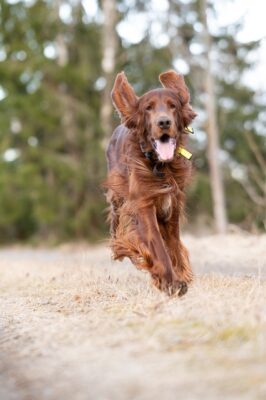
Before embarking on the training journey, it’s crucial to understand the various breeds that excel in bird hunting. Popular choices include Labrador Retrievers, German Shorthaired Pointers, English Springer Spaniels, among others.
Each of the breeds below comes with its unique set of characteristics, which can significantly influence training methods and the type of hunting they are best suited for.
Strengths Of Various Bird Dog Breeds
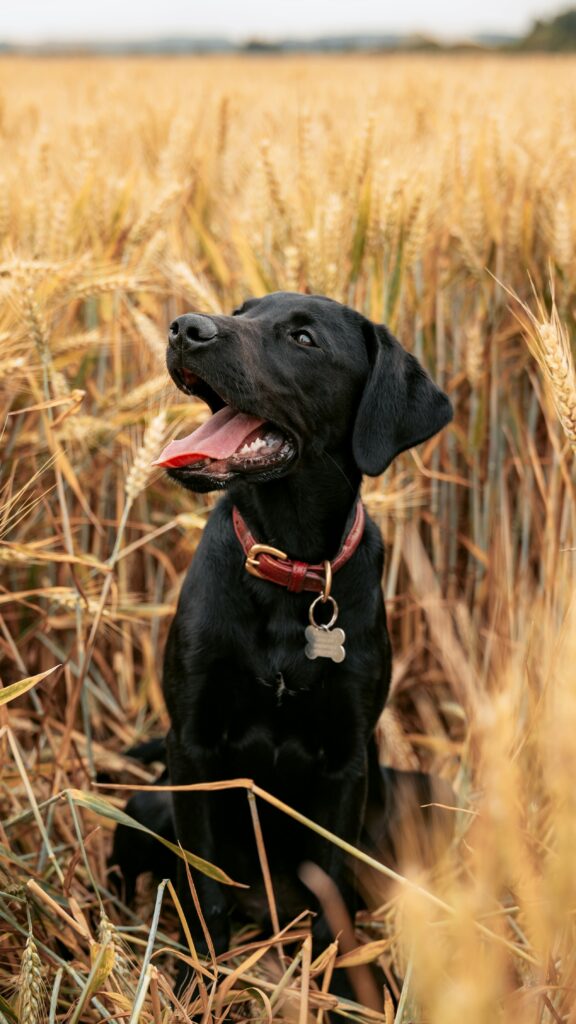
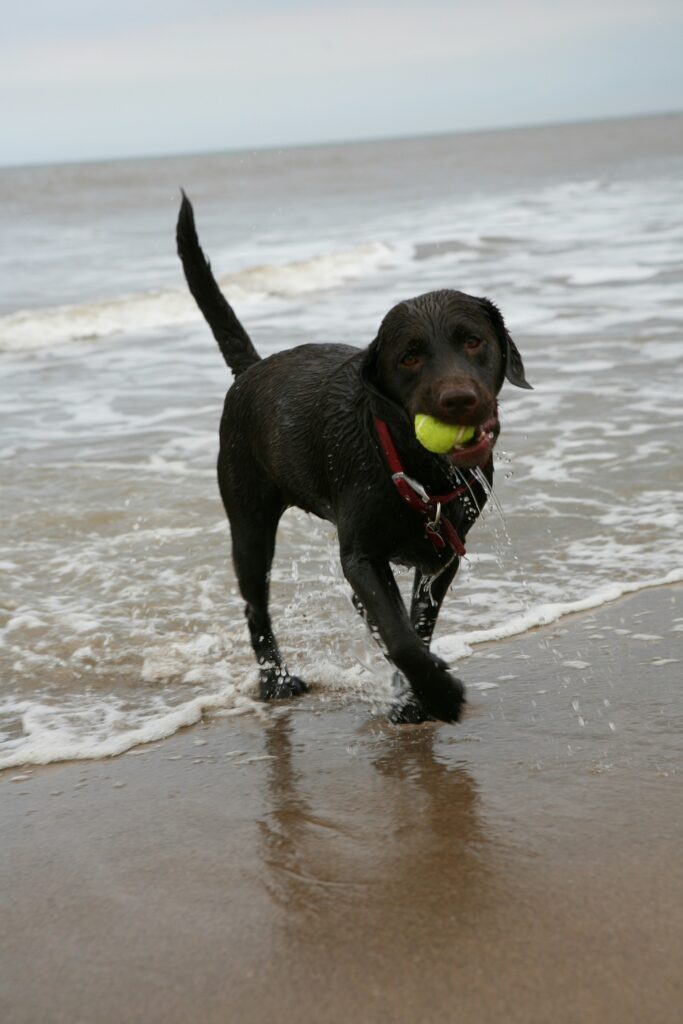
1. Labrador Retriever
Strengths: Excellent Retrievers, Versatility
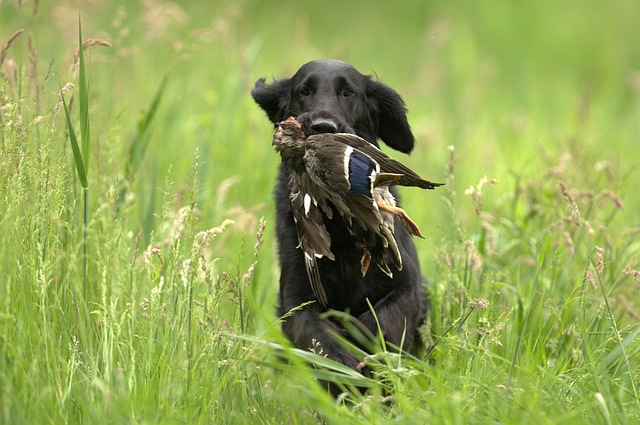
Labrador Retrievers are perhaps the most versatile of all hunting breeds, excelling in waterfowl and upland game bird hunting alike. With their friendly demeanor and boundless energy, Labs make exceptional companions both in and out of the field. Their love for water makes them ideal for waterfowl hunting. Labs are powerful swimmers, undeterred by cold water or rough conditions.
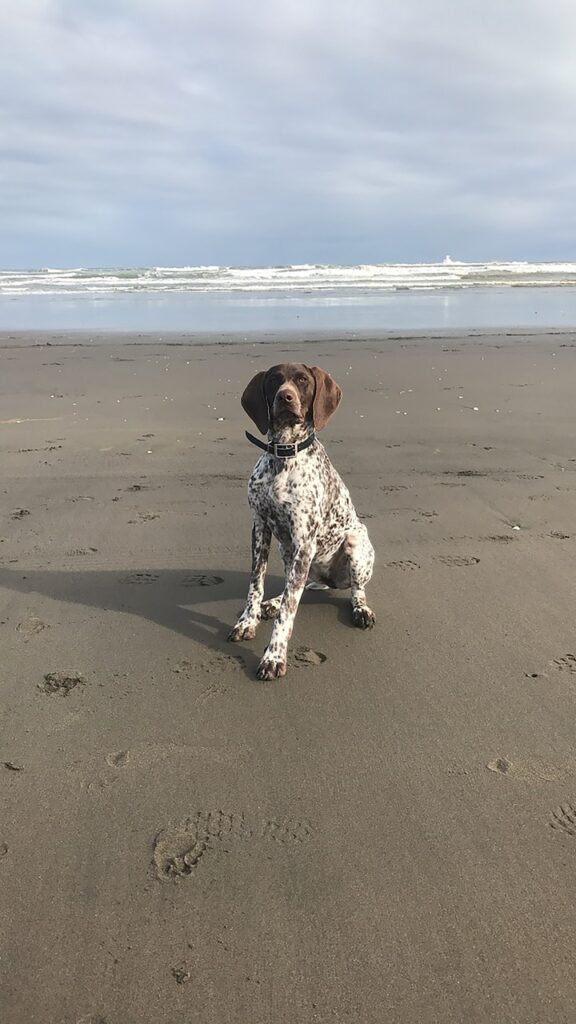
2. German Short-Haired Pointer
Strengths: Pointing, Versatility
German Shorthaired Pointers (GSPs) are known for their remarkable versatility and stamina. These dogs are equally at home pointing game birds in the field or retrieving waterfowl from icy waters.
GSPs have an innate ability to locate and point at game birds, signaling their presence to the hunter. This allows for a controlled approach before flushing. And, while not as specialized as Labs, GSPs are proficient retrievers. They have a strong prey drive and an eagerness to please.
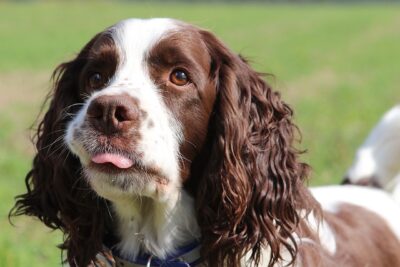
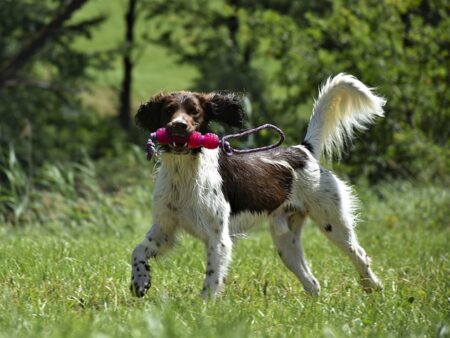
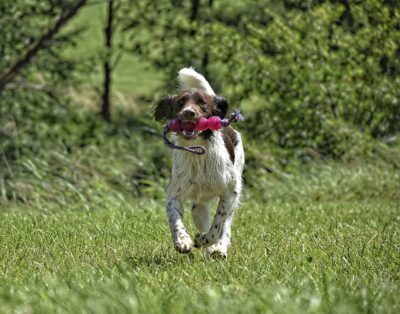
3. English Springer Spaniel
Strengths: Flushing, Agility
English Springer Spaniels are well-known for their exceptional flushing abilities. These compact and agile dogs can maneuver through dense cover with ease, flushing out game birds for the hunter.
Springer Spaniels are masters of flushing game birds from their hiding spots. Their energy and agility make them well-suited for hunting in dense brush and wooded areas.
While primarily flushers, Springers are also capable retrievers, especially in upland hunting scenarios.
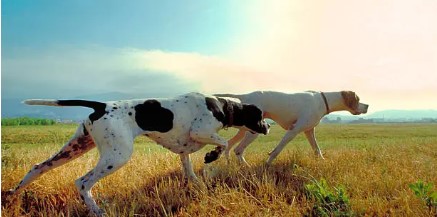
4. English Pointer
Strengths: Pointing, Endurance
English Pointers are elegant and distinguished hunting dogs, renowned for their impeccable pointing skills. These dogs have an incredible sense of smell and can hold a point with remarkable steadiness.
English Pointers are among the best pointing breeds, freezing on the spot to indicate the location of game birds. This allows hunters to approach carefully for a clean shot. With their exceptional stamina, Pointers can cover vast areas of terrain without tiring, making them ideal for long days in the field.
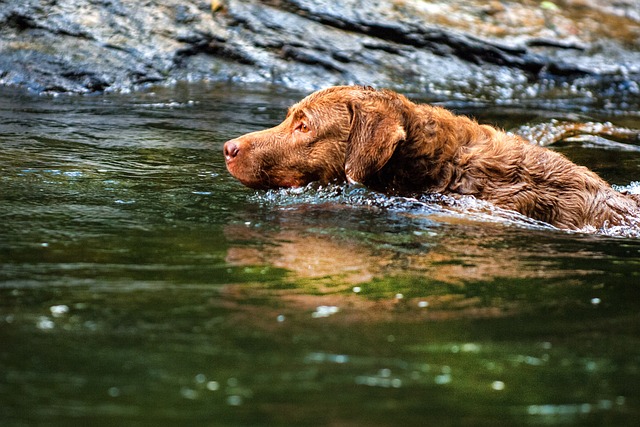
5. Chesapeake Bay Retriever
Strengths: Waterfowl Retrieval, Toughness
Chesapeake Bay Retrievers, often simply called “Chessies,” are known for their incredible toughness and resilience, especially in challenging waterfowl hunting conditions.
Chessies are built for retrieving waterfowl in cold, rough waters. Their thick, water-resistant coat and powerful swimming abilities make them invaluable in waterfowl hunting. These dogs are rugged and strong, able to handle adverse weather conditions and rough terrain with ease.
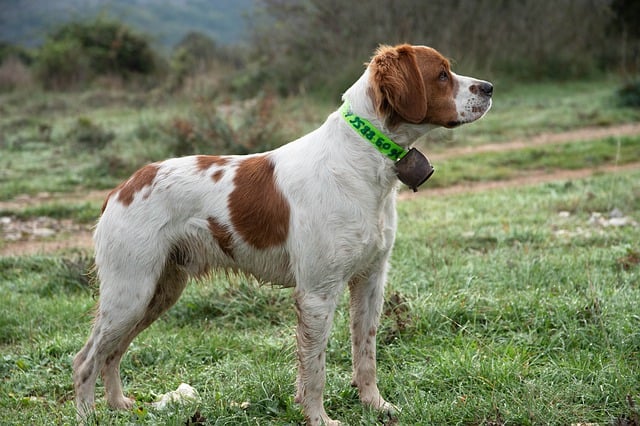
6. Brittany Spaniel
Strengths: Versatility, Agility
Brittany Spaniels, often called just “Brittanys,” are compact and energetic hunting dogs, equally adept at pointing and retrieving. They are known for their friendly disposition and eagerness to please.
Brittanys excel in both pointing and flushing game birds. They have a natural instinct for locating and flushing out birds from cover. These dogs are agile and quick, making them ideal for hunting in dense cover and navigating obstacles with ease.
7. Vizsla
Strengths: Versatility, Energy
The Vizsla is a versatile and enthusiastic hunting dog with a rich history as a pointer and retriever. Known for their striking appearance and affectionate nature, Vizslas are equally at home in the field and as family companions.
Vizslas are excellent pointers, with a keen nose and the ability to hold a steady point until the hunter arrives. While not primarily bred as retrievers, Vizslas are capable of retrieving game birds, especially in upland hunting situations. These dogs have an abundance of energy and stamina, making them ideal for active hunting styles and long days in the field.
One of the fundamental pillars of successful bird hunting dog training is establishing a strong bond between the hunter and the dog. This foundation of trust and respect forms the basis for all training endeavors.
Here are some ways you can build the bond with your bird dog:
Spend Quality Time Together
One of the simplest yet most effective ways to build a bond with your bird hunting dog is to spend quality time together both in and out of the field. Engage in activities that your dog enjoys, such as playing fetch, going for walks, or simply relaxing together. These moments of companionship help foster a sense of closeness and mutual understanding.
Positive Reinforcement and Rewards
During training sessions, use positive reinforcement techniques to strengthen the bond between you and your dog. Reward good behavior with treats, praise, and affection. Dogs thrive on positive feedback and will eagerly repeat behaviors that result in positive outcomes. This creates a sense of trust and cooperation between you and your canine partner.
We earn a commission if you make a purchase, at no additional cost to you.
02/06/2026 04:03 am GMT
Consistency and Clear Communication
Consistency is key when building a bond with your bird hunting dog. Be clear and consistent with your commands, using the same cues for desired behaviors. Dogs thrive on routine and clear expectations, so establish a consistent training regimen that both you and your dog can follow.
Understand Your Dog’s Body Language
A crucial aspect of building a strong bond is understanding your dog’s body language and cues. Pay attention to their signals of happiness, stress, excitement, and fatigue. By being attuned to your dog’s needs and emotions, you can better respond to them and build a deeper level of trust.
Incorporate Play into Training
Training sessions don’t always have to be serious and structured. Incorporate play into your training regimen to make learning fun for your dog. Use toys, games, and interactive activities to reinforce commands and behaviors. This not only strengthens the bond between you and your dog but also makes training enjoyable for both of you.
Be Patient and Understanding
Training a bird hunting dog takes time, patience, and understanding. Dogs, like humans, have their good days and bad days. Be patient with your dog’s progress and avoid getting frustrated or angry. Positive training methods and a calm, patient demeanor will go a long way in building a trusting and respectful relationship.
Share Adventures Together
Once your dog is trained and ready for the field, embark on hunting adventures together. These shared experiences create lasting memories and deepen the bond between you and your canine companion. Whether it’s tracking game birds, retrieving downed ducks, or pointing out pheasants, these moments of teamwork solidify the partnership you’ve built.
Respect and Care for Your Dog
Above all, show your bird hunting dog the respect and care they deserve. Attend to their physical and emotional needs, providing proper nutrition, exercise, grooming, and veterinary care. A well-cared-for dog is a happy and healthy one, ready to give their best in the field.
Obedience Training
The cornerstone of any dog’s training regimen, obedience training, is particularly vital for bird hunting dogs. Basic commands such as sit, stay, come, and heel are not just convenient—they are essential for safety and effective hunting.
Below are some ways you can work with your dog specifically on obedience training:
Start Early and Be Consistent
Begin Early: The foundation of a well-trained bird hunting dog starts early in their life. Start obedience training as soon as you bring your puppy home. Even at a young age, they can begin to learn basic commands such as sit, stay, and come.
Consistency is Key: Consistency is crucial in obedience training. Use the same commands and cues consistently, ensuring everyone in the household is on the same page. Dogs thrive on routine, so establish clear expectations from the beginning.
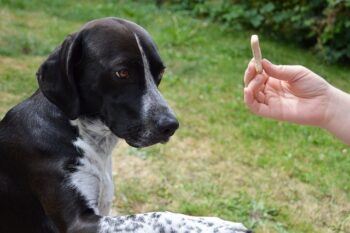
Use Positive Reinforcement
Reward Good Behavior: Positive reinforcement is a powerful tool in obedience training. When your bird dog responds correctly to a command, immediately reward them with treats, praise, or a favorite toy. This positive association reinforces the desired behavior and encourages your dog to repeat it.
Avoid Punishment: Avoid using punishment-based training methods, as they can erode trust and damage the bond between you and your dog. Instead, focus on positive reinforcement to build a strong and positive association with obedience commands.
We earn a commission if you make a purchase, at no additional cost to you.
02/06/2026 05:00 am GMT
Keep Training Sessions Short and Engaging
Short, Frequent Sessions: Bird dogs, especially puppies, have short attention spans. Keep training sessions brief—around 10 to 15 minutes—several times a day. This helps maintain their focus and prevents them from becoming bored or frustrated.
Make it Fun: Incorporate fun and interactive elements into training sessions to keep your bird dog engaged. Use toys, games, and treats as rewards to make learning enjoyable. This positive experience creates enthusiasm for training and strengthens the bond between you and your dog.
Gradually Increase Distractions
Build Distraction Tolerance: As your bird dog progresses in obedience training, gradually introduce distractions to challenge their focus. Start in a quiet environment, then add mild distractions such as toys or noises. Progress to more challenging distractions, such as other dogs or people, to teach your dog to obey commands regardless of the environment.
Use Controlled Settings: When introducing distractions, ensure you are in a controlled setting where you can manage the situation. This allows you to maintain control over the training session and set your dog up for success.
Practice Regularly in Different Locations
Generalize Commands: Dogs don’t automatically generalize commands to different locations or situations. Practice obedience commands in various environments, such as the backyard, park, or woods. This helps your bird dog understand that the commands apply everywhere, not just at home.
Real-Life Scenarios: Mimic real-life hunting scenarios during training sessions. Practice recall (come) commands while your dog is distracted by scents or other animals. This prepares them for the unpredictable situations they may encounter during a hunt.
We earn a commission if you make a purchase, at no additional cost to you.
02/06/2026 05:00 am GMT
Use Verbal and Hand Signals
Combine Verbal and Hand Signals: To enhance communication with your bird dog, combine verbal commands with corresponding hand signals. This dual reinforcement helps your dog understand commands more clearly and allows for effective communication at a distance.
Consistent Signals: Ensure your hand signals are consistent and easily distinguishable. Practice these signals regularly during training sessions to ensure your bird dog associates each signal with the correct command.
End on a Positive Note
Positive Endings: Always end training sessions on a positive note, even if progress is slow. Finish with a successful command that your bird dog knows well, followed by plenty of praise and rewards. This leaves your dog feeling accomplished and eager for the next training session.
Avoid Frustration: If you or your dog are becoming frustrated during a training session, it’s time to take a break. Frustration can hinder progress and lead to negative associations with training. Take a breather, regroup, and return to training with a fresh perspective.
Seek Professional Help When Needed
Professional Trainers: If you encounter challenges or feel overwhelmed with obedience training, don’t hesitate to seek help from a professional dog trainer. A professional can provide guidance, tailored strategies, and hands-on assistance to address specific training issues.
Group Classes: Group obedience classes can also be beneficial for socialization and obedience training. These classes provide structured environments for learning and offer opportunities for your bird dog to interact with other dogs in a controlled setting.
A critical aspect of bird hunting dog training is familiarizing the dog with the scents of different game birds. This is where scent training aids and dummy birds become invaluable.
Here are some ways you can effectively introduce your bird dog to bird scents:
Start with Familiarization
Begin by exposing your bird dog to the scents of common game birds in a controlled and calm environment. You can use commercially available bird scent products specifically designed for training purposes. These scents mimic the natural scent of birds such as quail, pheasant, or grouse.
Use Scented Training Aids
Invest in scented training aids, such as bird scent dummies or wings, to introduce your bird dog to the scent of game birds. These aids are often made of canvas or plastic and can be infused with bird scents. Start by placing the scented training aids in areas where your dog can easily find and investigate them.
We earn a commission if you make a purchase, at no additional cost to you.
02/06/2026 05:00 am GMT
Associate Scent with Rewards
As your bird dog shows interest in the scented training aids, reinforce their behavior with rewards. Use treats, praise, or playtime to create a positive association with the bird scents. This positive reinforcement encourages your dog to seek out and engage with the scents willingly.
Incorporate Scent in Retrieval Training
Integrate bird scents into your bird dog’s retrieval training sessions. Begin by placing the scented training aids in the field or training area. Encourage your dog to retrieve the aids, using the scent as a cue for the desired behavior. Reward successful retrieves with praise and treats.
Gradually Increase Complexity
As your bird dog becomes more familiar with the bird scents, gradually increase the complexity of the training exercises. Hide the scented training aids in different locations, varying the terrain and cover. This challenges your dog to use their sense of smell to locate the scents amidst distractions.
Simulate Realistic Scenarios
To further prepare your bird dog for hunting situations, simulate realistic scenarios using bird scents. Place the scented training aids in areas where birds are likely to hide, such as under bushes, in tall grass, or behind obstacles. Encourage your dog to search and locate the scents, mimicking the actions they would take during a hunt.
As your bird dog advances in their training, introduce multiple scents to practice scent discrimination. Use different scents for different types of game birds, such as quail, pheasant, and duck. Encourage your dog to differentiate between the scents and respond accordingly.
Maintain a Positive and Patient Approach
Throughout the process of introducing your bird dog to bird scents, maintain a positive and patient approach. Every dog learns at their own pace, so be patient with your dog’s progress. Celebrate small successes and avoid becoming frustrated or discouraged.
Regular Reinforcement and Practice
Consistency is key to solidifying your bird dog’s ability to recognize and respond to bird scents. Incorporate scent training into your regular training sessions, ensuring that your dog continues to practice and reinforce their skills. Regular practice will help maintain their keen sense of smell and readiness for hunting season.
We earn a commission if you make a purchase, at no additional cost to you.
02/06/2026 05:01 am GMT
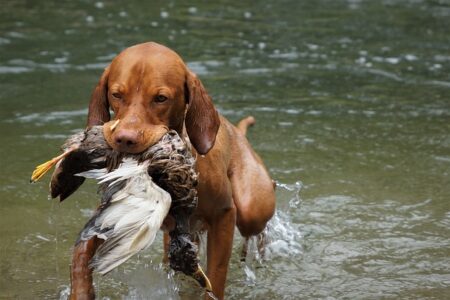
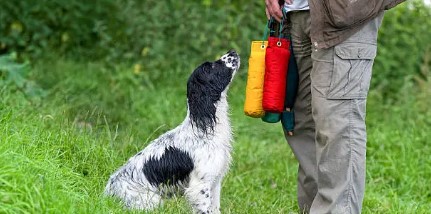
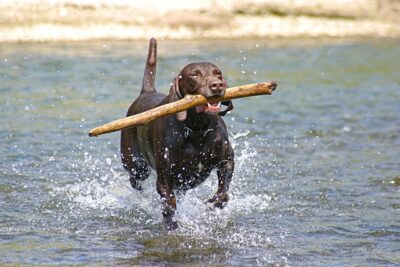
Retrieving Skills
For many bird hunting dogs, retrieving is second nature. However, refining and enhancing this instinct can make all the difference in the field. Begin with basic retrieves using dummies and bumpers, gradually progressing to more challenging scenarios. This not only hones their skills but also strengthens the bond between you and your canine companion.
We earn a commission if you make a purchase, at no additional cost to you.
02/06/2026 05:00 am GMT
Pointing and Flushing
Depending on the breed, your dog may excel in pointing or flushing—or even both. Pointing breeds, such as the English Pointer, are trained to locate and indicate the presence of birds. On the other hand, flushing breeds, like the Springer Spaniel, are adept at flushing birds from cover. Tailor your training methods to capitalize on your dog’s natural abilities.
For waterfowl hunting enthusiasts, training your dog for water retrieves is essential. Begin by introducing your dog to shallow water, gradually building confidence with each session. Use retrieving dummies that float to simulate real hunting scenarios, rewarding your dog for successful retrieves.
Advanced Bird Dog Training Strategies
Introducing Your Bird Dog to the Gun
Introducing your bird hunting dog to gunshots is a crucial step, and it must be approached with care.
Here’s a step-by-step guide on how to introduce your bird dog to the gun:
1. Build a Foundation of Trust
Before introducing your bird dog to the sound of gunfire, ensure that you have established a strong bond and foundation of trust. Your dog should feel secure and comfortable in your presence, knowing that you will not expose them to anything harmful or threatening.
2. Start with Desensitization
Begin the process of introducing your bird dog to the gun by desensitizing them to loud noises in a gradual and controlled manner. Start with everyday sounds such as clapping, banging pots, or slamming doors. Observe your dog’s reactions and ensure they remain calm and relaxed.
3. Create a Positive Association
Associate the sound of gunfire with positive experiences and rewards for your bird dog. For example, play with your dog, offer treats, or engage in a favorite activity immediately after a controlled gunshot. This positive reinforcement helps your dog develop a positive association with the sound.
4. Start with Distant Sounds
When your bird dog is comfortable with the initial noises, move on to introducing distant gunshots. Begin in a quiet and familiar environment, such as your backyard or a secluded area. Have a helper fire a gun at a distance while you are with your dog, engaging them in a fun activity or training exercise.
5. Gradually Decrease Distance
As your bird dog becomes more accustomed to the distant gunshots, gradually decrease the distance between them and the source of the sound. Move closer in small increments, always monitoring your dog’s reactions for signs of stress or anxiety.
6. Use Muffling Techniques
To help reduce the intensity of the gunshot sound, consider using muffling techniques such as firing from behind a barrier, using a blank pistol, or firing over water. These methods can help gradually acclimate your dog to the sound without overwhelming them.
7. Incorporate Gunfire into Training Sessions
Integrate the sound of gunfire into your bird dog’s training sessions to simulate real hunting scenarios. For example, fire a blank pistol when your dog is retrieving a training dummy or during a simulated hunt. This helps your dog associate the sound with the excitement of the hunt.
8. Monitor Your Dog’s Reactions
Throughout the gun introduction process, closely monitor your bird dog’s reactions and body language. Look for signs of stress, fear, or discomfort, such as trembling, cowering, or avoidance behaviors. If you notice any negative reactions, stop the training session and reassess your approach.
Your bird dog will look to you for guidance and reassurance during the gun introduction process. Remain calm, confident, and reassuring, providing comfort and positive reinforcement. Your demeanor will greatly influence your dog’s response to the gunfire.
10. Gradual Exposure to Different Guns and Calibers
Once your bird dog is comfortable with the sound of gunfire, gradually expose them to different types of guns and calibers. This helps them become accustomed to the variety of sounds they may encounter during hunting trips, ensuring they remain focused and undeterred.
11. Seek Professional Guidance if Needed
If you encounter challenges or have concerns about introducing your bird dog to the gun, seek guidance from a professional dog trainer. An experienced trainer can provide personalized advice, techniques, and support to ensure a successful and safe gun introduction process.
To simulate real hunting situations, incorporate field training drills into your regimen. These drills simulate real-life hunting scenarios, allowing your dog to practice essential skills such as retrieving, pointing, flushing, and handling various terrains.
Here are some effective field training drills to enhance your bird dog’s abilities:
1. Retrieve and Return Drill
Objective: To reinforce retrieving skills and obedience commands.
Setup: Place training dummies or bird wings at varying distances in an open field.
Execution:
Command your bird dog to retrieve the dummy.
Gradually increase the distance of retrieves.
Incorporate obstacles such as tall grass or low shrubs.
Practice “hold” and “drop” commands for proper retrieval and release.
2. Blind Retrieve Drill
Objective: To develop your bird dog’s ability to retrieve objects they cannot see.
Setup: Place training dummies or bird wings in hidden locations, out of sight from your dog.
Execution:
Use hand signals or whistle commands to guide your dog to the hidden retrieves.
Start with short distances and gradually increase the challenge.
Reinforce “back” or “over” commands to direct your dog to the hidden object.
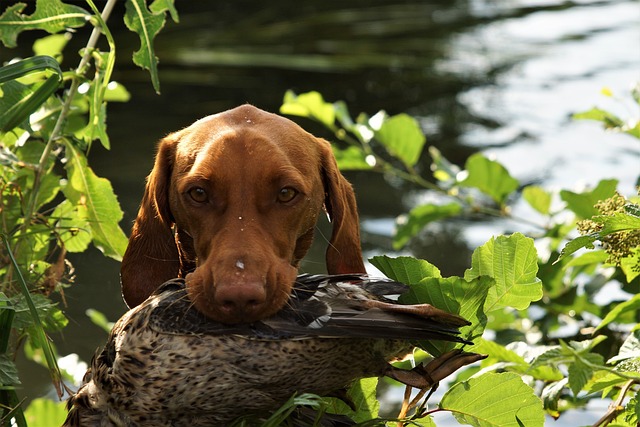
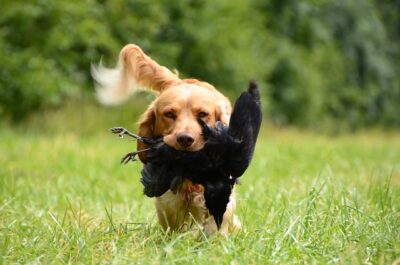
A “soft mouth” is a highly desirable trait in bird hunting dogs, especially retrievers. It refers to a dog’s ability to retrieve game birds without causing damage to the bird, such as puncturing or crushing it with their teeth.
Training your bird dog to have a soft mouth not only preserves the quality of the game bird but also ensures the safety of the bird for future release or consumption.
Here are some tips to help you train your bird dog to have a soft mouth:
1. Start Early and Be Consistent
Begin training your bird dog for a soft mouth from a young age. Puppies are more receptive to learning and can develop good habits early.
Be consistent with your expectations and commands. Use the same cues and training methods consistently to reinforce the desired behavior.
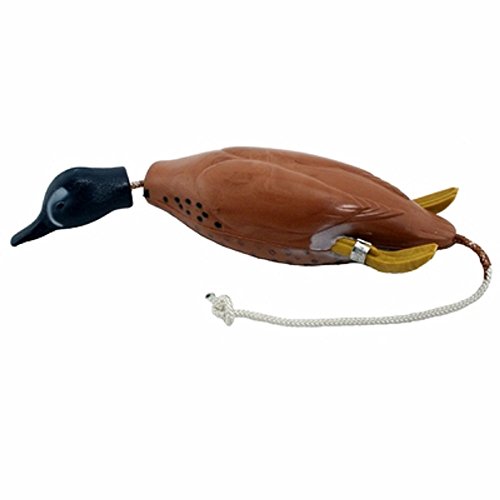
2. Use Gentle Retrieving Objects
Start with soft retrieving objects such as canvas dummies, soft rubber bumpers, or foam training dummies. These objects mimic the feel of a bird without the risk of damage.
Introduce the retrieving objects gradually, allowing your bird dog to become familiar with them before moving on to more challenging retrieves.
3. Use Positive Reinforcement
Reward your bird dog for gentle retrieves with treats, praise, or playtime. Positive reinforcement helps reinforce the behavior you want to encourage.
When your dog retrieves the object gently, immediately praise them and offer a reward. This creates a positive association with the desired behavior.
We earn a commission if you make a purchase, at no additional cost to you.
02/06/2026 05:01 am GMT
4. Avoid Rough Play
Discourage rough play with retrieving objects. If your dog starts to play aggressively or chew on the object, redirect their behavior.
Stop the retrieving session if your dog becomes too rough or excited. Wait for them to calm down before resuming training.
5. Teach the “Hold” Command
Teach your bird dog to hold the retrieving object gently in their mouth without biting down. Use the command “hold” or “gentle” as they grasp the object.
Start by offering the object and encouraging your dog to take it gently. Use treats and praise to reinforce the behavior when they hold it softly.
6. Progress to Moving Objects
Gradually progress to moving retrieving objects to simulate the behavior of a live bird. You can use a fluttering bird wing or a dummy on a string.
Encourage your bird dog to retrieve the moving object gently, rewarding them for soft mouth behavior.
7. Practice “Give” or “Drop” Command
Teaching your dog to release the bird after retrieving is key to the soft mouth training process.
Teach your bird dog to release the retrieving object on command. Use the command “give” or “drop” as they release the object into your hand.
Offer a treat or praise when they respond to the command, reinforcing the behavior of releasing the object gently.
8. Work on Control and Patience
Incorporate control exercises into retrieving drills, such as waiting for a command before retrieving.
Use obedience commands such as “sit” or “stay” before sending your dog to retrieve. This teaches patience and control, which are essential for a soft-mouthed retrieve.
9. Use Real Game Birds for Training
When your bird dog has mastered retrieving with soft objects, introduce real game birds for training.
Start with freshly killed birds and gradually progress to live birds for training retrieves. Ensure the birds are properly handled and prepared for training sessions.
10. Monitor Progress and Reinforce Training
Regularly assess your bird dog’s progress in soft mouth training. Observe their retrieving behavior during training sessions and hunting simulations.
Reinforce training sessions as needed, especially if your dog starts to show signs of reverting to rough retrieving behavior.
11. Be Patient and Consistent
Training a bird dog to have a soft mouth takes time, patience, and consistent practice. Every dog learns at their own pace, so be patient with the process.
Consistently reinforce the desired behavior and correct any unwanted behavior promptly and consistently.
A seasoned bird hunting dog must be comfortable navigating various terrains, from dense forests to open fields. Train your dog to handle obstacles such as fallen trees and undergrowth. This not only enhances their agility but also ensures they can effectively locate and retrieve birds in any environment.
Gun shyness can be a significant hurdle in bird hunting dog training. If you notice signs of apprehension around gunfire, take a step back and reassess your approach. Gradual desensitization, coupled with positive reinforcement, can help your dog overcome this challenge.
Dealing with Distractions
In the field, distractions abound—from other animals to unfamiliar scents. Train your dog to maintain focus amidst these distractions by gradually exposing them to varying environments. Incorporate distractions into training sessions, teaching your dog to stay on task regardless of the circumstances.
Maintenance and Continued Training
During the off-season, engage in activities such as scent training and retrieving drills to maintain peak performance. Additionally, prioritize your dog’s health and wellness, ensuring they are in top physical condition for hunting season.
Training doesn’t end after the initial stages—it’s an ongoing process. Even seasoned hunting dogs benefit from regular training sessions to keep their skills sharp.
Remember, each dog is unique, so tailor your approach to suit their personality and abilities. With time and consistency, you’ll have a skilled hunting partner ready to tackle any field with enthusiasm and expertise.
Training a bird hunting dog is an art that requires patience, dedication, and a deep understanding of canine behavior. By following the tips and techniques outlined in this guide, you can embark on a rewarding journey with your canine companion.
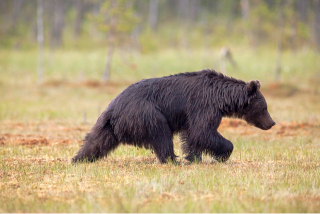
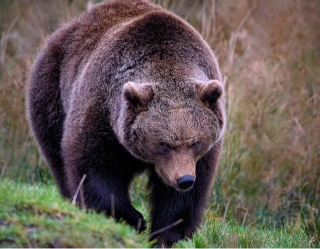
When we think of bears, the image of a powerful, lumbering creature often comes to mind. Yet, these majestic animals are not just symbols of strength—they are also incredibly fast when they need to be.
From the mighty Grizzly to the stealthy Black bear, understanding the speed of bears provides insight into their hunting prowess and survival strategies in the wild.
Don’t let a bear’s lumbering demeanor fool you. They can accelerate quickly when needed.
Physiological Factors Contributing to Bear Speed
Bears are built for both power and agility. Their physiology plays a crucial role in their ability to reach impressive speeds when necessary. With strong, muscular limbs and large paws that act like natural snowshoes, bears have efficiency in movement.
A bear’s skeletal structure, particularly the arrangement of bones in their legs, allows for powerful strides. This, combined with well-developed muscles, enables bears to accelerate quickly when chasing prey or fleeing danger. Despite their seemingly bulky appearance, bears can move swiftly with surprising grace.
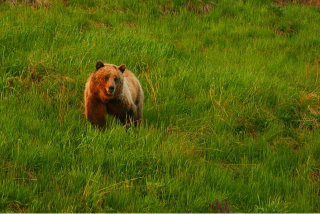
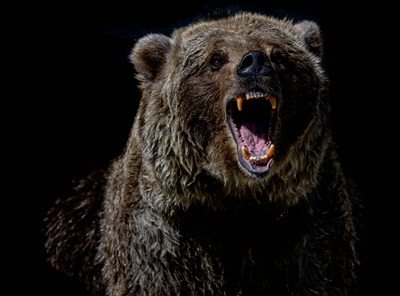
Bears are opportunistic predators, employing a variety of hunting techniques depending on their species and environment. While some bears, like the Grizzly, are known for their ambush tactics, others, such as the Black bear, are more inclined to pursue their prey.
Bears can chase down unsuspecting prey over short distances.
When hunting, bears will use their speed to surprise their quarry or to chase it down over short distances. Their bursts of speed are effective for catching slower prey such as younger deer and elk, or fish. This ability to accelerate quickly gives bears an edge in capturing their meals, ensuring they can secure the sustenance needed for survival.
We earn a commission if you make a purchase, at no additional cost to you.
02/06/2026 06:03 am GMT
How Fast Can Bears Run | Bears Vs. Other Animal Species
So, you’re probably reading this because you’re wondering, “how fast can bears run anyway?”
Researchers have conducted numerous studies to measure the speed of bears in various environments. One such study, published in the Journal of Wildlife Management, found that Grizzly bears in pursuit mode could reach speeds of up to 35 miles per hour (56 km/h) for short distances.
In terms of average speeds, different bear species exhibit varying capabilities:
Grizzly Bears: Average speeds range between 30 to 35 miles per hour (48 to 56 km/h) when in pursuit.
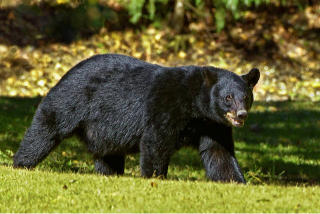
Black Bears: Generally slightly slower, with average speeds of around 25 to 30 miles per hour (40 to 48 km/h).
Polar Bears: Surprisingly agile for their size, reaching speeds of 20 to 25 miles per hour (32 to 40 km/h) on land.
Polar bears tend to be the slowest of the bear species, yet they still can reach speeds of 20-25 miles per hour!
Comparing this to other animals of similar size, bears fare quite well.
We earn a commission if you make a purchase, at no additional cost to you.
02/06/2026 11:00 am GMT
Comparing Bear Speed to Human Speed
Many people want to know… are bears faster than humans? See below!
For context, let’s consider the human perspective. The average human running speed falls between 8 to 12 miles per hour (13 to 19 km/h). This means that in a race against a bear, the outcome would be clear—the bear would quickly overtake a fleeing human.
Understanding the speed of bears is not just a matter of curiosity; it’s also essential for safety in bear country. When venturing into wilderness areas where bears roam, hikers and campers must be aware of these impressive speeds. Knowing that a bear can close the distance rapidly underscores the importance of proper precautions and respect for these wild creatures.
In conclusion, bears are not just the lumbering giants we often perceive them to be. With their remarkable speed and agility, they are nature’s speed demons, finely tuned for both power and pursuit.
Whether hunting for prey or avoiding threats, bears demonstrate their impressive capabilities in the wild.
So, next time you catch a glimpse of a bear in its natural habitat, remember the incredible speed it possesses—a reminder of the awe-inspiring wonders of nature!


 N1 Outdoors® Multicam Logo BeanieOriginal price was: $17.99.$9.99Current price is: $9.99.
 N1 Outdoors® Est. 2014 Forest Camo Heavyweight Sweatshirt Hoodie$34.00
 N1 Outdoors® Duck Camo Block Logo Heavyweight Hoodie$34.00