man shooting shotgun in field

Trigger Types For Outdoors Shooters Explained

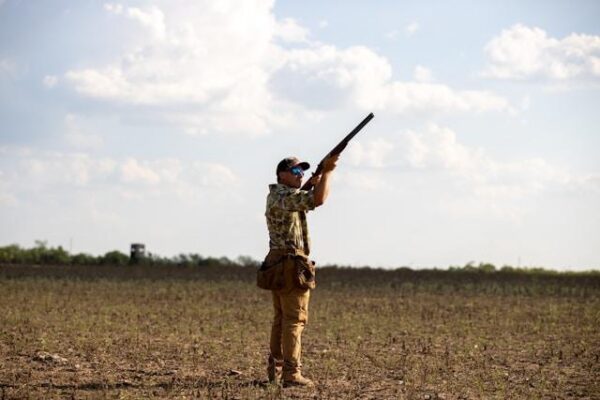
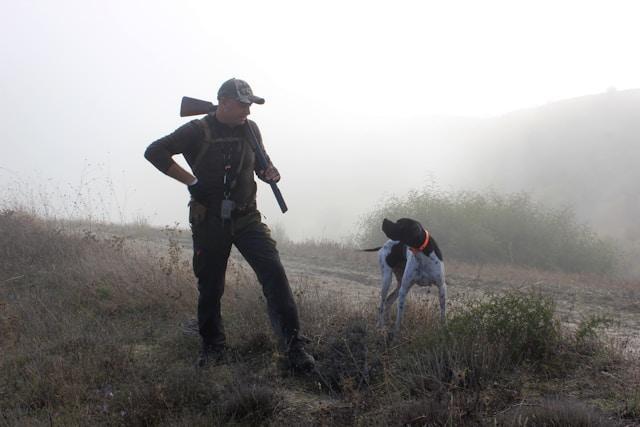
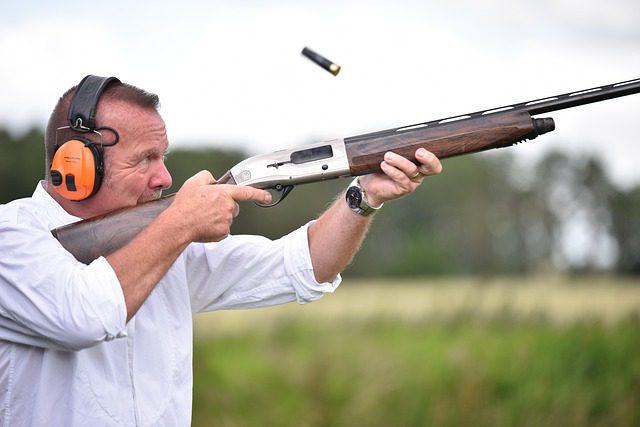
Outdoor shooting puts pressure on your hands, your breathing, and your focus. Trigger choices can either support that focus or fight it.

To start, we’ll take a look at some essential information on triggers, the terms people use, and the options that matter in cold, wet, and dusty conditions.

Trigger Basics You Should Know

The trigger is a control lever that releases the shot when pressure reaches a certain point. The “trigger shoe” is the surface your finger presses. “Take-up” is the early movement, before you hit firm resistance. Afterward, the “wall” is the point where resistance feels steady and clear. The “break” is the instant the shot releases. “Overtravel” is movement after the break, and “reset” is how far forward the trigger must move before it can fire again. It may be helpful to refer back to these terms throughout the article.

It’s important to note that outdoor shooting adds variables that range work can hide. For example, cold hands reduce fine control. Gloves are, therefore, among the most important things to take with you outdoors when shooting.

Uneven footing makes you tense your grip, rain can make surfaces slick, and dust can add roughness. For these reasons, a predictable press of the trigger often matters more than a light press. However, a pull that is too heavy can drag your sights off target if you rush it.

Also, it’s important to remember that any modifications should be within the manufacturer’s specs. If you are unsure, use a qualified gunsmith. After any work, do a careful inspection before a live fire.

Different Trigger Types

Trigger shoe shape can become a comfort issue and a control issue. A straight trigger uses a flat face, which provides a broad contact area. A cut trigger, as many makers describe it, uses a contoured face that guides the finger into a repeatable spot. In contrast, a curved shoe can feel familiar to shooters who grew up on classic designs.

man holding gun over shoulder with bird dog in field

However, placement changes leverage when it comes to the straight vs. cut trigger issue. Pressing lower on a straight face can make the pull feel lighter. Pressing higher can make it feel heavier, and it can increase sideways input. With a cut face, the contour can reduce that drift by nudging the finger to the same point each time. Always keep safety first and keep the muzzle in a safe direction while testing any new trigger position or feel.

Gloves can affect trigger feel. Thick gloves can slide on edges, so a wider straight face can feel calmer. Thin gloves can benefit from a contoured cut face because the finger finds the trigger faster.


What Good Trigger Feel Means

“Good” trigger feel usually means “repeatable.” A smooth take-up lets you prep without surprise. A clear wall lets you pause with control. A clean break reduces the urge to snatch the shot. Creep is slow movement at the wall, while grit is rough drag during travel. Both can raise tension, and that tension can leak into your hands, hindering your good eye-hand coordination, which is essential for a shooter.

Trigger choices that feel easy on a bench can feel jumpy in outdoor use, when you are breathing hard on a climb. Still, a moderate pull with a clean break can be easier to manage than a very light pull with a vague wall. Overtravel matters for the same reason follow-through matters. If your finger keeps moving far after the break, your grip can keep pushing, and the muzzle can drift.

semi auto shotgun with shell coming out

At the same time, the reset preference depends on the pace. A short, positive reset can help control follow-up shots. A longer reset can still work well for slow, deliberate hunting shots.


Decibullz Percussive Moldable Earplugs for Hunting & Shooting, Gun Range Hearing Protection for Shooters, Reusable Ear Plugs for Shooting Range
$69.99
Buy Now
We earn a commission if you make a purchase, at no additional cost to you.
04/15/2026 09:00 am GMT

Single-Stage, Two-Stage, And Set Triggers

To begin, a single-stage trigger moves and breaks in one continuous press. It can feel simple, and it suits many general hunting setups.

A two-stage trigger has stage one you can take up, and then a wall that breaks with less added movement. That design lets you prep, settle your sights, and finish the press with small added pressure.

Each style has field tradeoffs for your hunting setup. A single-stage can be faster when the shot window is short. A two-stage trigger can help when you need a steady hold on a small target at a distance.

Finally, set triggers can reduce the final release to a very light press. For that reason, they demand strict discipline and practice, especially when stress is high.

It’s important to remember that any design can suffer if grit builds up or if maintenance is neglected. So, keep all gun parts clean, use light lubrication per manufacturer’s specifications, and practice the same press you will use outdoors.


Evergreen Pistol Ammo Case Compatible with 5.7/9mm/.40/.380-100 Rounds Lockable USA Made
$42.95


Buy Now
We earn a commission if you make a purchase, at no additional cost to you.
04/15/2026 10:05 pm GMT

Choosing Trigger Type For Your Terrain And Routine

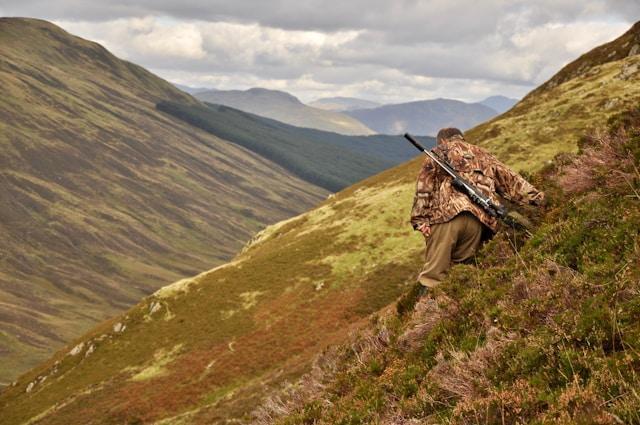
Next, match features to the way you actually shoot. If you hike through brush, you may prefer a clear wall and a pull that resists accidental contact. If you shoot from sticks, a pack, or a bipod, you may value a wall you can prep while the sights stay steady.

Another factor is climate. Dust can add drag. Snow can add moisture. Heat can thin some oils. For these reasons, be sure to choose parts with good finishes and simple upkeep.

In addition, think about shoe width and surface texture. A wider shoe can spread pressure across the finger pad. Light texture can add grip without biting. In contrast, extreme shapes can catch gloves or feel sharp in recoil. Trigger choices should protect safety margins, not squeeze them in search of tiny gains. As a result, the safest upgrade is often the one that improves clarity, not the one that only drops weight.

Safety First

In summary, the best setup is the one that stays predictable when conditions get messy. A clear wall, a comfortable shoe, and a safe pull help you press straight back. Trigger choices should serve safety first, and accuracy second, every time you head outdoors in season.


alligator eye

Gator Hunting In Texas: A Guide To Hunting Tags, Season Dates, and How to Hunt Gators Legally

on . Posted in Blog, Hunting

Every species of game that is hunted in the state of Texas is assigned unique regulations when it comes to tags, seasons, and hunting.

When it comes to alligator hunting in Texas, the regulations differ based on whether you’re hunting in core or non-core counties, and enforcement is rather strict. 

What are the Texas Alligator Hunting Season Dates?

alligator on surface of water

Core vs. Non-Core Counties

TPWD divides Texas into core counties, which are historically strongholds of large alligator populations, and the rest are labeled as non-core counties. 

These 22 core counties include: 

  • Angelina
  • Brazoria
  • Calhoun
  • Chambers
  • Galveston
  • Hardin
  • Jackson
  • Jasper
  • Jefferson
  • Liberty
  • Matagorda
  • Nacogdoches
  • Newton
  • Orange
  • Polk
  • Refugio
  • Sabine
  • San Augustine
  • San Jacinto
  • Trinity
  • Tyler
  • Victoria

Hunting rules in the two different types of counties are quite different.

Gator Season Dates

Core Counties: Texas’s public gator hunting season is open from September 10 to September 30, during which time gator tags are valid in core counties and TPWD-approved “special” properties.

Non-Core Counties: The gator hunting season for non-core counties runs from April 1 through June 30, but only on private land and only if no harvest occurred on that land during the fall season.

Gator Hunting Hours

Surprisingly enough, gator hunting in Texas is limited to daylight only. This means that hunters may gator hunt from a half-hour before sunrise all the way to sunset.

Unlike a variety of other Southern states, nighttime hunting is illegal in Texas, even if you’re spotlighting. 


Do You Need Tags to Hunt Alligators in Texas?

Tags in Core Counties

In the state of Texas, CITES hide tags are mandatory

Hunters must have a valid tag before hunting, and tags are issued only to landowners or their agents following TPWD inspection.

alligator hunting four men

Tags in Non-Core Counties

Now, gator tags in non-core counties are quite different, as they may only be taken on private land and with the owner’s consent.

Hunters must attach a Wildlife Resource Document (WRD) immediately after taking down a gator and later convert it to a CITES tag.

Texas gator bag limits when it comes to non-core counties are one gator per person, per license year. The only exception is if the landowners hold hide tags that allow impersonation of core rules.

Resident vs. Non‑Resident Hunters

Both residents and non-residents need a General Texas Hunting License, as well as the appropriate tags.

When it comes to public draw hunts, non-residents are actually permitted to participate in (see Section 4) or hunt on private land, again, with the explicit permission of the landowner.

Penalties for Hunting Without Tags

alligator with mouth open

These penalties range from significant fines to possible jail time. They also almost always result in the forfeiture of any hide or meat, and sometimes even the weapons or vehicles involved.

TPWD strictly enforces these hunting regulations, so it is in any hunter’s best interest to avoid ever hunting without valid tags and permits.

Hunting Options in Texas

Similar to most types of game, there are a handful of options when it comes to where to hunt gators in Texas.

Public Land Hunting

TPWD offers occasional draw hunts on select Wildlife Management Areas (WMAs) and public lands in core counties.

For example, Daughtrey WMA provides draw hunts requiring a shotgun dispatch, the use of a boat, floaters, and familiarity with the habitat.

Draw hunt application fees are fairly modest, with adults paying around $130. With these favorable draw terms, the success rates are typically low due to high interest and relatively limited spots.

Private Land Hunting

Most gator hunting in Texas takes place on private land, where landowners either hold CITES tags or secure nuisance control permits.

Hunters can also hunt under the fall season (core tags) or spring (WRD), depending on property type.

Private land gator hunting also offers the benefit of guided hunts, and while they are more costly, they often come with certain levels of assistance and assurances.

Guided vs. DIY Hunts

If you’re considering a Texas gator hunt, you have two options when it comes to the types of hunts.

The first option, which is preferred by hunters looking for a guaranteed trophy, is a guided gator hunt. A guided hunt will typically take place on private land, where hunters will be guided by the landowner or a professional guide.

Pros

  • Access to CITES tags
  • Expert tracking & guiding
  • Equipment support (boats, floats, guns)
  • Heightened sense of safety

Cons

  • Higher costs
  • Less flexible timing

The second option is a DIY gator hunt, which is where a hunter will secure their own tags and hunt on either public or private land without the aid of a guide

Pros

  • Freedom to hunt your own land, private land, public land, or with friends
  • Lower costs

Cons

  • You must navigate regulations solo
  • You handle all of the logistics
  • You’re responsible for acquiring WRDs
  • You must provide and prepare your own gear


alligator head

Approved Harvest Methods

In the state of Texas, the lawful methods of hunting gators include:

  • Hook-and-line sets (minimum 300‑lb test line, must attach float and gear tag).
  • Alligator gig (pronged pole, spring arms, or detachable head).
  • Archery (barbed arrow) or hand‑held snare with float.
  • Firearms:
    • In non‑core counties, centerfire rifles and handguns are allowed for gators caught legally, but rimfire weapons aren’t allowed.
    • In core counties, firearms (like bang sticks and shotguns) may ONLY be used on gators after capture with a taking device.

Baiting Rules

In Texas, baiting is allowed for gator hunting on both public and private lands, but hunters must follow gear tagging and line inspection regulations.

Ethical hunters often avoid heavy baiting to preserve meat quality and avoid over-attracting gators.

Daytime vs. Nighttime Methods

Spotlighting is unlawful in the state of Texas when it comes to gator hunts, making this a major difference from other states.

alligators in algae

Equipment Requirements

Lines for gator must hold at least 300 lb and include a visible gear tag with the hunter’s name, address, license number, and (if applicable) hide tag number.

It is also required that:

  • Floats on lines, snare, gig, or arrow must be at least 6″×6″×8″ or 8″ spherical.
  • Hook-and-line sets must be checked daily, and upon capture, the gator must be killed and tagged immediately.

Checking In Your Harvest

Planning your Texas gator hunt and taking down your trophy is only half the battle, as there are protocols to follow when it comes to tagging, reporting, and processing your gator.

Immediate Tagging

In Texas core counties or on “special” properties, you must attach a valid CITES hide tag to the gator immediately after killing, typically within 10 inches of the tip of the gator’s tail

Now, in non-core Texas counties, hunters still have to attach a temporary WRD right away, then convert it to an official hide tag once the rest of the paperwork is completed.

Reporting to TPWD

When it comes to non-core counties, hunters have 72 hours to submit their Alligator Hide Tag Report form (PWD 304A).

Core county tag holders have a little more leeway, where they are required to file annual reports on all issued tags within 10 working days after the season close date.

Processing Your Gator

Once you land and process your gator, its meat and hides can be sold only to licensed dealers or alligator farmers.

To preserve trophy hides, it’s best to have them salted or environmentally tanned within 24 hours of processing. There are typically a variety of expert tanneries located near or around most core counties.

Gator meat is highly sought after, quite lean, and super flavorful, so treat it like fish to avoid any sort of dryness in the meat.


FAQs

Can non-residents hunt alligators in Texas?

Yes. A non-resident must have a Texas General Hunting License and either draw permits or have private land permission, plus tags.

Is there a size limit on Texas gators?

No. Texas law doesn’t specify a minimum or maximum length for gators, but each harvest does count against your overall tags.

Do I need both a license and an alligator tag?

Yes. A valid General Hunting License and either a CITES tag (core) or a WRD-to-hide tag (non-core) are a must-have to hunt gators in Texas.

How many gators can I harvest?

Core counties: One per valid hide tag.

Non-core counties: One per person per license year, unless the landowner has additional tags.

How much does a Texas gator hunt cost?

Hide tags cost around $21 each.

Draw fees run about $130/adult.

Guided hunts range widely in cost, from $300 to $1,500 depending on location and exclusivity.

Which counties are best for gator hunting?

Core counties like Chambers, Galveston, Mineola, and Sabine are hotspots. When it comes to large trophy gators, the Big Thicket region (Hardin, Jasper, Tyler, Polk, San Jacinto) is the best place to hunt.

Is Gator Hunting In Texas Right for You?

alligator head 2

Between seasonal windows, tag requirements, and legal methods that vary by region, it’s not something to approach lightly. With that being said, for hunters willing to do the prep work, it’s a rewarding and thrilling excursion you’ll likely want to revisit with friends and family, because nothing beats the feeling of bringing home a trophy gator.


Edge Matters | How to Sharpen a Hunting Knife

on . Posted in Blog, Hunting

The morning fog rolls in, and a bull hangs somewhere in the timber. If your knife pops hair now, the work ahead feels lighter. If it doesn’t… well, you’re about to invent new swear-words. So, let’s keep the edge singing…

What we’ll cover:

Why Edge Sharpness Matters in the Field

Edge gets dull—even on custom blades. Try separating a deer’s atlas joint with a butter-knife-dull blade.

Tendons fray… patience frays faster.

A clean edge slices, not wedges, so you stay in control and blood on the hide stays where it belongs—off your fingers.

4 hunting knives on stump

Sharp steel also means fewer strokes, which matters when daylight fades and the meat has to cool before the pack out.

I’ve watched guys baton through bone to compensate for a lazy edge. That’s a cracked tip waiting to happen. Keep it sharp from the start; save the drama for campfire stories.

Understanding Your Knife: Steel, Grind, and Angle

Steel: 1095 holds a toothy bite but oxidizes if you so much as breathe near salt water. D2? Semi-stainless, stubborn to sharpen but stays keen halfway through an elk. CPM S30V? Slick stuff—vanadium carbides ride the edge like skateboard bearings, so go slow on coarse stones or you’ll skate right past the apex.

Grind: Hollow grinds whisper through hide; full flat likes to wedge in hardwood but splits pelvis clean. Sabre gives spine strength when prying joints. Know which you have—grind controls how the edge thins out toward the apex.

KNIFE BLADE GRINDS DIAGRAM

Angle: Most factory hunting knives sit around 20° per side. I chase 18° on carbons, 22° on tough stainless like 420HC when I expect bone contact. The marker trick tells you the truth: black the bevel, make one light pass, see where the ink’s gone. That’s your real angle, not the catalog’s promise.


Essential Tools and Sharpening Setup

  • Coffee stained 1000/6000 water stone is good middle road.
  • 320 grit diamond plate for the “oh man I hit a rock” days.
  • Leather strop glued to maple, with green chromium oxide compound rubbed in like linseed oil on a gun stock.
  • Fine ceramic rod that rides in the pack; weighs less than a granola bar.
  • Black Sharpie, shop towel, headlamp, and something to catch water—an old baking tray works.
sharpening knife on stone

Sharpening Procedure: From Dull to Razor Edge

1. Fix the flats. Start coarse—320 diamond or 600 if the edge isn’t wrecked. Lay steel down like you’re slicing a tomato-thin slice off the stone. Push away, raise a hair until marker disappears spine-to-edge. Repeat until a wire-thin burr shows the full length.

2. Flip and match. Burr tells you apex reached. Roll it over; chase the same burr to the opposite side. Consistency beats speed. If the knife sounds like sandpaper in stereo, you’re doing fine.

3. Walk up the grits. 1000 smooths, 3000 polishes, 6000 turns reflections into a mirror. Wipe swarf; muddy slurry helps carbides tuck in. Pressure lightens as grit climbs—pretend the blade would bruise if you press too hard.

4. Neutralize the burr. Light edge-leading passes, almost weightless, alternate sides. Feels like shaving peach fuzz off the stone. Finish with two edge-trailing strokes to align grains.

Finishing Touches: Honing, Stropping, and Edge Testing

Run the edge down a ceramic rod at the same angle—two passes each side. On the strop, the spine leads, so draw back like drying a paintbrush. The compound turns black quickly; that’s metal, not dirt.

Edge tests I trust:

  • Arm hair float: blade pops hairs without skin scrape.
  • Phonebook page push-cut: quiet tsssk sound, no tearing.
  • Flashlight glint: shine at the edge; any light reflection = flat spot. Chase it away.


Field Maintenance and Edge Preservation

As previously mentioned, pack a ceramic rod or pocket strop. Ten light licks at lunch keep you from a full re-profile later. In camp, in case you forgot your sharpening stones, you can sharpen the knife up on a coffee mug rim—makeshift ceramic.

Remember, after dressing any game, rinse off any residue and dry on your shirt. If you are carrying any oil, apply a dab of it to the blade.

Troubleshooting: Chips, Burrs, Angle Errors

Micro-chips: Looks like glitter on the edge under a magnifying glass. Drop two grits coarser, apex fresh steel. Steels high in chromium carbides (S30V) chip if you dig into frozen hide; slow down.

Never-ending burr: Likely too much pressure or you’re chasing it in circles. Stop. One light pull on a wood block can snap it off, then strop.

Uneven bevels: You changed angle mid-stroke. Paint the bevel again, correct before polishing or you’ll burn daylight flattening cosmetic mistakes.


How To Sharpen a Hunting Knife [Frequently Asked Questions]

man looking down blade of knife

How often should I sharpen my hunting knife?
Touch up after every animal. Do a full sharpening maybe once a season, depending on the steel and how gentle you are on bone.

Can I use pull-through sharpeners?
I’d rather chew tinfoil. Pull-through sharpeners rip steel, set random angles, and don’t remove burrs cleanly.

What grit should my final stone be?
6000 gives a shaving edge. If you prefer tooth for fibrous hide, stop at 1000 then strop.

Is stropping necessary?
For carbons—absolutely. For high-vanadium stainless, it still refines but gains are smaller. I strop anyway; feels wrong not to.

Best field sharpener?
A 6-inch ceramic rod wrapped in paracord. Lightweight, no water needed, survives backpack abuse.

Now, let’s hope that elk comes in