XOP Ambush Evolution climbing stand review header image

Inside Information | XOP Ambush Evolution Sit-And-Climb Deer Stand Review

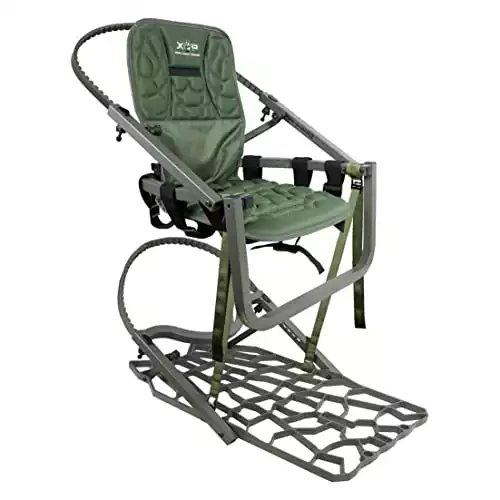
In this review, I cover the XOP Ambush Evolution Sit and Climb stand.

I’ve got some things I like about the stand. I’ve also got some things that I would change, to improve the stand.

So, let’s get to it!

The XOP Ambush Evolution Sit-And-Climb Review

I hunted with this stand several times this year, because I wanted something that would fold down – that wouldn’t have anything in front of me that would inhibit my bow shots.

I’ve used other climbers that have a rail around it that at times gave me problems.

Unpacking the Ambush Evolution

xop shoulder straps

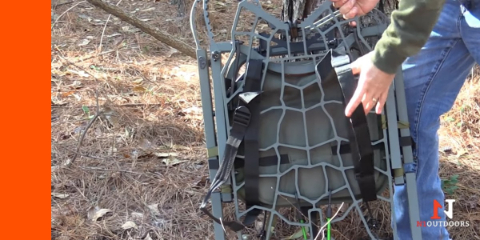
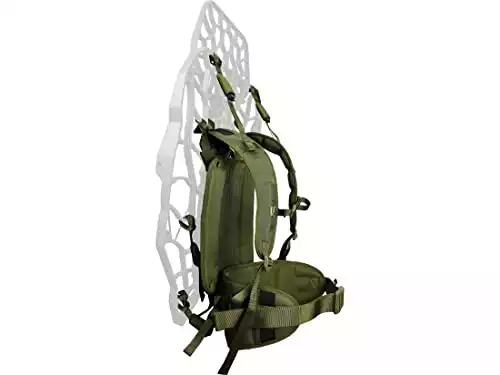
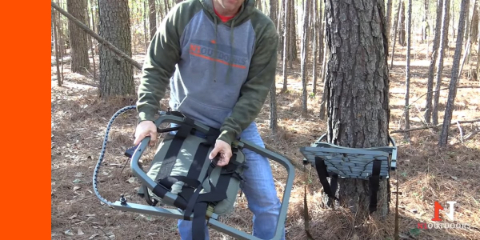
The XOP Ambush Evolution Sit-And-Climb comes packed up really nicely. It has some bungee straps that hold it together well. It and it comes from the factory with some “get you by” shoulder straps. They have XOP sales after-market shoulder strap system as well (see below photo).

xop shoulder straps deluxe

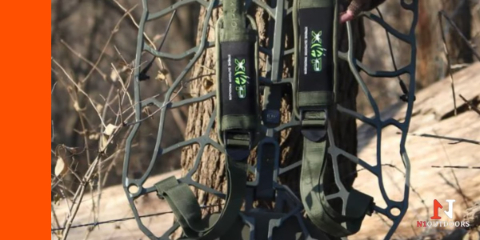
Here’s a look at the more “deluxe” version of the shoulder straps from that you can buy from XOP.


XOP Treestand Transport System
$69.99
Buy Now
We earn a commission if you make a purchase, at no additional cost to you.
09/27/2024 04:13 pm GMT

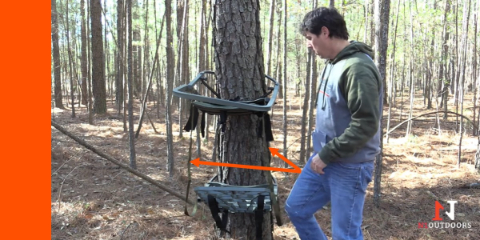
Below, you can see how tightly and compact it is. It’s less than 4″ wide, and when you put it on your back and carry it through the woods, because of the way the bungee strap pulls the cables down, it would not get hung up on vines, brush, or tree limbs.

XOP evolution folded width

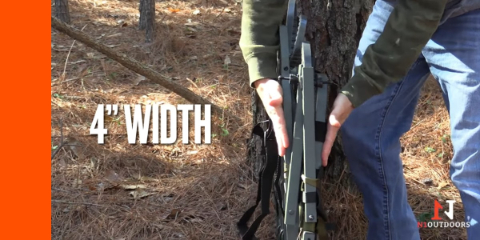
The XOP Ambush Evolution folds up to an incredibly thin 4 inches!

XOP Evolution 18 lbs

One of the best things I like about the XOP Ambush Evolution is the weight. it weighs only 18 lbs and is the lightest stand I’ve ever hunted from.


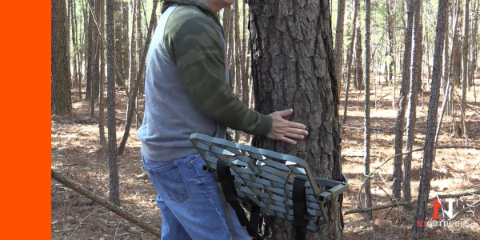
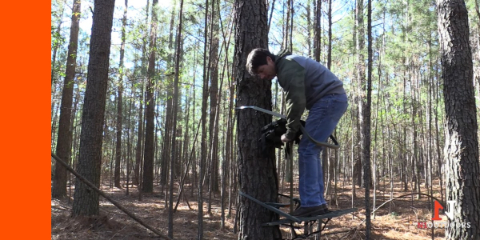
Attaching To The Tree

XOP Evolutions sliding locks

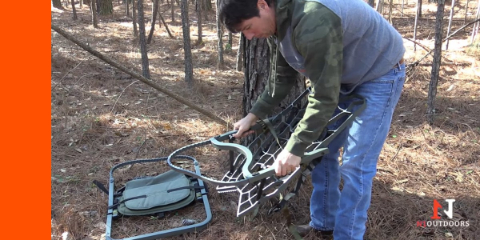
To open the stand from the folded position, you simply slide the knob attachments toward the front of the stand until they stop…

XOP Evolutiions tightening screws

…then, you tighten down the knobs to secure the side bars into place.

XOP Evolution knobs

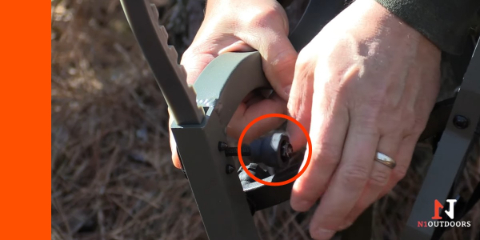
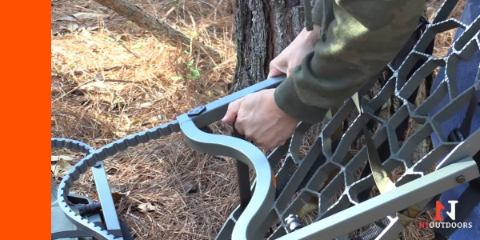
Unlocking and adjusting the strap that goes around the tree is pretty simple… just loosen the knob under the straps, and then push up to disengage. Once you have the strap to your desired length, you tighten the knob back down.


Hydro Flask 12 OZ All Around Tumbler Indigo
$23.42
Buy Now
We earn a commission if you make a purchase, at no additional cost to you.
09/27/2024 05:08 pm GMT

XOP Evolutions danger zone on straps

The yellow “danger zone” is a good reminder not to lock the strap in place this far out.

XOP Evolution attaching bottom part to tree

When attaching to the tree, you need to set the strap circumference so that when you reach your desired height, the platform will be at a 90 degree angle to the tree.

One nice thing about the cables on the Ambush Evolution is that when they’re on the tree, they will get tight, but they don’t dig in like some other types of deer stands, and that’s by design. You don’t want to dig in to the tree and damage it, and possibly kill it.


XOP Evolution attaching bottom part to tree

The stand has a cool feature where the cross brace is curved, which allows easier attachment to the tree as well as easier climbing.

XOP Evolution seat strap

Here’s a look at the top half of the XOP Ambush Evolution before unpacking to attach to the tree.

XOP Evolution putting top half on tree

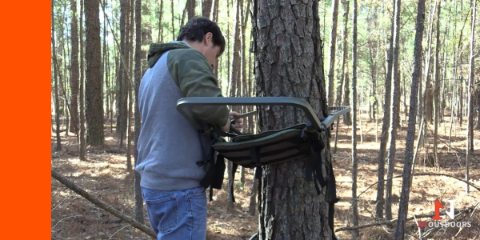
When you wrap the straps around the tree, you realize… boy, those straps nice and quiet!

XOP Evolution Climbing Straps

These straps connect the top half to the bottom half while climbing so that you don’t accidentally drop the bottom half and have it fall down the tree.


Climbing The Tree

getting into the XOP Evolution stand

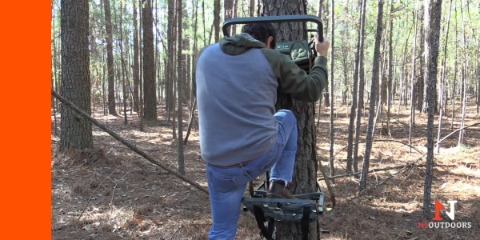
You need to get inside of the top half of the climber to begin your ascent.

xop boot clearance

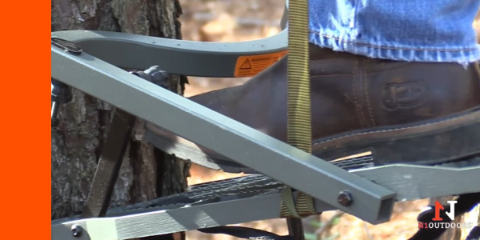
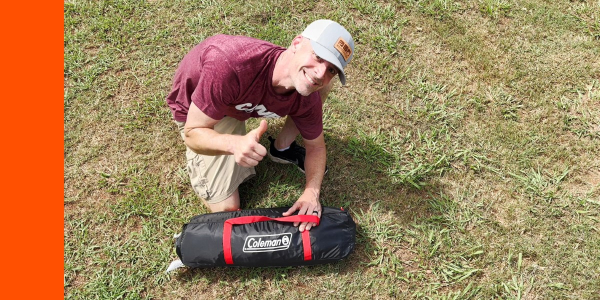
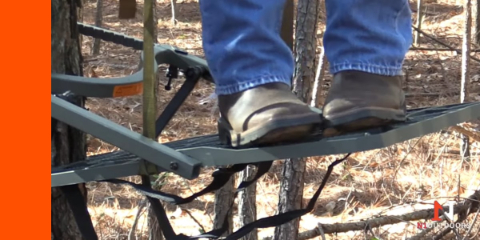
In this review, I’ve got on these cowboy boots. But, that’s not what I hunt in. I prefer to hunt in insulated rubber boots. And this stand doesn’t give a whole lot of clearance between the base of the stand and where you need to get your foot. And my rubber boots don’t go in here very easily.

XOP Evolution feet in bottom part

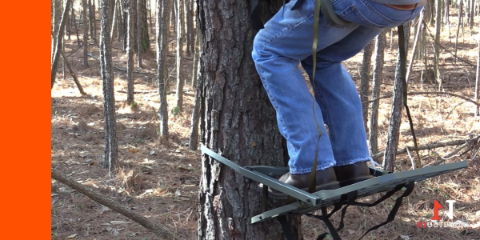
As you sit on the bar, you put your feet under the crossbar… this is how you will lift the bottom portion up the tree…


climbing in the XOP Evolution

and just move the bottom platform up the tree a few feet at a time until you reach your desired height.

XOP Evolution tightening climbing straps

Once you get the stand the height that you want to hunt at, the first thing you do is to tighten the safety straps down as tight as you can get them. This will prevent the top from coming down since it can’t be lifted while strapped tight. And it will keep the bottom connected to the top as well.

sitting in the XOP Evolution stand

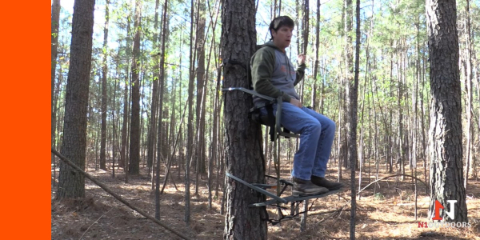
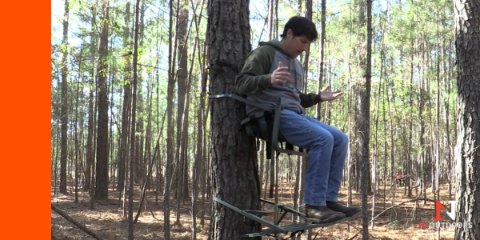
You can see how my knees are just a little bit bent. I’m going to have my bow on a hanger, and I want my legs to have only a little bit of bend in them so whenever I go to stand up, I don’t have as far to go.

The sit and climb bar is designed for bow hunters to step through it and fold it under out of your way.

And that leaves me to one of the things that I would change just a little bit about the stand. I would prefer a larger seat, as my hips are squeezed a bit, due to the size of the factory seat.


If you bowhunt, you know it’s true!

XOP Ambush Evolution Foot space on platform

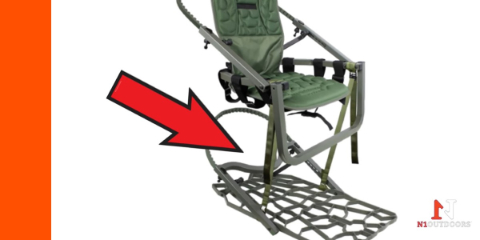
The platform doesn’t give you a ton of room to move around, but again, lightweight is often a tradeoff with size.

XOP Evolution seat

The seat width created a tighter fit on my hips than I would have liked, but there are some aftermarket mesh seat options out there that may help remedy this.

Another “con” to this stand is that the seat is a very tight fit on my hips, and it’s not the most comfortable seat.

Of course, there are gives and takes with how light and portable a stand can be and still be as comfortable as a larger and heavier stand might be.


Final Thoughts On XOP The Ambush Evolution Sit-And-Climb Deer Stand

Overall, I like the Ambush Evolution Sit-And-Climb stand from XOP. It’s performed really well for me on several hunts. This is by far the most compact stand I’ve ever hunted in. I also love how light it is.

The only improvements I would make is foot clearance under the crossbar, as well as the “hip squeeze” I experienced with the factory seat.


I hope this review has helped you make a choice on whether or not you would use this stand. I would recommend it to anybody who likes to run and gun with a light setup, has a good bit of walking to do, or has to carry camera equipment with them. Because the stand is so light, it makes the walk into your hunting spot easier.

Happy hunting, and please always wear a safety harness!

– Josh Wells, N1 Outdoors® Co-Founder

>>Be sure to check out N1 Outdoors hunting shirts HERE!

coleman sun dome 4p tent review header image

Coleman Sun Dome Tent Review [Dark Room Technology… Wait, What?]

When it comes to camping, Coleman is certainly a household name. They make everything from coolers, to grills, to lanterns, and of course tents.

We wanted to take a peek at a household tent name within the Coleman line.

sun dome 4p tent box front

We wanted to check out one of their most popular offerings… the Sun Dome tent!

coleman sun dome 4p tent parts

Here are the components of the Sun Dome 4p tent from Coleman. Pretty simple setup!

Features of the Coleman Sun Dome Tent

coleman sun dome 4p tent box back

The Coleman Sun Dome tent has several advertised features… let’s take a look!

Below are some of the features of the Sun Dome 4P tent from Coleman:

  • Dome tent with a sturdy frame that can withstand winds of up to 35 miles per hour
  • Darkroom Technology, blocking 90% of sun’s light
  • The Sun Dome 4p sleeps up to 4 people
  • Measures 9 ft x 7 ft and has a center height of 4 ft 11 inches
  • Very easy setup, at only 10-15 minutes
  • A great tent for backpacking, as it folds up and packs away into a small carrying bag.
  • Weathertec system with patented welded floors and inverted seams to keep you dry
  • Large windows and a ground vent for superior ventilation
  • Measures 7 x 5 feet with 4-foot center height
  • An “E-Port” that makes it easy to bring in electrical power inside the tent
  • Average Price $125-$140
  • Comes with a 1-year limited warranty


Coleman Sun Dome 4p Tent Setup

coleman sund dome 4p tent two-pole setup

Setup was not difficult to figure out, with the tent only needing to be staked down and the two poles inserted.

Coleman Sun Dome 4P Tent 10-15 min setup time

It took about 10-15 minutes (without reading directions) to set up the Sun Dome 4P tent.

coleman sundome 4p tent side view

The weather dome cover was very easy to install, using only one short pole and some tie downs.


“Darkroom Technology” Inside A Tent Box?

coleman sun dome 4p tent box darkroom technology

One of the features we were most interested in was the “Darkroom Technology,” which Coleman advertises as blocking 90% of the sun, so you can sleep better once the sun comes up, or even go to bed early!

coleman sun dome 4p tent front tent logo

We headed inside the tent to see what this “darkroom technology” was all about…

sun dome 4p tent light coming through

The tent material did block a lot of the sunlight, with the mesh screen being where most of the light seemed to be coming in.


Check out our YouTube video of setting up the Coleman Sun Dome 4p tent!


Final Thoughts on the Coleman Sun Dome 4p Tent with Darkroom Technology

We picked an extremely hot and sunny day to set up the Coleman Sun Dome 4p tent. However, that turned out to be perfect, because we were able to get a good feel for how much light and heat the Darkroom Technology blocks.

Well, it was still really hot inside the tent. And, while we didn’t have any kind of light meter to test the light level, it was in fact significantly darker inside the tent.

coleman sun dome 4p tent pack

The Sun Dome 4p tent folded up nice and neat and went right back into the small carrying bag fairly easily!

All in all, the Sun Dome 4p tent seems like a great tent for the money!

Happy camping!

best stoves for backpacking header image

Hot And Light! | The Best Stoves for Backpacking

Backpacking is one of the most unique ways to experience the outdoors. By accessing some of the world’s remote areas, you can certainly experience unforgettable moments outdoors.

However, backpacking is tough and requires a fair bit of knowledge and gear.

man backpacking in the wilderness

There are many camping stoves for backpacking on the market, and you need one that is reliable and of high quality. After all, these directly affect whether you can eat hot food on the trail or not.

One of those important pieces of gear is… a stove.

So, let’s take a look at best camp stoves for backpacking!

MSR PocketRocket

MSR pocketrocket backpacking stove

The PocketRocket stove from MSR is compact, structurally sound and efficient.

We will kick off the list with one of the most common backpacking stoves on the market… the MSR PocketRocket.

If you walk up to any campsite on the trail, there is a good chance they are cooking with the PocketRocket or a similar MSR model.

This is because the PocketRocket is efficient, versatile and easy to use.

As compared to other backpacking stoves of this size, this one comes in near the top. The PocketRocket is pretty compact, and has decent structure to keep the pot stable.


MSR PocketRocket 2 Ultralight Camping and Backpacking Stove
$45.99
Buy Now
We earn a commission if you make a purchase, at no additional cost to you.
09/27/2024 06:08 pm GMT

It’s an overall steady camping stove and has good marks on about every subset you can apply to it.

However, one of the faults of the PocketRocket is the ignitor.

There are many reviews that say that the built-in ignitor is not reliable and does not work after a certain amount of time. So, always have a backup plan with matches or a lighter.


Jetboil Flash

jetboil flash stove for backpacking

The Jetboil stove is engineered to boil water and other liquids quickly, giving you a fast hot drink or additive to dehydrated food.

One of the newest types of backpacking stoves is the Jetboil.

Jetboil is a brand of compact and efficient camp stoves that are perfect for those who want to save space and quickly heat up food.

The Flash model specifically is one of the best, but there are other models to fit various budgets.

What makes the jetboil different is the amount you can cook and how fast it happens.

The Jetboil pot is specifically made for boiling water quickly. Then, you can apply this water to dehydrated food or whatever else you need cooked.


Jetboil Flash Camping Stove Cooking System, Carbon
Buy Now
We earn a commission if you make a purchase, at no additional cost to you.

Traditional camp stoves allow an open pot to sit on top to cook the food, but the entire Jetboil design is to specifically boil liquids very quickly, which is different.

The biggest drawback to the Jetboil is the amount of liquid that can be heated up at once. It is a small pot and really only serves one purpose.

So, if you want something that will make coffee or just enough water to add to a bag of dehydrated food, Jetboil is the stove for you.


Jetboil Genesis Basecamp Camping Stove
$299.95
Buy Now
We earn a commission if you make a purchase, at no additional cost to you.
09/27/2024 05:57 pm GMT

MSR WhisperLite Universal

whisper lite stove for backpacking

The WhisperLite Universal camp stove is a pricier option, but is known for quality and reliability.

MSR is making another appearance on our list with the WhisperLite Universal camp stove.

This is a pretty high-end backpacking stove, as it carries a heftier price tag than many other stove options out there.

However, MSR carries a reputation and product quality control system that guarantees a good experience for a majority of users.


The WhisperLite uses a hosed approach that puts the burner and stand right on the group and not on top of a fuel can. This adds stability and improves performance.

Going with an MSR stove with MSR fuel optimizes performance on the trail. This is important, as on longer treks it is not only crucial to have proper nourishment, but to have a stove that is reliable and steady.


Msr Whisperlite Universal Stove One Color One Size
$189.99
Buy Now
We earn a commission if you make a purchase, at no additional cost to you.
09/27/2024 06:19 pm GMT


Soto WindMaster

soto windmaster camping stove

For the price-conscience backpacker, the Soto WindMaster is not only affordable but super light, weighing in at only three ounces.

Our pick for the most efficient backpacking stove for the price is the Soto Windmaster.

For what you get, the Windmaster is a very affordable backpacking stove.

When a normal backpacking stove is faced with strong wind, the light will either go out, or the flame is so altered that cooking is slowed dramatically. But, as the name implies, the Windmaster is made to work well during high winds.

The stove itself is just three ounces, which is super light. The only other weight would be the isobutane or propane bottle that screws into the bottom of the bracket.


SOTO WindMaster 4-Flex Stove
$69.95
Buy Now
We earn a commission if you make a purchase, at no additional cost to you.
09/27/2024 06:47 pm GMT


The brackets on the burner are not the best, but you are reducing weight, which is a plus for backpacking.

If you are trying to save a lot of weight and may be hiking in windy areas, the Soto WindMaster is for you.


BRS Ultralight Camping Burner

BRS ultralight camping stove

The BRS Ultralight Burner is certainly super light, but is often outperformed by other backpacking stoves on the market.

One of the more unique offerings is the BRS Ultralight Camping Burner.

This “stove” is not the whole setup, but rather an attachment that goes on top of a propane bottle.

This helps you save money and overall weight. However, while you might be saving money, you may also be sacrificing better performance that can be found in other backpacking stoves.

The Ultralight requires a source of fuel. This burner screws right to the top of a fuel bottle, and you can then add your pot or anything else being cooked. The attachment is not super strong, but it is just about as light as it gets.


BRS Outdoor BRS-3000T Ultra-Light Titanium Alloy Miniature Portable Picnic Camping Gas Cooking Stove (1 pc)
$16.95
Buy Now
We earn a commission if you make a purchase, at no additional cost to you.
09/27/2024 05:44 pm GMT


Solo Stove Lite

solo stove lite camping stove

The Solo Stove Lite is truly a light option because it doesn’t have a fuel source, but instead is wood burning.

Another one of the more unique stoves on the market is the Solo Stove Lite.

This is the only srove featured that is wood-fired and does not use a different source of fuel like propane.

So, if you are more of a traditionalist and want to connect with nature in a unique way, the Solo Stove Lite is a good camp stove option.


The Solo Stove is a steel cylinder that holds small pieces of wood and has air intake holes on the bottom to help you regulate temperature and steady burning.

This is a very light option, coming in at just nine ounces. Although you will save weight in your pack by not using fuel, you will need to either pack in wood or camp in areas with reliable wood sources.


Be careful how this is used, as many places will not allow campfires because of droughts and wildfire hazards. This probably does not classify as a “campfire,” but whenever using a live flame, it is best to check with someone and make sure it is okay to do so.


Final Thoughts On Best Stoves For Backpacking

Hopefully this list has helped you make an informed decision on which stove you should make it into your backpack on your next adventure.

So, whether you are backpacking hunting or just out adventuring and enjoying God’s creation, be sure to soak up the memories and stay warm!