Have you ever wanted to learn how to make your very own European mount of your recent big game harvest But weren’t sure where to start? We’ll show you how easy it is!

The European mount is a great option for a buck you won’t be taking to the taxidermist. And, it can be done very inexpensively.
The European Mount | A Great DIY Opportunity
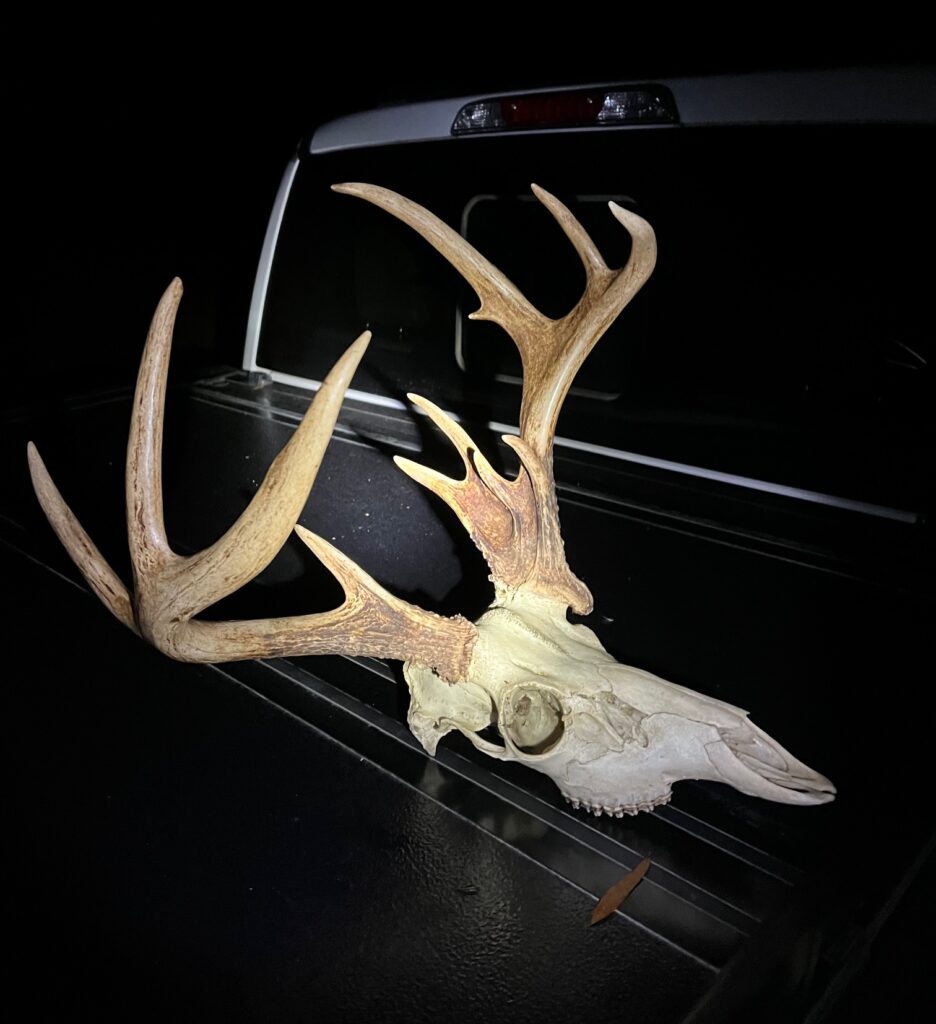
On a recent bow hunt trip to South Georgia, my partners and I had identified a wide 6-point with spindly antlers and very small brow tines, as a buck that we felt like would be a good one to go ahead and harvest if given the opportunity.
Well, that opportunity presented itself the very next morning, as I was able to able to take this buck with my bow at about 12 yards, which is always fun and always a blessing.
However, this management buck was not one I was going to take to the the taxidermist.
So, we felt like this would be a great opportunity to show those of you at home how to do your very own European mount.
The “euro mount” process is not near as difficult as it might seem. You can do the entire process as home for as little as $10.
How Much Will It Cost To Do A European Mount?
You might be wondering, how much will it cost to do a European mount? Well, if you’re willing to do it yourself, you can use some supplies you already have around that house and most likely do your own for about $10!
So, let’s take a look at what you’ll need…
Supplies You’ll Need To Make A European Deer Mount
We’ve got a few essential materials that you will need to do European mount. I will go through those with you in just a second.
I want you to know that I’m not a taxidermist. I’m not a professional doing this. But, I have done it several times and over the years and through trial and error, have figured out some of the best practices in doing a Euro mount.
It doesn’t have to be expensive! You can make your own Euro mount for around $10!
I’ve gotten the product where it has turned out almost as good as what you would get from a taxidermist. So, hopefully this video helps you out.
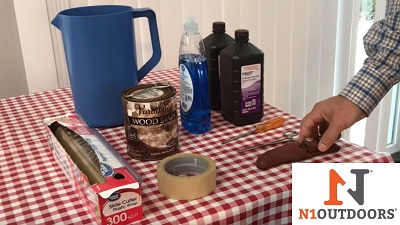
A few supplies that you are going to need to the European mount are obviously, a knife to skin the head from the skull, a good set of forceps, a screw driver.
You will also need two quarts of hydrogen peroxide and some liquid dish soap. You’ll also need some dark wood stain, masking tape, clear shrink wrap, and a pitcher or a big cup to add water to the pot as it’s boiling.
- Knife for skinning
- Forceps
- Screwdriver
- 2 Quarts Hydrogen Peroxide
- Liquid Dish Soap
- Dark Wood Stain
- Masking Tape
- Clear Shrink Wrap
- Water Pitcher
How To Make A Euro Mount Step-By-Step
In just 5 hours, you can have a European mount for your deer skull that you can be proud of.
Time needed: 5 hours
How to do your own European mount…
- Remove the skin of the deer head
Using your knife, remove the skin from the deer head and remove the lower jaw.
- Boil the skull
Add 1/4 cup (for other measurements, you can convert ml to mg also) of liquid dish soap to the water in the pot you will boil the skull in. On a very slow boil, simmer the skull for 4 hours.
- Remove tissue
After you remove the skull from the water, use your knife and forceps to remove eyes, tissue and tendons from the skull. Use the screwdriver to remove the ear buds so you can access the brain cavity. Remove the sinus tissue with the forceps. Use a water hose to spray in the brain cavity to remove the brain tissue.
- Add Peroxide
Add 2 quarts of hydrogen peroxide to your boiling water.
- Wrap antlers
Use shrink wrap to wrap around the bases of the antlers to protect them from being bleached. Secure the plastic wrap with masking tape.
- Boil skull again for 30 minutes
Put the skull back in the water containing the peroxide for another 30 minutes.
- Remove shrink wrap and touch up as needed
Remove the deer skull from the boiling water and touch up the bases of the antlers with the dark wood stain if there has been any bleaching.
Read a more detailed set of instructions on making the Euro mount in the sections below:
-
N1 Outdoors® Tine Lines™ Elk Antler Tee
Price range: $26.99 through $29.99 Select options This product has multiple variants. The options may be chosen on the product page -

N1 Outdoors® Just Pass’N Through™ Bowhunting Tee
Price range: $24.99 through $28.99 Select options This product has multiple variants. The options may be chosen on the product page -
N1 Outdoors® Word Cloud Tee (Heather Orange)
Price range: $22.99 through $28.99 Select options This product has multiple variants. The options may be chosen on the product page
Time Requirements
This whole process will take about 5 hours. You will boil the skull on a very low boil for 4 hours. Then, you’ll need to budget about 30 minutes or an hour for cleanup and for bleaching the skull (bleaching will take about 30 minutes.)
The key to the process is the 4 hour boiling time. If you do it for 3 hours, it’s not going to come off as good. Slow simmer for 4 hours works best. If you boil it too hard, it’s going to weaken the bone and you’re going to break some bones. So, be sure it’s a slow simmer. Don’ try to do it too fast.

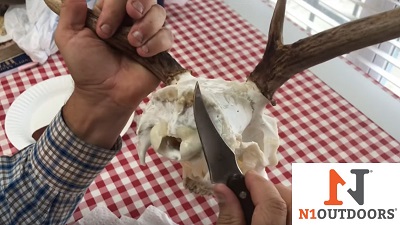
Remove Meat and Tendons
After boiling, remove the eyes and the tissue from the skull.
After 4 hours of boiling the skull in the liquid dish soap, the meat around the skull will be very tender. You just work your knife in and remove the meat and the tendons as best as you can. Much of the meat will just fall away during this process.
You don’t want to get too aggressive with it because you can pop a bone loose.
The most aggravating part is around the eye sockets because all the eye sockets connect to the inside of the skull in the brain (we’ll cover how we are going to get the brains out shortly) and it makes them a little bit harder to get to.
Remove The Ear Buds
All After you’ve gotten all the meat scraped off, it’s now time to pop the ear buds out. This is how we get the brains out.
Take your screwdriver and work it around in the ear buds and pop them out.
Remove Sinus Tissue
Remove the sinus tissue from the from the skull with forceps.
Now use the forceps to remove all the sinus tissue.
You need to get everything out of the sinus cavity because anything that you leave, will cause the bone to turn yellow. It may take two or three years for it to happen, but I’ve had it happen.
Be gentle while the skull is hot, because if you are too rough while removing the tissue, you could break the bone.
And, if you do break the bone, don’t worry. Sometimes the bones at the bottom of the nose will come loose if these tendons get cooked too long. If they do, you can put them back with super glue. So, don’t worry if they come off. You can super glue them back.
Get as much of the sinus tissue as you can from the front side and then you can get the rest under the brain cavity.
Remove The Brain
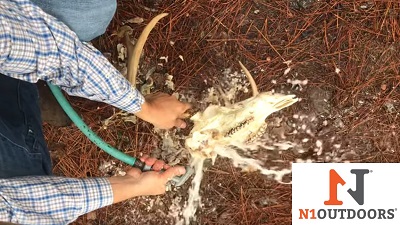
Use a water hose to rinse out the brain cavity.
Once you get the ear buds popped out and you get the sinus cleaned out, you’re going to need a water hose to rinse out the brain tissue.
Some people will use a pressure washer for this step. I don’t like using a pressure washer because if you’re not careful, you can damage the bone.
Put the water hose into the hole where the brain is located and flush out the brain matter. Anything left over will break loose once we boil the skull for the second time in the peroxide.

Prep Antlers And Boil Skull In Peroxide
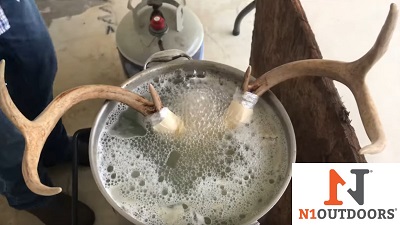
Wrap antlers in shrink wrap and masking tape and boil a second time for 30 minutes.
Once you are finished rinsing the brain matter out of the brain cavity, it’s time to boil the skull for a second time in order to bleach the bone white.
Add two quarts of hydrogen peroxide to the existing pot of water.
NOTE: Some people will ask, “can I use bleach on the euro mount instead of peroxide?” You should never use bleach on your Euro mount, as it will erode the bone. So, stick with the peroxide!
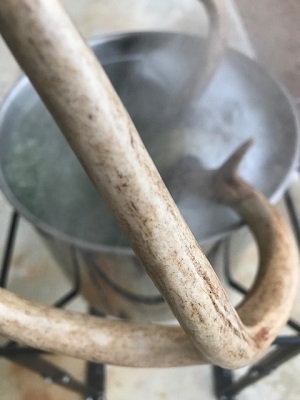
Wrap the base of each antler tightly with shrink wrap and secure it with masking tape. There’s not really any particular way that you need to do this other than to just get them wrapped from the base up to the bottom of the brow tine.
Once the skull is placed into the boiling water, the plastic wrap will shrink tightly to the antlers and keep out the majority of the water. Some water may find its way through and that’s why we have the dark stain.
We can come back and if some of these darker parts around the base get bleached a little bit, we just use a q-tip to re-color it and you’ll never know the difference.
Once the antlers have been adequately wrapped, place the skull back into the boiling water and peroxide for 30 minutes.
The Finishing Touches
After the 30-minute boil in the peroxide and water, remove the skull and take the plastic wrap off.
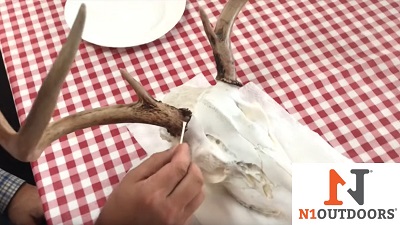
Touch up any bleached areas of the antler base with wood stain and Q-Tip.
The plastic wrap will seem sticky and gummy, sticking tightly to the antlers. And, that’s what you wanted to do because that keeps the peroxide off of the antlers and prevents it from bleaching.
If there has been any unwanted bleaching on the base of the antlers, use a very small amount of the dark wood stain and apply to those areas with a q-tip. You can repeat as many times as you like to get the desired darkness.
But, how do you get the skin off the skull initially?
I wanted to go back and cover the preparation process of the skull before you even start to boil it.
Obviously, you have to cut the deer’s head off. And preferably, you would want to cut it at the last vertebra that connects to the back of the skull. (Normally what happens because the deer’s neck and ears compressed on the spine, is that most people naturally cut about one vertebra back, so you have to two things to cut off before you can start boiling the skull.)
-
Sale!
Put A Hook N1™ Offshore TriBlock Leather Patch Hat
Original price was: $26.99.$15.00Current price is: $15.00. Select options This product has multiple variants. The options may be chosen on the product page -
N1 Outdoors® Deer Antler Leather Patch Hat (Brown/Khaki)
$29.99 Select options This product has multiple variants. The options may be chosen on the product page -
N1 Outdoors® Thwack ‘Em™ Leather Patch Bowhunting Hat (Black/Gray)
$29.99 Select options This product has multiple variants. The options may be chosen on the product page
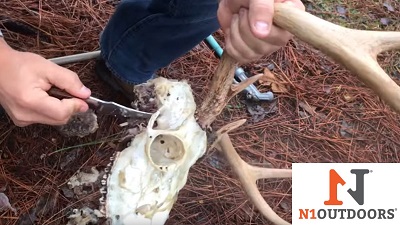
To remove the last vertebra, cut just behind the brain lobe as pictured here.
The place you want to be careful about is this lobe on the back of the skull where the brains are. Be careful not to cut into that lobe. Just use it as a guiding point as you cut. Once you cut around it, you will be able to remove the last vertebra.
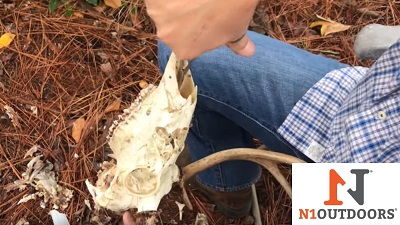
But while the deer head is lying on the ground, get your knife between the teeth and just cut back toward the back of the head. There’s going to be meat back there, so you want to cut that on both sides, so that you can open the deer’s mouth.
Once you’ve cut, pull the jaw all the way back until the bones that joined up under the brain cavity are loosened. Then then you can remove the meat from around those bones and pop that bottom jaw off.
Now, you are ready to start boiling!
How To Do A Euro Mount Without Boiling
If you’re looking to create a clean and polished euro mount for your deer skull without using the boiling method, there are some alternative approaches that can be just as effective without having to boil the skull.
Euro Mount Soak Method
So, let’s take a look at how to make a euro mount with the soaking method…
Materials Needed:
- Bucket or large container
- Enzyme-based degreasing agent (e.g., Dawn dish soap or specialized skull degreaser)
- Hydrogen peroxide (3% or 12%)
- Water
- Paintbrush
- White vinegar
- Soft cloth or towels
- Plastic gloves
Instructions:
- Initial Cleaning and Degreasing:
- Remove Excess Flesh: Much like you would if you were using the boiling method, use knife or pliers to carefully remove as much flesh and tissue from the skull as possible.
- Soak in Enzyme Solution: This process helps to remove oils from the bone, which is crucial for achieving a clean, white appearance. Fill a bucket or container with a mixture of water and Dawn dish soap or a specialized, enzyme-based degreasing agent. Submerge the skull in the solution and let it soak for several days to a week. The enzymes will break down and loosen remaining flesh and connective tissues, much like boiling would. This method just takes longer. Change the water and soap mixture daily.
- Scrub and Rinse:
- After soaking the skull, use a soft brush to gently scrub it, and be sure to focus on any areas where tissue remains. Be cautious not to damage the bone.
- Rinse the skull thoroughly with clean water to remove any loosened debris.
- Hydrogen Peroxide Whitening:
- Prepare the Whitening Solution: Once the degreasing is complete and the skull is dry, apply hydrogen peroxide (3% for a milder effect or 12% for more intensive whitening) to the entire surface of the skull. You can use a paintbrush to ensure even coverage.
- Let it Sit: Allow the hydrogen peroxide to sit on the skull for several hours or overnight. This will help to whiten the bone and remove any remaining stains. Avoid using bleach, as it can damage the bone and make it brittle.
- Final Rinse and Drying:
- Rinse the skull thoroughly with water to remove any residual hydrogen peroxide.
- Pat the skull dry with a soft cloth or towel and let it air dry completely in a well-ventilated area. Ensure it is thoroughly dry before handling or mounting.
- Optional Sealing:
- For added protection and to enhance the appearance, you can apply a clear acrylic sealer. Use a spray or brush-on sealer to give the skull a finished look and protect it from environmental damage.
Although the above method takes longer than boiling, it keeps you from having to smell the odor that boiling a deer skull can create.

How to Do a Euro Mount Using Beetles
Another interesting, yet effective method for doing a European deer skull mount is to use beetles.
Wait what?
Believe it or not, you can actually use beetles to clean your deer skull if you don’t want to use the boiling method!
That’s right, dermestid beetles can be used to remove the flesh from the skull efficiently and thoroughly. This process is often favored by taxidermy professionals for its precision and effectiveness.
So, here’s a step-by-step guide to achieving a pristine euro mount using beetles:
Materials Needed:
- Dermestid beetles (or a beetle colony)
- Large container or tub
- Gloves
- Mask (to avoid inhaling dust or debris)
- Soft brush
- Hydrogen peroxide (3% or 12%)
- Water
- Plastic sheeting or old towels
Euro Mount Beetle Method Step-By-Step:
- Preparation:
- Acquire Your Beetles: Dermestid beetles are expert skull cleaners! If you don’t already have a beetle colony, you may need to purchase one from a taxidermy supply company or online. They are typically sold as larvae or even as adult beetles.
- Set Up a Containment Area: Prepare a large, well-ventilated container or tub where the beetles can work. Ensure the area is easy to clean and that it is secure to prevent beetles from escaping. The last thing you want is to have beetles get in your house!
- Initial Cleaning:
- Remove Excess Tissue: Before introducing the skull to the beetles, manually remove as much flesh and connective tissue as possible, just as you would in the previous two methods we’ve covered abov. This helps to speed up the cleaning process and makes the job easier for the beetles.
- Introduce the Skull:
- Place in Container: Put the prepared skull into the beetle container. The beetles will begin to feed on the remaining flesh and cartilage.
- Monitor the Process: Regularly check the skull and the beetles. Depending on the size of the beetle colony and the complexity of the skull, cleaning can take anywhere from a few days to a couple of weeks. Be sure to keep the beetles well-fed and provide them with the approriate temperature and humidity to maintain their health and efficiency.
- Cleaning and Rinsing:
- Once the beetles have cleaned the skull to your satisfaction, carefully remove it from the container.
- Use a soft brush to gently remove any remaining debris and beetle frass (waste). Rinse the skull thoroughly with water to ensure all beetle residue is gone.
- Degreasing:
- Prepare Degreasing Solution: Soak the cleaned skull in a mixture of water and a degreasing agent like Dawn dish soap for several days to remove any remaining fat or oil residue left on the skull.
- Change Solution Regularly: Refresh the degreasing solution daily to ensure thorough cleaning. This step is crucial for preventing the skull from developing a greasy appearance over time.
- Whitening:
- Apply Hydrogen Peroxide: After degreasing and drying the skull, apply hydrogen peroxide (3% for mild whitening or 12% for a more intense effect) to the entire surface. Use a paintbrush to apply it evenly.
- Let it Sit: Allow the peroxide to sit for several hours or overnight to achieve the desired whiteness. Be sure to handle the skull in a well-ventilated area and avoid direct sunlight, which can degrade the peroxide.
- Final Rinse and Drying:
- Rinse the skull thoroughly with clean water to remove any residual hydrogen peroxide.
- Pat the skull dry with a soft cloth or towel and let it air dry completely in a well-ventilated area.
- Optional Sealing:
- For a finished look and added protection, you can apply a clear acrylic sealer to the skull. This will help preserve the bone and enhance its appearance.
Using beetles is a highly effective method for cleaning skulls. Much like the soaking method we covered above, it provides a meticulous and thorough cleaning without having to boil the skull, all while providing equivalent cleaning and final results.

Final Thoughts On DIY Euro Mounts
We hope you’ve enjoyed this instructional article and video on how to do your very own European mount. We hope you have a great deer hunting season, and remember… where moments happen, we’ll meet you there!
Euro Mount Instructional Video
BONUS: Watch N1 Outdoors® co-founder, Josh Wells, teach you the Euro mount process, step-by-step! Be sure you watch to the end of the video where Josh teaches you how to prep the head and the skull for this process that he shows you. We hope you learn something. Link below… enjoy!
Did everything right to the letter, it turned out beautiful! Thank you so much!
Glad to hear Richard! Thank you for visiting our site!
Trying it tomorrow. Thanks for the info.
Good luck and send us picture of the finished product! We’d love to see it!
Followed your instrucructions and i couldnt have asked for a better end product. Thank you for taking the time to make the video and instructions!
So glad to hear that Philip. Thank you for visiting N1outdoors.com!
Why do you reuse the boiling water? Does it not work as well if you use clean water? Thanks
You can empty water and bleach with clean water, it’s just not necessary.
Started at 7:30 done at 2:00 worked great thanks for all the great information.
Glad to hear! Thank you for reading N1outdoors.com!
How do you dispose of the peroxide water when done? Is it safe to pour in the yard?
At that strength and dilution, you should be ok to pour out. Maybe don’t pick the prettiest part of your yard 🙂
Can you use bleach instead of peroxide
Don’t use bleach when making a euro mount. The bleach will break down the bone. Stick with peroxide… Thank you for reading!