Some fishing trips are worth planning years in advance. For fly anglers, there are rivers, lakes, and flats that stand out because of the quality of fishing, the setting, and the overall experience. These locations often combine reliable fisheries, knowledgeable guides, and comfortable lodges in locations that feel far removed from everyday life.
But what defines a true bucket-list fishing destination? Well, that depends on each angler’s preferences and the species of fish they want to pursue. Still, for a trip to feel truly memorable, an all-inclusive, lodge-based experience is hard to beat.
Often guide-led and set on productive local waters, these trips offer a balance of comfort, service, and serious angling – without the guesswork of planning every detail. Whether you’re wading a shallow flat for bonefish, drifting a wild river for trophy rainbows, or stalking sea-run browns in remote estuaries, these are fishing adventures that stand the test of time.
From Alaska’s salmon-filled rivers to Patagonia’s legendary trout waters, and from bonefish flats in the Bahamas to the remote atolls of the Seychelles, certain destinations stand out as true bucket-list experiences. This guide highlights when to go, what species to target, and how lodge-based trips can make your adventure unforgettable.
Wild Trout an Salmon In Alaska – Lodge Based Fly Fishing
Alaska remains one of the most varied and productive fisheries in the world. Bristol Bay’s rivers and lakes hold all five Pacific salmon species, trophy wild rainbow trout, Arctic char, and grayling. The Naknek River is famous for its large rainbows, while the Kvichak delivers consistent action for salmon and trout from June through fall.

Many lodges in Alaska operate fly-out programs, giving anglers access to a variety of rivers, creeks, and lakes within a short flight. This flexibility allows guests to target different species and water types as conditions change, whether casting flies for kings in early summer or sight-fishing for trout in clear-water tributaries later in the season.
On the Kenai Peninsula, lodges provide access to prolific salmon runs and big resident rainbows. Daily float trips, jet boat runs, and walk-and-wade options make this area a strong choice for anglers who like to mix techniques or who are seeking a more active adventure.
Fishing Shirts you’ll love from N1 Outdoors!
-
Put a Hook N1™ UPF 50+ Redfish Performance Fishing Shirt
$15.00 -
N1 Outdoors® Royal Flush™ UPF 45+ Performance Fishing Shirt
$19.00 -
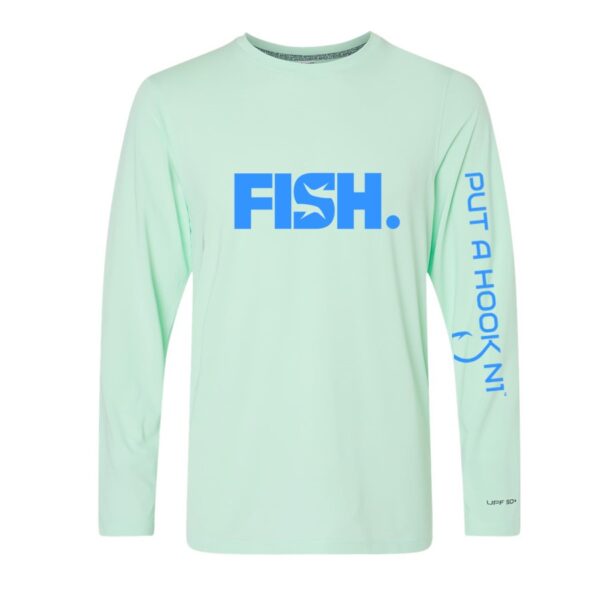
N1 Outdoors® FISH. Performance UPF 50+ Shirt
Price range: $37.99 through $39.99
Patagonia’s Rivers and Lakes – Trophy Trout Lodges

Patagonia’s trout waters stretch across both Argentina and Chile, with a wide range of lodges serving rivers, spring creeks, and large glacial lakes. In the Neuquén region, rivers like the Limay and Aluminé produce excellent summer hatches, with browns and rainbows feeding hard on the surface. Multi-day float trips are a highlight here, often with overnight camps or lodge-to-lodge itineraries.
Further south, Santa Cruz Province is known for its big stillwaters, including Lago Strobel (better known as Jurassic Lake) where rainbow trout can reach remarkable sizes. While access here is limited to a small number of outfitters, across Patagonia there are many more lodges offering diverse programs that combine lake and river fishing.
At the southern tip in Tierra del Fuego, the focus shifts to sea-run brown trout. From January through April, fishing is available to target these powerful fish as they enter the Rio Grande and other rivers, and experienced guides help anglers adapt to the subtle changes in conditions that can make all the difference.
Bahamas – Saltwater Flats Fly Fishing
The Bahamas are one of the world’s classic flats destinations, with islands like Andros and Abaco offering endless shallow waters that hold strong populations of bonefish. These flats are often within sight of your lodge, making for easy daily access and plenty of time on the water.

While bonefish are the main target, certain areas also provide opportunities for permit and tarpon, giving anglers the chance at a flats “grand slam.” Conditions are best from October through April, when weather patterns are more stable and water temperatures are ideal.
Lodges range from simple, family-run operations to full-service resorts, but the focus is always on clear water, sight-fishing, and the thrill of spotting tailing bonefish across wide, open flats.
Seychelles – Remote Fisheries and Various Species
The Seychelles offer one of the most unique saltwater fly fishing experiences in the world. Remote atolls hold bonefish, giant trevally, milkfish, triggerfish, and Indo-Pacific permit – species that demand quick, accurate casts and strong tackle.

When timed right, the Seychelles deliver some of the most memorable saltwater flats fishing available anywhere. Small groups, experienced guides, and untouched waters make each trip feel both remote and special.
While fishing is possible year-round, the prime window is October through May, when lighter winds and calmer seas provide the best access to the flats. During the southeast monsoon from June to September, stronger winds can make travel and fishing more challenging. Alphonse Island is a notable exception, offering year-round fishing thanks to its more sheltered location.
When To Take Your Fly Fishing Trip

Timing matters. Fish behavior, weather, and even lodge availability change through the year. So, picking the right season can make the difference between a fair trip and a great one.
- Alaska (Jun–Sep) – From Bristol Bay to the Kenai systems, all five Pacific salmon species return during summer, fueling the ecosystem. June is the prime time for king salmon, while August and September bring big rainbow trout and Arctic char feeding heavily behind spawning salmon. Early and late in the season can also mean fewer anglers on the water.
- Patagonia (Nov–Apr) – Across southern Argentina and Chile, rivers such as the Limay and Aluminé see long summer days, steady insect hatches, and trout feeding actively on the surface. Lakes and spring creeks add variety, and the austral summer offers the most reliable conditions for anglers targeting wild browns and rainbows.
- Bahamas (Oct–Apr) – This is the most reliable season for flats fishing, with stable weather, comfortable temperatures, and good light conditions. Bonefish are the main draw across islands like Andros and Abaco, with occasional opportunities for permit and tarpon, depending on the area.
- Seychelles (Oct–May) – While some destinations like Alphonse operate year-round, the most reliable fly-fishing season across the Seychelles’ outer atolls runs roughly from October to mid-May. The calmer northwest monsoon during this period brings steadier, lighter wind and better casting conditions, ideal for targeting species such as bonefish, giant trevally, milkfish, triggerfish, and Indo-Pacific permit
Tip: traveling just before or after peak season often means fewer people and lower costs, with good fishing still available.
How To Choose Your Fly Fishing Lodge
A bucket-list fly fishing trip isn’t just about the fishing – it’s about finding the right destination and lodge to match your style. When evaluating options, consider:
- Species Focus – Do you want variety (salmon, trout, grayling) or a single target (like sea-run browns)? Some lodges specialize narrowly, while others offer daily variety.
- Guiding Philosophy – Are you seeking one-on-one coaching, or do you prefer a more independent style where guides simply put you in the right spot?
- Accessibility – Fly-out lodges in Alaska or boat-access atolls in the Seychelles can add adventure, but also cost and complexity. If convenience matters, look for road-access lodges near regional airports.
- Lodge Experience– Some focus on rustic authenticity, others on luxury comforts. Decide whether you want fine dining and spa options, or a simpler camp that maximizes fishing time.
- Sustainability & Conservation – Increasingly, lodges are adopting catch-and-release policies, habitat projects, and community partnerships. Supporting these operations ensures the fishery remains world-class for the future.
Mistake to avoid: Don’t choose a destination only for its trophy-size catch potential. A memorable fishing trip is about more than just the size of the fish. The quality of guides, the variety of water, and even non-fishing amenities often play a bigger role in how enjoyable the experience will be.
How To Communicate Directly With Fishing Lodge Owners Worldwide
Don’t choose a destination only for its trophy-size catch potential. A memorable fishing trip is about more than just the size of the fish. The quality of the fishing guides, the variety of water, and even non-fishing amenities often play a bigger role in how enjoyable the experience will be.
Whether your dream is chasing salmon in Alaska, stalking trout in Patagonia, or wading the tropical flats of the Bahamas or Seychelles, the right lodge can turn a good trip into an unforgettable one.
Sites like Fishing Explora offer offers a curated selection of premium fly fishing lodges and destinations worldwide, where members can directly contact lodges to plan their next adventure with confidence.
Now Get Out There!
We hope we have provided helpful info for you to assist in making your decision of where to take your next bucket list fly fishing adventure. Remember, be sure to consider the species of fish you’re after, the location, the timing and the lodge preferences before packing up and heading out.
Happy fishing and we hope you put a hook N1!


