If you want to find an early chink in the armor of a buck cast a wide net. Trail cameras are a great way to do just that.
When it comes to trail cameras, there are definitely many options these days. But even after you pick one, there can be lots of questions…
- How do you use trail cameras to their potential so that you can get pictures bucks frequenting your hunting property?
- What is the best time of year to start mounting trail cameras?
- Are there some strategies that work best for locating target bucks?
- What is the best way to mount a trail camera?
If you are looking for some answers to these questions, read on, we have some great trail camera tips for you!
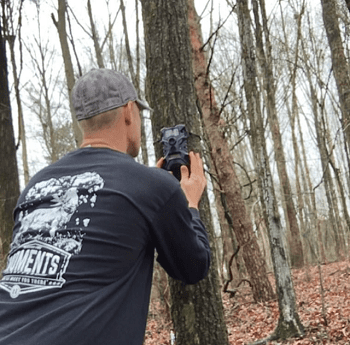
Buying a trail camera is only the first step to capturing buck activity on camera. Below, learn some tips on how to set them up!
-
Sale!
N1 Outdoors® Hunting · Fishing · Outdoors Flagship Tee
$15.00 Select options This product has multiple variants. The options may be chosen on the product page -
Sale!
N1 Outdoors® N1 Moments™ Licking Branch Buck SS Tee
$5.00 Select options This product has multiple variants. The options may be chosen on the product page -
Sale!

N1 Outdoors® Bowhunt Oh Yeah™ Bowhunting Tee
Original price was: $26.99.$9.00Current price is: $9.00. Select options This product has multiple variants. The options may be chosen on the product page
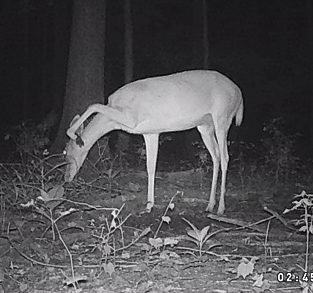
You have a trail camera… now what?
When it comes to putting out trail cameras, I always start a little earlier than most people. But, it’s understandable that not all hunters want to waste batteries and time going to check them.
So, if you are already very familiar with the property you intend to hunt and have an idea of the summer patterns of the bucks on that property, you could wait until late July or early August.
Trail Camera mounting tip #1 Hot zones are Bedding and Feeding Areas
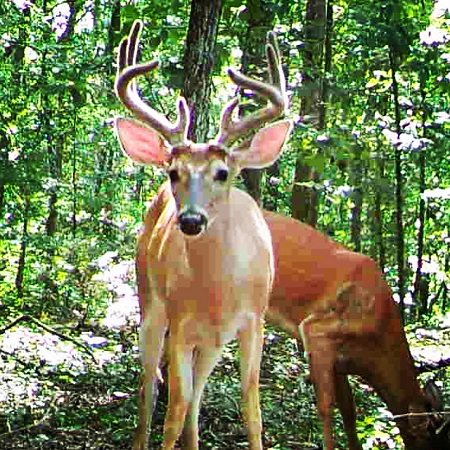
As I have learned more and more about deer hunting – and more specifically, buck behavior – it has become clear that it’s imperative to determine where bucks are bedding and feeding.
So, how can you set up the trail camera to get daylight pictures of those bucks?
Well, once you have an idea of where they are bedding and feeding, set up your trail cameras on routes that deer take to and from these areas until you begin to get daylight pictures of bucks.
Getting these pictures may be easier if you hunt near agriculture such as corn, soybeans, sorghum, etc. than if you are hunting large stands of timber or hardwoods.
Locating bedding and feeding areas are the first step to identifying the travel routes that bucks are using to move between the two.
If you only hunt large forested areas, then you might want to focus on open areas in the timber that have a lot of previous deer sign.
Another thing to focus on in these types of forested areas is browse pressure on native vegetation. For example, if you look closely, you may be able to see the tops of some of the plants and vegetation that have been nipped off. If there is too much browse pressure, then you might need to use a supplemental food source or deer mineral until deer season (if it is legal in your area).

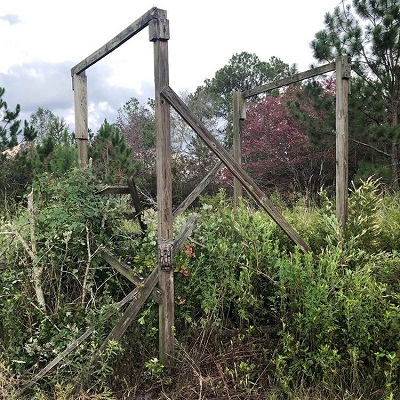
Set up cameras near scrapes
Another way to get great early season bucks on camera is to get trailcam pictures near mock scrapes or active scrapes from last season. I look for open areas or trails that might have a brushy limb or vine hanging over bare ground or low vegetation.
I’ve got some great video of a target buck tending a scrape and chasing another 3-year-old buck away from it. These are the types of areas I will key in on and look for locations to put deer stands in hopes of taking a successful shot on a mature whitetail.

Then, I might set up a scrape dripper in hopes of increasing the buck activity in that location. If the bucks and does are already using a scrape now they will more than likely continue to use it during the season.
I have seen as many as 20 open scrapes on a 300 yd trail that led from bedding to food. Some bucks will travel up to three square miles for a safe food source. The bucks on that particular scrape line were bedding 1,000 yards away and traveling almost every night to and from that food source to bed.
-

N1 Outdoors® Put A Hook N1™ Fish Hook Leather Patch Hat (Brown/Khaki)
$29.99 Select options This product has multiple variants. The options may be chosen on the product page -
N1 Outdoors® Deer Antler Leather Patch Hat (Grey/Light Grey)
$29.99 Select options This product has multiple variants. The options may be chosen on the product page -
Sale!
N1 Outdoors® Fleece Logo Tactical Beanie
Original price was: $17.99.$9.99Current price is: $9.99. Select options This product has multiple variants. The options may be chosen on the product page
Put in the extra effort
If you want to your trailcam strategy to yield the best intel possible, you need to be willing to get out of your comfort zone and do some scouting off the road. Some of the best sign and bedding areas are off the road a good bit, but may be closer than you think.
I have cut through 10 yards of thick brush and vegetation off a main trail and all of the sudden, boom… a big buck travel corridor! If you find water or a swamp, even better. Now you have a funnel, bedding, and a water source.
Deer are edge creatures, so if you find where the terrain transitions from hard woods or pines to swamp or thickets, then you should find good sign, or at least some type of deer trail.
When I’m scouting, I look for droppings, deer tracks and old rubs. Once you practice looking for these long enough, you will begin to get an eye for a good place to hunt or hang a trail camera.
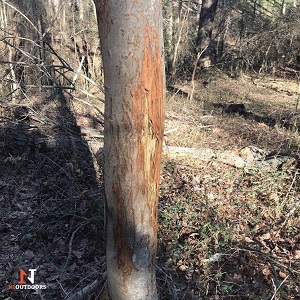
Rubs and other buck sign are good locations to consider mounting a trail camera.
Swampy areas…
If you hunt swamps like I do in the South, then you might feel overwhelmed by the amount of water. But, deer like to bed in swampy areas because it is cooler, and they can detect predators farther away.
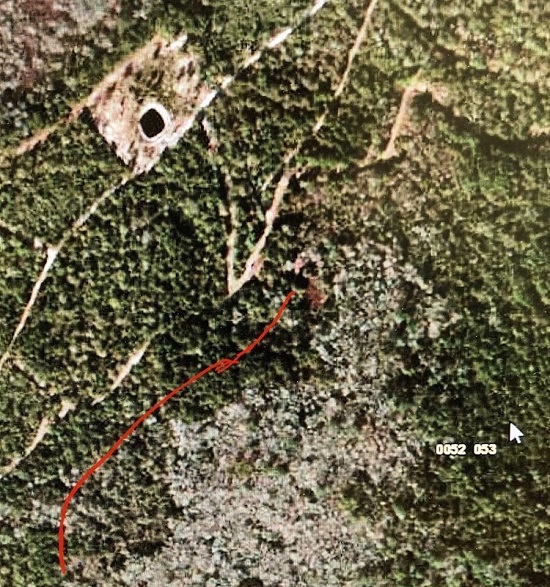
A lot of times, aerial pictures taken when there is still foliage on the trees makes it impossible to see these deer trails coming in and out of a swampy area. So, because pines and hardwoods hold their foliage longer, pictures taken during Winter or before Spring green-up will show transition areas better.

If you can only find does, keep looking, because the bucks will be nearby within a couple hundred yards.
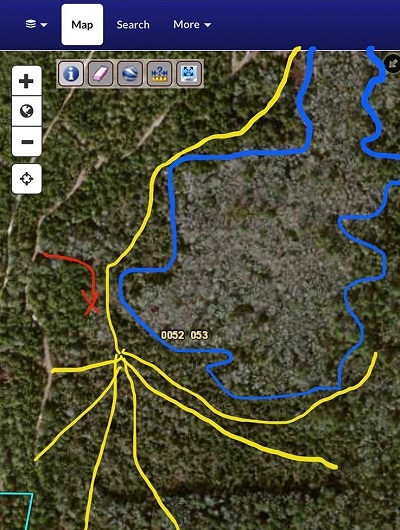
Water, funnels and fences
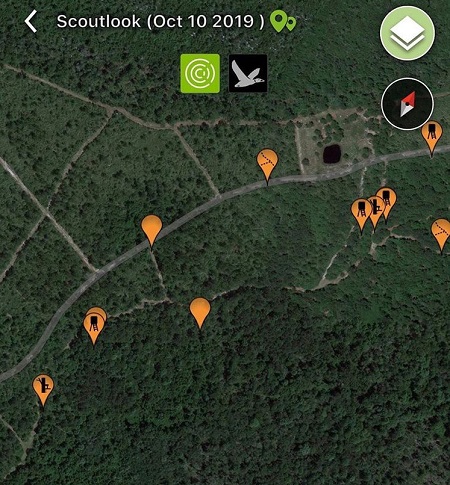
Another way to use aerial maps to hang trail cameras is to look for tree lines and natural funnels.
Agriculture, fence lines, and water all make great natural funnels for deer to travel. Deer do not feel as comfortable going across an open field, through water, or over a tall fence.
While deer can jump over or go under just about anything, they will default to openings in fence lines.
When it comes to water, I have seen deer chase through two feet of swamp water, but they would much rather go around it if they can.
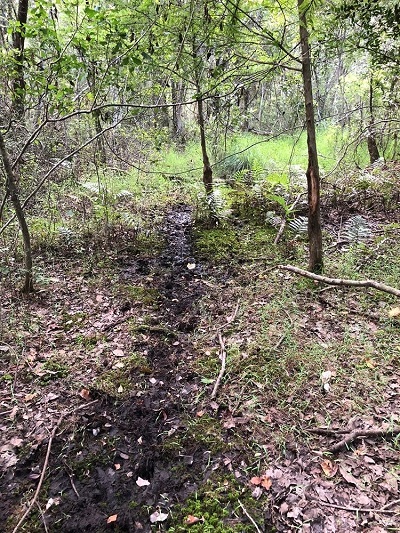
The “diamond in the rough” in swampy areas are trails in the mud coming in and out of the swamp as deer will often skirt around the edges of water.
Field Edges and corners
Field edges and corners are also great places to hang trail cameras.
Deer will come out of just about anywhere if you have a good stand of bedding area along a field, but for some reason, they seem to prefer coming out of the corners.
On one of my hunting properties, there is a corner of a field that also has a water source that deer will skirt around. This area makes for an awesome trail camera spot. In one pre-season, I have gotten pictures of 10 different bucks coming back to bed.

If you are having trouble getting daylight pictures of bucks, try glassing the field and see where they are coming out at in the afternoon.
I have also seen bucks come out of the middle of a strip of trees off a field. It all just depends on where they are bedding, and you will not know that unless you watch where they come out at in the afternoon or go back to in the morning.

-
Sale!

N1 Outdoors® Duck Camo Block Logo Heavyweight Hoodie
$34.00 Select options This product has multiple variants. The options may be chosen on the product page -
Sale!

N1 Outdoors® “Sunset Mountain” Pullover Hoodie
$34.00 Select options This product has multiple variants. The options may be chosen on the product page -
Sale!
N1 Outdoors® Est. 2014 Forest Camo Heavyweight Sweatshirt Hoodie
$34.00 Select options This product has multiple variants. The options may be chosen on the product page
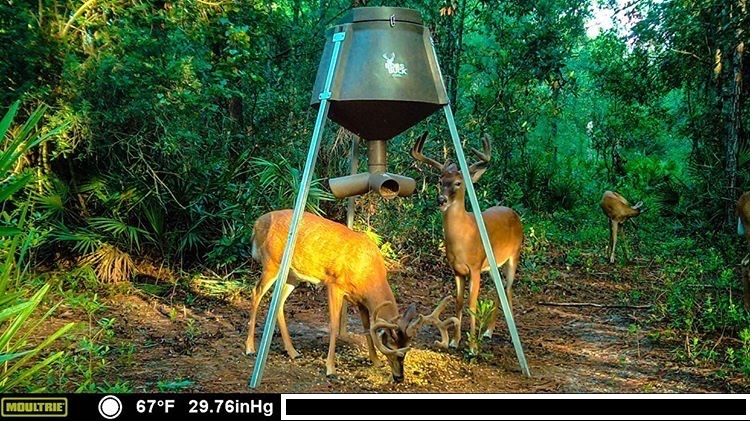
Cellular trail cams… a game changer
If baiting is not legal in your area, cellular cameras are a great option if you do not want to intrude on the area once it is set up. There are certainly huge advantages to not disturbing or leaving unnecessary scent in the area you are hoping to hunt.
Cell cameras allow you to wait until you see the buck you want using the area before going in for the kill.
There are new guidelines out now for the Boone and Crockett club that you cannot use a cell camera to help you kill a buck that meets their scoring requirements if you want it entered in the record books. The Pope & Young Club has also updated its guidelines regarding the use of cellular trail cameras as it pertains to fair chase.
If you are like most people, you probably do not have booners running around and may not necessarily care about making the record books.
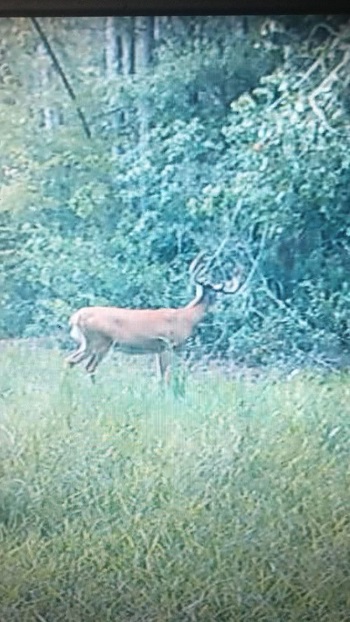
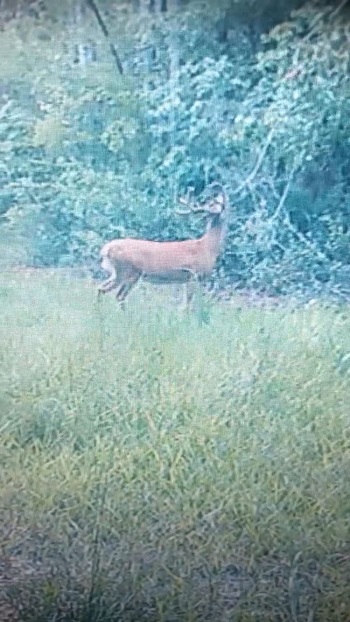
I typically run three cell cameras and eight regular cameras. I use my cell cameras mainly to tell me when it is time to go refill the feed. In my opinion, you can pattern deer just as well with standard trail cameras.
You should, however, be more careful when you check the regular trails cameras. Typically, I like to wait until around noon to check my trail cams, or I check them late at night after I know deer are already in the field feeding.
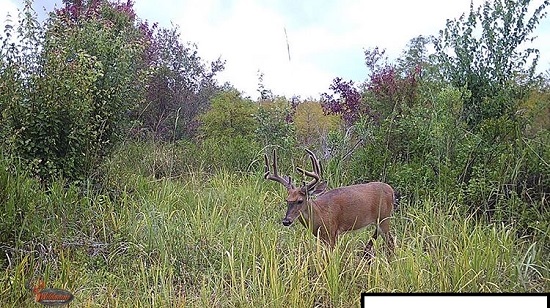
I shot my biggest buck in 2019 after using a regular trail camera. I noticed he was coming in the second day after I put out corn and deer lure, and I was able to take him just as planned.
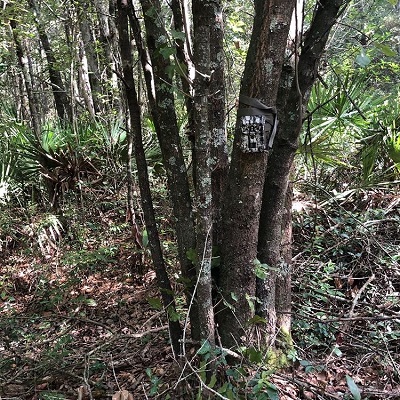
How to set up the trail camera | Best practices
When I set up a new trail camera, I mount it to a sturdy tree, at a height of about 3 feet off the ground. Or, I will set it up at a height where it can cover the most field of view.
I make sure to clear vegetation and try and get a northern camera direction unless it has a lot of overhanging foliage or forest canopy to shield the sun. Facing the trailcam East or West can cause the sunlight to interfere with the pictures as well as producing false triggers that result in unwanted pictures.
Mounting Tip: you can use is using your smart phone camera and flipping it to selfie mode. Put the back of your phone on the trail camera, and you can get a good idea of what your camera will be seeing.
I also hang cameras parallel to the trail to catch the movement as well.
You do not want to face the camera directly across the trail or you will end up getting pictures of just tails or brow tines.
As deer season gets closer, you can also use video determine the direction the bucks are traveling to the bait sites or how they are using travel corridors. (when using still shots only, it can be hard to tell which directing deer are moving).
If you are trying to save your trail camera’s battery, I would set it to a three-picture burst and then switch to video when the season starts.
Trail Camera Tips Conclusion
As you can tell, an effective trailcam strategy involves planning and attention to detail. Hopefully, you have learned some tips that will help you become a more successful hunter. Not only that, but you never know what unexpected pictures of rare things you might get on your trailcam.
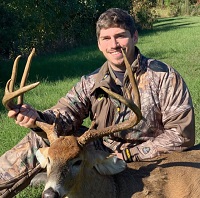
Here’s to great trail camera pics and even better pics of you sitting behind a trophy buck!
If you have any more questions or would like to follow along this deer season, I am active on social media:
I use the HuntWise App and my username is jrwilliamsjr.
On Instagram, you can find me under aon_whitetail.
My email address is jo***********@******ta.edu if you would like to contact me there. I am currently in school to become a wildlife biologist.