I’m Josh, and I got my hands on a hunting blind made by Nukem… it’s called the Grab & Go Hunting Blind.
This blind is supposed to be more for the run and gun type hunter, which sometimes I am, and sometimes I’m not. But, I’ve got young boys that I am trying to familiarize with the turkey woods, so I was excited to see how this worked with them.
The Nukem Blind’s Ease Of Assembly
I was able to put the Nukem Grab and Go blind together very quickly (and I didn’t even read the directions!) The poles are like tent poles. They just connect together and have a bungee inside to hold them together once you get them fastened. There’s a bushing in the center on each one. There’s one along each side, and there’s one in the middle to keep it rigid.
The Nukem blind is adjustable to the height that you need it to be, based on the position you’re sitting. You can widen it out to shoot through it from a lower position. And then, if you’ve got a chair or something, you put it up higher.
This was as I was putting together the “double up” Nukem system…
There is a center piece that attaches in the middle of the two blinds to connect them… it is attached to the leafy camo cover.
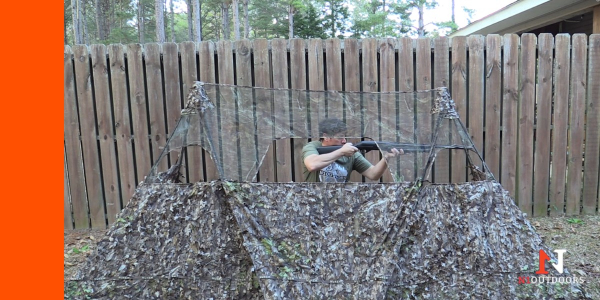
Here’s a look at what the double system looks like after connecting the two blinds. My first impressions on putting it together was that I was really impressed. I love the leafy camouflage. This is the Mossy Oak Country Roots color, but there are four or five different colors that Nukem has in this blind.
I’d say the whole setup only took about three or four minutes to set up, and that was my first time ever doing it! So, I’m sure you can do this in the woods in less than a couple of minutes.
I could tell that you’d want to be able to shoot to the sides of it if you can. I can see me back here with the video camera, videoing. I’d maybe have the boys a little bit closer so they can still shoot out the side, but so they’re more concealed. But, I really liked the way it was set up.
Trying Out The Double Up System In The Woods With Kids
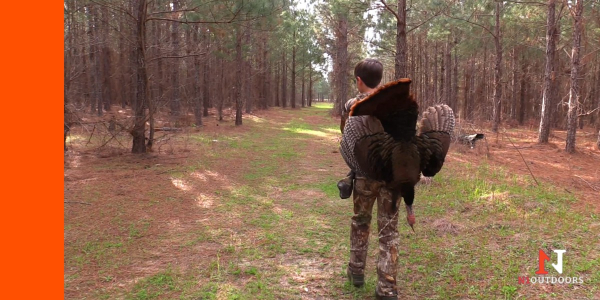
As you could tell, those two little boys blended in real nicely behind this blind. And I don’t believe any a wily gobbler would have been able to pick them off (as long as they sit still!)
#ad
The Nukem Hunting Blind Is Solid
If you’re like me and you got kids that you’re going to be taking hunting this Spring, or even if you’re going to be videoing and doing a lot of moving behind the blind in the turkey woods, the Nukem Hunting Blind is a great option for turkey hunters.
This Nukem Grab & Go double up system really has impressed me. I don’t know what the woods look like where you are, but here in central Georgia, the Mossy Oak country roots pattern blends in really well. I’m not sure I’ve ever seen a blind blend in better than this Nukem Blind does in the Mossy Oak country roots.
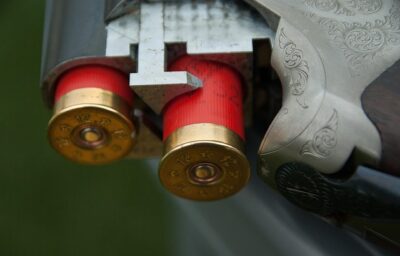
Prior to the mid-19th century, all shotguns were muzzleloaders. But, the invention of cartridge ammunition made it possible for several shotgun actions to emerge. Self-contained shotgun rounds encouraged innovation in gun design and made repeating actions and breechloaders possible.
Shotgun types are categorized by their gauge and their action, which functions as its operating system. Every gauge and action type has benefits and uses both on the range and in the field.
Let’s take a look at some popular types of shotguns and what makes each unique.
Overview of Shotgun Types
The 5 most common types of Shotguns are:
Pump-Action Shotguns
Semi-Automatic Shotguns
Over-Under and Side-by-Side Shotguns
Single-Shot and Bolt-Action Shotguns
Lever-Action Shotguns
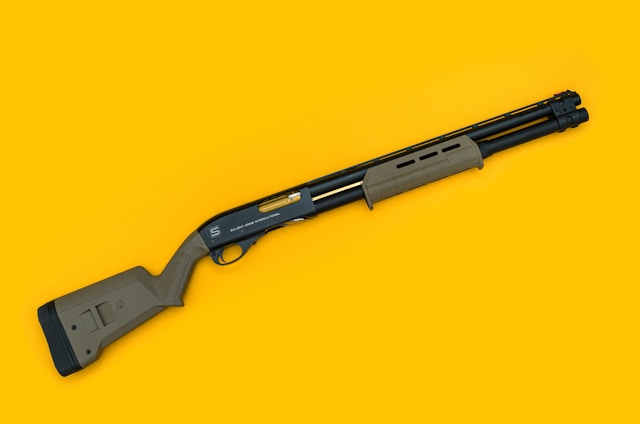
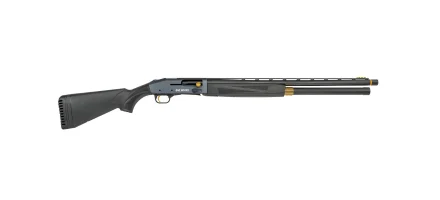
Pump-Action Shotguns
Pump-action shotguns are a great option for both hunting small game, waterfowl and turkey hunting as well as for home protection.
A sliding handguard on the gun’s forestock is moved to activate the pump action, a sort of manual handgun operation. When firing, the sliding stock is moved forward to load a fresh cartridge into the chamber, after being dragged backward to expel any used cartridge, and usually to cock the hammer or striker.
While some pump-action guns employ detachable box magazines, the majority use integrated tubular magazines. Although technology has also been used in rifles, grenade launchers, and other weapons, pump-action weaponry are usually thought of as shotguns. In colloquial terms, a gun that uses this system is called a pump gun.
Since the trigger hand does not need to be taken off of the trigger while reloading, a pump-action weapon is much quicker than a bolt-action and somewhat faster than a lever-action since the forend is often operated with the support hand. Additionally, since the action is cycled linearly, less torque is produced, which might tilt the gun and cause it to go off target when firing quickly.
Selecting a shotgun that is semi-automatic is no different from selecting any other kind of weapon. You should consider pricing, performance, brand, and quality.
Naturally, the adage “you get what you pay for” still holds true in most cases. More abuse, longer firing schedules, and occasional cleanings are likely to be handled more reliably by a high-end shotgun, such as a Beretta 1301 or Benelli M4, than by one at the lower end of the spectrum.
Low-cost semi-automatic shotguns have long been seen as unstable and only suitable for range practice rather than any real-world usage. Although there is some truth to this reputation, it is mostly focused on the low-cost firearms of the past rather than more recent, reasonably priced, but superior models.
However, there are still many shotguns that perform well at all price ranges, so unless complete dependability is your top need, you don’t need to spend a fortune.
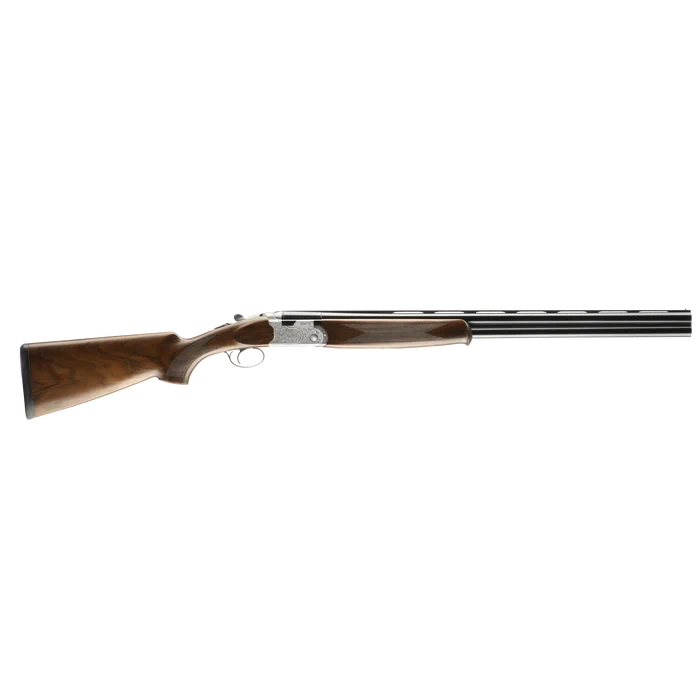
The question of over-under, and side-by-side will always be up for discussion. An over-under will not get the same derisive remarks on a shot as it did thirty years ago, despite the fact that tradition has favored side by side. In fact, many firearms discover that stacked barrels improve their shooting. Which would you prefer, side by side or over and under?
Over-Under shotguns have barrels stacked one on top of the other...
Over-unders are typically thought to be easier to aim because they only have one sight plane, but some shooters prefer the quicker handling feel that side-by-sides provide.
The over-under, who usually weighs about 7 pounds, would be a whole pound heavier than the side-by-side, to begin with. Therefore, the perceived recoil in the side-by-side and the muzzle-flip would be much higher when utilizing identical 28g No. 7 ammunition, for instance.
And the “side-by-side” shotgun has its barrels parallel to one another, side-by-side.
Not only will the over-under’s extra weight absorb more recoil, but the side-by-side’s barrel configuration causes the recoil to return in a dogleg fashion, which is backwards and slightly to the side, following the stock’s line, which normally has more cast in it than in the over-under. As a result, the way you experience the recoil will vary depending on whatever trigger you pull. But with the over-under, the recoil will return in a roughly straight line.
One tip when shooting an over-under is to use a considerably straighter lead-arm than you would with an over-under to increase pointability and lessen perceived recoil and muzzle-flip in a side-by-side.
In fact, the gun would always seem short if you held the fore-end of it side by side with your lead-hand, which would make it harder to handle. Therefore, the straight arm not only absorbs recoil (instead of your shoulder), but it also allows you to have more control over the barrels, which increases accuracy and precision.
The phrase “single-shot” describes weapon designs that need manual reloading after each shot since they can only contain one cartridge of ammunition.
Single-shot designs are much simpler and also more durable than magazine/belt-fed firearms, but they also fire at much slower rates. This is because single-shot designs do not require a large receiver behind the barrel to accommodate a moving action, unlike multi-shot repeating firearms (also known as “repeaters”), which have moving parts other than the trigger, hammer/firing pin, or frizzen.
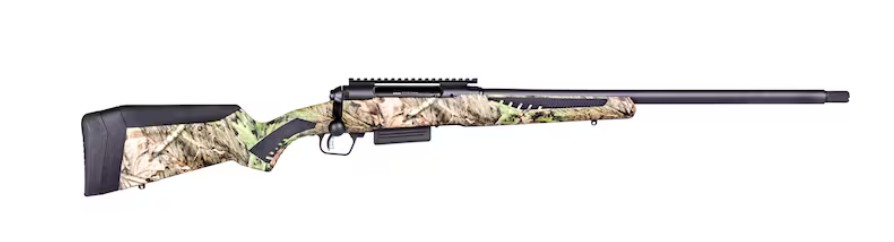
Bolt-action shotguns use an attached handle to manually cycle the bolt. Technically speaking, however, every shotgun — aside from break-action models like over/under and side-by-side shotguns — has a bolt. (Photo credit: Savage Arms)
Particular to “bolt action” shotguns, the bolt closes up the rear aperture of the barrel chamber as the propellant in the cartridge burns. The bolt rotates forward to load a fresh cartridge after the round is shot and back to remove the used cartridge.
Examine that action in comparison to other shotgun kinds. To cycle the bolt on a pump-action shotgun, slide the forestock forward to load a fresh round and backward to expel the previous one, locking the bolt in position. In a semi-automatic, the bolt is cycled by gas from the fired cartridge.
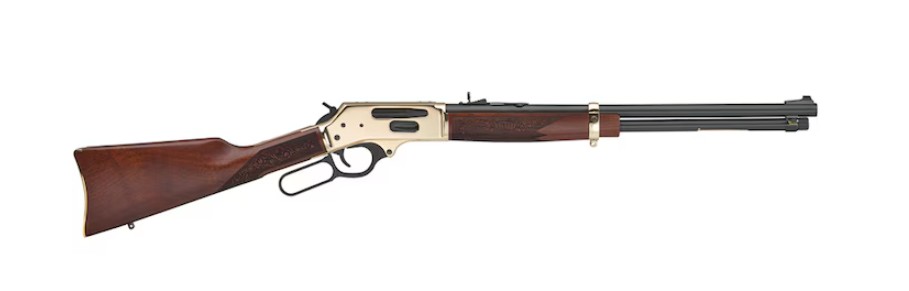
Behind the trigger of a lever-action gun is a sizable metal lever. Usually, this handle also serves as the trigger guard. The cartridge case is ejected from the chamber by pushing the lever forward and downward to open the action.
Semi-automatic shotguns are helpful when rapid follow-up shots are required, such as in bird hunting, competitive shooting and even self-defense situations (photo credit: Mossberg.com).
Pros:
Faster rate of fire.
Can reduce the amount of recoil that is felt.
Cons:
More complex mechanisms, leading to potential reliability issues with certain ammunition.
Generally more expensive.
Require more frequent cleaning to ensure proper operation of the mechanisms.
Bolt action shotguns are very simple and reliable, but also have a slow rate of fire (photo credit: savagearms.com).
Pros:
Very simple and reliable.
Inexpensive.
Bolt actions with rifled barrels make them a good option when hunting with slugs.
Cons:
Very slow rate of fire.
Limited capacity.
5. Lever-Action Shotguns:
Lever action shotguns have a very historical feel and are relatively easy to use, but can be difficult to reload quickly (photo credit: MidwayUsa.com).
Pros:
Relatively fast rate of fire.
Unique and historical appeal.
Fairly easy to use.
Can fire a variety of ammo.
Cons:
Less common, so fewer options and potentially higher prices.
Can be more difficult to reload quickly.
Slower rate of fire compared to pump action and semi-automatic shotguns.
Can be prone to jamming if not maintained/cleaned properly.
Triathlons are often a solution for athletes who think one sport just isn’t enough.
Triathlons, which consist of a swim, cycle, and run event across varying durations, present a significant challenge in terms of endurance, strength, and mental toughness. And, while triathlons consist of running, swimming and biking, the bike component often accounts for around 60% of the race, regardless of the overall distance of the event.
Sounds difficult, right? Well, that’s because it is!
If you are new to triathlons and triathlon bikes, you might be wondering what makes triathlon bikes unique from other bikes, right? Well, they have a number of special features that make them unique. Let’s take a look at what those features include…
What Is A Triathlon Bike… The Details
Let’s take a look at some the characteristics of a triathlon bike and what makes them unique from other bikes…
Seat position
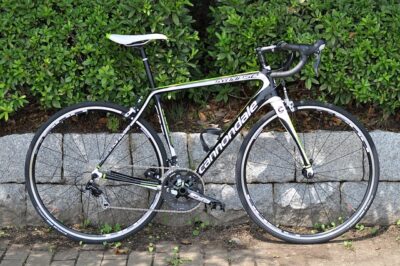
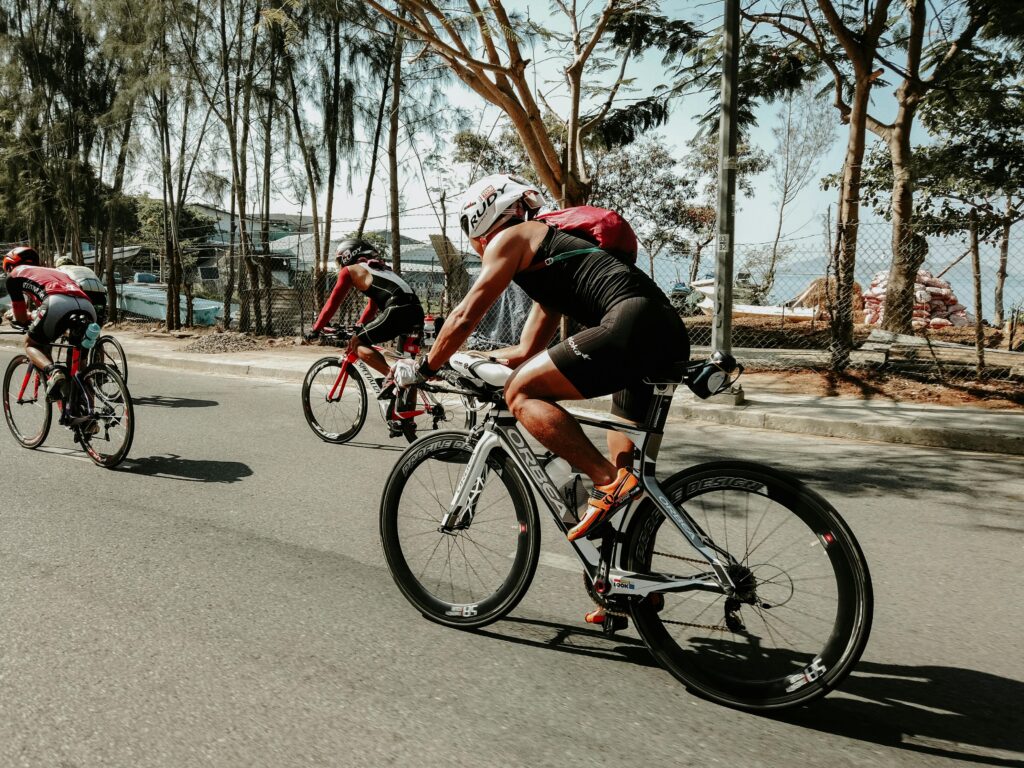
The geometry of any bike has a significant impact on its purpose, and triathlon bikes are no exception. Triathletes need to be comfortable in an aerodynamic position for extended periods of time, in addition to being able to run long distances once off the bike.
A steeper seat tube angle helps save the quads for the running portion of the triathlon.
Because of this, the seat tube angle and top tube length are the two key differences between triathlon bikes and road bikes, which are designed to recruit different muscle groups and provide comfort without sacrificing performance.
Triathlon bikes feature a substantially steeper seat tube angle than road bikes, often starting at 74 degrees and increasing to more than 80 degrees.
This huge push forward stimulates more glutes and hamstrings during the pedal stroke, sparing the quadriceps for the race’s run leg. It also enables riders to take an aggressive aerodynamic position and lower their frontal profile.
We earn a commission if you make a purchase, at no additional cost to you.
05/25/2026 09:02 pm GMT
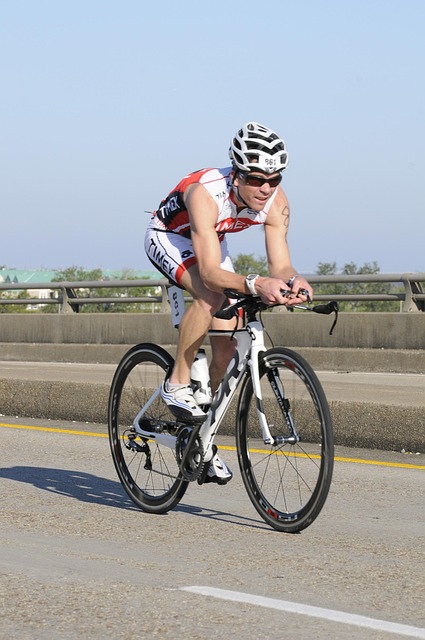
A steeper seat angle on a triathlon bike helps to save the quads for the running portion of the race.
However, while this hyper-aggressive positioning is excellent for aerodynamics, it can also be challenging to maintain for long periods, particularly for people who lack flexibility and mobility in their hips and lower back.
To mitigate this, triathlon bikes typically have a somewhat shorter crank length than road bikes, and seats are designed to better accommodate the pronounced anterior pelvic tilt caused by bending forward.
These minor adjustments increase the hip angle, enhancing comfort and allowing riders to remain in that position for extended periods.
Triathlon bikes also have a longer top tube and an expanded reach. This adjustment is intended to stretch out the rider, placing them in a more aggressive, horizontal stance that increases their aerodynamics. This also helps to distribute a rider’s weight across both wheels appropriately.
Note: Triathlon bikes can be expensive, so if you’re looking to ease your way into owning one, take a look at these used tri bikes for sale at QR.
Triathlon bikes are not limited in the same way as time trial bikes are, allowing for significantly more imaginative designs. Now, the flip side is that triathlon bikes must have a lot of storage space, which adds more elements to the aerodynamic jigsaw.
Triathlon bikes use the same computational fluid dynamics and dynamic wind tunnel testing as road racing bikes, but in most cases, the testing is done when the bike is race-ready and equipped with fluid, tools, and food storage. Some manufacturers employ these tweaks and enhancements to improve the bike’s aerodynamics.
Aerodynamics is an important component of triathlon bikes since any minor advantage can be the difference in a race.
One way to improve aerodynamics is to use bigger tube profiles. The larger profiles allow the wind to pass smoothly along the bike, reducing turbulent airflow and increasing drag.
This is usually found on the front forks, downtube, and seat tubes. Other manufacturers will replicate this oversized tube profile by basically chopping the “tail” off an oversized tube profile, reducing overall weight, creating a stiffer frame, and simulating the same airflow.
Another way manufacturers increase a bike’s aerodynamic efficiency is to “hide” or integrate components such as brakes, wires, and storage. Triathlon bike brakes are often found behind the forks, inside the forks, or disguised behind the bike’s front fairing. They are positioned at the rear of the bike, either underneath the bottom bracket area or out of the wind in partial tube cuts on the seat stays. Internal cables are now standard on the majority of bikes, improving aerodynamics and lowering the risk of damage from environmental causes.
Another popular way to improve aerodynamics is to change the geometry of the frame. Some manufacturers have traditionally used a dipped downtube, which lowers the gap between the downtube and the front wheel, thereby boosting airflow.
Dropped seat stays are another common modification that limits the frontal area contacting the wind and thus reducing drag. Some brands have even removed the seat stays entirely, and now you can find triathlon bikes without seat tubes or seat stays.
Lastly, triathlon bikes also improve their aerodynamics by adding wheels. Although a deeper wheel profile is generally more aerodynamic, it makes the bike more difficult to handle because it is more susceptible to side winds than a shallow rim.
In addition to this, the additional material needed makes the ride harsher because it provides less compliance (comfort) than a shallower wheel.
Triathlon bikes used to have several after-market modifications, such as rear water bottle holders behind the seat, saddle bags, chunky food storage containers on the top tube, and sticky tape for attaching gel packets to the top tube.
Modern triathlon bikes have considerably more complex storage options built into the design, removing the need for retrofitting equipment.
Some bikes have a front hydration storage device designed with a frame to hold the same amount of water as a standard sports bottle while also increasing the bike’s aerodynamics.
We earn a commission if you make a purchase, at no additional cost to you.
05/25/2026 05:00 pm GMT
Others have an integrated tool storage system that fits between the front and rear wheels, while others offer a ‘draft box’ that lies behind the seat tube and millimeters above the rear wheel to improve airflow while also providing excellent storage for parts, tubes, and tools.
Specialized brands have an integrated hydration system that sits within the extra-thick downtube and eliminates the need for water bottles.
Of course, all of these features come with a price, and more storage means a higher price.
Entry-level models often have basic cockpit setups with a classic fork, steerer tube, stem, and handlebar combinations, with no integrated storage systems.
This can be useful from a functional standpoint because it allows for simple adjustment and maintenance as necessary.
Top-tier versions, on the other hand, feature fully integrated cockpit layouts with various fairings, modifications, and integrated storage systems. This strategy improves aerodynamics and integration while making modification and maintenance more challenging.
There is no right or wrong triathlon bike to go for. It all depends on you and your preferences. Hopefully, this article has helped you understand what exactly a triathlon bike is and have gotten a starting point for the types of features that will be important to you on your triathlon journey!