Owning a gun of any type has its fair share of responsibilities. One of these important responsibilities is designating a storage spot to protect it from unauthorized access.
Proper storage helps prevent accidents and injuries. And, given that not everyone knows how to properly and safely handle guns, appropriate storage should be staple for every homeowner.
The responsibility of your gun safely lies with you. Be sure that you not only know how to properly handle your firearm, but how to safely store it as well.
Remember, the law holds you responsible for your firearm. If someone steals it and uses it to commit a crime, you may be charged with inadequate preventative measures to safeguard the weapon.
Types Of Shotgun Storage Solutions
The good news is that there are several storage solutions.
Notably, you can embark on a do-it-yourself (D-I-Y) project and create one. Alternatively, you can buy sophisticated storage solutions that involve technological features such as biometrics sensors.
On that note, let’s take a look at some shotgun storage solutions you’d want to consider:
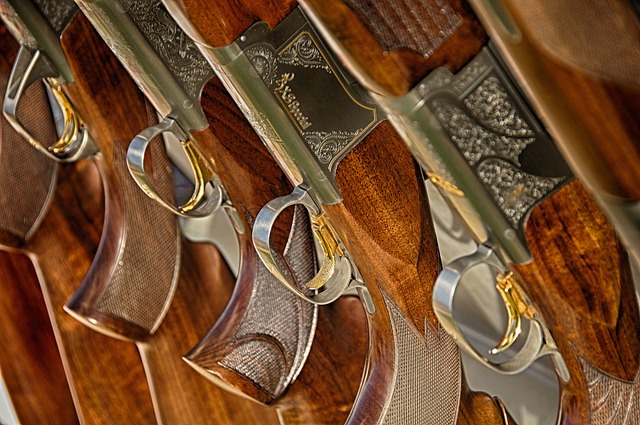
Wall Mounts
Wall mounts are a safe way to store your gun and easily access them. They’re perfect for gun owners who want to display their collections.
The beauty of a wall mount is the numerous design options available. You can create a vertical or horizontal rack and then anchor your mount. (Note that the wall mounts work best on concrete walls.) They also work best when you need to save on floor space. You can use any room for a wall mount installation without interfering with its primary purpose.
Since a gun on a wall mount is still visible, choosing a secure location for a wall mount is best. You may want to place it behind the door. This way, one can only access the gun if they’re inside the room.
Before securely attaching the wall mount, you’d want to test whether the space is ideal depending on your gun’s length. This way, you won’t do all the work of installing the mount, only to realize you have insufficient space.
Smart Safes
One of the safest ways to secure your gun from everyone else is by keeping it in a lockable safe. There are numerous smart safes whose features vary significantly.
Some advanced smart safes feature biometric locks that can only be opened with your fingerprints, while others comprise electric locks or passcodes that guarantee no one else can get in the safe unless they know the access details.
![[2023 NEW] 7-8 Fireproof Biometric Gun Safes for Home Rifle and Pistols, Heavy Duty Anti-Theft Long Gun Safes for Rifles and Shotguns with 3 Handgun Pocket, Removable Shelf, Silent Mode](https://m.media-amazon.com/images/I/51p4wp7SYjL._SL500_.jpg)
Safes vary in size. The larger safes can contain more than one compartment, to allow you to store more guns. So, choose a safe with as many compartments as the number of shotguns you have. Also, consider preserving other compartments for ammo or gun-cleaning supplies.
Some smart safes have notification systems that alert you when someone tries to tamper with them. Typically, you’ll get notified on your smartphone about an attempted break-in. You can quickly go and check what the matter is before more damage is done.
-
Product on sale
 N1 Logo Leather Patch Hat (Mossy Oak Bottomland)Original price was: $26.99.$19.99Current price is: $19.99.
 -
 N1 Logo Leather Patch Hat (Navy)$26.99
 -
 N1 Outdoors® Blaze Orange Leather Patch Hat$26.99
Lockable Gun Drawers
Like the safes, shotgun drawers are lockable, hence limiting access. The drawers can be created in not-so-obvious places so that no one can know that they are in fact for gun storage.
Some excellent locations to attach the gun drawers include the following:
- Inside other drawers
- Bedside drawers
- Beneath your dining table
- End table drawer

The drawers act as hidden spaces to store your guns. Unless someone is very observant, it’s not easy to predict that the drawers are gun storage. Always ensure that the drawers have locks and keep the keys far from reach.
Gun Storage Cabinets
If you have enough space, it’s best to have standalone storage cabinets to keep your guns in.
Additionally, ensure the cabinets are fitted with security features such as locks and heavy gauged doors.
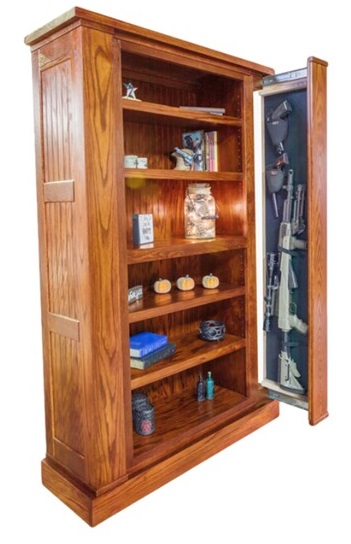
The beauty of storage cabinets is that they can be modified using the correct measurements so that the gun fits perfectly (photo credit: American Concealed Furniture).
And, you can have high cabinets to ensure they’re not easily accessible, especially by children.
You can modify the cabinets by installing alarm systems to notify you if someone tries to tamper with the locks. These features make it hard for thieves or unauthorized personnel to get to the guns.
Rented Gun Safes
A rented gun safe offers an offsite storage location if you’re not comfortable storing the shotgun in your house.
Rented gun safes are excellent for hunters because you can take the shotgun to storage when the hunting season is over.
Concealment Shelves
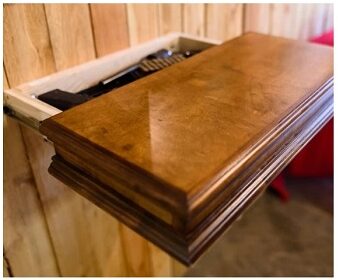
With a concealment shelf, you can place the firearm inside the shelf and arrange several books on it for a disguise. This storage idea facilitates a quick reach for the gun in case of a home invasion (photo credit: American Concealment Furniture).
Another way you can store your gun in the house is by using shelves. Luckily, these can be homemade. However, it’s not ideal to keep the firearm in visible areas.
Concealment shelves, on the other hand, are discrete, so it takes work to notice the weapon. You can do a better job at hiding the guns by using bookcases or dummies.
Hidden Storage Step
Another discrete way to store your gun is in a hidden step.
The hidden step functions normally, except that it can open and close. This can be an excellent place to hide your firearm in the house. However, you should ensure the step doesn’t open accidentally or appear odd, as someone could be tempted to check. You should also be sure that doesn’t make a squeaking sound when opening, as it could catch someone’s attention.
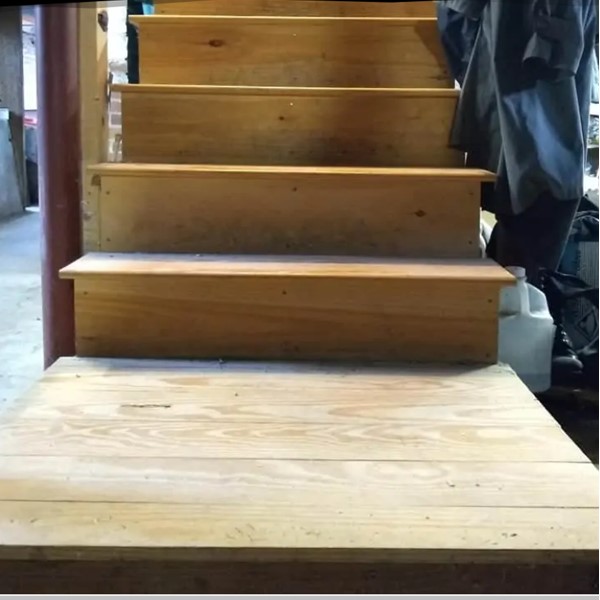
Hidden storage built into stairs can be an effective place to secretly store your shotguns or firearms (photo credit mymydiy.com).
Alternatively, you can make drawers under the stairway to avoid the opening being directly on the stairs.
Note that the storage step design only works with wide-enough steps. It’s the only way your shotgun can fit perfectly without any adjustments on the steps.
Final Thoughts On Shotgun Storage Solutions
Storing your shotgun securely is an essential precautionary measure against accidents. As such, it’s vital to have a reliable storage solution for your rifle.
Without proper shotgun storage, you put everyone at risk by leaving the gun where anyone can access it.
It’s always safe practice to unload the firearm before storage to prevent accidental discharge. Also, consider fitting the gun with a trigger lock to ensure no one can intentionally, or accidentally, pull the trigger.
Innovative storage solutions like sensors and smartphone notification systems are also helpful in remotely monitoring your shotgun. You’ll know whenever someone tries to tamper with the locks in your absence and quickly spring into action.
So, hopefully these shotgun storage solutions provide you some helpful information on how to safely and securely store your guns!