Are you looking for tips on how to build your own bowhunting arrows? Well, you’ve come to the right place!
We’ll walk you through the process step-by-step so you can start enjoying the process of arrow building.
First things first… Be sure you have selected an arrow shaft that is appropriate for the draw weight of your bow.
Before building your own arrows, it’s important to be sure you have selecting an arrow shaft that is appropriate for your setup. What poundage you are pulling back and what forward-of-center % (FOC) you are looking to get from your arrow are a few factors.
So, you may want to consult your local bow shop before purchasing your bare shafts.
Arrow Building | What you’ll need to build your own arrows
Before you get started with arrow building, there are some items you will need to get started:
- Arrow spin tester ($20-$50)
- Arrow saw
- Sharpie or other marker
- Arrow squaring tool
- Acetone or denatured alcohol
- Q-Tips
- Cool melt
- Arrow inserts
- Field points / Broadheads
- Butane torch
- Cup of cold water
- Arrow nocks (we suggest lighted nocks are best if filming your hunts)
- Arrow wraps (optional)
- Fletching jig
- Fletching glue/adhesive (primer pen also if your fletching type requires it).
Once you have decided on and purchased your arrow shafts, you are ready to start building! If purchasing Sirius arrow shafts (including arrow spinners and adhesives), use code N1Outdoors during checkout for a 12% discount!
-

N1 Outdoors® Stain The Vanes™ Bowhunting Tee
Price range: $24.99 through $30.99 Select options This product has multiple variants. The options may be chosen on the product page -
N1 Outdoors® HUNT. Tee (Various Colors)
Price range: $24.99 through $28.99 Select options This product has multiple variants. The options may be chosen on the product page -
Sale!
N1 Outdoors® Est. 2014 Vintage Camo USA Tee
$15.00 Select options This product has multiple variants. The options may be chosen on the product page
How to make arrows step-by-step
30 minutes per arrow 30 minutes
Here, we’ll walk you through the step-by-step process here of building your own hunting arrows (plan on about 30 minutes per arrow:
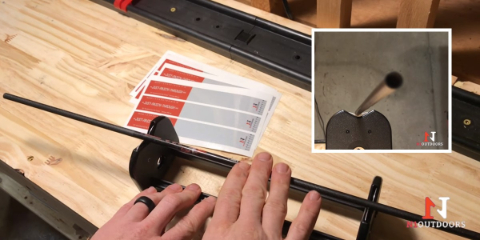
- Spin your arrow shafts
Before we get to cutting our arrow shafts, we want to spin them to see which end of the arrow needs to be cut. Use an arrow spin tester and spin your arrow (test both ends). Watch the ends of the shafts as they spin. Whichever side is more wobbly is the end you want to cut on. Make a mark on the end of the shaft that you will cut, just to be sure you cut the correct end.
.
- Cut arrow shafts
[IMPORTANT: BEFORE you cut your arrow shafts, be sure you know exactly how long the shafts need to be. You want to be sure you have accounted for the length that the nock will add to the shaft and also be sure your arrow will be long enough that your fingers will not be cut by the broadheads when you shoot!]
Set your arrow saw guide to the correct length. When cutting your shafts, be sure to “roll” the shaft as you cut.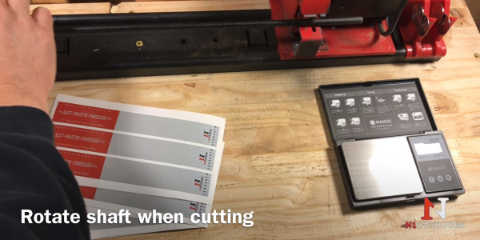
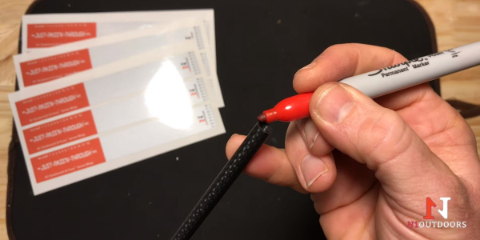
- Mark the ends of your arrow shaft
After cutting your arrow shafts to length, use a sharpie or other marker to make a mark around the top edge of the shafts.
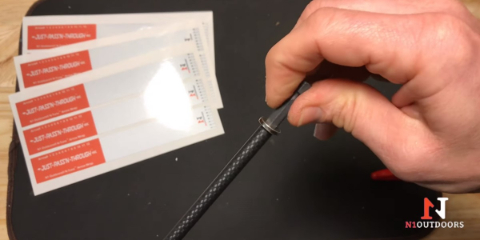
- Square the ends of the arrow shaft
Using an arrow squaring tool, sand down the tops of the shafts until all the marker is sanded away. Squaring the ends of your arrows is critical to achieving the best arrow flight possible.
- Clean arrow shafts
Next, you need to clean the dust/debris left over from squaring the shafts. Take a Q-Tip, dip it in acetone or denatured alcohol, and clean the top edge and inside of the front of the arrow shafts.

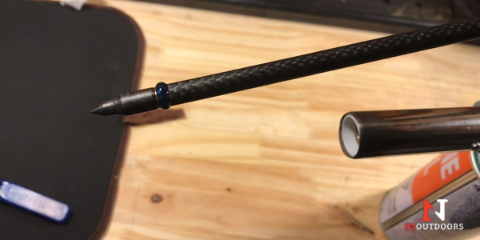
- Heat arrow insert
Screw in a field point to the insert you will be using and hold field point with a pair of pliers. Using your butane torch, heat up the insert (it only takes a few seconds of heat, but it takes a few more seconds for the heat to work its way through the insert).
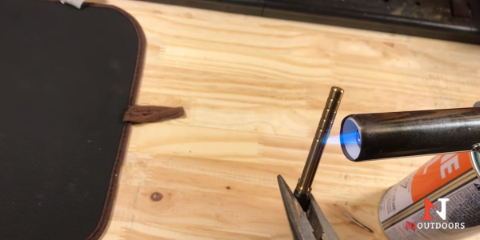
- Apply cool melt to insert
Once you have heated the insert, apply the cool melt to your insert. (do not put the cool melt directly in the flame). If it the cool melt doesn’t melt when touching it to the insert, heat the insert some more.
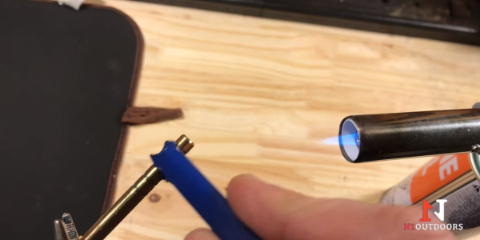
- Load arrow inserts
After coating the insert with the cool melt, insert it into the end of the arrow shaft that you cut while slowly rotating. The rotation will ensure that the cool melt will fully coat the inside of the shaft, resulting in better adhesion.
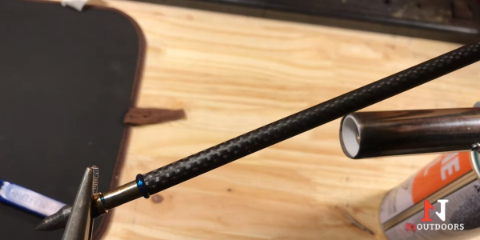
- Cool the arrow shaft
After inserting the insert that you coated in the cool melt, dip the tip of the arrow in the cup of cold water.
- Remove excess cool melt
Once you have cooled down the arrow shaft, you can peel off the excess cool melt from around the insert.
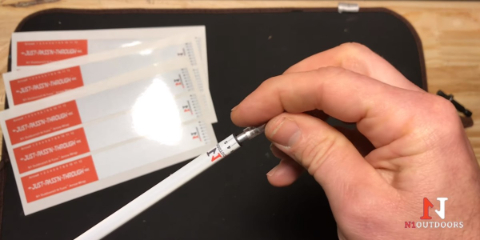
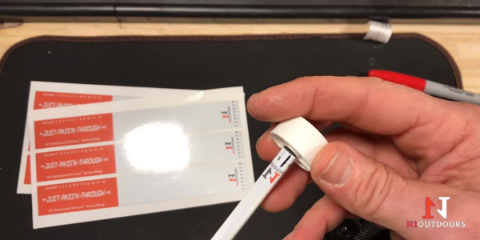
- Apply arrow wraps (optional)
If you like to apply arrow wraps to your shafts for added color, ease of fletching, or nock tuning, follow these instructions.
Lay a hot pad or mouse pad on a hard surface. Lay the arrow wrap on the pad with the adhesive side up. (The mouse pad/hot pad has some “give” to it, which allows you to press down and apply even pressure, making the wrap application a little easier.)
Lay the arrow shaft on the pad, parallel to the long edge of the arrow wrap. Line up the nock end of the arrow shaft with the end of the wrap (an arrow wrap pad can help with this). Once you have it lined up, slowly roll the arrow shaft forward over top of the wrap, applying even pressure, until it meets the other edge.
(You can also check out this video about how to apply arrow wraps)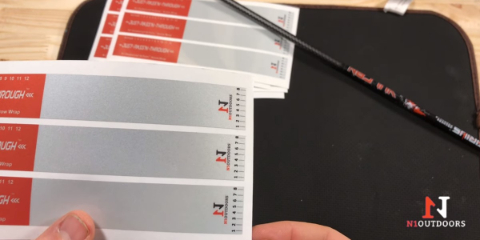
- Insert the nock
Insert your standard or lighted nock into the end of the shaft.
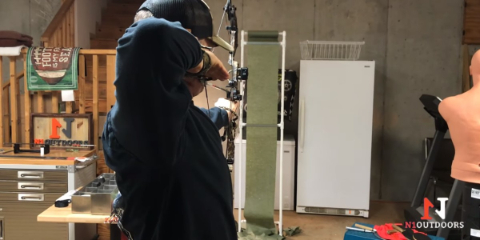
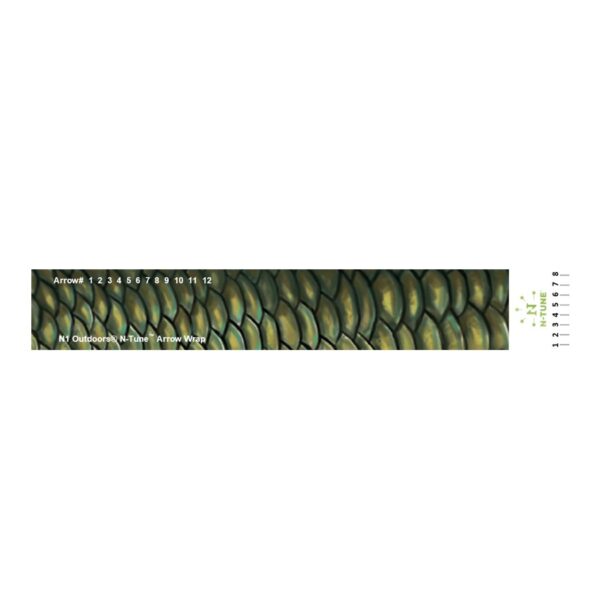
- Bare shaft tune your arrow (optional)
If you want to ensure that you will get the best arrow flight possible, it’s a good idea to nock tune your arrows through paper. (this is where the N-Tune arrow wrap is extremely helpful).
- Fletch arrows
If you are going to fletch your own arrows, you will need a fletching jig. There are several brands of jigs available, but for the purposes of this illustration, we are using the Bitzenburger jig.
NOTE: If you have bare shaft tuned your arrows, be sure to fletch your arrows so that when nocking your arrow, the mark you made on your arrow shaft during bare shaft tuning is facing up and that your fletchings will clear your rest and bow cables.)
Place you vane in the jig clamp and apply primer to the vane (if necessary for your vane type). Then apply fletching glue/adhesive to the vane.
NOTE: Be sure to mark on the jig clamp how high up you want the bottom of your vane to be on the shaft. Then, line up the bottom of all vanes with that mark when fletching.
Seat the bottom of the clamp on the base of the jig and then gently press the jig clamp down onto the arrow shaft. Hold the clamp and the shaft together with light pressure for 10 seconds or so to ensure you get good adhesion between shaft and vane. Let the vane (still in clamp) dry for 5-15 minutes. Then, remove clamp, rotate knob on jig. Then use this same process for the second and third/fourth vanes.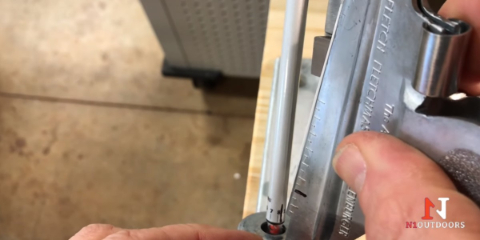
- FOBS (alternative to fletching)
If you are using FOBS instead of fletchings, simply apply the FOB to the end of the arrow shaft and insert the nock and you are finished!)
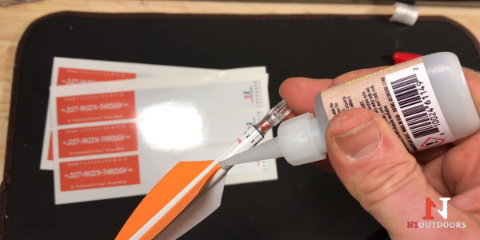
- Seal ends of vanes
Once you have finished fletching your arrows, be sure to dab a small drop of adhesive on both ends of each vane, to seal them so that the vanes will not rip off when passing through an animal or target.
-

N1 Outdoors® N-Tune™ Nock Tuning Reflective Arrow Wraps – Just Pass’N Through™
Price range: $18.99 through $27.99 Select options This product has multiple variants. The options may be chosen on the product page -
N1 Outdoors® N-Tune™ Nock Tuning Reflective Arrow Wraps – Bass Scales
Price range: $18.99 through $27.99 Select options This product has multiple variants. The options may be chosen on the product page -
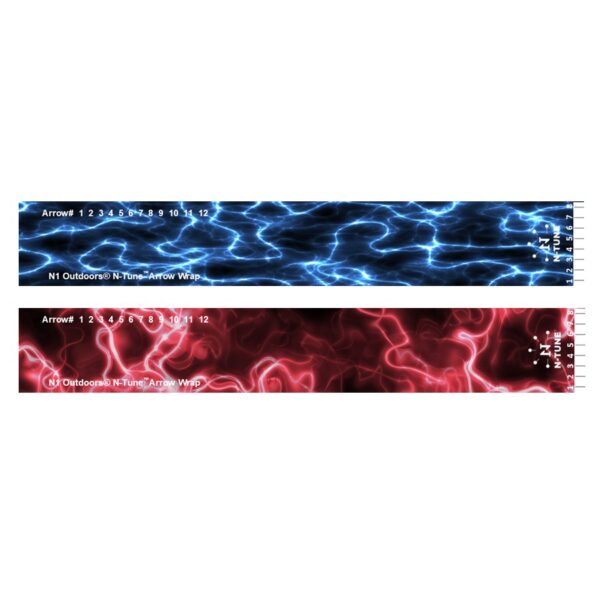
N1 Outdoors® N-Tune™ Nock Tuning Reflective Arrow Wraps – Electricity (Various)
Price range: $18.99 through $27.99 Select options This product has multiple variants. The options may be chosen on the product page

You’re all done! Now you have arrows that are ready to send down range! If you need help knowing what kind of broadhead to choose before your next hunt, be sure to check out our all-encompassing broadheads article!
We hope you put a hole N1!
Arrow Building Videos
How To Apply Arrow Wraps Video