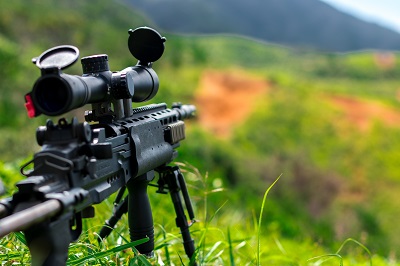
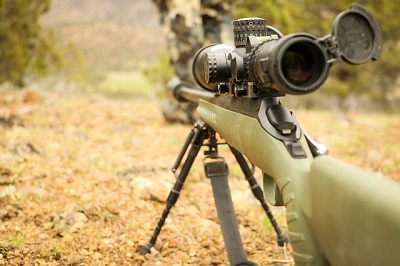
mounting a rifle scope

How To Mount A Rifle Scope | What You Need To Know

It is interesting that one of the most mystical elements of rifle-shooting (after buying a rifle scope) is getting a scope sight mounted correctly and, when done, finding out if the rifle will shoot straight after zeroing.

So, if you are not a pro on mounting a rifle scope, check out this guide below.

What You’ll Need

When mounting a rifle scope, the tools you’ll need can be as simple as a correctly sized screwdriver, and sometimes a small open-end wrench. (This all depends on the type of mounts being used, however, and yes, there are differences by the dozens).

A bench-rest system is a great way to install a scope. In some cases, an Allen wrench is also advised, or even required, to lock down ring screws. (However, in other situations, the full array of gunsmith tools are required when receiver bases and ring systems need installing).

bench rest for mounting rifle scope

A bench rest is a helpful tool to keep everything you’ll need close by while mounting your rifle scope.

What you’ll need to mount a rifle scope:

  • Screwdriver
  • Small open-end wrench
  • Bench rest
  • Allen wrenches


Mounting Your Rifle Scope | Step-By-Step

When going to work on a rifle scope mounting job, it is nice to have a clean, clear space to do the work. Even the use of a gun vise or mount is a great idea, and can save both time and effort in the event parts fall away from the scope or rifle.

If you’re worried about mounting a scope being a difficult task, let me put your mind at ease; I mount scopes while watching my favorite hockey game at the same time!


There are some jobs that require tapping new screw holes, and advanced mounts that require more parts then the scope contains. However, in general, most mounts are field dirt simple to work with and figure out for yourself.

Time needed: 15 minutes

Step-by-step rifle scope mounting

  1. Set scope in place

    Currently, modern rifle scopes are making more use of the Weaver-style bases that carry a rail with notches cut into the upper surface. The rings are set up with matching cuts and all you need to do is drop the scope into the rail.

    Be sure both rings are aligned with the correct notches, and set in place solidly. Once you have the rings in place, simply draw down the primary (large) compression bolt or nut.

    Independent bases are a bit more work in that each is set on the pilot holes in the receiver, one at a time and with two screws In most cases, they are set in place and tightened down. The bases are always paired with a specific scope ring type. Be sure the rings and bases match. If you buy them as a set, this should not be an issue.

    IMPORTANT: At times the base sets are not exactly the same height. Check each with care. In most cases (but not all), the higher base is forward, and the lower base is toward the rear. That is because the height of the receiver section is different. If bases were the same, you would have an issue there.

    A suggestion here is to get new combination rings and base systems, often called cantilever bases and rings. All you do is this:

    Using a Weaver-style (Picatinny-style) mounting rail, drop the whole system into place on the grooves, split the ring half sections, then set your scope onto the lower half of the ring group. (If you can’t do that, it is advised that you not shoot a gun either!)

    NOTE: Looking for the perfect scope for your rifle? Check this out.

    weaver style base for mounting rilfe scop

  2. Align the scope

    Now, with the rings installed as above, it’s time to align the scope within the rings. Keep in mind that the crosshairs require leveling, so leave the rings with the installed screws loose enough to allow you to rotate the scope as required.

    Also, be sure to check eye relief at this point. You’re may regret having leveled the scope, then tightened it down, and found that you’re stretching a mile to see through your scope.

    Why do I know this?

    Because it has happened to me more times then I should admit here.

    When leveling the scope’s crosshairs, see the horizontal line and set the scope in a solid rest position.

    Now look through the scope, again with the rings not turned very tight against the scope tube in order to allow that horizontal line to run level with an object that is of a known correct level. This can be the edge of a building, or some other related structure.

    When I align my scope, I use a bubble-mounted system that long-range shooters use, or at times, I just wing it and go with my gut feeling as to a correct level. When I recheck my level after mounting, I am almost always right on the money. I guess that comes with experience, as there are some weeks when I mount five or six rifle scopes in as many days.

    One thing is for sure, you don’t want to count on the person at the gun counter for all the help.

    I have friends who who do work in gun shops and sure as heck know their stuff. However, some of the “help” needs a tune-up and could well take a course on scope-mounting and parts sales to be sure. So, don’t assume everything is correct because the person at the gun counter says so.

    I have heard about hunters and shooters who went on “exclusive” and costly trips with a gun that was never checked beyond the gun counter.
    Not a good idea, as some have found out when a once-in-a-lifetime trophy walks out in front of them at 100 yards and they miss the shot because the scope is heading south when the shooter is looking west. (An exaggeration, but hopefully you get the point).

    So if you’re deer hunting for example and your scope isn’t dialed in exactly right, you’re going to have an errant shot. Arguments about what caliber is best don’t really matter if you can’t hit what you’re aiming at!

    rifle scope level

  3. Shoot for final zero

    Remember, just because a salesman at a gun shop “bore-sights” your scope for you, that is only a starter adjustment in terms of locating the correct zero for the rifle and scope.

    Bore sighting means getting a bullet some place on paper, with luck. After the rifle is bore-sighted, additional adjustments are necessary. In other words, shoot the rifle before ever counting on the correct sight adjustments on your new scope sight.

    When checking for scope accuracy and live fire shooting, try and shoot from a sitting bench-rest position with bags (sand is best). You want to eliminate as many variables as possible that could enter into producing a bad group or point of zero.

    As a final note, always shoot a group of at least three rounds for a quick double-check in terms of your bullet’s impact accuracy. Also, don’t be alarmed if someone shooting your rifle hits a different zero point. We all shoot a bit differently, even with textbook training. What is your zero belongs to you.

    sandbag rifle rest


Vortex Optics Crossfire II 2-7x32 Second Focal Plane, 1-inch Tube Riflescope - Dead-Hold BDC Reticle
$99.99
Buy Now
We earn a commission if you make a purchase, at no additional cost to you.
11/22/2024 10:24 pm GMT


Lapping Rifle Scope Rings

A word about lapping the scope rings. Lapping means taking any possible variation in roundness off the inside of the rings, so that you have as much contact between rings and scope as possible. Lapping the rings is a good idea if you’re shooting bench-rest or super accuracy group development.

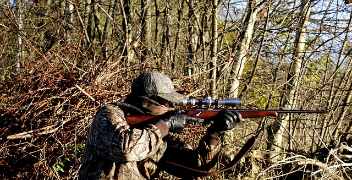
man on rifle range holding rifle

Shooting for final zero is critical. Here the rifle shoots ½ MOA (minutes of angle) group on steel at 600 yards, because the work at the bench-rest with the rifle and glass was done correctly.


I do not lap my rings because my good rifles and ammunition all shoot sub-½ MOA, and that is all anyone not shooting bench-style events needs. (Bench-rest is shooting for the smallest hole possible in the target. One hole groups win in many cases.)

So, if you are deer hunting for example, lapping the rings isn’t really necessary.

screw bases on rifle scope

Be sure to check screws and bases often, as vibration can cause loose parts, which lead to innaccuracy of your rifle scope.


Final thoughts

Once you have properly mounted and sighted in your rifle, that doesn’t mean you never check it again.

Screws and bases need to be tight and checked often, as even general transport can cause vibration and lead to a loosening of parts. Bumping your scope when pulling your gun up to a tree stand is another thing that might cause you to need to check the accuracy of your rifle scope.

Happy shooting!

man holding duck hunting shotgun

Choosing The Best Duck Hunting Shotgun | 3 Things To Consider

No worse feeling exists in the sport of waterfowl hunting than pulling up to dust a flock of mallards and then… your gun misfires.

I’ve been in that frustrating situation before and I don’t want you to experience the pain I did. 

So, how exactly can you keep this from happening?

Well, it begins with the firearm you select. I’m not here to push one brand over another, but rather to help you find the gun and gauge that best fits you so you can go with it.

What exactly is shotgun “fit?” Scroll down and watch the video near the end of the article to find out!

Does price matter?

I’ve hunted with guys who bought the latest and greatest shotgun on the market only to watch them miss every duck that decoyed. I’ve also hunted with guys who were shooting a “pawn shop special” and they absolutely slaughtered every duck within a mile radius.

So, what was the difference?

dead geese and duck

At the end of the hunt, you want a shotgun that has performed as expected, hopefully resulting in a successful harvest.

Well, one group of guys thought the expensive gun would make them a good shot. The other group knew they needed a gun that they were extremely comfortable shooting in several different conditions.

Simply put, the best shotgun is the one you are most comfortable using.

But how do you figure that out?


Which type of shotgun fits your hunting style?

There are three main types of shotguns. The most popular is the semi-auto, followed by the pump-action, and the over-under. They all come in different gauges and all are solid choices when it comes to waterfowl hunting. I have personally hunted with all three for at least one season each. As I hunted with each, I found there are pros and cons to all.

I prefer to hunt with a 12-gauge shotgun, regardless of the type of shotgun I am shooting. But, enough about me, let’s look at three critical factors in determining the best shotgun for ducks and waterfowl.


The three criteria I used to determine the best type of duck hunting shotgun are as follows:

  • Dependability: How unlikely it is to malfunction in different weather conditions?
  • Ruggedness: How much abuse can it take from being tossed in the back of a truck and dragged through mud all season long?
  • Amount of birds in the blind: That should be pretty self-explanatory. If I was able to shoot more birds with it, I hunted with the firearm more often!


The Most Dependable Shotgun

As far as dependability goes, an over-under is going to fire every time the trigger is pulled. A pump-action is going to fire basically every time, as well. The weather conditions are not prone to affect the firing capabilities of an over-under or pump-action.

The semi-automatic shotgun is a different story.

shotgun and decoy

Part of having a dependable gun is knowing it won’t jam or misfire.

As long as they are clean and lightly oiled in warm conditions, a semi-automatic works great! However, in my experience, when the cold weather hits, semi-auto shotguns tend to become finicky.

So, if you’ve ever wondered “how long do ducks live?” Well, a lot longer than you’d like, if your gun won’t fire dependably in the cold weather!

So, when I need a gun that is dependable, I hunt with a pump-action or an over-under. 


The Most Rugged Shotgun

Ruggedness, once again, goes to an over-under or a pump-action. The over-under has so few moving parts that make it such a rugged gun. Now, this does not apply if your over-under is a gun that only comes out of the gun safe to get oiled and then gently placed back in its place. 

12 gauge shotgun shells

Shotgun types come in different gauges… my personal favorite is the 12-gauge.

The over-under I used was as basic as they are made, perfect for the tough conditions I hunt. A pump-action has a few more moving parts, but in my experience hunting with one, they are just as rugged as an over-under.

The semi-auto shotguns I hunted with were not as rugged as I had hoped they would be, but in recent years semi-auto shotguns have made tremendous strides in ruggedness. 


The Deadliest Shotgun

The most critical factor is the number of birds the firearm helps bring down cleanly.

The semi-auto shotguns are outstanding when I need to fire off all three shots quickly, but I have a tendency to rush my shot. That is my fault, not the firearm!

When hunting with a pump-action, I am forced to slow down just enough to be much more accurate and add more birds to my limit.

semi automatic shotgun and black lab

Semi-automatic shotguns give you the ability to fire 3 shots rapidly, but may also lead the shooter to rush the shot.

The over-under shotgun I hunted with drastically fell short because it lacked the third shot I was familiar with. My friend, Jason Cruise, claims the third shot is a wasted shot more often than not.

I would disagree.


Yes, many times by the third shot, the birds are out of range. However, when the ducks are back-flapping in your face, that third shot is a huge advantage. Every hunt I am on, I will consistently shoot all three shells in a single volley. When I hunted with my over-under, I desperately missed having that third shot. 


Higdon Outdoors Standard Mallard Duck Decoys
$54.99
Buy Now
We earn a commission if you make a purchase, at no additional cost to you.
11/22/2024 10:28 pm GMT

So, what exactly is “shotgun fit” and how do you get the right fit for you? Check out this video to find out.

And, the best shotgun type is…

As I mentioned above, all three shotgun types have their pros and cons. However the one that stands out the most is the 12 gauge pump-action shotgun.

The pump-action shotgun is a workhorse. It is not anything fancy but it consistently gets the job done. Time after time, adding birds to the limit. No matter the weather conditions, a pump-action shotgun will deliver what it promises… three shells. 


Why the Pump-Action Shotgun is the Best

The reasons I choose to hunt with a pump-action shotgun over the other two styles are because a pump-action is typically more dependable than a semi-auto, it is extremely rugged, and I shoot more birds with a pump-action than an over-under. 


I admit I am extremely tough on my gear. So, I need a firearm that will hold up to the abuse, enduring throughout the season.

A pump-action shotgun does this for me more consistently than the other two styles. However, that doesn’t mean I don’t bring my other guns on a shoot or two during the season.


I love shooting my semi-auto when the weather permits and my over-under has become my turkey hunting shotgun. 

Whether you are just getting into duck hunting or waterfowl hunting has been a lifestyle for a while now, a pump-action shotgun is a tool that won’t let you down.

Before purchasing any firearm, do your research. I would recommend not only reading the online reviews, but also getting your hands on the gun you intend to buy prior to buying it. This ensures that it fits you well and you are more than comfortable handling it.

Buying a firearm is a big purchase, don’t rush into it. Take your time and choose the best shotgun for you

*All photos used by permission from Brad Alan

man sighting in a riflescope

Bullseye! | How To Sight In A Riflescope

If you’re ready to invest a little money in upgrading your rifle, one of the best things you can buy that will totally transform the way you shoot is a scope.

Not only will a scope improve your range and accuracy, but it will make our beloved sport more competitive and much safer.

But buyer beware.

Not all scopes are created equal! Some scopes are just poorly made, and other scopes are made for various purposes.

For example, the scopes I recommend in my 6.5 Creedmoor guide are solely dedicated for long range shooting.

Do You Need A Riflescope?

But before you buy a riflescope, learn why you should even buy a riflescope in the first place.

Some are built for tactical purposes while other sniper/hunting scopes specialize in longer-range targets.

mounting a riflescope

Purchasing a riflescope is only the beginning. You should properly mount and sight in your scope before you ever think about shooting it.

You may be shooting a .22 all the way up to a high-powered rifle, so it’s important that you have the right scope for the job. Be sure to read reviews on the scope you have in mind before purchasing. Reviews (like this Scope for Ruger 10-22 Reviews) can be very helpful in helping you decide how to spend your hard-earned dollars.

A quick pro-tip here is that it’s generally better to have too much scope than not enough. So, if you must err on the side of caution, err in favor of the scope.


I Have A Riflescope… Now What?

Okay, so you’re happy with the scope you’ve purchased, and now you want to get out and shoot, right?

Wrong.

Only after you have properly mounted your riflescope can you sight it. This component is just as important as anything else because it is how you customize the rifle to your own anatomy and mechanics.

Your arm length, eye spacing, and the unique way you hold the rifle are slightly different from everybody else, and these subtle differences can make a big difference downrange.


You might find it is easiest to sight your rifle at a local shooting range. However, if you live far from one but have a lot of land nearby, just make sure you’re shooting in a safe direction where there is no chance of passing hikers, campers, etc.

Make sure you use the same exact brand and weight of bullets that you’ll be using on the hunt. Even the slightest variation can have a significant effect on how the round fires.


Vortex Optics Venom 5-25x56 First Focal Plane Riflescope - EBR-7C (MRAD) Reticle
$416.57
Buy Now
We earn a commission if you make a purchase, at no additional cost to you.
11/22/2024 09:03 pm GMT

The basic idea of sighting is to make sure the bullet hits exactly where you’re aiming. If this doesn’t happen, it is either because of two things:

  1. You need a refresher on the fundamentals of marksmanship.
  2. Or the scope isn’t properly sighted.

Assuming it’s number 2, you might be wondering:

How do I properly sight my scope? Keep reading to find out!


Vortex Optics Viper PST Gen II 5-25x50 First Focal Plane Riflescope - EBR-7C Reticle (MRAD) , black
$899.99
Buy Now
We earn a commission if you make a purchase, at no additional cost to you.
11/22/2024 11:48 pm GMT


Step 1: Focus the Reticle

The first thing you need to do is make sure your reticle is in focus.

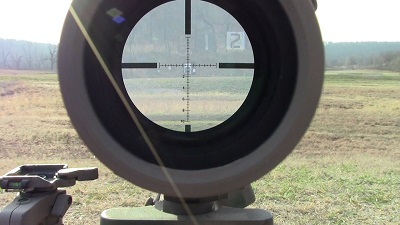
The reticle is the shape (crosshairs, a singular dot or circle, a triangle, etc.) you see when you look through the scope, and its function is to indicate scale or location of an object.

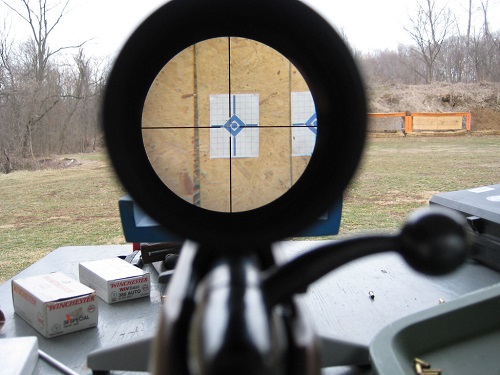
view through riflescope and reticle

Step 1 of sighting in your riflescope is to be sure you focus the reticle.

Look through the scope to ensure the whole picture is sharp. If it’s blurry, twist the diopter adjustment on the scope, which is typically going to be the end of the scope closest to your eye.

Something to keep in mind is that when shooting is that you will be focusing your naked eyes way downrange, scanning for targets or game, and then you’ll quickly switch to the scope right in your face.

Your eyes take a little time to adjust, so the view through the scope can be a little blurry for a few seconds.


Vortex Optics Viper HD Spotting Scope 20-60x85 Angled
$699.99
Buy Now
We earn a commission if you make a purchase, at no additional cost to you.
11/22/2024 09:48 pm GMT

To eliminate this lag, look away from the scope and let your eyes focus on something else at a distance. Stare at it for a few moments, then quickly look through the scope and in the brief moments before your eyes adjust, determine if the picture appears blurry. Keep doing this until the image is sharp and in focus immediately upon looking through the scope.

Step 2: Boresighting

view while sighting in riflescope view

When boresighting your riflescope, be sure that what you’re aiming at down the barrel is the same thing your reticle is aimed at.

Boresighting your rifle first will save a lot of time and ammo.

This will take just a few minutes and will ready your weapon for the fine-tuning we are about to do.

First, securely mount the rifle to aim downrange at a highly visible target 25 yards away. Then, remove the bolt so you can see straight down the barrel at the target.

Look through and aim the barrel center mass. Next, look through the scope to ensure the reticle also lands center mass. You will likely need to adjust the scope’s turrets to achieve this. The turret on top adjusts the scope’s elevation (up and down) and the one on the side adjusts its windage (to the left and right).

Once your reticle is adjusted center mass, replace the bolt and get ready to start shooting.

Pro-tip: There are even specialized zero targets you can use that are gridded to help precisely determine the adjustments you need to make. You’ll see why that might be useful later.


Step 3: Fine Tuning

Sighting requires great precision, so make sure the rifle is either mounted or thoroughly supported for this step.

Replace the bolt, insert your high-quality ear protection, and fire three rounds directly at the bullseye of your target at 25 yards. You will probably not hit the bullseye, so focus more at the consistency of the shot group.

If your three shots are really close to each other, but the whole group is about 1 inch south and 2 inches west of the bullseye, you need to adjust the elevation for 1 inch and the windage for 2. It looks complicated, but it’s really simple.

scope turrets for sighting in riflescope

Use your scope turrets to fine tune your riflescope. 1 click typically changes shot location by 1/4 of an inch at 100 yards.

The turrets we were playing with earlier in the article are what we will now use to fine-tune your scope.

But before I go in-depth, here’s a quick primer on elevation and windage adjustments:

Usually one click changes the location of the bullet’s impact by ¼ inch at a target 100 yards away. The way we represent that is “1/4 MOA,” where MOA stands for Minute Of Angle. Four clicks will move the bullethole one inch in the direction indicated.

But, if the target is only 25 yards away, we need to move the dial 4x as many clicks to move the bullethole the same 1 inch. If the target is 200 yards away, conversely, 2 clicks move it 1 inch. Four hundred yards away, 1 click for 1 inch.


So, for the example above, we need to rotate the turret 16 times to elevate 1 inch and another 32 clicks to the right. The turret itself will indicate which direction to turn and the MOA (although most are ¼).

Once your scope is sighted for the target at 25 yards, it is time to extend the range to 100.

Fire another three rounds for your shot group, then determine how far off the bullseye the group is located.


Measure the deviation and adjust your elevation and windage in the same way we just did, bearing in mind that 4 clicks at this distance will equal 1 inch.

Fire another shot group at your 100-yard target, and if they hit where you wanted them to, you have successfully sighted your scope.

NOTE: Be careful not to bump your sight during transport or when pulling your gun up to your treestand. If you do, you could have to repeat the process to get your sight zeroed in again.

Happy Hunting!