The Best Deer Hunting Treestands for your next hunt

Deer season is coming and you’re ready to hunt.

You’ve done your homework on all the local laws, and you’re ready to go bag some venison.

Your rifle is cleaned up and ready to go. You’ve mounted and zeroed your scope of choice onto your hunting rifle.

You’ve spent time at the range mastering your shooting technique. And, you’ve carefully chosen the right ammunition. Maybe you even went all-out and got one of those fancy rangefinding scopes).

But, there’s one more piece of equipment you might want to invest in: a deer stand.

Now, there are a lot of options to choose from out there, and the choices can seem overwhelming. But that’s why I put this guide together.

I’ve spent the time and money to find out the best treestands for deer hunting in 2021 so that you can be sure and get the best bang for your buck. Ready to learn more? Keep reading!

Why Use a Deer Stand?

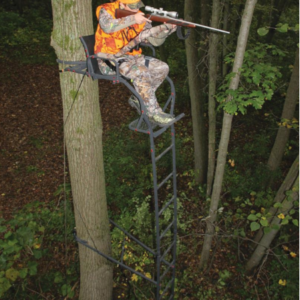
Basically, a tree stand is a portable way to get yourself up above ground level for hunting.

Unlike a hunting blind, a tree stand can be taken down and moved to another location, and doesn’t require that you build a permanent structure. With a tree stand, all you need is a sturdy tree to gain a huge advantage over your prey.

Being above the ground not only makes you harder for deer to see, but it also helps keep your scent away from skittish noses.

And, it’s safer. Not only is your orange safety gear easier for other hunters to spot in the field, but shooting from an elevated position means that your rounds will travel downward into the ground, and not towards any houses or roads.


Types of Deer Hunting Treestands

There are four main types of deer stands on the market: climbing, hang on, tree saddle and ladder.

Climbing deer stands use a blade that bits into the tree to literally “climb” the tree to the desired height while you sit in the sand and work a foot bar. Climbing stands are extremely portable and easy to use, since they don’t require any sort of ladder, stairs, or climbing stick to use.

Hang on stands use a ratcheting strap to hold a small standing platform onto a tree. Hang on stands tend to be the lightest, but require additional equipment to set up and get in and out of.


Ladder treestands use metal ladder sections that attach onto each other. Once you’ve built the ladder to the desired height, you can attach the stand to the top once you’re ready. These are designed to be more permanent, so they are usually much heavier and more difficult to set up than the other types.

Now let’s take a look at the best options for each of the three types, plus a fourth “special” stand.


Summit Viper SD | Best Climbing Tree Stand

There are some good options in the climbing stand category. Lone Wolf Custom Gear, for example, has been manufacturing light and innovative climbing stands for years.

But there’s one that has stood the test of time. The Viper SD stand from Summit, has been their most popular stand for over 17 years, and it’s easy to see why.

The Viper only weighs 21 lbs but can support up to 300 lbs of weight, so even bigger hunters can feel both safe and comfortable up in the trees.

The best thing about the Viper SD is the QuickDraw attachment cable, which is way easier to use than the pins or bolts that most other treestands rely on. Plus, the seat is very nicely padded for those long hunts.

Best of all is the patented DeadMetal technology. Basically, Summit uses an expanding foam to prevent any metal-on-metal noises or creaking, which helps keep you quiet while lining up that perfect shot.

summit viper treestand

The Summit Viper sports a comfortable seat and has quieting foam, which helps conceal unwanted noises.


Summit Treestands 81120 Viper SD Climbing Treestand, Mossy Oak
$361.82
Buy Now
We earn a commission if you make a purchase, at no additional cost to you.
12/23/2024 12:39 am GMT


Lone Wolf Assault II | Best Hang On Tree Stand

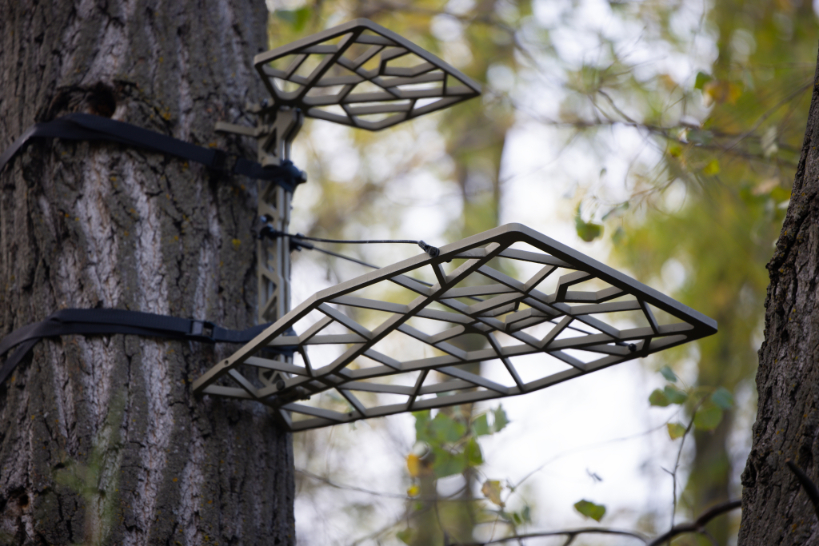
This baby is both lightweight and extra-quiet.

The Lone Wolf Assault II only weighs 11 lbs, but it’s rated for 350 lbs, and it’s even got a built-in bow holder for all you bow hunters out there.

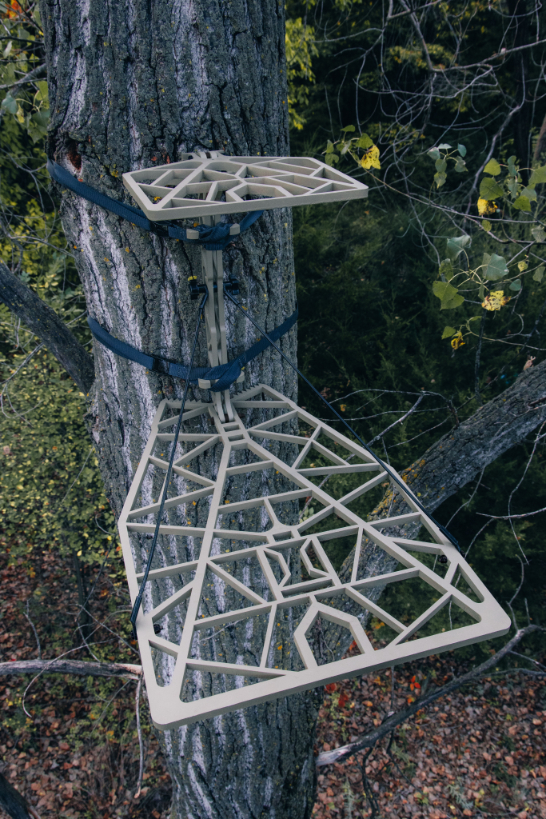
The skeletonized platform is small enough to place up in a tight cluster of trees, but still wide enough to allow for standing shots, and the padded seat is comfortable.

Plus, it doesn’t creak or pop when you’re getting into position. If you’re in the market for a lightweight, quiet hang on stand, then the Lone Wolf Assault II is the stand for you.

lone wolf assault 2 hang on treestand

The Lone Wolf assault II weighs only 11 lbs!


Lone Wolf Assault II Hang On Tree Stand
Buy Now
We earn a commission if you make a purchase, at no additional cost to you.


Trophyline Ambush Lite | Best Tree Saddle Kit

If you’re looking for a hunting system that you can wear on your back and set up in minutes, look no further than the Trophy Line Ambush Lite.

This kit includes everything you need to get up off the ground, plus a few accessory pouches to store your gear while you “hang out” waiting for your prey. And, the seat is more comfortable than you would expect from something so lightweight.

The best thing about it, though, is that it’s designed specifically for mobility.

The whole thing packs away into the included cinch bag or fits easily into your day bag, which means you can easily set it up where you want it, and then move and redeploy it in another location if you want to.

trophy line ambush lite deer stand

The Trophyline Ambush Lite packs up nice and tight and can be set up in minutes.


X-Stand “The Duke” | Best Ladder Tree Stand

The Duke earns it’s royal name by providing the shooter with a host of added features over more portable treestands.

Sure, it weighs 79 pounds, but it’s still easy enough for one person to set up by themselves, and it’ll go as high as 20 feet.


With that kind of height, you definitely want to make sure your stand is sturdy, and that’s where The Duke’s Jaw Safety System comes in. It uses serrated steel jaws to clamp hard to the trunk of the tree, so you know it’s not going anywhere.

The X-Stand Duke ladder stand is the most comfortable deer stand I have ever used. It’s got a flip-out footrest that not only adds to comfort, but acts as a nice stabilizer for shooting. Plus, there’s a padded shooting rail, multiple accessory hooks, and even cupholders!

the duke ladder treestand

The Duke ladder stand is the most comfortable ladder stand I’ve ever sat in.


X-Stand Treestands The Duke 20' Single-Person Ladderstand Hunting Tree Stand, Black
Buy Now
We earn a commission if you make a purchase, at no additional cost to you.


X-Stand “The Comrade” | Best 2-Man Tree Stand

Thanks to The Comrade, stand hunting doesn’t have to be a solitary experience.

This baby packs a spacious, curved shooting platform, 2 padded seats, and a center storage console to allow for two hunters to take to the trees together.

It features a full safety harness for both shooters, as well as X-Stands patented Jaw Safety System.

The X-Stand Comrade is a heavy, 2-man ladder stand, weighing in at 125 pounds, but I can’t think of a better way to go hunting with a buddy.

x-stand treestand

The X-Stand Comrade is a great option for hunting with a friend.


X-Stand TreestandsTreestand
Buy Now
We earn a commission if you make a purchase, at no additional cost to you.


Final Thoughts On The Best Tree Stands For Deer Hunting

Whether you’re trophy hunting or just hunting to put some tasty venison in the freezer, this quick review will hopefully give you the information you need to decide which stand will be right for your next trip to the deer woods.

Hopefully, you’ll have a big set of antlers walk by your deer stand.

Good luck!

view while sighting in riflescope view
Richard Douglas, founder and editor of Scopes Field


hand hold a baitcasting rod

How To Cast Light Lures With A Baitcaster | The Inside Information

on . Posted in Blog, Fishing

Baitcasters are beloved my many in the fishing community, but many have trouble casting light lures with them.

So, how do you get any distance on those light lure casts and keep from getting a bird’s nest?

Well, it’s obviously a challenge, because the lure is very lightweight. So, challenge, guys, because there’s very light weight. You have to really get the spool on your baitcaster turning in order to get momentum so that you can get distance on your cast.

So, I’m going to show you a few tips that are really going to help you cast little bitty light lures with a baitcaster!

First things first… the proper fishing rod

Before we get into the actual reel itself, one of the most important aspects of casting lighter lures with a baitcaster is to make sure you have the proper rod.

For a longer cast with lighter lures, you ideally want a 7’4″ rod with a very fast tilt.

joshua taylor holding a st croix baitcaster fishing rod
To cast lighter lures with a baitcaster, you should aim to have a 7’4″ rod with a fast tilt. This is the St. Croix Legend Xtreme, which is only a 7-foot rod, but it has a very, very fast tilt. I can still cast a light lures a good distance by making a few small adjustments. I’m also using the Concept TX reel, from 13 Fishing. It’s one of the smoothest baitcaster reels I’ve used.


Reel adjustments for casting light lures with a baitcaster

Once you have an appropriate rod for baitcasting smaller lures, you’ll need to make some adjustments to your reel.

Adjust the magnetic brake

One thing that you have to do is adjust your magnetic break control. Now, this is going to be different for each reel, so you really need to get to know your baitcaster reel very well.

Now, ideally, you’re going to want to reduce the amount of breaking when you’re casting light lures. There will be a sweet spot and you’re going to have to play with the reel breaking to find where that is. I typically turn the breaking down to the 2 setting (on a reel with a 0-6 range). I find that setting works best for me. But you are going to want to adjust that to see where that sweet spot is for you.

making magnetic brake adjustment on baitcaster reel
On the Concept TX reel from 13 Fishing, the side panel has a small wing that you press and it will open up so you can adjust the magnetic brake.


13 Fishing Concept TXZ Saltwater Inshore Baitcasting Fishing Reel
$249.99
Buy Now
We earn a commission if you make a purchase, at no additional cost to you.
12/23/2024 01:48 am GMT


Adjust knob tension

Now, the other thing you need to adjust on your baitcaster reel is the tension knob. (If you want to learn more about how to tune your Baitcaster, I go into complete detail).

Adjust the tension knob on your reel so that when you press the button to release the line, the lure will be able to hit the ground and not cause a massive bird’s nest.

adjusting tension knob on baitcaster
You need to adjust the tension knob so that your lighter lure can fall to the ground freely without causing a large bird’s nest in your line.
man holding baitcaster after adjusting tension knob
The key to adjusting your tension knob is to be sure you are not getting a bird’s nest when the lure hits the ground.


Proper light lure casting techniques

Once you have everything dialed in on your reel, you need to be sure you have the proper mechanics and technique to be able to maximize the distance on your light lure casts.


Longer leader length

One of the important factors when you’re trying to do a light cast or cast lighter lures is line leader length. You want to make sure that when you cast, your leader is actually hanging down a little longer than normal.

Typically, 8 to 10-inches from lure to the rod tip works well with a baitcaster. However, when casting a really light lure, you can let out 2 to 2-1/2 feet of line, so that you can get more momentum on your cast, resulting in a great cast distance.

I can absolutely guarantee you that longer linger leader length will work and help give you that leverage you’ll need to cast farther.


Minn Kota 1358894 Terrova Freshwater Electric-Steer Bow-Mount Trolling Motor with Universal Sonar 2 & i-Pilot GPS, 80 lbs Thrust, 60" Shaft
$2,399.99
Buy Now
We earn a commission if you make a purchase, at no additional cost to you.
12/23/2024 01:12 am GMT


Try a wider spool

In addition to longer leader length, you should try to find a reel that has a larger spool. There a many on the market, and I have found that larger spools will allow you to increase your distance because the spool has to turn fewer revolutions to disperse the line.

So, if you have a smaller, skinnier spool, you’re not going to get as far of a cast as you would with spool that has a larger diameter.


Casting mechanics

When you’re casting lighter lures with your baitcaster, you’re going to make sure that you’re not over powering the throw or you’re going to have overruns resulting in a bird’s nest.

You have to use not only your wrist and your arms, but you want use the full momentum of all of your body. This includes your legs, back and torso.

man casting light lure with baitcaster
When casting the baitcaster, use both your wrist and your arms.
man casting bait caster and following through
I’m using not only wrist and my arms but also my legs, back, and torso. If you use your entire body, in sync, you can cast very light lures. Then, you can adjust to drop-shots and other weighted baits. The key is not to overpower it, but to finesse cast using your entire body.


Conclusion

I hope you enjoyed this tutorial on how to cast light lures on a Baitcaster.

Remember, it’s not very complicated. It just really boils down to making sure that you’re practicing and that you understand the mechanics of your reel and your rod.

Fine tuning your baitcaster is one of the most important things in getting the the range out of your light lure casts.

joshua taylor of salty scales
Joshua Taylor

More related content from N1 Outdoors:


ice fishing 101 header image

Ice fishing 101 | A beginner’s guide to ice fishing

So, you’d love to ice fish, but aren’t quite sure how to do it?

Well, I’m going to cover the basics of ice fishing – an Ice Fishing 101 – so you can get out, safely fish, and share moments on the ice with your family and friends.

Ice Fishing For Beginners

You can navigate to any part of the article more quickly by clicking the links below:

  1. Locate an ice fishing spot
  2. Be sure ice is safe
  3. Ice fishing clothing
  4. Ice fishing gear
  5. Drill hole in ice
  6. Bait the jig
  7. Jig the lure

Step 1: Locate your ice fishing spot

man at ice fishing spot
Once you locate a good spot, it’s best to fish 50 to 100 yards from shore.

Now, the first step to getting on ice fishing is to find a good place to ice fish. Once you do that, you’re going to want to start to fish in the first 50 to 100 yards from shore.

You’re going to typically target 10 to 15 feet in depth and that will allow you to catch panfish, crappie, bluegill as well as pike and hopefully largemouth bass as well.

If you are ice fishing for the first time in a particular location and don’t know exactly where to fish, a good move is to get started right next to some other shelters. There are great communities out on the ice and everyone is fighting the cold and usually love fishing next to each other.

Step 2: Check for safe ice conditions

man making sure ice is safe for ice fishing
Always be sure the ice you are planning to fish is safe before drilling.

You should always be sure that the ice conditions are safe before attempting to fish a certain location. I highly recommend that you call or stop into your local bait and tackle store and make sure that the lake you picked out has safe ice conditions.

You can typically see where other people are safely fishing as well as sticking to the foot paths that they’ve already created, so you know it’s generally safe ice.

I highly recommend drilling holes (we’ll get to that further down) every 10 to 20 yards to double check the ice thickness.

I don’t recommend going out on any water that has under 5 inches of ice. If you have 5 inches, you’re going to be good, but you want to keep checking to make sure that there’s no variation in thickness.

If you do get to an unsafe spot, get off that lake. Five inches is the minimum.


Step 3: Wear appropriate clothing

man wearing ice fishing clothing
Be sure to layer up in the appropriate clothing: coat, mittens, hat, snow pants and snow boots.

Before you go ice fishing, be sure to gear up with warm winter clothing. It’s a good idea to dress in multiple layers as well as a coat, mittens, hat, snow pants and snow boots.


Safety gear is an essential part of your clothing

Safety spikes and ice cleats and floating bibs are very important components of proper ice fishing clothing.

The cleats help you walk on the ice without slipping and the safety spikes allow you to pull yourself up out of the water in the event that you fall in.

The floating bib has material in it that will allow you to bob back to the surface if you were to fall through the ice.

Now, if you don’t have higher end ice fishing bibs that can float, I highly recommend taking some sort of floatation device with you, most notably, an inflatable life preserver that’s easy to carry and lightweight.


man holding ice fishing safety spikes
Safety spikes are an essential part of your ice fishing safety clothing.
man holding ice cleats
Ice cleats help you walk on the ice without slipping and falling.


Step 4: Ice Fishing Gear Inventory

Once you get your winter clothing taken care of, you need to get your ice gear taken care of.

ice fishing gear and tackle

There are a few pieces of gear that are rudimentary and essential to getting out on the ice to fish.

Sled: First, because you will likely need to drag your gear and equipment with you for long distances, you will need a sled.

ice fishing sled
You’ll need an ice fishing sled to hold all your tackle and gear.

Nordic Legend Explorer Ice Shelter 5 Sides Wide Bottom Insulated 6-8 Person Ice Fishing Tent
$499.99
Buy Now
We earn a commission if you make a purchase, at no additional cost to you.
12/22/2024 11:13 pm GMT

Auger: Secondly, you will need an auger. An auger is a drill that will cut through the ice. It goes from 6 inches to 10 inches, and some even go up to 12. If you’re just getting started, I highly recommend just having a 6-inch hand auger.

ice fishing auger
You’ll need an auger to drill a hole in the ice.

Bucket: Another important thing to have is a bucket. This bucket is going to carry all of your tackle, your bait, all in one thing. And it also serves as a stool so you have a place to sit when you’re out on the ice.

ice fishing bucket
Your bucket holds your tackle and also gives you a place to sit.

Scooper: Next, you need a scooper. This is going to allow you to hold the ice out of your hole, clean it up and fish that hole consistently without having the ice interrupt your fishing or the fish coming through the hole.

ice fishing scooper
You’ll need a scooper to clean the ice out of the hole you drilled.

Ice Fishing Rod: When you’re ice fishing over a hole that’s right in front of you, you don’t want a long freshwater fishing rod, because it will put you too far away from the hole. You won’t be able to fish with it inside of a shelter. Plus, they have very low sensitivity. I recommend a 28″ ice fishing rod.

man holding bent ice fishing rod catching fish
The size of the ice fishing rod is important. It needs to be small. 28″ is recommended.

Jigs: Next, you need some jigs. The Tailored Tackle Multispecies Ice Combo allows you to jig or deadstick for a multitude of species. It includes micro jigs, tungsten jigs and others that you’re typically going to be using.

tailored tackle jigs
You’ll need jigs to put your bait on.

Bait: Lastly, you’re going to need some bait. Spikes are maggots that are used in ice fishing. You tip two to three of them on your jig and you jig them up and down to catch all sorts of species; primarily panfish, like perch and crappie.
spike maggots for ice fishing
Spike are a great bait for ice fishing that can attract a variety of species to bite.


Step 5: Drill A hole in the ice

Once you arrive at your spot, you’ll need to drill a hole in the ice. You will need to take the safety device on top of the bottom of the auger and remove it. Drill down into the ice by moving it clockwise.

man holding ice fishing auger
Make a hole in the ice with your auger by moving it clockwise. Once you have drilled your hole, pump the auger up and down three to four times to remove all of the big bunch of slush out of the hole.

Once you have drilled your hole, remove the excess slush with your boots.

man removing slush from ice fishing hole
Once you have drilled a hole in the ice, kick the sides of the slush off the side. Be sure to cover up the auger blade with the safety guard so that while it’s standing there, nobody trips and falls on it.


Korkers Men's Neo Arctic Rubber Boots - Inuslated and Waterproof for the Extreme Cold - Includes Interchangeable All Terrain Sole - Size 9/Black
$199.99
Buy Now
We earn a commission if you make a purchase, at no additional cost to you.
12/22/2024 11:17 pm GMT

Scoop the hole

After drilling the hole, you’ll need to scoop it, using your scooper. Dip the scooper slowly into the hole and pause.

man scooping ice slush out of ice fishing hole
When scooping the hole, wait for all of the ice and slowly lift it up. Don’t do it quickly, or you’ll just push the ice around. Do that until the hole is nice and clean.


Step 6: Bait the jig

Once you have drilled the hole and scooped out all the ice, it’s time to bait the jigs.

a hand holding jig head for ice fishing
A jig head, like these from Tailored Tackle, are great for baiting your hook with spike maggots.
baiting a jig head with spike maggots
Spike maggots are great for ice fishing and can attract a bite from many species of fish.

Once you have baited your jig, lower the lure down into the hole. Open the bale on the reel and let the line out. Fishing one to two feet off the bottom is very effective.

man letting out line ice fishing
Set your drag loosely and pull out your line until your lure is on the bottom. This helps get any kinks out of the line. Then crank the reel a few times so that your lure is one to two feet off the bottom.

Step 7: Jig the lure

man jigging ice fishing lure

The next step after lowering you lure and getting it off the bottom is to jig.

Lift your rod tim up and back down and then pause 2 to 3 seconds. That’s just a basic jig. Lift up. Drop it down. Pause 2 to 3 seconds.


You can even last a couple of seconds longer, maybe 5, 6 seconds for the pause. The bites are going to happen on the pause. So, the jigging is calling in fish and the pause is letting them come up and take a bite.

Another jigging cadence you can try is to softly jiggle it in place or work it upwards in little blips upwards just like that. So mix your jigging cadences. Try different techniques, big swoops, lift-ups, jiggling in place, or just the regular jig. Pause.

man holding bream caught while ice fishing
Wait until you feel that tap, tap, tap. Then, set the hook lightly, by lifting the rod tip up 3 to 4 inches and then reel the fish in.

Now, when a fish comes through and is interested in the bait, you’ll feel a tap, tap, tap.

It will be easier to handle the fish by taking off your mittens and using your bare hands.

When releasing the fish, kneel down and drop it into the hole. Sometimes a bigger fish will need a tail wag in the water and it will be on its way for someone else to catch!

Good luck ice fishing!

Ed Hitchcock of Tailored Tackle
Ed Hitchcock of Tailored Tackle.

More related content from N1 Outdoors: