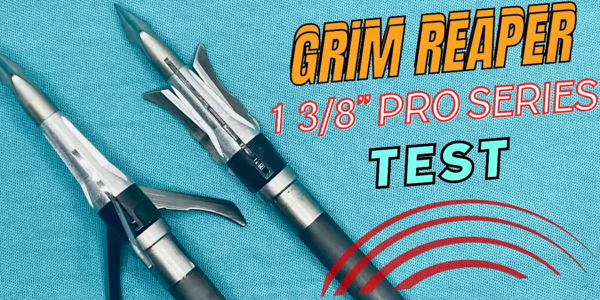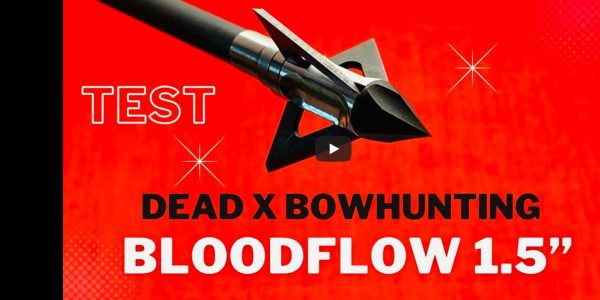
I’ve got a really cool broadhead test to recap in this article! It’s the Bloodflow 1.5.
I’ve been wanting to test this head for quite a while, but the introduction and rollout of this broadhead is really bittersweet. Let me give you the backstory.
A Bittersweet Broadhead Release
I had been talking to the designer of this head, John Smith, for quite a while. He owned and had been running the family business of Dead X Bowhunting for quite a while.
In the industry, you come across some really special people, and John was definitely one of those. He had such a passion for broadheads, for archery, and for coming up with all kinds of cool stuff over the years, but he was also just a really good guy, family man, and man of faith, so we bonded at that level as well.
The Bloodflow 1.5 broadhead was John Smith’s pride and joy, which made testing this head so much more special.
But I’d been talking to him about this Bloodflow 1.5 design. He had already done the Big Game 3 and Big Game 2. They both tested well and are incredible broadheads. I’ve used them in the field as well.
But, he was working on one with a bit of a smaller cut and less weight. It was going to be more practical for everybody. And, we had been talking about the design. He was giving me updates every step of the way. And, then he told me he was just about done and he was going to send me some to test.
When the date I was supposed to receive the heads to test rolled around, I still didn’t have them, so I followed up.
-
Sale!
N1 Outdoors® Trifecta Fish Arrow Tee
Original price was: $22.99.$5.00Current price is: $5.00. Select options This product has multiple variants. The options may be chosen on the product page -
Sale!
N1 Outdoors® N1 Moments™ Licking Branch Buck SS Tee
$5.00 Select options This product has multiple variants. The options may be chosen on the product page -
Sale!

N1 Outdoors® Licking Branch Buck LS Tee
$19.00 Select options This product has multiple variants. The options may be chosen on the product page
I sent him a text, but he didn’t send anything back, which was unlike John.
And, then I sent him another text. He didn’t respond to that either. I was wondering what was going on.
And, then his son reached out to me and told me that John had just been tragically killed in a car accident.
I was devastated to hear that news. The industry lost a great man. Society loses a great man. Missouri loses a great man.
I loved this guy. I loved the family-owned business. And, everything was done right there in-house and in their own machine shop.
The sweet part about it is that this broadhead was his pride and joy. And so, it’s more than just a really cool-looking broadhead. It’s really like a tribute
It’s called the Bloodflow. And man, this broadhead is going to make some blood flow!
So, As I tested I was thinking about John and thinking about all that he poured into the design. So, I really felt honored to be the first one to test this broadhead and to introduce it to the market!

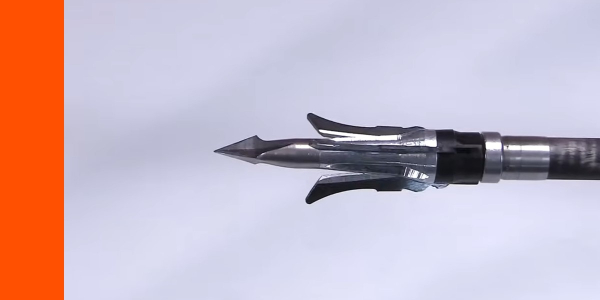
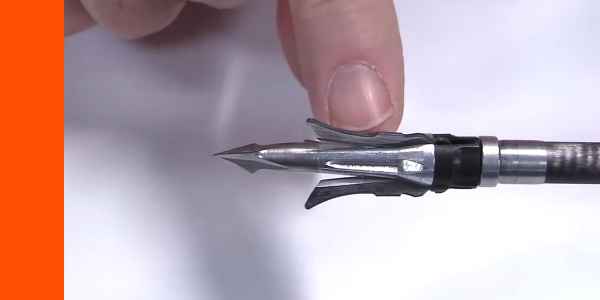
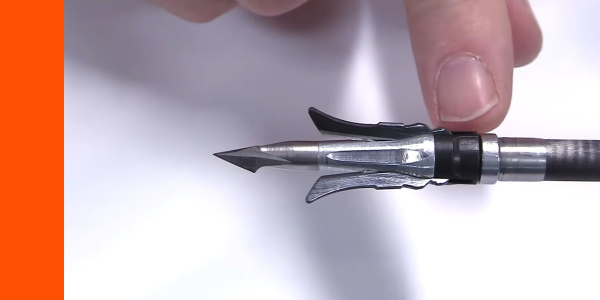
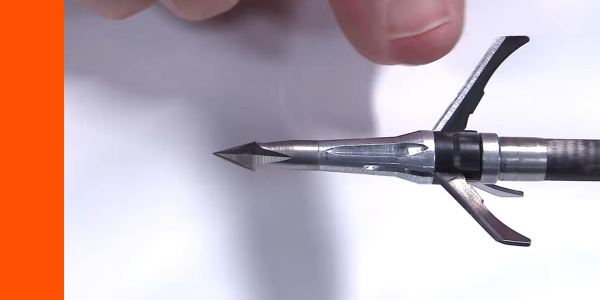
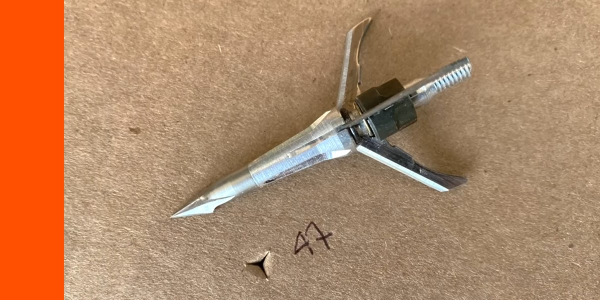
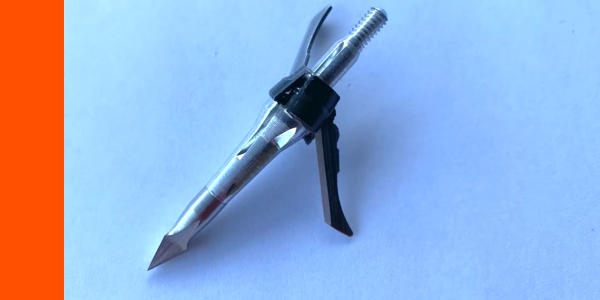
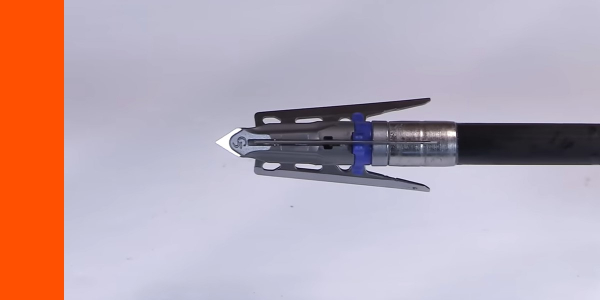
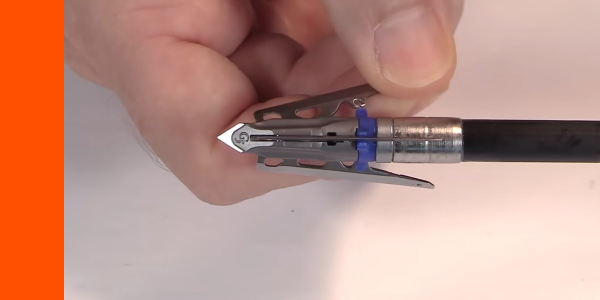
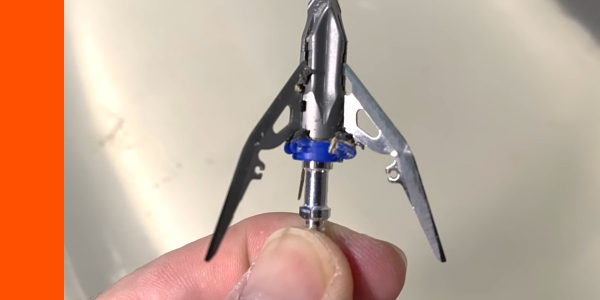
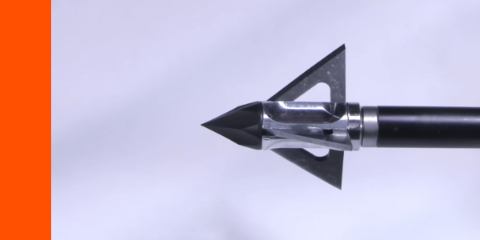
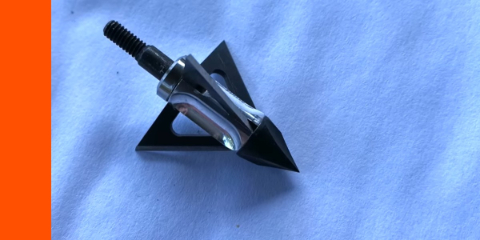
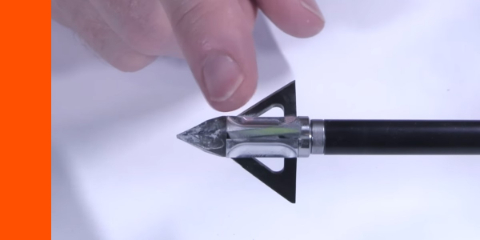
The BloodFlow 1.5 Up Close
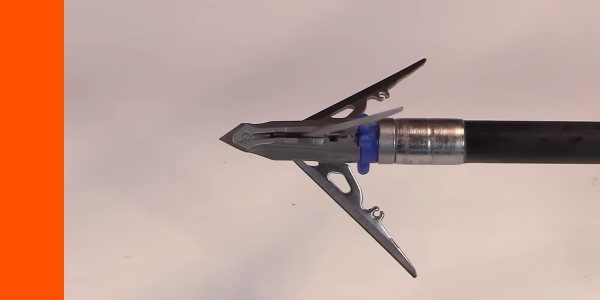
Let’s zoom in and go through some of the design features and specifications of the Bloodflow broadhead… And this is one beast of a broadhead right here!
I had been looking forward to testing the Bloodflow 1.5 for awhile. Man, it just looks so cool!
Bloodflow 1.5 Materials
Let’s first go through all the materials…
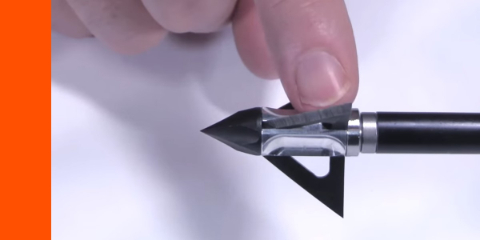
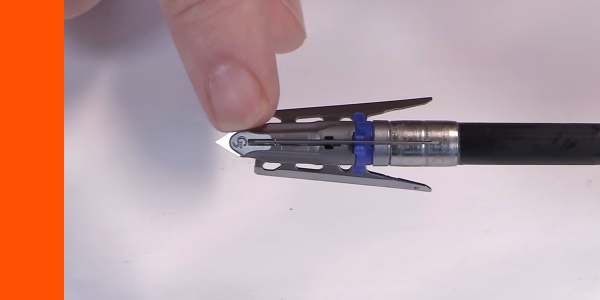
The ferrule is a single piece of hardened steel, 1144 high carbon steel, brought to a Rockwell hardness of 45, and it’s one piece of machine steel. It has a small collar over it to help hold the blades in place, but without adding stress load to the collar.
The blades are 1095 high carbon steel. They are brought to a Rockwell hardness of 55 and they are 0.062″ thick (really stout, thick blades). And, you notice they’re single bevel sharpened with a bevel angle of 37 degrees. That’s to maximize rotation and maximize edge durability, and to reduce edge chatter that can occur.
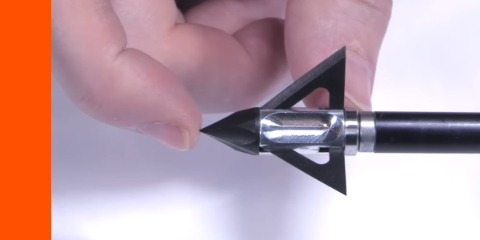
The Bloodflow 1.5 has a very short profile, which helps aid in penetration and flight.
When you go below and angle of 30 degrees, you’re probably going to get some edge chatter, because there’s just so much pressure as it rotates on that leaning edge. But, this is a nice 37-degree angle. The overall super-short profile maximizes penetration as well as flight, because there’s less exposed blade.
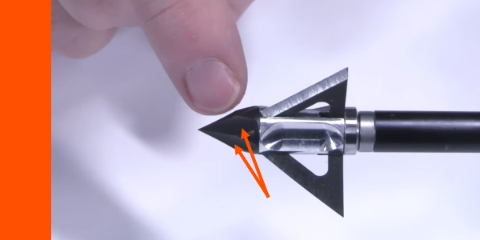
The cutting diameter is a stout 1.5″ of cut. Wow! There are not many 3-blade broadheads that have that large of a cutting diameter. That gives you a total cut of 2.25″. Wow! That’s a lot. But, it’s actually even more than that, because they have this new tip and it’s a 6-fluted tip.
The fluted tip on the Bloodflow 1.5 gives you an edge that just goes up into the cutting diameter of 1.5″, but then you’re getting another little edge in between. And so, each little edge is between the other two blades. That’s giving you an extra 2/10 of an inch cut. So, if you multiply that times 3, you are getting an extra 0.6″ of cut between the blades total (and, all that in this short package!)
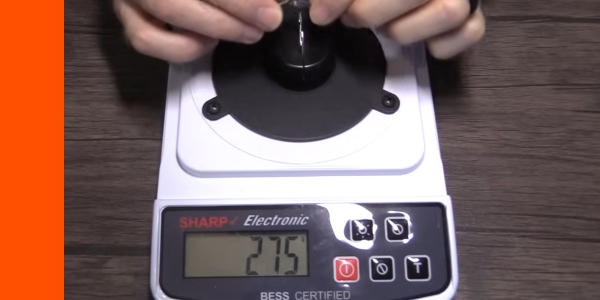
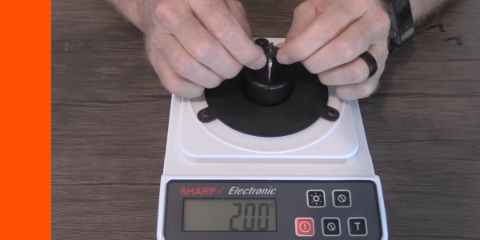
And, the total weight is 200 grains, so it’s also going to increase your FOC and it’s going to increase your momentum tremendously there.
-
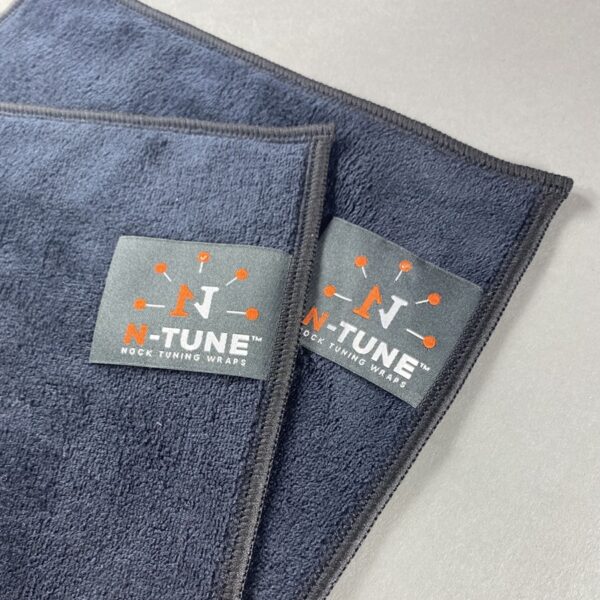
N-Tune™ Arrow Shaft Cleaning Cloths
$4.99 Add to cart -
N1 Outdoors® N-Tune™ Nock Tuning Reflective Arrow Wraps – Color Fade (Various)
$18.99 – $27.99 Select options This product has multiple variants. The options may be chosen on the product page -
N1 Outdoors® N-Tune™ Nock Tuning Reflective Arrow Wraps – Fade To Black (Various)
$18.99 – $27.99 Select options This product has multiple variants. The options may be chosen on the product page
Check out all our arrow wrap designs HERE!
>> More arrow wraps and archery supplies here!
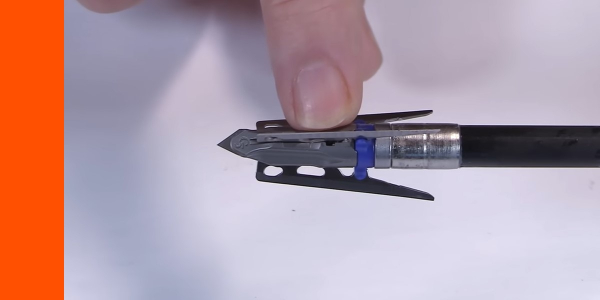
Now, another thing about these broadheads is that the owners are machinists themselves, and they have extremely tight tolerances. So, when you slide the blades in place, they actually slide and hold snugly in place without even a little O-ring holding it at the bottom. That’s so nice without that washer.
For these tests, I used my Bowtech CP28 set at 72 pounds andBishop FOC King Arrows. (on the really hard impact shots, I used the Bishop FAD Eliminators because they can take a beating!)
Normally with broadheads like this, you slide the blade in then you rotate around and it falls out. That doesn’t happen so readily with this one because of those nice, tight tolerances. But, also because of that, if you initially install the blades in the broadhead, screw it on to your arrow and spin it, it’s probably not going to spin very well and you’re going to think, “What’s wrong with it?”
You have to keep loosening it and tightening it, loosening it, tightening it about 20 times or so, 20, 25 times. And you want to use the broadhead wrench that it comes with it. After you do that about 20, 25 times, then man, it spins like a charm! Just a perfectly balanced broadhead.
So, I was really impressed with the look and feel and specs of this head, which made me super eager to put it to the test and see how it performed!
Flight Forgiveness Test
I shot one field point and then one broadhead @30 yds… Very good flight!
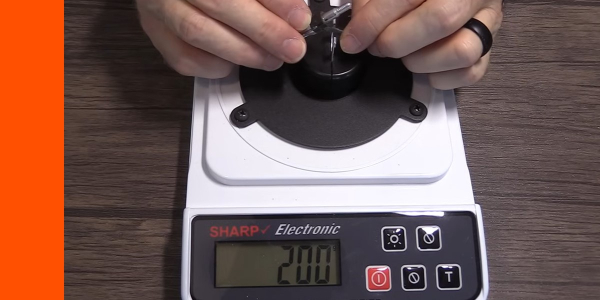
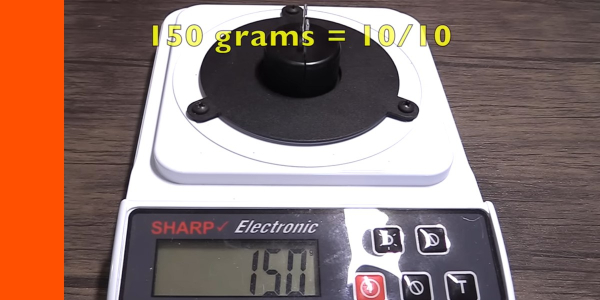
Initial Sharpness Test
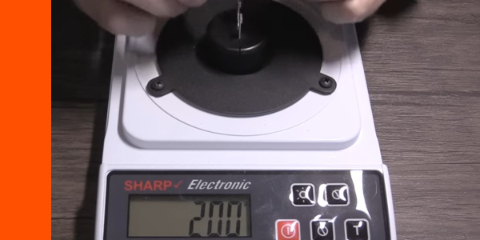
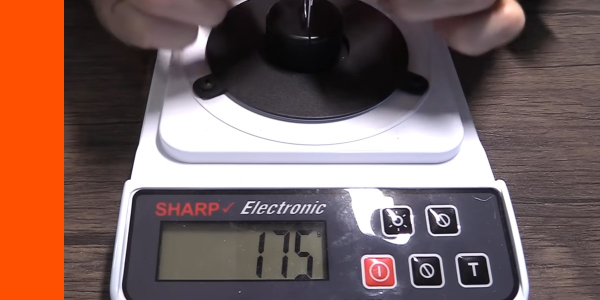
It took 200 grams of force to cut through the wire which is a 10 on a 10-point scale.
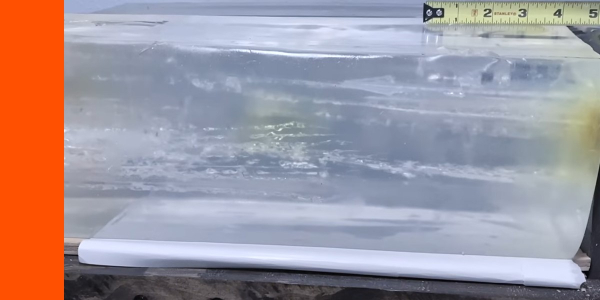
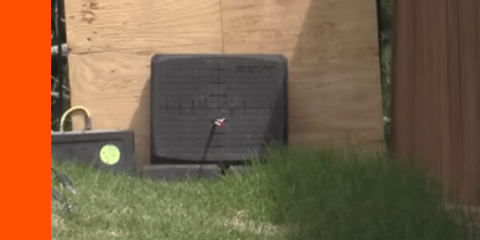
Penetration Test 1
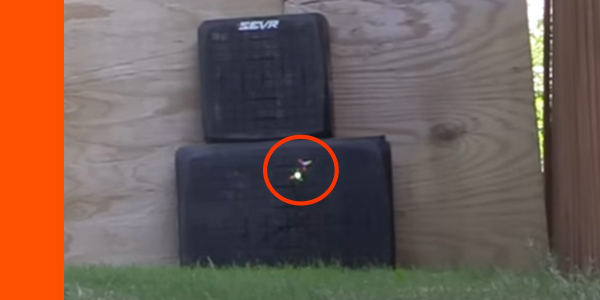
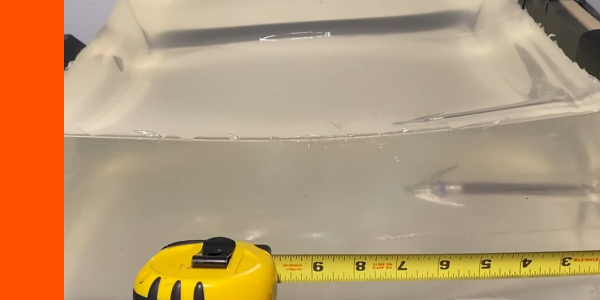
I shot the head into ballistic gel, fronted by a 2/3″ rubber mat, and 1/2″ MDF. It penetrated right at 7-1/2 inches.
Edge Retention Test (sharpness after Penetration Test 1):
It didn’t take any extra force to cut through the wire after Penetration Test 1, so that’s a 10 on a 10-point scale.
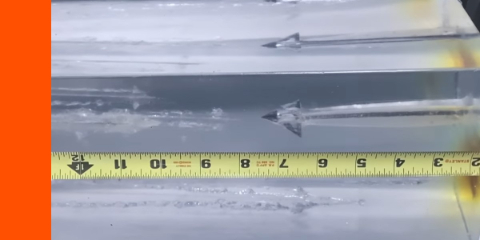
Rotation Test
I shot the head into a block of ballistic gel. It rotated 40 degrees and penetrated 10-1/2″.
Penetration Test 2 (layered cardboard)
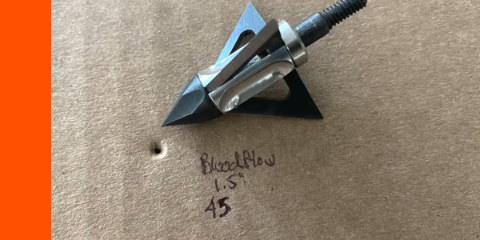
The Bloodflow 1.5 penetrated through 45 layers of cardboard.
Angled Shot Test (1/4″ MDF Carpet)
The Bloodflow 1.5 had no problem penetrating the angled MDF.
Durability Test (1/2″ MDF max 3 shots)
The head was in absolutely perfect condition after the three shots through the MDF.
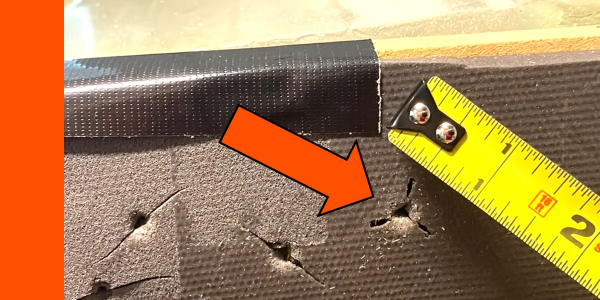
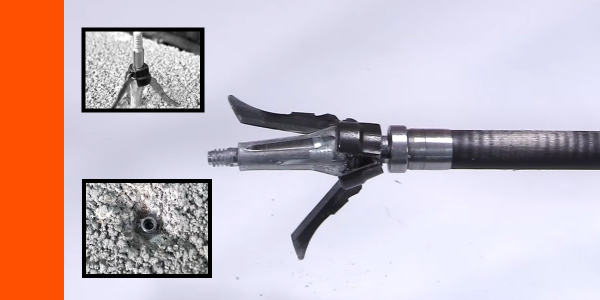
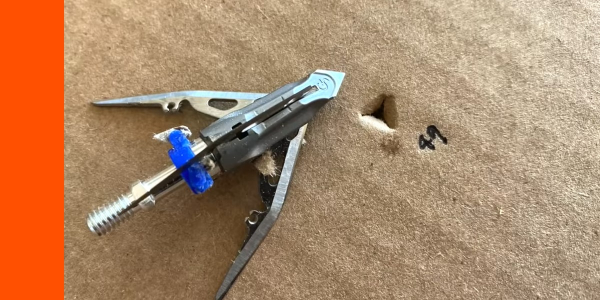
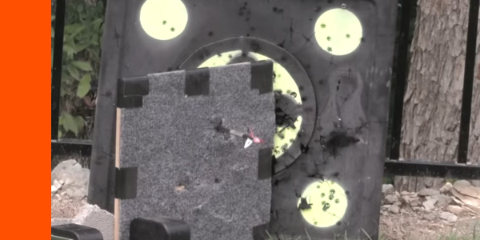
Durability Test (22 gauge steel plate: Max 2 shots)
And here it is after the two shots through the steel plate, and it’s in great condition. The blades look fantastic.
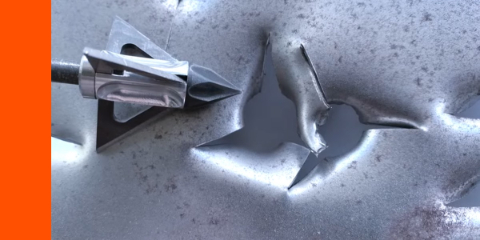
Wow! Take a look at the holes the Bloodflow 1.5 made in the steel plate!
The tip got a little bit blunted as you can see there in the picture. And those holes, man, those holes! What incredible holes! You can even see the S-cut, the curvature of the single bevel through those holes. That’s going to be a wound channel that is really difficult to close up.

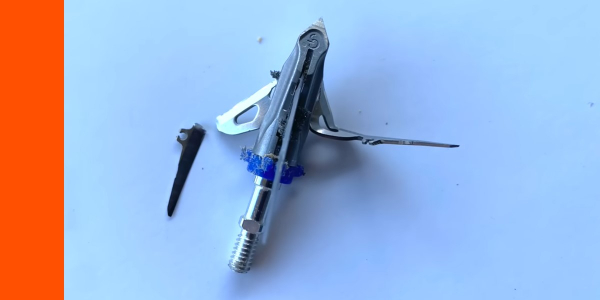
Concrete Test
Here’s a good look at the Bloodflow 1.5 after all the durability tests. It has gone through MDF three times, through the steel plate two times, and then it just smacked into the concrete. It didn’t stick, but it made a really nice hole in that concrete. And wow! It still spins very well. The blades are just in very good condition. You can barely tell they have been shot. The tip got a little bit blunted after all that, but man, really impressive durability!
Final Thoughts On the Bloodflow 1.5 Broadheads
So, what do you think of the Bloodflow?
Man, I’ll tell you what… if you’re going to have a tribute broadhead, this is a good one to have. John would be super proud that his life’s work culminates in his best masterpiece ever. I mean, this thing performed really well.
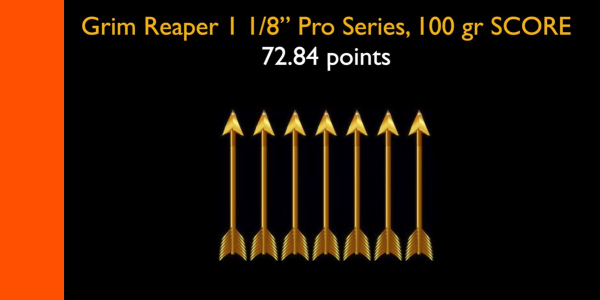
It actually got one of the highest scores of any broadhead I’ve tested. It has the second highest score of any fixed blade I’ve tested to this point. The highest was the Trifecta Fixed. And, this was just 6/100 of a point behind it.
So, great work Dead X Bowhunting. And, great work, John. I really appreciate all the passion and creativity you put into this.
Another cool thing about this head is that it has interchangeable blades. They have 1-1/2″ of cutting diameter. You can even swap them out for a 1-1/4″ cutting diameter blade to give you better penetration.
So, here’s to you, John. Great work! I look forward to using your broadhead in the field.
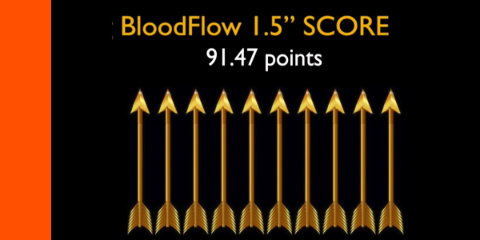
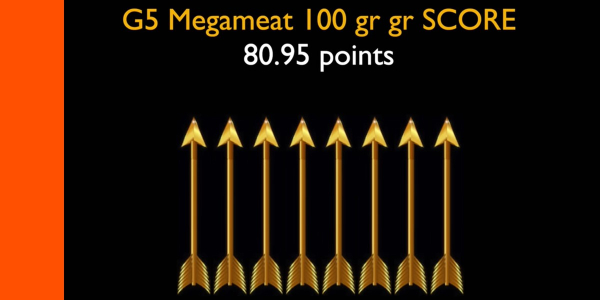
The Bloodflow 1.5 scored 10 golden arrows and is the second-highest score of any fixed blade I had tested to this point!
And, to the rest of you, I really want to encourage you to check out Dead X Bowhunting. Go to their website and especially check out this Bloodflow broadhead. And, if you know the family, reach out to them and thank them for all they’ve done for the industry over the years.