arrow with broken nock in target

Pin-point accuracy | How nock tuning your arrows can be a game-changer

See if this sounds familiar…

Deer season is coming up. You know you need to get out and shoot your bow but you can’t seem to find the time. There’s just so much going on with work and/or with family.

So, you don’t get in the reps in shooting your bow like you need to.

two arrows near bullseyes on foam target

Nock tuning your arrows can be the X-factor in achieving superior arrow flight.

The next thing you know, deer season is here. You’re in a deer stand and Mr. Big walks by and you let an arrow fly.

You either miss, or that arrow doesn’t do exactly what you thought it was going to do, and you make a bad shot on that animal.

If this sounds familiar, you’re not alone.

I’d like to share how the flight of one arrow made me pay much more detailed attention to each of my arrows prior to hunting with them.

This is the story of how I decided it was time to start nock tuning my bare shaft arrows.

How To Paper Tune Your Bow (Diagram)

Before you nock tune your arrows, you need to be sure your bow is in tune (if you are unsure, visit your local archery pro shop). The diagram above shows you the different types of tears you can encounter when paper tuning. Tears for both fletched arrows as well as bare shaft arrows are shown.


how to paper tune a bow and paper tune arrows diagram

Click here to jump straight to the step-by-step nock tuning process with the N-Tune™ Arrow Wraps!


So, What Is Nock Tuning Anyway?

So, before we get into how nock tuning became an integral part of our setup, you might be wondering…

“What is nock tuning?”

Well, simply put, nock tuning is the process of turning the nock on your arrow, in order to find out which position results in the straightest arrow flight. While the exact position can vary, it’s often where the location of the arrow’s spine is in the 12 o’clock position.

Did the arrow fail? Not quite, but it wanted to!

Shooting at a deer is not a good time to find out that your arrow is not flying true.

On one of our bowhunting retreats to South Georgia, my business partner, Josh Wells, was able to take a whitetail buck, but it was not without a little bit of drama.

buck laying down in high grass with lighted nock arrow flying toward it

When we reviewed the footage of the shot on this bedded buck, the lighted nock allowed us to see the corkscrew flight path of the arrow… not what you want to see.

When we reviewed the footage of the shot, the lighted nock allowed us to notice some pretty severe corkscrew movement on his arrow.

Thankfully, the fletchings did their job and the arrow found its mark.

But, this really got us thinking hard about bare shaft tuning our arrows.

We had not nock tuned our arrows in the past, but we knew folks who did and who recommended it highly.


What if bowhunting commercials were like drug company commercials?


Just give me one dozen arrows and let’s go hunting…

To be honest, like many of you, in the past we had just gone to our respective local bow shops, ordered a dozen arrows, and went hunting.

We had taken for granted that that arrow was going to fly true. After all, when it comes to bowhunting we just need to be a “good shot,” right?

Josh Wells of N1 Outdoors with a south georgia whitetail

Josh was able to recover his whitetail, but the corkscrew flight of his arrow left him wondering if he had in fact delivered a fatal shot.

Well, we were reminded of an important lesson on this hunt… when it matters most, no one wants that arrow to fly better than the person that’s actually releasing it.

So, as good as your bow shop is (and we have some great bow shops in our area), the truth is that they don’t grip your bow like you do. They don’t necessarily have the same anchor point as you, and they may not have the same release of the arrow that you do.


Pine Ridge Archery The Arrow Inspector, Black
$30.99
Buy Now
We earn a commission if you make a purchase, at no additional cost to you.
01/10/2025 01:21 am GMT

So, while your bow shop can get your bow in center shot and “in tune,” there is much about your personal shooting method that can affect arrow flight.

So, it’s your responsibility to be sure that each arrow has the best chance of finding its mark when shot from your bow, by you!


In the moment of truth, we want great arrow flight

Now, some will argue that nock tuning is nock tuning is not necessary. If an arrow doesn’t fly true, it’s all the shooter.

Maybe it was poor form.

Maybe it was hand torque.

Maybe…

Well, while form is an extremely important part of bowhunting. We all don’t possess world-class shooting form.

arrow with nock tuning wrap in decoy

When it really mattered, we needed confidence that fletchings would not have a ton of correcting to do. This way, we could be ensured with arrow flight that is as straight as possible.

Our experience with erratic arrow flight on this hunt made us want to learn for ourselves how to get our bow, as well as our arrow shafts as tuned as possible.

Enter bare shaft nock tuning.

I had seen Troy Fowler (aka, the “Ranch Fairy”) talking about high FOC arrows and also how nock tuning bare shaft arrows was “witchcraft” and that it mattered greatly to achieving excellent arrow flight.

Now, when you start using words like “witchcraft” in regards to bowhunting, you have my attention.

So, the digging into the process of nock tuning began…


Here’s why you SHOULD care about nock tuning!

Last Chance Archery Last Chance Ez Green Press
$549.99
Buy Now
We earn a commission if you make a purchase, at no additional cost to you.
01/10/2025 01:48 am GMT

If you are still reading, and are wondering what nock tuning is all about, I’m going to take you through the process step-by-step, so that you too can do this for yourself. Keep reading!

Why is nock tuning your arrows necessary for great arrow flight?

Nock tuning has much to do with finding the stiffest part of the arrow, known as the “spine.” The arrow most often flies best when this portion of the shaft is facing up when shooting.

The goal of nock tuning is to gradually turn the nock of your arrow to different positions on the shaft to find the one where the arrow flies the straightest.

One of the best ways to do this is to shoot a bare shaft (unfletched) arrow through paper until your find the position on the shaft where it shoots a “bullet hole.”


A bullet hole (or as close to it as possible) will give us a very good indicator that when this arrow is fletched and shot, the fletchings will have very little to correct.

After all, you may have gripped the bow too tightly during the shot, or even released the arrow abnormally.

Those fletchings will have all that to worry about without adding an arrow that is not properly tuned.


A word about arrow spine

We could certainly go in-depth about arrow spine, but we’ll keep it simple here.

When arrows are shot and released from a bow, a tremendous amount of stored energy is transferred from the limbs of the bow to that arrow.

arrow flexing in flight after being shot from bow

If you look closely, you can see in this picture that the arrow flexes when shot from the bow. Having the a properly spined arrow for your bow setup is critical to the nock tuning process being fully effective.

The arrow will flex during the shot and the stiffness of the spine is what determines how much that arrow will flex.

To fly properly, your arrow needs to flex, but it needs to flex the right amount. That is why having properly spined arrows for your bow setup is critical.

So, as I walk you through the process of bare shaft nock tuning your arrows through paper, I’m going to assume a few things right off the bat.

I’m going to assume that your bow is already in center shot and that you have properly spined arrows for your bow setup. Because after all, nock tuning is not meant to take the place of a properly tuned bow and setup.


Check out the “Happy Arrow” Commercial from the N1 Outdoors YouTube channel!

The N-Tune arrow wrap and how it makes the nock tuning process easier

Please hear me.

I am not trying to argue for or against arrow wraps.

Many of you may have also gotten interested in the nock tuning and paper tuning bare shaft process by watching the Ranch Fairy.

Troy Fowler will tell you, he is not an arrow wrap guy. In fact, he is not for anything that adds extra tail weight. And as it pertains to high FOC, we totally understand why.


What we are saying is, we have found that in the process of bare shaft nock tuning through paper is tedious. It can take several, if not dozens of shots, and knowing where you are and where you have been on that arrow shaft is critical to figuring out where that arrow will fly the truest.

marking arrow number on the n1 outdoors n-tune arrow wrap

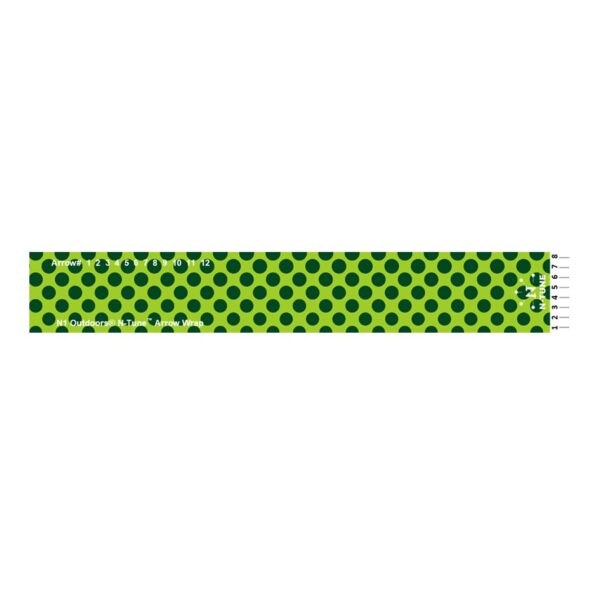
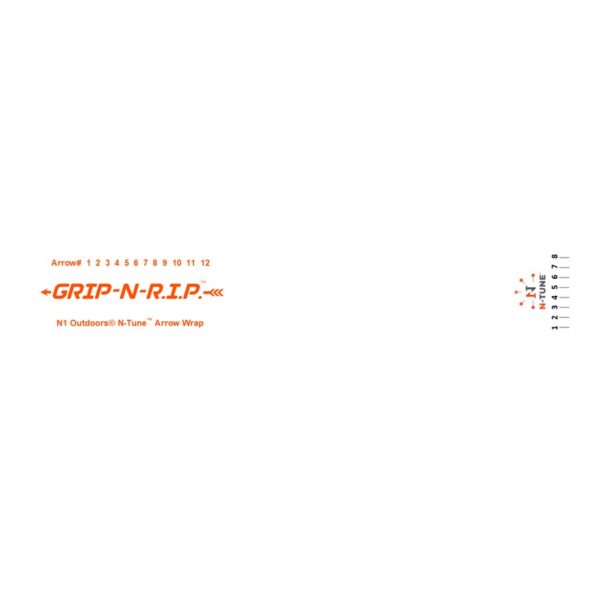
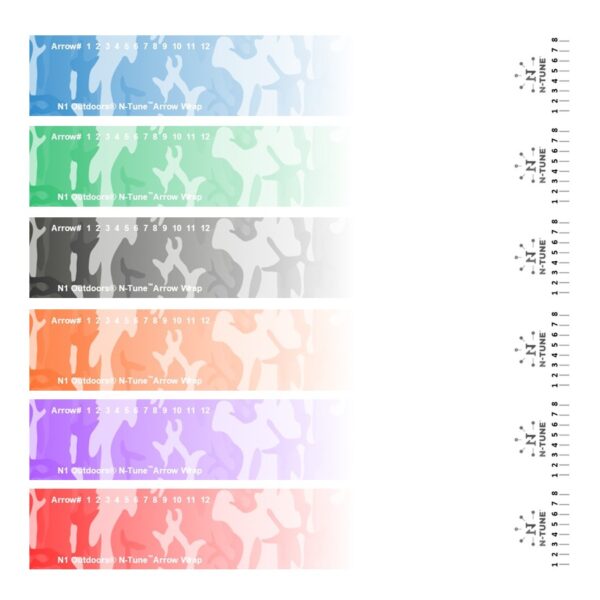
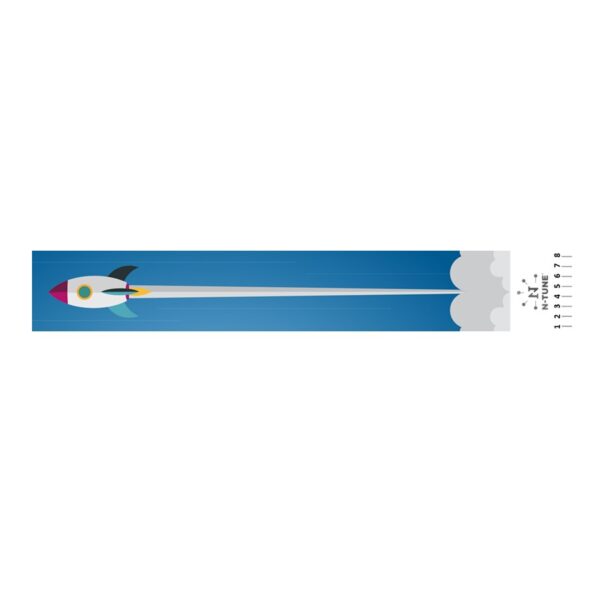
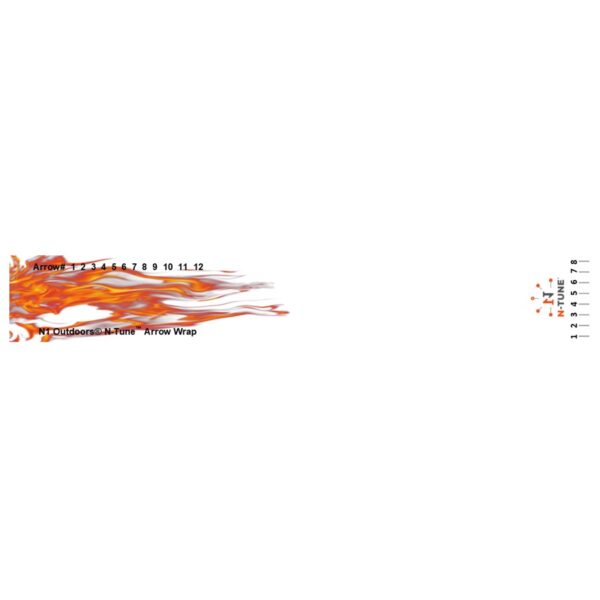
The N-Tune arrow wrap allows you to put a small indicator of which arrow you are shooting, so you don’t have to write on your fletchings.

So, we wanted to come up with a way to make the nock tuning process a little bit better, so that you can easily reference which parts of the shaft are tuning better through paper. We also wanted to be able to indicate which arrow you’re working on, so that you can reference that without having to mark up your arrows too much.

So, let’s get down to business of how to nock tune your arrows with the N-Tune™ Nock Tuning Arrow Wraps!

NOTE: (before attempting to tune arrows, you should always be sure that you or your local bow shop has properly set up and tuned your bow per manufacturer’s specs).

How To Nock Tune Your Bowhunting Arrows With The N-Tune™ Nock Tuning Arrow Wraps | Step-By-Step

If you’re still reading, you’re probably wondering, “so how do I bare shaft nock tune an arrow?” Well let’s take a look at how you do it with the N-Tune arrow wraps!

Time needed: 15 minutes

Here’s how to nock tune your arrows through paper using the N-Tune arrow wrap. (estimate: 15 min per arrow):

  1. Align hole/mark on nock with line on the arrow wrap

    Line up the center of the hole in the lighted nock (if you have one) with the number 1 line on the wrap. If your nock does not have a hole, you can mark any place on the nock with a dot as a reference point.

    lining up nock with marks on n1 outdoors n-tune arrow wrap

  2. Shoot bare shaft arrow through paper

    Shoot the arrow from about 10 feet away through paper (be sure you have a heavy target, such as a speed bag or crossbow target behind the paper that will stop the arrow. Also, be sure that your target is behind your paper more than a full length of your arrow, so that the arrow will not impact the target until it has fully passed through the paper).

    man shooting bow through paper while nock tuning

  3. Mark corresponding wrap number next to hole in paper

    Next to the hole in the paper, write which position on the N-Tune arrow wrap you were on when you shot that hole.

    holes in paper from nock tuning through paper

  4. Mark your arrow shaft

    Once you have shot using all 8 positions on the wrap, examine the holes and see which one is closest to a “bullet hole.” Once you determine this, make a mark on the shaft with a sharpie or other marker and be sure to shoot the arrow with this mark facing up. (Note: If you are fletching your own arrows, you may need your fletchings pointing a certain direction in order to clear your rest of cables. Just be sure that t this mark can always be facing up when shooting.)

    marking the n1 outdoors n-tune arrow wrap for nock tuning

  5. Repeat steps 1 through 4 on all shafts

    Continue the above process for all 8 positions on the N-Tune arrow wrap. (You may have to do this process more than once on each number if you know you had a bad irregularity on one of the shots that was not necessarily the “arrow’s fault.”

  6. Fletch arrows

    If you are going to fletch your own arrows, be sure that you fletch them so that the mark you have made on your shaft is pointing UP when you nock the arrow.

    fletching arrow with nock tuning mark facing up


Spine Tester Pro
$209.99
Buy Now
We earn a commission if you make a purchase, at no additional cost to you.
01/10/2025 03:32 am GMT


Nock tuning your arrows [step-by-step]

Conclusion

So maybe you’re still asking, “why are you so worried about all this bare shaft nock tuning through paper stuff? That’s what’s the fletchings are for, to correct arrow flight!”

Well, that’s true. But again, if you’ve bow hunted long enough, you know that a lot of things can happen when you release that arrow.

Maybe your stance wasn’t exactly right.

Maybe you were wearing baggy clothing and the string slapped your sleeve when you released the arrow.

Maybe you had hand torque when you released the arrow.

Maybe you had facial pressure on the bow string.

All these things can negatively affect arrow flight.

Yes, when these things happen, the fletchings will help correct the flight of that arrow. But, you want them to have to correct as little as possible.


Nock tuning your bare shafts through paper is a great way to be confident of your arrow flight when it really counts.


Minimal correction is best

Would you rather your fletchings be correcting lots of imperfection because the arrow was not properly tuned? Or, would you rather the fletchings be correction small imperfections because you had taken every precaution to ensure that the bare shaft was flying as true as possible before any of that other bad stuff happened?

I’m choosing option 2, because not only do I want to be the best hunter I can be, I want my arrow to have the best chance possible of making an ethical impact on my target deer or other animal. This will result in me having the best chance possible of recovering that animal.

I hope you’ve learned some helpful information regarding nock tuning through paper.

If you’re interested in the N-Tune arrow wraps, just visit our online store!


Giles Canter of N1 outdoors with archery buck
Giles Canter of N1 Outdoors.
arrow building header image

Arrow Building 101 | How to make your own bowhunting arrows

Are you looking for tips on how to build your own bowhunting arrows? Well, you’ve come to the right place!

We’ll walk you through the process step-by-step so you can start enjoying the process of arrow building.

arrow in target with N-Tune wrap on arrow

First things first… Be sure you have selected an arrow shaft that is appropriate for the draw weight of your bow.

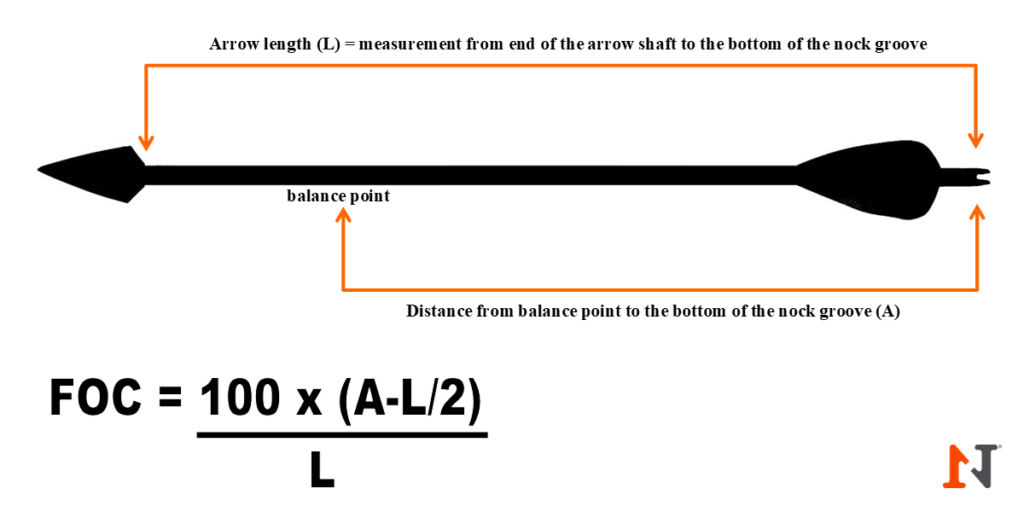
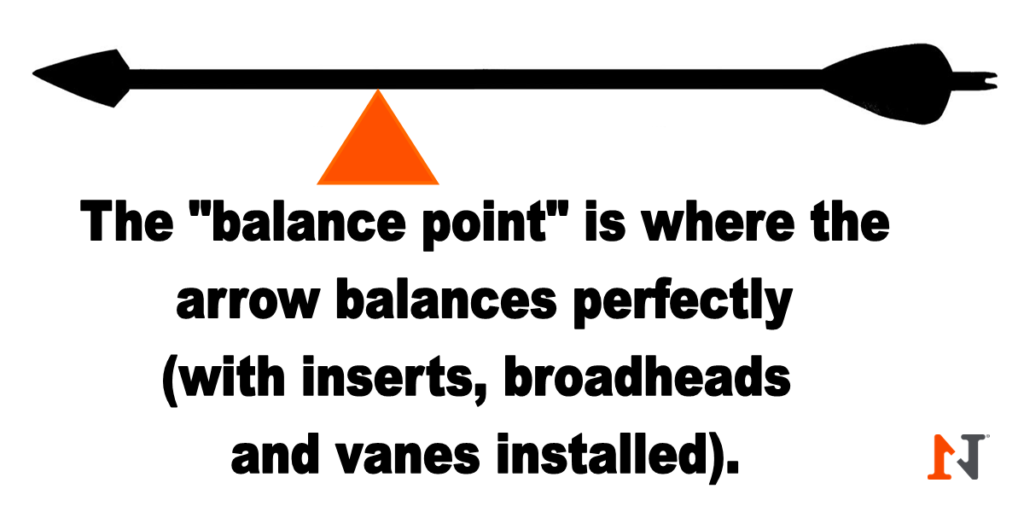
Before building your own arrows, it’s important to be sure you have selecting an arrow shaft that is appropriate for your setup. What poundage you are pulling back and what forward-of-center % (FOC) you are looking to get from your arrow are a few factors.

So, you may want to consult your local bow shop before purchasing your bare shafts.

Arrow Building | What you’ll need to build your own arrows

Before you get started with arrow building, there are some items you will need to get started:


Once you have decided on and purchased your arrow shafts, you are ready to start building! If purchasing Sirius arrow shafts (including arrow spinners and adhesives), use code N1Outdoors during checkout for a 12% discount!


How to make arrows step-by-step

30 minutes per arrow 30 minutes

Here, we’ll walk you through the step-by-step process here of building your own hunting arrows (plan on about 30 minutes per arrow:

  1. Spin your arrow shafts

    Before we get to cutting our arrow shafts, we want to spin them to see which end of the arrow needs to be cut. Use an arrow spin tester and spin your arrow (test both ends). Watch the ends of the shafts as they spin. Whichever side is more wobbly is the end you want to cut on. Make a mark on the end of the shaft that you will cut, just to be sure you cut the correct end.

    .spin tester spinning arrows

  2. Cut arrow shafts

    [IMPORTANT: BEFORE you cut your arrow shafts, be sure you know exactly how long the shafts need to be. You want to be sure you have accounted for the length that the nock will add to the shaft and also be sure your arrow will be long enough that your fingers will not be cut by the broadheads when you shoot!]

    Set your arrow saw guide to the correct length. When cutting your shafts, be sure to “roll” the shaft as you cut.

    cutting arrow shaft

  3. Mark the ends of your arrow shaft

    After cutting your arrow shafts to length, use a sharpie or other marker to make a mark around the top edge of the shafts.

    marking the end of arrow shaft when arrow building

  4. Square the ends of the arrow shaft

    Using an arrow squaring tool, sand down the tops of the shafts until all the marker is sanded away. Squaring the ends of your arrows is critical to achieving the best arrow flight possible.

    squaring the ends of an arrow shaft

  5. Clean arrow shafts

    Next, you need to clean the dust/debris left over from squaring the shafts. Take a Q-Tip, dip it in acetone or denatured alcohol, and clean the top edge and inside of the front of the arrow shafts.

    cleaning ends of arrow shaft with q-tip and acetone

  6. Heat arrow insert

    Screw in a field point to the insert you will be using and hold field point with a pair of pliers. Using your butane torch, heat up the insert (it only takes a few seconds of heat, but it takes a few more seconds for the heat to work its way through the insert).

    heating arrow insert with butane torch when arrow building

  7. Apply cool melt to insert

    Once you have heated the insert, apply the cool melt to your insert. (do not put the cool melt directly in the flame). If it the cool melt doesn’t melt when touching it to the insert, heat the insert some more.

    applying cool melt to arrow insert

  8. Load arrow inserts

    After coating the insert with the cool melt, insert it into the end of the arrow shaft that you cut while slowly rotating. The rotation will ensure that the cool melt will fully coat the inside of the shaft, resulting in better adhesion.

    inserting arrow into arrow shaft

  9. Cool the arrow shaft

    After inserting the insert that you coated in the cool melt, dip the tip of the arrow in the cup of cold water.

    dipping arrow shaft into cold water

  10. Remove excess cool melt

    Once you have cooled down the arrow shaft, you can peel off the excess cool melt from around the insert.

    remove the excess cool melt from arrow shaft after cooling

  11. Apply arrow wraps (optional)

    If you like to apply arrow wraps to your shafts for added color, ease of fletching, or nock tuning, follow these instructions.

    Lay a hot pad or mouse pad on a hard surface. Lay the arrow wrap on the pad with the adhesive side up. (The mouse pad/hot pad has some “give” to it, which allows you to press down and apply even pressure, making the wrap application a little easier.)

    Lay the arrow shaft on the pad, parallel to the long edge of the arrow wrap. Line up the nock end of the arrow shaft with the end of the wrap (an arrow wrap pad can help with this). Once you have it lined up, slowly roll the arrow shaft forward over top of the wrap, applying even pressure, until it meets the other edge.

    (You can also check out this video about how to apply arrow wraps)

    apply arrows wraps to shafts

  12. Insert the nock

    Insert your standard or lighted nock into the end of the shaft.

    insert lighted nock into arrow shaft when arrow building

  13. Bare shaft tune your arrow (optional)

    If you want to ensure that you will get the best arrow flight possible, it’s a good idea to nock tune your arrows through paper. (this is where the N-Tune arrow wrap is extremely helpful).

    bare shaft tuning arrows through paper when arrow building

  14. Fletch arrows

    If you are going to fletch your own arrows, you will need a fletching jig. There are several brands of jigs available, but for the purposes of this illustration, we are using the Bitzenburger jig.
    NOTE: If you have bare shaft tuned your arrows, be sure to fletch your arrows so that when nocking your arrow, the mark you made on your arrow shaft during bare shaft tuning is facing up and that your fletchings will clear your rest and bow cables.)

    Place you vane in the jig clamp and apply primer to the vane (if necessary for your vane type). Then apply fletching glue/adhesive to the vane.
    NOTE: Be sure to mark on the jig clamp how high up you want the bottom of your vane to be on the shaft. Then, line up the bottom of all vanes with that mark when fletching.

    Seat the bottom of the clamp on the base of the jig and then gently press the jig clamp down onto the arrow shaft. Hold the clamp and the shaft together with light pressure for 10 seconds or so to ensure you get good adhesion between shaft and vane. Let the vane (still in clamp) dry for 5-15 minutes. Then, remove clamp, rotate knob on jig. Then use this same process for the second and third/fourth vanes.

    fletching arrows with bitzenburger jig

  15. FOBS (alternative to fletching)

    If you are using FOBS instead of fletchings, simply apply the FOB to the end of the arrow shaft and insert the nock and you are finished!)

    installing fob in arrow shaft

  16. Seal ends of vanes

    Once you have finished fletching your arrows, be sure to dab a small drop of adhesive on both ends of each vane, to seal them so that the vanes will not rip off when passing through an animal or target.

    sealing the ends of the vanes when arrow building


PRIMOS HUNTING Double Bull Surround View Blind 270
Buy Now
We earn a commission if you make a purchase, at no additional cost to you.


You’re all done! Now you have arrows that are ready to send down range! If you need help knowing what kind of broadhead to choose before your next hunt, be sure to check out our all-encompassing broadheads article!

We hope you put a hole N1!


Arrow Building Videos

Check out our video on how to build arrows!
More specific arrow building tutorials!


How To Apply Arrow Wraps Video

Check out this video on how to quickly and easily apply arrow wraps


Giles Canter of N1 outdoors with archery buck
Giles Canter of N1 Outdoors
maston boyd with whitetail buck

Bow Hunting Tips [Be Ready When The Moment Of Truth Comes]

Bow hunting is a fun and adventurous way to hunt wild game. Many who have experienced success at it will tell you that there’s nothing quite like it.

Whether you are looking for information on bow hunting for beginners or even a seasoned veteran, we’ve got some helpful bow hunting tips to help you in your quest to become a better bow hunter.

lock on tree stand

There’s lots to learn with bowhunting. Below are 10 tips that will help you become better at harvesting an animal with the stick and string!

Bowhunting Tips Overview

Don’t worry, we’ll get to bowhunting tactics further down, but some of the best bowhunting tips are the ones that you learn before the hunt.

Tips 1-5 will prepare you in a way so that you can have the confidence to make a great shot when it counts the most.

Tip #s 6-10 will focus on tips and strategies to help put you in a position to hopefully punch your tag on your target animal.

  1. Bow Maintenance
  2. Blind Bale Shooting
  3. Aim Small / Miss Small
  4. Hunting Stances
  5. Off-Season Practice
  6. Guessing Is Gambling
  7. Scent Control Is King
  8. Entry And Exit Routes
  9. Take An Ethical Shot
  10. Celebrate!

Check out the FIVE archery video tips below to get valuable information on how you can be sure you have an arrow that’s “Just Pass’N Through!”

Bow Hunting Tips: #1 – Bow Maintenance | Avoid Freak Accidents Like This One…

When you see this freak archery accident, you’ll want to learn what you can do to help prevent the possibility of it ever happening to you.

Bow hunting is more than just flinging arrows. bow maintenance checks in the off-season, as well as before your hunt, are an extremely important part of being sure you are able to bow hunt safely and avoiding injury.

In the first of our bow hunting tips, we’ve got details on how to do preventative bow maintenance, so you can avoid unnecessary accidents like this one when shooting your bow…


Shop Bow Hunting Apparel

Archery Accidents And How To Avoid Them

If you watched the above video, you’ll understand why bow maintenance is an important part of bow hunting.

Some of you are shooting your bow year round, but some of you put it into storage during the off season and because the temperatures can change in those environments, it’s very important to check bowstrings cables as well as your limbs before shooting.


Bow maintenance checklist [Pre-Shoot Checklist]

Here are some things you should check before you shoot your bow:

  • Be sure before every shoot that you check your strings and your cables for any signs of wear or fraying. Anything like that can be a potential for a broken string or cable during a hunt just like in the video above.
  • Be sure you check your limbs very carefully. You want to be sure there’s no signs of splintering, bubbling, or cracking. Extreme temperatures and sometimes even storage can cause limbs to weaken. And, you don’t want to have one of those limbs be damaged or break during a shoot.
  • Be sure all your screws and any bolts are tightened properly, so that you don’t have any of your accessories loose during a shoot.
  • Check your cams. Be sure you don’t have any nics or cuts that would affect your string in any way,  whether it be to cause a fraying or a cutting of the string, or else damage to a cam, where your string may actually even come off the track.
  • Be sure your rest is aligned properly.
  • Check cam rotation and be sure the cams are not warped and that they both reach letoff at the same exact time.
  • Be sure you get the proper arrow spine for your bow set up.

If you are not sure how to check the above items, we recommend you take to your local bow shop and have them look for you and inspect that, so that you can have the best chance of a safe shoot.


Barronett Blinds BX550BW Ox 5 Pop Up Portable 5-Sided Hunting Blind, Backwoods Camo
$329.99
Buy Now
We earn a commission if you make a purchase, at no additional cost to you.
01/10/2025 02:38 am GMT


Tip #2 – Blind Bale Shooting [Improve Your Archery Technique]

In this N1 Minute archery tips video, learn how closing your eyes can be the best way to see results in your archery and bow hunting technique.


bow hunting tips blind bale shooting

Stand back a few feet from a large target. Draw back and locate your target. Close your eyes and shoot. This drill will help grip, form, anchor point and release techniques. Put all these techniques together N1, and you’ll be seeing the results soon.


Tip #3 – Aim Small Miss Small [Improve Your Accuracy]

In the third of our bow hunting tips videos, 3D archery tournament shooter, Cole Honstead, shows you a “small” tip that could help you BIG during hunting season!


Tip #4 – Hunting Stances Can Make Or Break A Bow Hunt [So, Know Them All!]

In the below N1 Minute archery tips video, learn about various stances that can help you in all types of bow hunting scenarios.


For those of you who have bow hunted any amount of time, you know that some things can happen during a hunt that simple target practice can’t prepare you for. The video above will show you some archery tips to help you be best prepared when your moment of truth comes.


Archery Stances For Bow Hunting

Hunting stances can be used for everything from spot and stalk hunts in the West to using blinds and tree stands in the east.

For tree stand hunting, try your best to get to the elevated position. This is as simple as finding the hill and using the bed of a pick-up.

For spot and stalk hunts, try practicing using incline and decline slopes. When shooting from a blind, you’d better get used to sitting in a chair or kneeling position.

Practicing these stances throughout the off season will give you that confidence for a shot of a lifetime.


Spot-Hogg Archery Products WGBOA Black/Purple Wise Guy Bow Release w/BOA Strap
$147.80
Buy Now
We earn a commission if you make a purchase, at no additional cost to you.
01/10/2025 03:08 am GMT

Tip #5: Off-Season Bow Practice [You’ll Hunt Like You Practice]

In this N1 Minute, learn some bow hunting tips on how to to keep your archery skills polished and sharp during the off-season so that you can maintain proper archery form.


Shop N1 Apparel

Archery Practice Tips

You know for us bow hunters, this is the time of year that we practice and practice for. But what about when the season’s over? How do you keep your skills sharp?


Archery exercise for bowhunters

Here’s a simple tip to keep those muscles active after hunting season and all it takes is a simple exercise band.

So many hunters put away their bows, after the fall, through winter, until turkey season. With, one of these exercise bands, you can practice your draw cycle throughout the winter and make that first draw in the spring a little easier.


Simply grasp one end of the band with your front hand and with your drawing hand, pull the band back to your anchor point. Repeat this ten to fifteen times and then switch hands. This will work both your back and shoulders. A few sets of this draw cycle exercise a day, and you’ll be ready to hit the mark on your next 3D shoot or Spring turkey hunt.


Rivers Edge RE646, Classic One Man Ladder Stand, Black
$163.33
Buy Now
We earn a commission if you make a purchase, at no additional cost to you.
01/10/2025 02:27 am GMT

Tip #6: Guessing Is Gambling [Scout Instead!]

Everyone has things going on in life. Whether it’s work, family or other obligations, sometimes it’s hard to make time to scout. Then, before you know it, deer season sneaks up on you and you find yourself scrambling to grab your bowhunting gear and get in a tree or blind.

Or, maybe you’re just tempted to get in the same stand you always hunt and hope for the best.

Sure, there’s always a story of this happening… but the reality is you need to put in the work before the season ever starts to increase your chances of taking a deer or other game.

man mounting a trail camera to a tree

Don’t gamble when you bowhunt. Scout prior to the hunt so you can put yourself in a position to be successful.

Basic trailcams have become much less expensive in recent years, so save your pennies and get a couple of these helpful scouting tools and place them overlooking scrapes or on know travel corridors to and from bedding and food sources. Y


ou can even put out a mineral site. This will help you take inventory of the deer that may be on or travelling through your hunting property.

Trail cam pictures can you give you insight into deer patterns and how they coincide to time of day, time of year, weather and food/water source availability. This will help you make decisions on where to hang that deer stand or blind.


What could go wrong at 5-yards? Well….


Tip #7: Scent Control Is King

As discussed in our earlier tips, having properly functioning equipment and being proficient with it is critical. However, it can all be for nothing if you don’t practice scent control.

You will be hunting deer and other animals on their home turf. They have the upper hand and their noses are a big reason why.

Not only are the deer at an advantage – but you’re bowhunting – so, you need to be able to get much closer to the animal than you would if you were rifle hunting.

So, the bottom line is that you need to smell as little like – well, YOU – as possible!

doe smelling deer scent

Don’t give a deer’s nose a reason to tell it to run away. Make every effort to be as scent-free as possible.

There are plenty of scent-free and scent-control soaps and detergents available at your local sporting goods store. You can also wash your clothes in baking soda. Then, store your clothes in a scent free bag or container.

On the day of your hunt, avoid coming in contact with any scent that would smell unnatural to a deer’s nose. Yes, that means you might need to skip the steaming hot sausage biscuit run or the pre-hunt cigarette before the hunt.


Plano All Weather Series Bow Case, Green, Small
Buy Now
We earn a commission if you make a purchase, at no additional cost to you.


Tip #8: Entry And Exit Routes [They Can Make Or Break Your Hunt]

When you’re bowhunting, it’s easy sometimes to get focused on where you’re going to hunt.

But, you need to spend just as much time planning how you’re going to get to that magic hunting location that will put you in the best spot for a harvest.

Whether you’re hunting public land on thousands of acres, private land or even suburban hunting, animals are always looking – and smelling – for danger (you realize you are considered danger, right?)


hunting wind direction graphic
Staying downwind of the deer’s location will decrease your chances of getting busted!


So, if the deer or other game see, smell or hear “danger” as it goes to and/or from the magic hunting spot, they aren’t going to stick around and stand quartering away for you to put an arrow through the boiler room.

So, how can you avoid being busted on your way to and from your hunting location?


First of all, as we’ve already covered, you must do everything you can to be scent free and you must always pay attention to the wind direction. You don’t want your scent blown to where you expect the deer to be on your way in.

The same goes for exiting your hunting location. If deer bust you leaving your hunting location, they will associate that location with potential danger and you may not get another chance at them there.

So, be sure to plan your entry and exit routes so that you stay downwind of the where you know the deer or game to be. This can greatly increase your odds of slipping in and out as undetected as possible.


Tip #9: Take An Ethical Shot

Locating deer to hunt and setting up in a spot to potentially kill them is one thing.

Now, you actually have to execute a lethal shot.

6-point buck

Taking an ethical shot is such an important part of bowhunting. Take a shot that gives you the best chance at a quick and clean kill.

This isn’t always easy when bowhunting. So, that’s why it’s so important to have followed the pre-hunt bowhunting tips in #1-5 that we covered, so that when the moment of truth comes, you know you are ready.

You don’t want the animal to suffer and you also want to be sure you are shooting at the deer or game so that you can have as quick and humane kill as possible.


Kansas public land hunting!


Tip #10: Celebrate!

We couldn’t leave out number 10, could we. After all, you’ve put in the work getting proficient with your bow and you’ve worked hard to get yourself in position to successfully take an animal. So, when you finally do it, you’ve got to celebrate the moment!

18 point huge buck

Celebrate! It’s one of the best bowhunting tips we can give you…

And, there’s no better way to do that than with family and friends.

That’s why we say here at N1 Outdoors: Where the moments happen, we’ll meet you there!

Bowhunting Tips | Final Thoughts

Happy hunting… we hope you have found our bow hunting tips to be useful in your quest to become better at your craft.

Do you have some bowhunting tips that you think would be good additions? Let us know in the comments below. It’s always great to learn from other hunters!

We hope you have an arrow that’s Just Pass’N Through!

To view other hunting and fishing tips videos, simply click on the “videos” link in our menu.