The Trilene knot, which is sometimes called the “Two-Turn Clinch Knot,” is a very strong fishing knot that every angler should know. Let’s show you how step-by-step!
Want to learn this strong fishing knot called the Trilene Knot? Well, let’s get started!
Time needed: 1 minute
How to tie the Trilene Knot
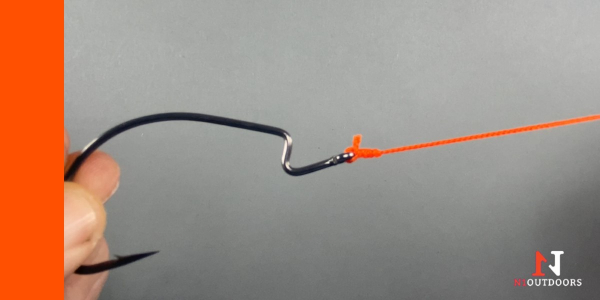
Insert tag end of line through hook eye.
Insert line through hook eye, leaving about 8 inches to work with.
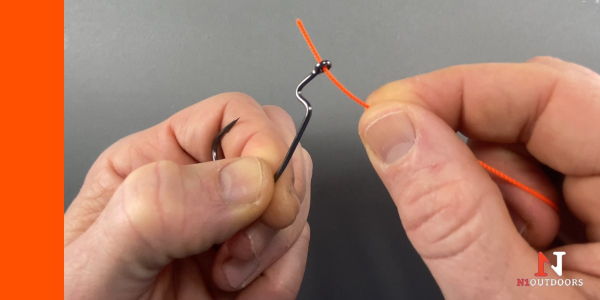
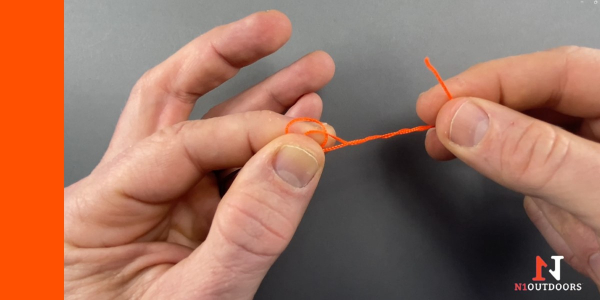
Insert tag end through the hook eye a SECOND time.
Insert the line through the eye of the hook a second time, making a loop.
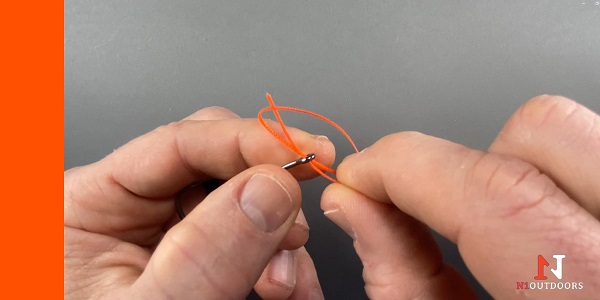
Pull tag end to make loop smaller.
Pull the tag end of the line until the loop shrinks down to the top of your thumb and hold the loop in that position.
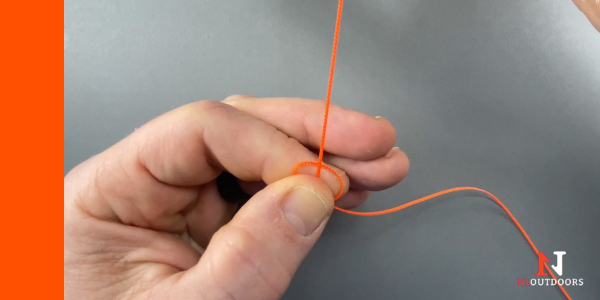
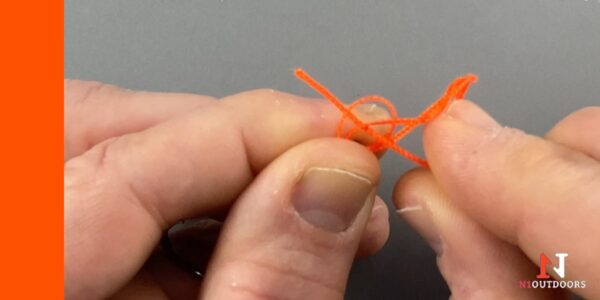
Wrap tag end line around main line.
Wrap the tag end of the line around the main line 5-8 times.
Insert tag end through both loops.
After wrapping the tag end around the main line, take the tag end and insert it through both loops that you have been holding with your other hand.
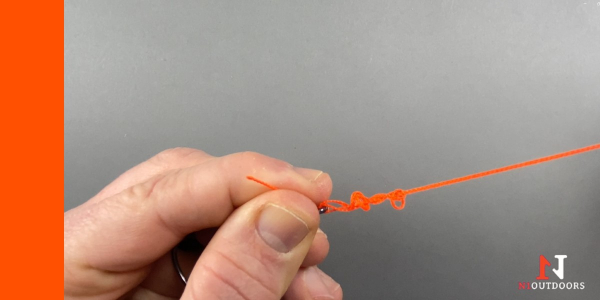
Lubricate and cinch down.
Lubricate the knot area with water or saliva and while holding the tag end, pull the main line to cinch down the knot.
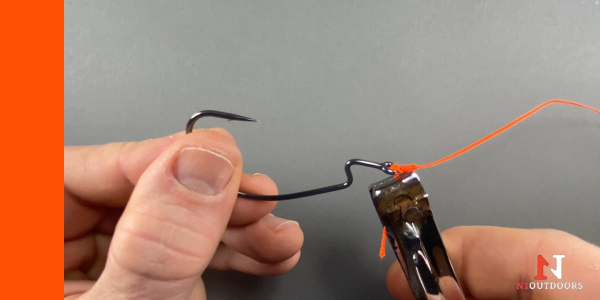
Trim tag end.
Trim the tag end of the line to desired length… and you’re done! You’ve just tied the Trilene knot! We hope you put a hook N1!
Deer season is coming up. You know you need to get out and shoot your bow but you can’t seem to find the time. There’s just so much going on with work and/or with family.
So, you don’t get in the reps in shooting your bow like you need to.
Nock tuning your arrows can be the X-factor in achieving superior arrow flight.
The next thing you know, deer season is here. You’re in a deer stand and Mr. Big walks by and you let an arrow fly.
You either miss, or that arrow doesn’t do exactly what you thought it was going to do, and you make a bad shot on that animal.
If this sounds familiar, you’re not alone.
I’d like to share how the flight of one arrow made me pay much more detailed attention to each of my arrows prior to hunting with them.
This is the story of how I decided it was time to start nock tuning my bare shaft arrows.
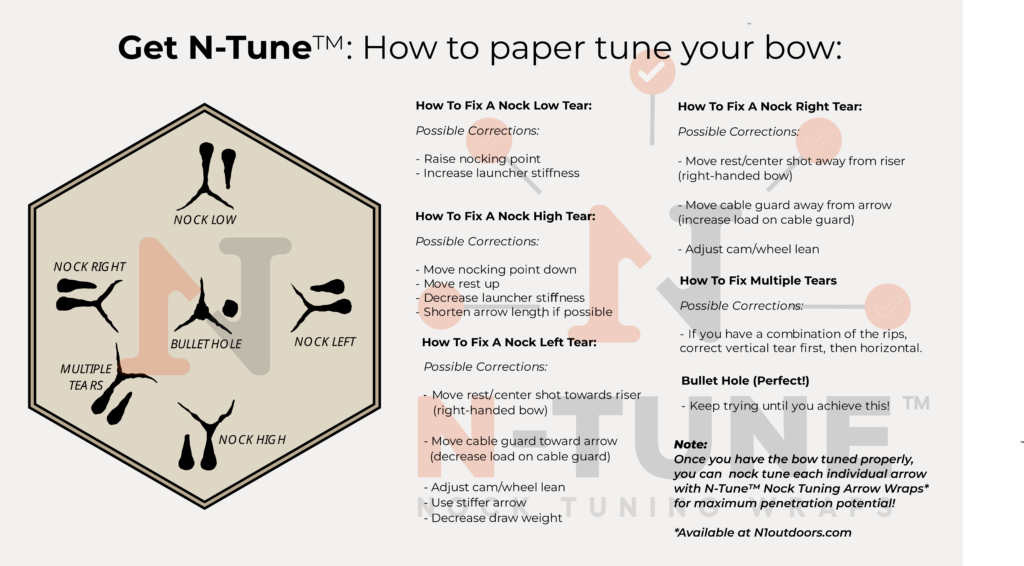
How To Paper Tune Your Bow (Diagram)
Before you nock tune your arrows, you need to be sure your bow is in tune (if you are unsure, visit your local archery pro shop). The diagram above shows you the different types of tears you can encounter when paper tuning. Tears for both fletched arrows as well as bare shaft arrows are shown.
So, before we get into how nock tuning became an integral part of our setup, you might be wondering…
“What is nock tuning?”
Well, simply put, nock tuning is the process of turning the nock on your arrow, in order to find out which position results in the straightest arrow flight. While the exact position can vary, it’s often where the location of the arrow’s spine is in the 12 o’clock position.
Did the arrow fail? Not quite, but it wanted to!
Shooting at a deer is not a good time to find out that your arrow is not flying true.
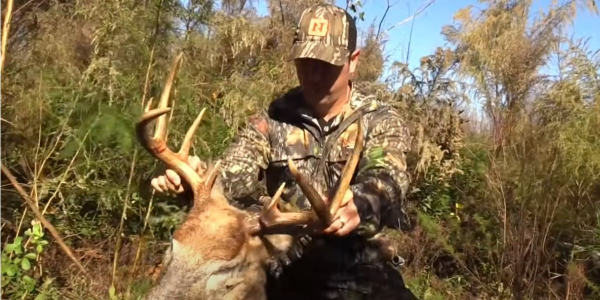
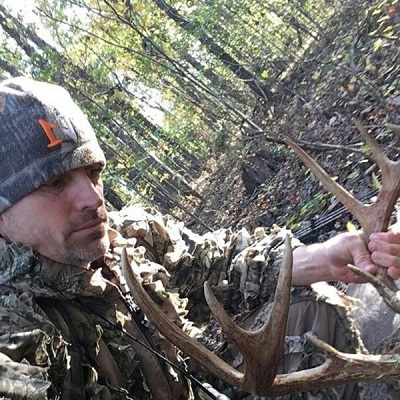
On one of our bowhunting retreats to South Georgia, my business partner, Josh Wells, was able to take a whitetail buck, but it was not without a little bit of drama.
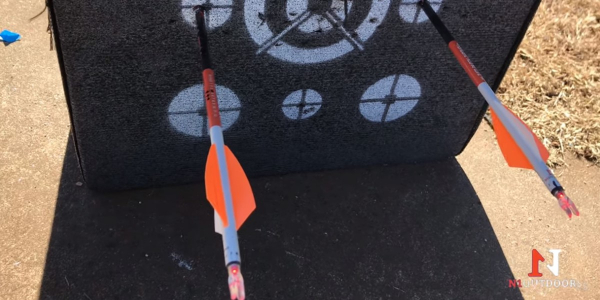
When we reviewed the footage of the shot on this bedded buck, the lighted nock allowed us to see the corkscrew flight path of the arrow… not what you want to see.
When we reviewed the footage of the shot, the lighted nock allowed us to notice some pretty severe corkscrew movement on his arrow.
Thankfully, the fletchings did their job and the arrow found its mark.
But, this really got us thinking hard about bare shaft tuning our arrows.
We had not nock tuned our arrows in the past, but we knew folks who did and who recommended it highly.
Just give me one dozen arrows and let’s go hunting…
To be honest, like many of you, in the past we had just gone to our respective local bow shops, ordered a dozen arrows, and went hunting.
We had taken for granted that that arrow was going to fly true. After all, when it comes to bowhunting we just need to be a “good shot,” right?
Josh was able to recover his whitetail, but the corkscrew flight of his arrow left him wondering if he had in fact delivered a fatal shot.
Well, we were reminded of an important lesson on this hunt… when it matters most, no one wants that arrow to fly better than the person that’s actually releasing it.
So, as good as your bow shop is (and we have some great bow shops in our area), the truth is that they don’t grip your bow like you do. They don’t necessarily have the same anchor point as you, and they may not have the same release of the arrow that you do.
$19.00Select options
This product has multiple variants. The options may be chosen on the product page
In the moment of truth, we want great arrow flight
Now, some will argue that nock tuning is nock tuning is not necessary. If an arrow doesn’t fly true, it’s all the shooter.
Maybe it was poor form.
Maybe it was hand torque.
Maybe…
Well, while form is an extremely important part of bowhunting. We all don’t possess world-class shooting form.
When it really mattered, we needed confidence that fletchings would not have a ton of correcting to do. This way, we could be ensured with arrow flight that is as straight as possible.
Our experience with erratic arrow flight on this hunt made us want to learn for ourselves how to get our bow, as well as our arrow shafts as tuned as possible.
Enter bare shaft nock tuning.
I had seen Troy Fowler (aka, the “Ranch Fairy”) talking about high FOC arrows and also how nock tuning bare shaft arrows was “witchcraft” and that it mattered greatly to achieving excellent arrow flight.
Now, when you start using words like “witchcraft” in regards to bowhunting, you have my attention.
So, the digging into the process of nock tuning began…
We earn a commission if you make a purchase, at no additional cost to you.
If you are still reading, and are wondering what nock tuning is all about, I’m going to take you through the process step-by-step, so that you too can do this for yourself.Keep reading!
Why is nock tuning your arrows necessary for great arrow flight?
The goal of nock tuning is to gradually turn the nock of your arrow to different positions on the shaft to find the one where the arrow flies the straightest.
One of the best ways to do this is to shoot a bare shaft (unfletched) arrow through paper until your find the position on the shaft where it shoots a “bullet hole.”
A bullet hole (or as close to it as possible) will give us a very good indicator that when this arrow is fletched and shot, the fletchings will have very little to correct.
After all, you may have gripped the bow too tightly during the shot, or even released the arrow abnormally.
Those fletchings will have all that to worry about without adding an arrow that is not properly tuned.
We could certainly go in-depth about arrow spine, but we’ll keep it simple here.
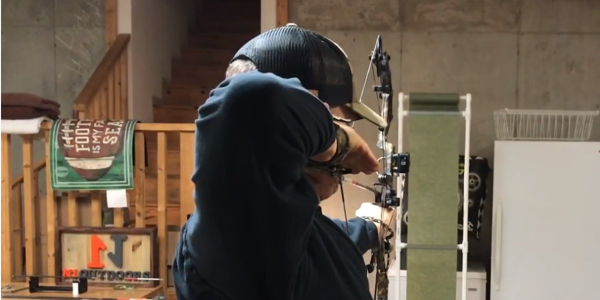
When arrows are shot and released from a bow, a tremendous amount of stored energy is transferred from the limbs of the bow to that arrow.
If you look closely, you can see in this picture that the arrow flexes when shot from the bow. Having the a properly spined arrow for your bow setup is critical to the nock tuning process being fully effective.
The arrow will flex during the shot and the stiffness of the spine is what determines how much that arrow will flex.
To fly properly, your arrow needs to flex, but it needs to flex the right amount. That is why having properly spined arrows for your bow setup is critical.
So, as I walk you through the process of bare shaft nock tuning your arrows through paper, I’m going to assume a few things right off the bat.
I’m going to assume that your bow is already in center shot and that you have properly spined arrows for your bow setup. Because after all, nock tuning is not meant to take the place of a properly tuned bow and setup.
The N-Tune™ arrow wrap and how it makes the nock tuning process easier
Please hear me.
I am not trying to argue for or against arrow wraps.
Many of you may have also gotten interested in the nock tuning and paper tuning bare shaft process by watching the Ranch Fairy.
Troy Fowler will tell you, he is not an arrow wrap guy. In fact, he is not for anything that adds extra tail weight. And as it pertains to high FOC, we totally understand why.
What we are saying is, we have found that in the process of bare shaft nock tuning through paper is tedious. It can take several, if not dozens of shots, and knowing where you are and where you have been on that arrow shaft is critical to figuring out where that arrow will fly the truest.
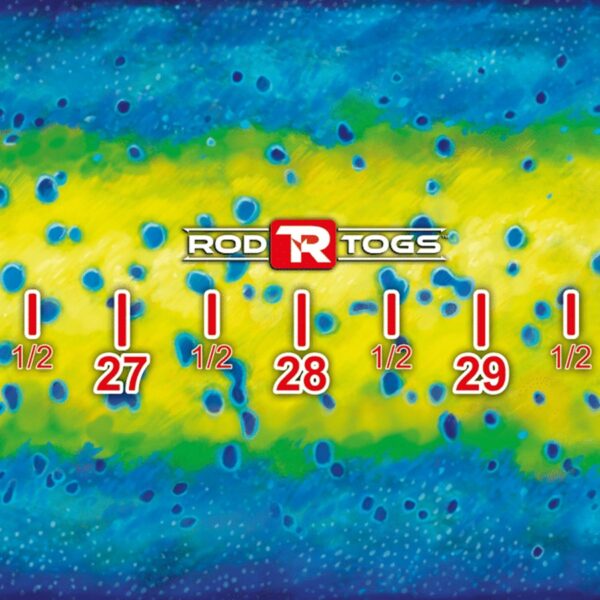
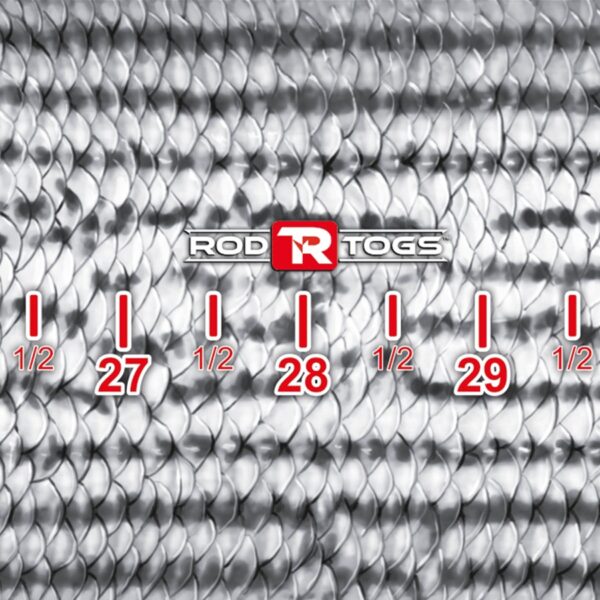
The N-Tune™ arrow wrap allows you to put a small indicator of which arrow you are shooting, so you don’t have to write on your fletchings.
So, we wanted to come up with a way to make the nock tuning process a little bit better, so that you can easily reference which parts of the shaft are tuning better through paper. We also wanted to be able to indicate which arrow you’re working on, so that you can reference that without having to mark up your arrows too much.
So, let’s get down to business of how to nock tune your arrows with the N-Tune™ Nock Tuning Arrow Wraps!
NOTE: (before attempting to tune arrows, you should always be sure that you or your local bow shop has properly set up and tuned your bow per manufacturer’s specs).
How To Nock Tune Your Bowhunting Arrows With The N-Tune™ Nock Tuning Arrow Wraps | Step-By-Step
If you’re still reading, you’re probably wondering, “so how do I bare shaft nock tune an arrow?” Well let’s take a look at how you do it with the N-Tune™ arrow wraps!
Time needed: 15 minutes
Here’s how to nock tune your arrows through paper using the N-Tune™ arrow wrap. (estimate: 15 min per arrow):
Align hole/mark on nock with line on the arrow wrap
Line up the center of the hole in the lighted nock (if you have one) with the number 1 line on the wrap. If your nock does not have a hole, you can mark any place on the nock with a dot as a reference point.
Shoot bare shaft arrow through paper
Shoot the arrow from about 10 feet away through paper (be sure you have a heavy target, such as a speed bag or crossbow target behind the paper that will stop the arrow. Also, be sure that your target is behind your paper more than a full length of your arrow, so that the arrow will not impact the target until it has fully passed through the paper).
Mark corresponding wrap number next to hole in paper
Next to the hole in the paper, write which position on the N-Tune™ arrow wrap you were on when you shot that hole.
Mark your arrow shaft
Once you have shot using all 8 positions on the wrap, examine the holes and see which one is closest to a “bullet hole.” Once you determine this, make a mark on the shaft with a sharpie or other marker and be sure to shoot the arrow with this mark facing up. (Note: If you are fletching your own arrows, you may need your fletchings pointing a certain direction in order to clear your rest of cables. Just be sure that t this mark can always be facing up when shooting.)
Repeat steps 1 through 4 on all shafts
Continue the above process for all 8 positions on the N-Tune™ arrow wrap. (You may have to do this process more than once on each number if you know you had a bad irregularity on one of the shots that was not necessarily the “arrow’s fault.”
Fletch arrows
If you are going to fletch your own arrows, be sure that you fletch them so that the mark you have made on your shaft is pointing UP when you nock the arrow.
So maybe you’re still asking, “why are you so worried about all this bare shaft nock tuning through paper stuff? That’s what’s the fletchings are for, to correct arrow flight!”
Well, that’s true. But again, if you’ve bow hunted long enough, you know that a lot of things can happen when you release that arrow.
Maybe your stance wasn’t exactly right.
Maybe you were wearing baggy clothing and the string slapped your sleeve when you released the arrow.
Maybe you had hand torque when you released the arrow.
Maybe you had facial pressure on the bow string.
All these things can negatively affect arrow flight.
Yes, when these things happen, the fletchings will help correct the flight of that arrow. But, you want them to have to correct as little as possible.
Nock tuning your bare shafts through paper is a great way to be confident of your arrow flight when it really counts.
Would you rather your fletchings be correcting lots of imperfection because the arrow was not properly tuned? Or, would you rather the fletchings be correction small imperfections because you had taken every precaution to ensure that the bare shaft was flying as true as possible before any of that other bad stuff happened?
I’m choosing option 2, because not only do I want to be the best hunter I can be, I want my arrow to have the best chance possible of making an ethical impact on my target deer or other animal. This will result in me having the best chance possible of recovering that animal.
I hope you’ve learned some helpful information regarding nock tuning through paper.
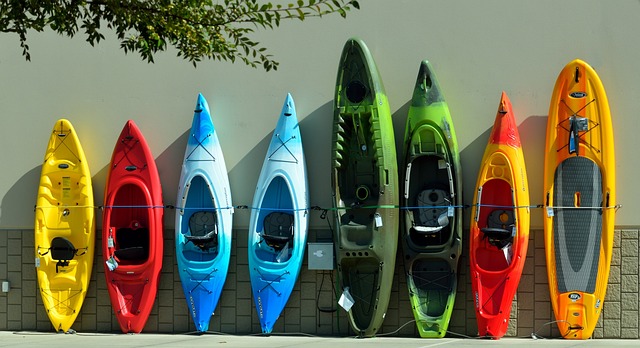
Despite what some may believe, there are, in fact, many different types of kayaks to choose from depending on your kayaking goals.
These different kayak types have distinct features that can impact function and should be selected for your specific needs.
Some kayaks are longer or wider to promote increased straight-ahead speed and stability in calm waters. On the other hand, if you see yourself in a whitewater situation, then a short, stubby, and maneuverable craft will serve you best. So which type should you choose? Keep reading!
Well, don’t get intimidated by what is ultimately a simple boat! Let’s take a look at the different types of kayaks so you can find out for yourself!
Types Of Kayaks
Lucky for you, this guide will provide guidance and information surrounding some of the main kayak types, to direct you toward the best kayak for your next adventure!
You can click on the links below to jump straight to the various types:
Sit-in kayaks are probably what you imagine when you picture a kayak.
Also called recreational kayaks, sit-in kayaks have one seat that is in the center of a boat that usually ranges from 8-12 feet long.
Sit-in kayaks are designed for comfort; with the bodies being wide, making entering and exiting easier. They typically also have a lot of leg room for the occupant.
The comfort-oriented design of a sit-in kayak lends itself to calm water travel. A recreational kayak like this can travel at decent speeds and stays stable in a relaxed water environment.
The downsides, however, are that these designs can struggle through rough water, in strong wind, and over long distances.
On the upside, recreational kayaks are usually one of the more affordable options given their widespread availability. Their versatility and price point make them a great option for any kayaker.
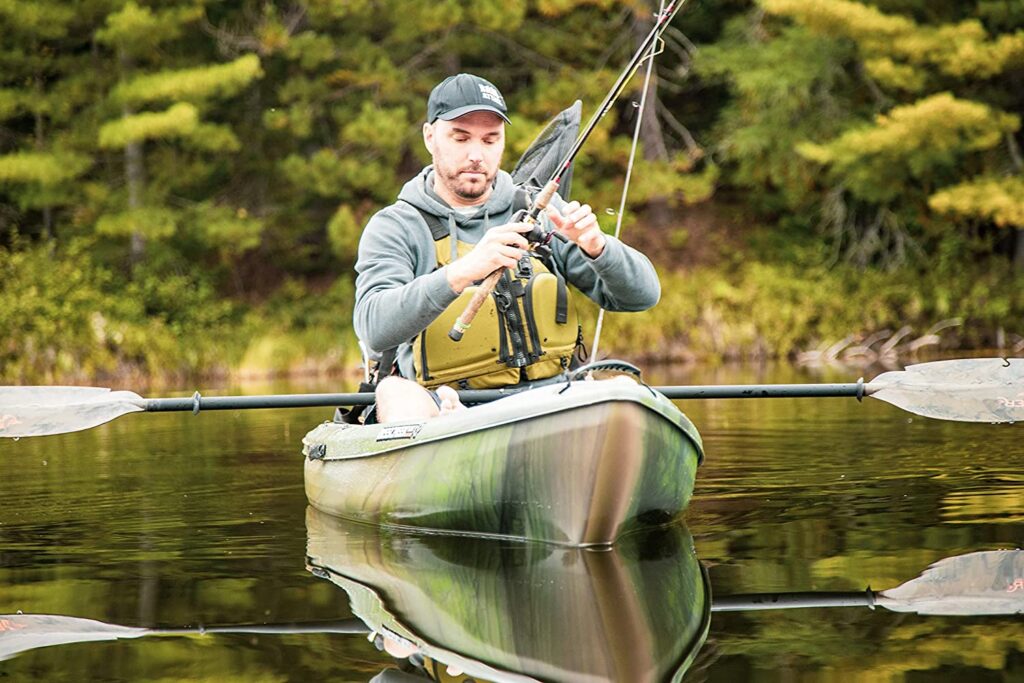
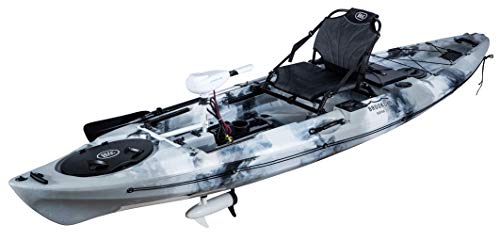
Sit-on-top kayaks are similar to the standard sit-in, recreational kayak.
The key difference is that instead of the occupant sitting inside the kayak structure, they sit on top, as the name implies. (photo credit: Amazon)
The open-air design of sit-on-top kayaks makes entering and exiting even easier than the typical sit-in kayak. What’s more, the lack of walls around your legs and feet provides significantly more room for a rider, making these types of kayaks extremely comfortable.
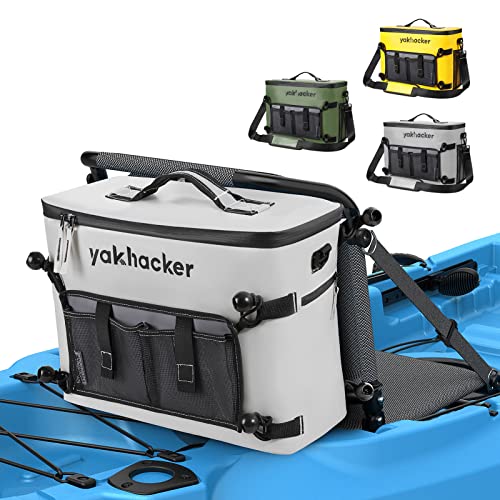
This open-air concept also makes for a more efficient hunting kayak setup, giving the hunter more range and freedom to move about.
We earn a commission if you make a purchase, at no additional cost to you.
11/06/2025 11:07 am GMT
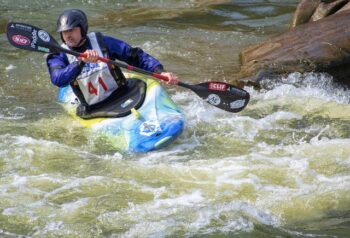
Whitewater Kayaks
If you have rough water adventure in your sights, a whitewater kayak may be what you’re looking for!
While the first two kayaks we discussed excel in calm waters, whitewater kayaks fill a different niche.
These kayaks are designed for fast, rushing whitewater with rapids and they tend to be shorter in length to increase maneuverability and stability in these difficult conditions.
However, the shorter length makes distance traveling in calm waters particularly difficult. In this sense, whitewater kayaks can struggle outside of a whitewater setting, which makes this model of the kayak a one-trick pony of sorts.
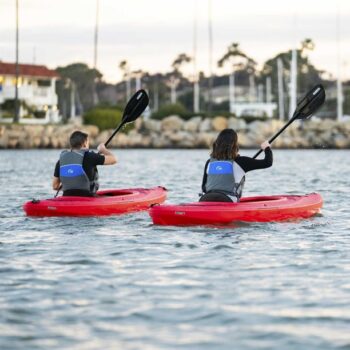
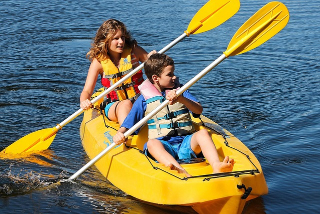
Kayaks are traditionally sleek and made for just a single person. But, then there are tandem kayaks…
Tandem Kayaks are designed such that two people can be seated in the watercraft as opposed to just one.
Tandem crafts can be found in numerous styles, including the sit-in and sit-on-top models. However, the tandem version of these two types of kayaks is going to be heavier and more expensive.
Fitting an extra person with you in a tandem kayak comes at a price. You are giving up speed and maneuverability due to the extra weight. However, you should expect to be more stable on the water with your extra passenger.
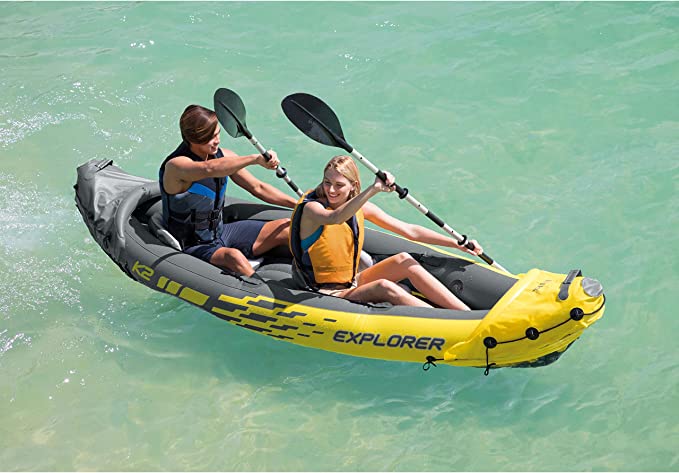
Portable kayaks can encompass any of the kayak types we outlined avove.
The key difference between portable kayaks and regular kayaks is that portable ones can be broken down into smaller, more manageable packages to transport.
There are two types of portables: inflatable kayaks (like the one pictured above) and collapsable kayaks.
Portable kayaks are usually more affordable and easier to transport. However, they have factors you’ll want to consider before purchasing. For example, you’ll have to inflate or assemble them once you get to the waterfront.
Portable kayaks can make transportation a cinch. But, you’ll also be giving up some conveniences…
Portable kayaks also tend not to move through the water as efficiently as other types due to their design. They may also lack some of the comforts of a more standard-construction kayak.
With that being said, there is a range of portable kayaks available on the market, with some costing more but providing more features such as stability, upgraded seating, propulsion systems, etc.
Just like with most things, in the world of kayaks, in one way or another, you get what you pay for!
At the end of the day, there are several types of kayaks to choose from depending on what you want from the boat and the specific activity you’re looking to take part in. There is truly a kayak for all styles of life, for all cars, and for all different types and speeds of water.