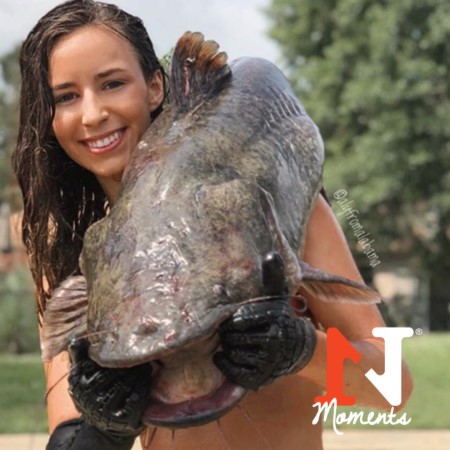
“I stuck my hand down in this hole and pulled out a giant catfish.”
Wait… WHAT??
If you’ve ever heard about noodling for catfish, you might wonder what in the world might possess someone to stick their hand into a dark hole and hope something latches on.
This is… noodling!
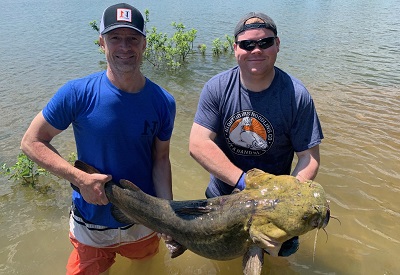
Does the thought of grabbing a big catfish with your bare hands make you want to learn more? Read on!
You can jump straight to any of the following sections of article:
- What is Noodling?
- Learn how to go noodling for catfish
- Quotes about nooding
- Can I go noodling in my state?
- Crazy noodling celebration video
- Noodling a monster flathead catfish video
- Aly From Alabama noodling video
- Tag-team noodling video
- Catfish spawning
- Underwater footage of getting bit by giant catfish video
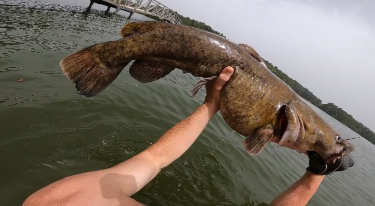
Grabbing a catfish with your bare hands will definitely make you want to raise your hands in victory!
So, what exactly is “noodling?” Well, it’s basically catching a fish with your bare hands. VIDEOS BELOW…
What Is Noodling?
Some call it hand fishing. Some call it grabbling (or grabblin) or hogging, and of course, some call it “noodling.”
The bottom line is that you are catching a fish with your bare hands!
Even though it might seem scary at first, it can be fun like you’ve never experienced when you #putahandN1!
So, How Can I Learn to Noodle A Catfish?
Do you want to learn to Put A Hand N1? Read below for a step-by-step tutorial!
Time needed: 10 minutes
How to noodle for catfish:
- Safety First!
Always have at least one person in the water with you, spotting you, when you noodle for catfish. Noodling can sometimes require you to go under water and holding your breath.
Don’t overestimate your ability to hold your breath. Also, catfish are extremely powerful fish, so be sure you don’t underestimate their strength. You may also want to wear gloves to protect your hands. They bite hard! - Find where they’re hiding…
Check under boat ramps and in holes in the bank. Some people also noodle in man-made catfish boxes that have been submerged to attract catfish during the spawn.
You can use a stick to probe in the holes. If there’s a catfish in the hole, it will often bite the stick with a distinct “thud.” - Stick your hand in the hole
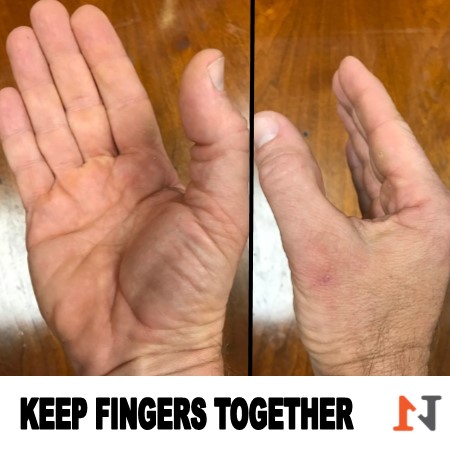
This can be the most unnerving part of noodling catfish. Be sure to keep your 4 fingers together so you don’t break a finger unnecessarily (see picture below!) Slowly move your hand around in the hole and get ready to get bit!
- Grab it!
Once the catfish bites your hand try to close your hand, grabbing its lower jaw. Once you get a grip on it, try pulling it from the hole.
Once you are able, slip your other hand up under the catfish’s gil plate (see picture below). This helps prevent the catfish from “rolling” and getting away.
The roll is very powerful, so don’t neglect this step. On larger fish, you may want to wrap your legs around its tail to lock it up.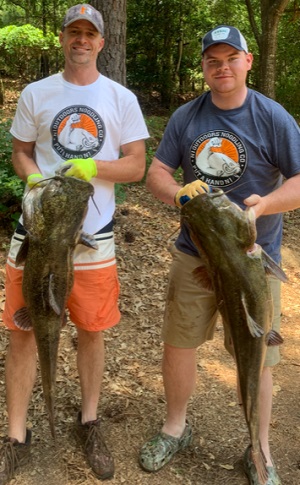
- Celebrate!
There’s nothing like the rush of grabbing a catfish with your bare hands. You’ll be able to handle this step with no problem! And be sure to shout, “Put A Hand N1!”
#ad
What Do Other People Say About Hand Fishing?
You might have seen people noodling for catfish on social media. Here’s what some of our friends have to say about this crazy hobby of catching catfish with your bare hands…
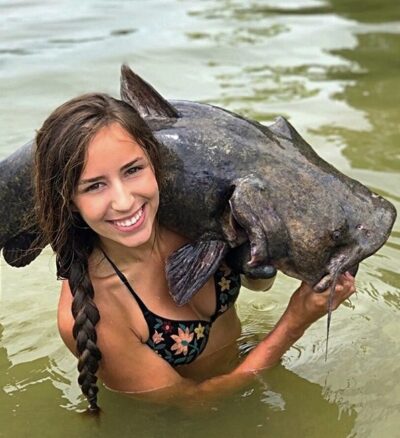
Aly from Alabama has grabbed her share of catfish bare handed!
“I love noodling because there isn’t anything that can prepare you for it. Every aspect of noodling is based on your ability to conquer your own fears — you can’t prepare yourself and you can’t practice. There is a level of surprise that is untouched in any other sport or hobby, and the adrenaline rush is absolutely incredible.”
Aly “Aly from Alabama” Hall
“Noodling challenges me every time and the feeling of conquering fear is absolutely addicting!”
Jess Bond
“There’s just something about the adrenaline rush of going into a hole blind, but expecting to get bit every time! That’s what I noticed the first time I tried it a 12 years old! From the first bite of a little 3 lb blue cat, I was hooked on that adrenaline rush! It’s become something of a passion for me, not just a hobby! Couldn’t really see myself going back to not doing it at this point!”
Nate Kennedy
“It’s just the adrenaline you get from getting on a big fish, and the experience of having fun while doing it. But it all comes down to putting a hand N1 and that’s what I love the most!”
Lane Allen
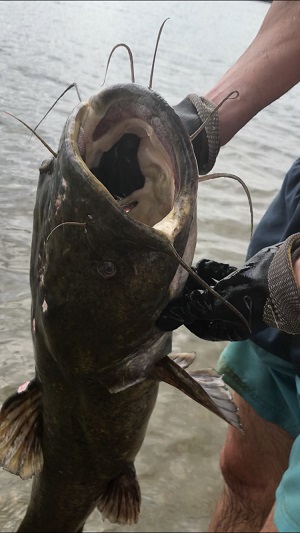
Since learning to noodle catfish, it’s now enjoyable to teach others how to grab big cats (those whiskers though!) Learn more below about how I learned to catch these dinosaurs with my bare hands!
Is noodling legal and can I go in my state?
You may have watched these videos and read the stories on this page and said, “There’s no way I’m ever doing that!”
However, you might be one that loves the thought of catching a catfish with your bare hands and wonder, “Is noodling legal in my state?“
If you want to see pure outdoor joy, watch these videos below of our friends, Andrew Urban and Luke-Avery Urban and “Aly from Alabama” as they noodle some huge catfish! The videos below will make you smile… we promise!
Now THIS is how you celebrate a catfish!
MORE VIDEOS BELOW THAT YOU WON’T BELIEVE…
Another Monster Catfish Moment
In this video, Andrew’s brother, Luke Avery-Urban, puts a hand N1! Check out this incredible video!
WATCH OUR FRIEND ALY FROM ALABAMA BELOW, NOODLE “A STINKY ONE…”
Aly From Alabama Noodles Big Blue Cat
Once upon a time, I was a first time noodler…
Watching videos like the ones above from the Urban brothers and Aly from Alabama made me want to put a hand N1 too!
What was it about sticking your hand into dark holes where you couldn’t see anything and hoping something huge would bite your hand?
We weren’t sure what the buzz was all about, but we were fascinated to find out what it was like to get bit.
So, we scheduled our first noodling trip with Luke-Avery Urban on Clarks Hill lake in Lincolton, Georgia.
After all, in addition to learning how to ice fish, is something we’d always wanted to try.
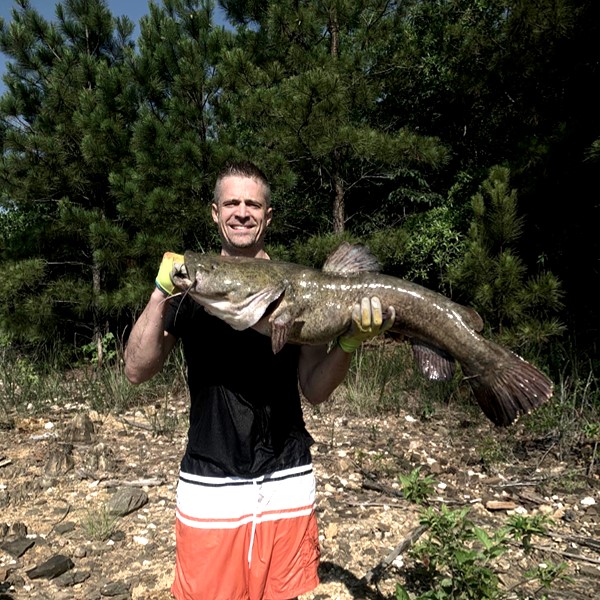
A great day on the lake noodling for catfish! This was a nice flathead I grabbed with the five-finger death grip!
Tag-Team Catfish Noodling!
But first, a limit out
Luke-Avery was generous enough to spend the whole day with us, teaching the N1 Outdoors audience how to fish for striped bass and hybrid bass.
So, we spent the first part of the day striper fishing and it turned into a striped bass and hybrid limit!
Once we had limited out on striped bass and hybrid, we were off to some boat ramps that had produced some quality noodling trips over the years for Luke-Avery.
Catfish spawning
Spawning time is the optimal time to noodle for catfish. We learned that water temperature is key in learning when the catfish spawn happens.
The female lays her eggs in hollow logs, crevices or caverns under the bank, and in holes or openings under boat ramps, which is where we would be searching.
Once the female catfish lays her eggs, the male guards the nest fiercely until the hatch occurs. We found out that they will bite down hard on anything entering the nest!
Spawning of catfish can vary depending on location, however, temperature ranges of 65-84 degree water temperature will trigger spawning action of blue cats and flathead catfish. Some believe 81 is the magical temperature for some species, but again, that can vary depending on location.
Well, whatever the perfect temperature is for each, we were able to experience both species in one outing!
Underwater Footage Of Getting Bit By Giant Flathead Catfish!
Hurt at first bite
At our first stop, I got to experience what it feels like to get bit on the hand when trying to noodle a catfish for the first time. I learned quickly that it’s best to keep your fingers together when trying to entice a catfish to bit your hand!
The first bite was actually on just my little finger. It sure didn’t feel very good! If you have never experienced how strong the mouth of a catfish is, hand fishing will help you understand very quickly!
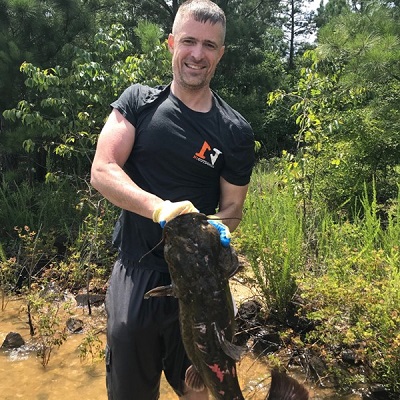
Getting a big catfish to bite your hand and then pulling it out of a hole will get your heart beating at high speed!
Luke-Avery said he’s taken a lot of grown men noodling and most of the have yelled underwater the first time they get bit. I was determined to not do that. But, I will say I was certainly startled.
I tried multiple times to grab the catfish in that first hole and just could get a grip fast enough.
Finally, Luke-Avery said to let him try. He stuck his hand into the hole and got bit as well.
When he came up he said, “that’s a blue cat. They bite harder than a flathead catfish does.” (Flathead catfish are sometimes referred to as mud cats, yellow cats or shovelhead catfish.)
We left that hole and moved farther down the boat ramp. Eventually, we were both diving down in 10 feet of water checking other holes. Luke-Avery was able to pull out a nice blue cat.
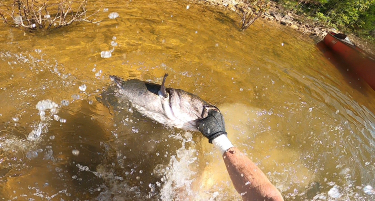
To “put a hand N1” is a rush quite unlike any outdoor activity I’ve ever tried. I highly recommend it!
My first bare-handed catfish!
When we left there, we went to another ramp where Luke-Avery had noodled some 40+ pound catfish in prior years. We got bit several times but were having trouble landing any cats. Finally, I was able to get a hand N1 and land my first flathead catfish! It was a rush for sure!
It’s fun now to take others to experience this same rush (like when I took our friends from FOB Archery).
I certainly found out that noodling was definitely worth all the hype. Let’s just say that was the first of many trips to come!

