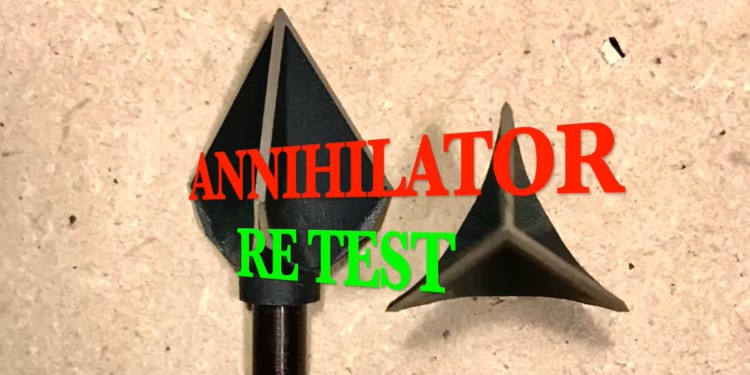
In this article, I’m covering a re-test of the 125-grain Annihilator Broadhead.
When I originally tested this broadhead, it performed extremely well in terms of penetration, (i.e., draining a water jug) and in terms of the hole that it produced in a layer of MDF.
It also flew really well out to 50 yards. However, beyond 50 yards, there just seemed to be a drastic drop in velocity, causing an incredible drop in the point of impact.

I decided to re-test the Annihilator after talking with multiple people that had not gotten the same results as I did in my original test.
However, after making a video of that test, I was contacted by some friends who had also tested this broadhead at longer ranges, but did not see the drastic results I had seen.
I then visited with the designers of the Annihilator broadheads at the Archery Trade Association (ATA) show. They also said that their tests had not shown the drastic drop. In fact, they had seen really consistent flight, even at longer ranges. So, I told them I would very gladly test it again.
The backstory to my original test of the Annihilator broadhead
The day of the re-test, it was sub-zero temperatures (with the wind chill). When I re-tested the head, I found that the people I had spoken to were exactly right. It flew extremely well, even at longer ranges.
I realized that in my original test, I had made a two-fold mistake.
My two mistakes
Before I tested the Annihilator broadhead the first time, I was talking to a friend about it. He told me that when he shot it at longer ranges, there was a really large drop due to the wind resistance of that big surface area that they have. And so, that was already in my mind.
So, then when I shot it and tested it and there was a big drop, and I thought, “Oh, this just confirms what my friend had said.” I didn’t retest it or question my test results enough. That was my first mistake. I shouldn’t have had that in my mind.
-
N1 Outdoors® N-Tune™ Nock Tuning Reflective Arrow Wraps – Honeycomb Fade On White Base (Various)
Price range: $18.99 through $27.99 Select options This product has multiple variants. The options may be chosen on the product page -
N1 Outdoors® N-Tune™ Nock Tuning Reflective Arrow Wraps – Dropp’N Hammers™
Price range: $18.99 through $27.99 Select options This product has multiple variants. The options may be chosen on the product page -
N1 Outdoors® N-Tune™ Nock Tuning Reflective Arrow Wraps – N-terceptor™
Price range: $18.99 through $27.99 Select options This product has multiple variants. The options may be chosen on the product page
Dozens more arrow wrap designs HERE!
The second mistake that I made in the initial test is that I had made adjustments to my site tapes and I didn’t take that into consideration when I was testing the Annihilator.
So, I felt really badly. I went back and made the adjustments in my site tapes and… Boom! Dead on!
I feel really badly that I made both of those mistakes, and both of those mistakes adversely affected the reputation of Annihilator (as well as my own reputation for doing a poor job in testing the broadhead).
I want to give a sincere apology to the makers of Annihilator broadheads, to their loyal fans, and especially to those who I turned off from these broadheads after my initial test, because it actually does fly very well even at longer ranges.
So, that’s why I wanted to do a completely new test. I’ve got new test mediums for 2020 that I’m using anyway. So it’s a good way to do those.
#ad

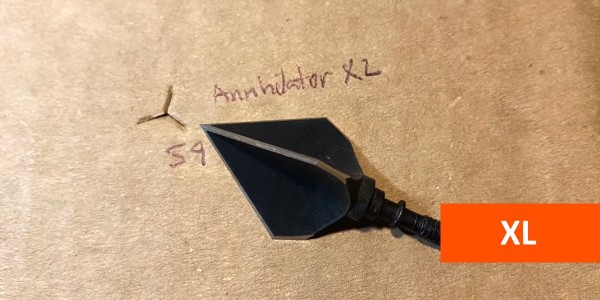
The Annihilator broadhead | The specifics
So, let me explain this broadhead just a little bit for those of you that aren’t familiar with it.
When I first heard about it, I wasn’t that interested in testing it because the cutting diameter is sub-1 inch. It’s 0.91 inches of cut. To me, that’s just so small.
I thought, “Why would I want to test the head that has that small of a cut?”
However, what I wasn’t understanding was the design of this head has a “scoop” feature to it. So, while it has a small cutting diameter, when it presses through a medium like animal tissue, it actually displaces an incredible amount of it. (Note: As of the publishing of this article, I personally have not tested the Annihilator head on an animal).
So, the hole that it creates, and the tissue that’s displaced, is in theory far greater than if it was just 3 crossblades of 0.91 inches. It has an incredible surface area. (That showed in a test that I had done originally. The Annihilator drained a water jug in record time. It also put a big hole through MDF. And so, in the retest, I wanted to show that).
The Annihilator is designed to put a much larger hole than the head size suggests. The small surface area allows it to fly really well, but then displace a lot of tissue. And so, it makes a really nice hole.
Another cool thing about this head is that it’s a solid piece of 4140 tool steel. That is a really high quality of tool steel. So, it’s way more resistant to impact and much tougher than stainless steel, for example. It has a Rockwell hardness of 52, which is a pretty good balance of being soft enough to resharpen and hard enough to keep its edge.
#ad

Another thing I really like about it is that re-sharpening for this head is extremely easy. It’s like the Bishop Holy Trinity and some other three blades that I’ve tested in the past.
You can just lay it flat on a flat stone or any kind of a flat edge surface and it is very easy to sharpen to a razor-like edge.
For penetration testing I used MDF board, foam padding and ballistic gel.
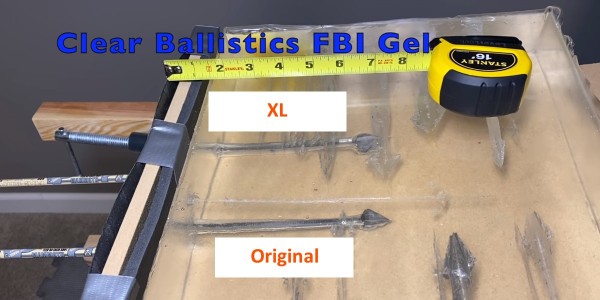
In my re-test, I used a half-inch layer of MDF surrounded by 1/3 of an inch of rubber foam mat. Beyond that was a gel block by Clear Ballistics, so you can see what happens to the broadhead once it enters the gel. (I will be doing this for all the broadheads I test this year).
Then, I shot it through a 22-gauge steel plate 5 times. (I like to shoot it through the steel plate until there begins to be significant damage to the blades. So, I basically see how many times it can be shot into the steel plate without facing significant damage. But, I stop at 5 because with some heads, I could keep going forever).
The Re-Test of the Annihilator
So let’s get into the test results and see how it did with long range flight, penetration and water drainage ability.
Long-Range Flight
In the re-test I was able to pop a balloon at 70 yards with this head.
-
The N1 Outdoors® “Rackingham™” Whitetail Tee
Price range: $28.99 through $32.99 Select options This product has multiple variants. The options may be chosen on the product page -
N1 Outdoors® Thwack’Em™ Bowhunting Tee
Price range: $24.99 through $30.99 Select options This product has multiple variants. The options may be chosen on the product page -
Sale!
N1 Outdoors® Sending™ Bowhunting Tee
$9.00 Select options This product has multiple variants. The options may be chosen on the product page
Penetration Testing
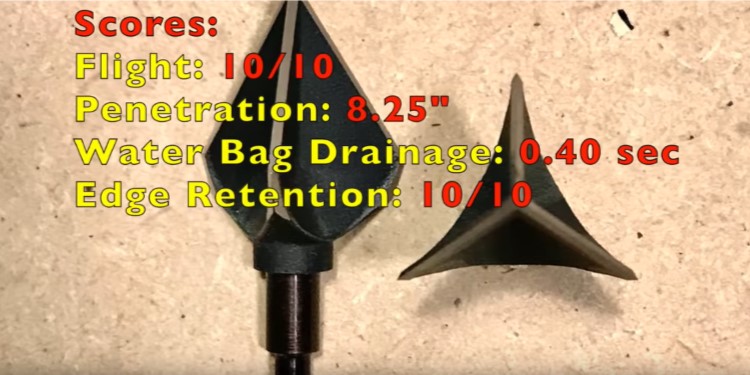
In terms of penetration through the MDF and gel, the Annihilator did very well. It did not do as well as some other broadheads I’ve tested, but it still had good penetration and made a nice hole in that MDF, as well as the gel.
Below, you can see the penetration of the Annihilator after going through the MDF and the rubber foam mats and into the gel. It penetrated 8-1/4 inches.
The Annihilator, through MDF, foam pad and ballistic gel.
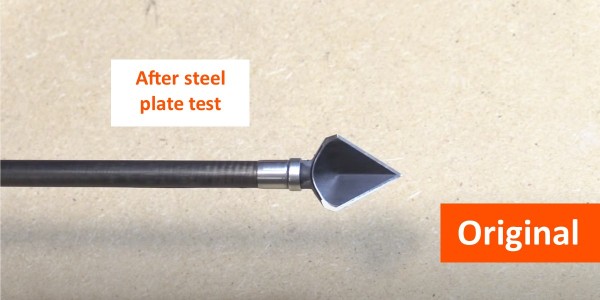
Below is a steel plate after I shot it 5 times with the same head. You can see the Annihilator really does make nice holes. Thus, it should displace a tremendous amount of tissue.
The Annihilator, shot into a 22-gauge steel plate.
Edge Retention
In terms of the durability of the edge (edge retention), the Annihilator is pristine. There is not a mark on it. It doesn’t quite shave hair, but it still bit into my fingernail… very impressive.
So, it’s durable as they come. It went through 5 layers of steel back-to-back-to-back with zero damage. That’s what that 4140 tool steel is going to do. It kept its edge really, really well.
The Annihilator kept it’s edge incredibly well, even after being shot 5 times through a 22-gauge steel plate.
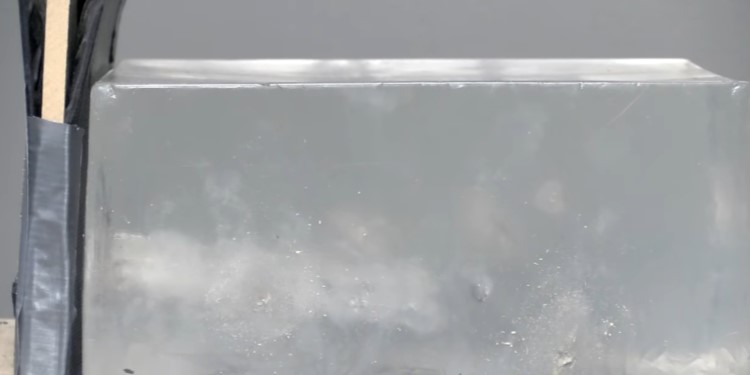
Water drainage test
The water drainage test was just other otherworldly. I don’t know any other word to describe it. It drained the bag in .40 seconds!
The reason I used the water bag drainage test instead of a water jug drainage test is that I felt that in a water jug, because the plastic is pretty stiff, sometimes the plastic folds in, sometimes it comes out, sometimes it stays in place. And so, the results are very inconsistent. Even with one head, I get different results.
But with water bag drainage test, and I fill it up 10 cups the same amount that the line is the same in all the tests that I do, try to shoot it in the same spot every time.
It’s much more consistent and much more like an animal because the bag is a little more nimble, like the tissue or the hide of an animal. And so, what you see is kind of what you’re going to get in terms of the drainage.
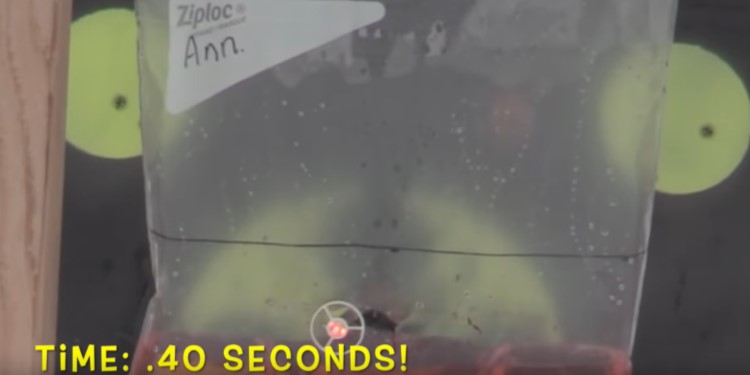
Water drainage test.
The Annihilator goes into the bag and displaced so much water so readily, it actually created a back-pressure to the water. When I looked at it in super slow motion, I could it make the hole and suck the water right out of the bag.
It was just amazing to see that. It’s an indication of what may happen with blood-letting and tissue damage within an animal as well. I can’t wait to test it on an animal at some point in the future.
#ad

Conclusion on The Annihilator Re-Test
I’m really grateful that I was encouraged to retest the Annihilator, because I knew it was a great head before. It tested really well in all categories except long distance.
However, now knowing after the re-test that it actually flies extremely well, even at long distances, it has gone from a very good head to a phenomenal head.
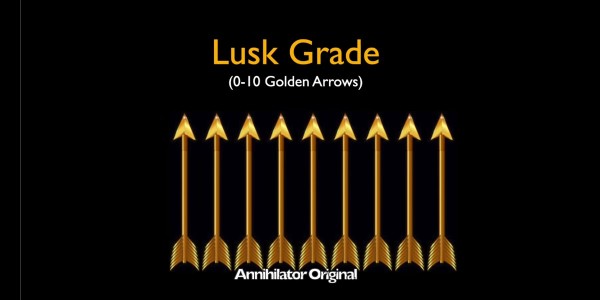
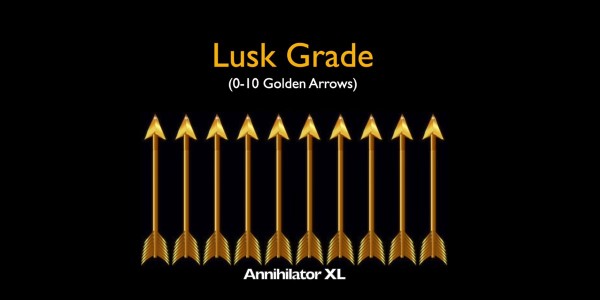
So, now I have confidence in this head at longer ranges. It gets a 10 out of 10 in terms of accuracy at long range.
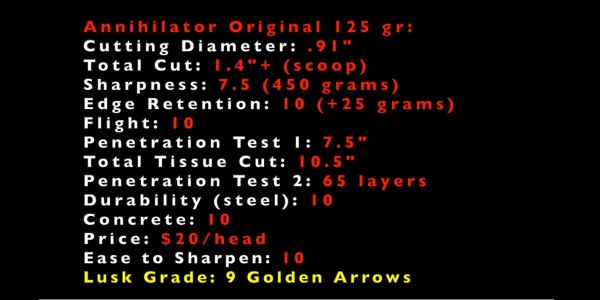
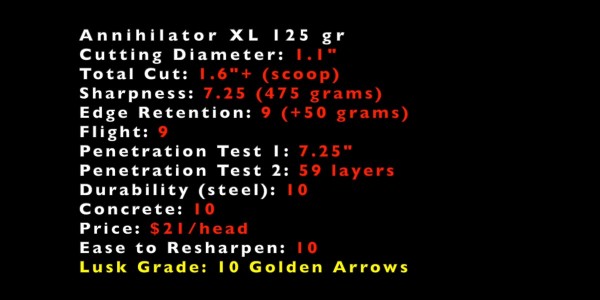
The Annihilator re-test report card.
The Annihilator did excellent in all of the test categories. This is a winner of a head and it’s something to really consider for pretty much any animal you are going after. Give the Annihilator a look. Great job, Annihilator!
And now a Battle! [Annihilator Original vs. Annihilator XL]
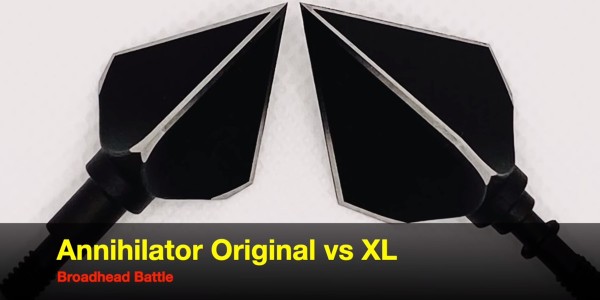
I was really excited to battle the Annihilator Original vs. the Annihilator XL. The XL is basically just a bigger version of the Original.
For my flight and some of the penetration testing, I used the Bishop FOC King Arrow from Bishop Archery. For some of the more harsh durability tests, like shooting through steel, I used the Bishop Frozen Fire Arms Dispatch (FAD) Eliminator. It has a nice footing on the end and that prevents the steel from cutting through the shaft.
And then for some of the concrete tests, I’m using a tank of an arrow by Bishop Archery. It’s called the GOAT (Greatest Of All Time). The Goat with a 125-grain tip weighs 1300 grains. Just the shaft is like a weapon in and of itself. It feels like a giant tent stake or even a spear. It is the best of the best when it comes to arrows.
So, let the Annihilator Broadhead battle begin!
Annihilator Original and XL compared
Here’s a good look at both models of the Annihilator heads below. The Original has a cutting diameter of 0.91 inches and the XL has a cutting diameter of 1-1/16 inches or 1.06 inches. So, 0.91, 1.06, about a 17% difference.
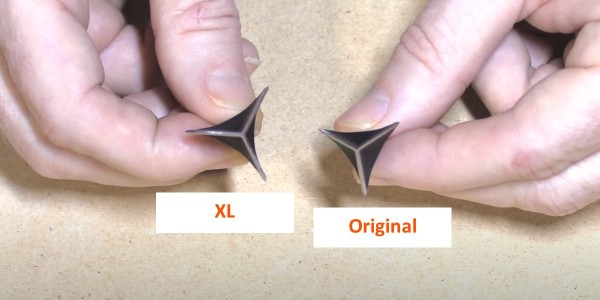
The Annihilator XL (on left) is a larger, beefier version of the original (right).
Flight comparison
For my flight comparison, I shot two broadheads of each model as well as a field point, to compare.
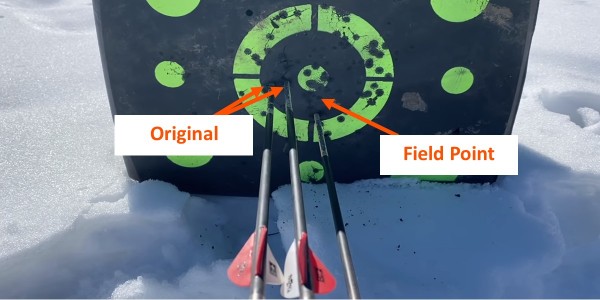
Here’s the Annihilator Original size. You can see the two broadheads there on the left. The field point is dead center, but I dropped just a little bit.
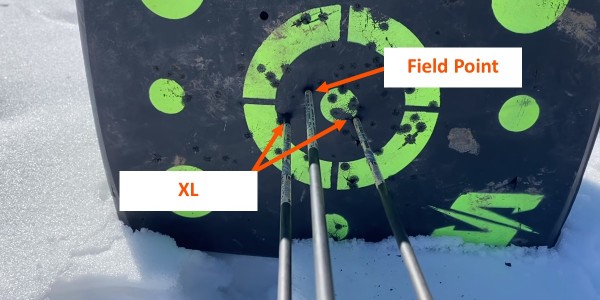
Here are the Annihilator XL’s. The field point is in the middle at the top and then the XLs are on either side.
Out of the box sharpness comparison
In the out-of-the box sharpness comparison, I used a sharpness testing machine, by Edge-On-Up. This tester holds a wire and measures how many grams of pressure it takes for the blade of a broadhead to break it.
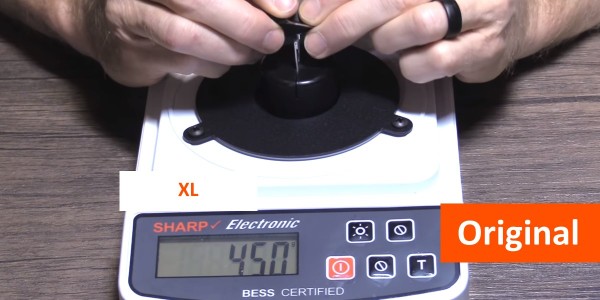
The Annihilator Original took 450 grams of pressure to cut the wire.
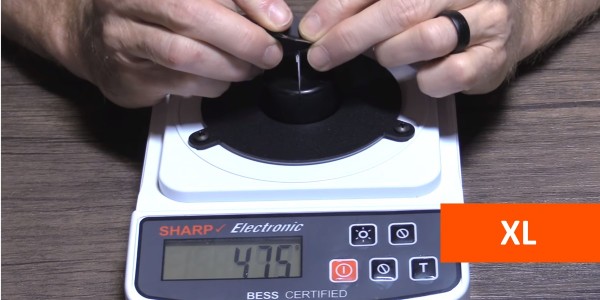
Annihilator XL took 475 grams of pressure to cut the wire.
Ballistic gel penetration test
I shot both the Original and the XL into ballistic gel, fronted by rubber matting and 1/2″ MDF.
The Original penetrated 7-1/2 inches and the XL penetrated 7-1/4 inches.
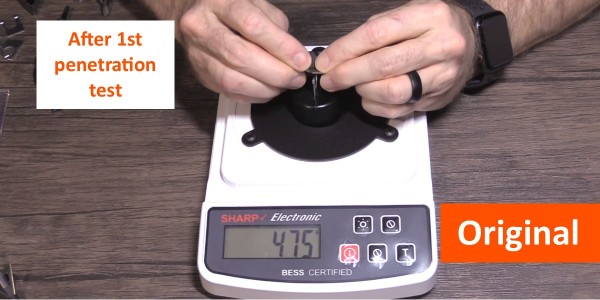
I decided to test the sharpness of the heads after the ballistic gel penetration test. The original cut the wire on the tester with 475 grams of pressure.
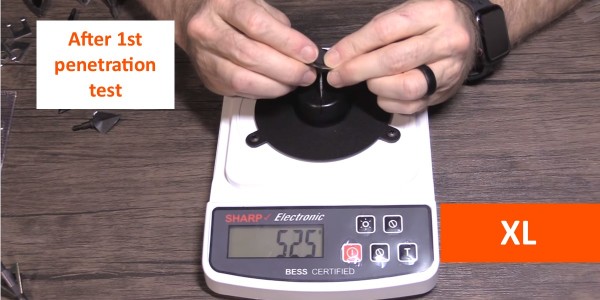
The Annihilator XL took 525 grams of pressure to break the wire after the ballistic gel test.
Cardboard penetration comparison
I shot both heads through layered cardboard to determine how many layers each could penetrate.
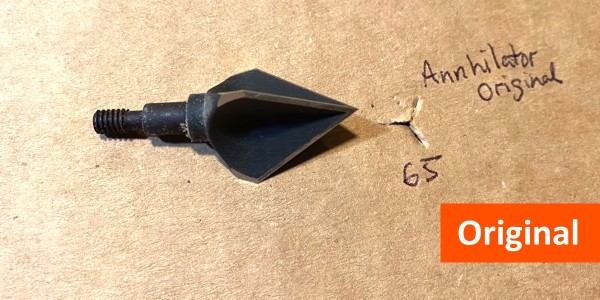
The Original penetrated through 65 layers.
The XL penetrated through 59 layers.
#ad

Steel plate penetration test comparison
I shot both the Original and the XL through a steel plate five times each.
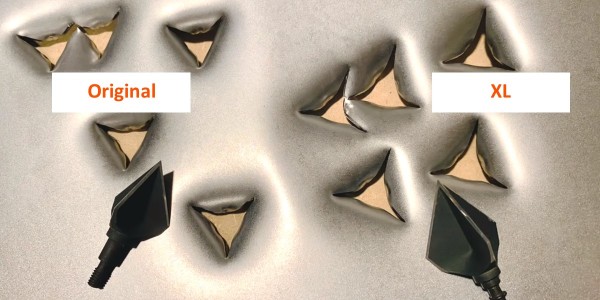
Here, you can see the holes that the Annihilators made in the steel plate. On the left is the Original and then on the right is the XL. And you can see they made great triangular chunk holes, not just 3 slits like some heads will do.
Now, I will say that I don’t think that the holes these heads made in the steel plate is really any different than the holes that an Exodus would make, (which are amazing), or a Tooth of the Arrow, a evan a solid steel 3-blade like a Bishop Holy Trinity.
Those all make triangular holes really similar to this. But, I do prefer those to just 3 slits. I mean they make a lot more internal damage and cause a lot more blood-letting than just the 3 slits do.
Here’s the Annihilator Original after being shot into the steel plate five times. It spun true and was still in fantastic shape. You really can’t even tell it has been shot, let alone shot through a steel plate five times.
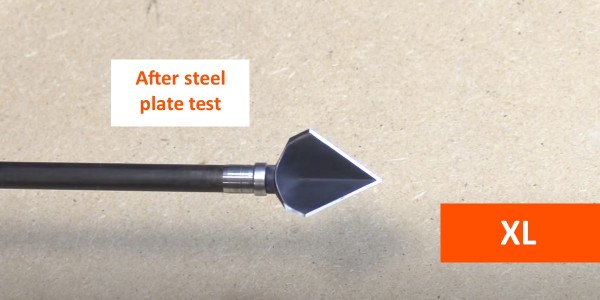
And here’s the XL. It too spins perfectly true. And like the Original, you just can’t even tell it has been shot, let alone shot through steel plate five times.
Cinder block test comparison
I shot both the Original and the XL into a cinder block to see how they would hold up. The XL showed out! See picture below.
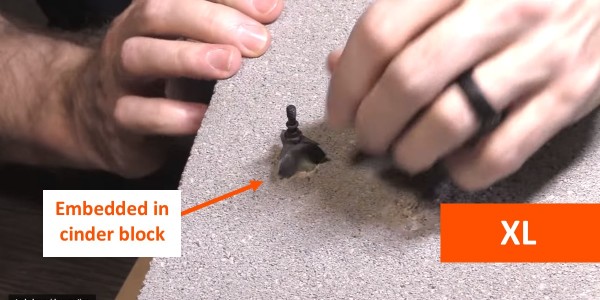
Look how deeply the Annihilator XL embedded into the cinder block! I couldn’t believe how stuck in there it was! It wasn’t budging at all!
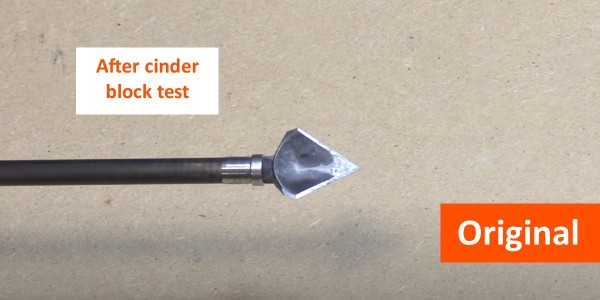
Here’s the Original after being shot through the steel plate five times and into that concrete block. Spins perfectly well even with a bunch of concrete still embedded at the end. It’s just in excellent shape. Even the tip is intact. The edges are intact as well.
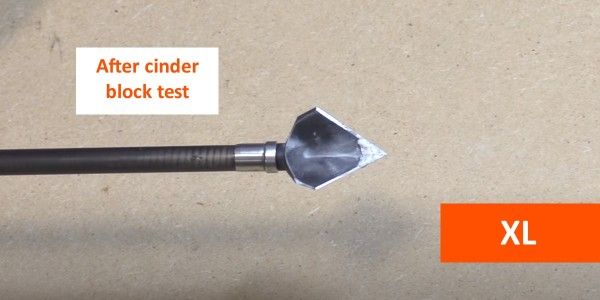
Now, let’s look at the XL. Spins perfectly well even with all this concrete stuck to it. If there was any wobble, it was because of the concrete. The tip on this one is still super sharp and not blunted at all. The edges remained in perfect condition.
How to sharpen the Annihilator broadheads
Now, you saw how durable they are and how they hold their edge really well. But, if you want to get them really sharp, one method of sharpening is super easy.
Because the Annihilator heads are 3-blade solids at a 60-degree bevel angle, you just one flat on any stone or any surface and just stroke it gently. Just be sure you have the same number of strokes on each side.
Do this until it comes out just like you got it from the factory. It’s super easy to do. You can even do it in the field. Again, you can do it on any surface. I love that about these 3-blade, 60-degree bevel heads.
You can also use the Stay Sharp Guide. They come out with individual sharpeners that are not very expensive at all for different styles of broadheads. And, in most cases, they put an edge on those heads better than how you got them from the factory.
They have a sharpener especially designed to put an extra sharp edge on these 3-blade, 60-degree heads. This is super helpful, because one of the drawbacks is that you can only get it so sharp with that 60-degree bevel.
-
N1 Outdoors® Put A Hook N1™ Fish Hook Leather Patch Hat (Kelly Green/White)
$29.99 Select options This product has multiple variants. The options may be chosen on the product page -
N1 Outdoors® RodTogs™ Patch Trucker Hat (Mossy Oak Elements Bonefish & Light Grey)
$26.99 Select options This product has multiple variants. The options may be chosen on the product page -
Sale!
N1 Outdoors® Leather Patch Trapper Hat (Flagship design – various patterns)
Original price was: $29.99.$9.00Current price is: $9.00. Select options This product has multiple variants. The options may be chosen on the product page
Conclusion of Annihilator Original vs. XL battle
What can I say about the durability of these Annihilator heads? They are absolutely fantastic!
Both of them performed really well and both had some great strengths.
My only critique of the Annihilator Original is the size of the cut. It has got some really cool features and it’s incredibly durable. It flies super well, penetrates exceedingly well, but I just have a little concern about that small cut.
And then you have the Annihilator XL. Even with it’s larger surface area, it still penetrated and flew very well and it was just still extremely durable.
So, for me and my hunting purposes, like hunting whitetails and hogs and stuff like that day in and day out, the broadhead battle winner of the Annihilator Broadhead battle is… the Annihilator XL! (check out the scorecards below).
Other fixed-blade broadhead reviews from John Lusk:

Mr. Lusk, Thanks for all your tests. Have you used the annihilator on an animal yet ? I am looking for a head to replace my slick mags. This looks like the one!!
I have not. And honestly, I’ve heard mixed results. Shot placement is everything, as I’m sure you know. Slick Trick Mags are really great heads and leave a really nice wound channel. I’m just not sure on the size of the wound channel with the Annhilators yet.
Hello John – just curious why you didnt give a tissue displacement number for this one.
Great review and right on the money!! I bought three 125 grain and remember calling the staff to ask about shooting them out of the package or sharpening before use. I made the mistake of shooting them out of the package! I shot 2 deer with little to no blood trails!!! Had to try to get dogs to track them down. Both shot were in the chest and penetration was great but penetration without a lot of blood is bad!! I switched broads pretty quickly. Good luck and make sure you sharpen them really good!!!
You must have been paid well for this bias review.! I have just 3 major comments! .#1 If a broadhead impacts lower then a field point, as measured by a tape measure at a any distance , then the point of impact is lower PERIOD. Has nothing to do with (well it was in my head that it would be lower, therefore it wasn’t lower) What kind of logic is that.. #2 If sight tapes have to be readjusted , then the point of impact is not the same PERIOD. #3 22 gauge metal is called sheet metal, not Steel plate. Steel plate is metal which is 1/4 inch thick or greater If this review is the best non-bias review that you can do then perhaps look for a new hobby!