So, there’s a lot of discussion in the archery/bowhunting world surrounding shot angles.
When it comes to this hot topic, there are several subtopics like, “how to,” “where,” “which angle,” and “the best.”
Angles aren’t just important in Geometry class, they are “vitally” important when considering shot angles on deer and other game.
And, of course, there’s the chatter surrounding what arrow and broadhead to use (I have some not so humble opinions on that!)
But, very few shot placement discussions answer the only thing that matters… “Why do you shoot any shot angle?”
Understanding “why” in regard to shot angles requires practical application. So, keep reading and find out!
The “why” is important when contemplating shot placement
Just so you know, I drove my teachers crazy in school when we did math equations or wrote papers for English class. Over and over and over again I simply wanted to know… “why are we doing this!?”
The answer was usually, “because that’s what we are doing today!” (which still falls like an anvil on my reasoning capability.)
I just kept thinking “we’ve been doing that stuff the past few days and I am moderately proficient!”
But, “why” requires practical application. So, keep reading and I’ll cover some of that stuff.
-
Sale!
N1 Outdoors® Sunrise In Tineville™ Tee
Original price was: $28.99.$19.00Current price is: $19.00. Select options This product has multiple variants. The options may be chosen on the product page -
Sale!
N1 Outdoors® Dominion™ Tee
$19.99 Select options This product has multiple variants. The options may be chosen on the product page -
N1 Outdoors® Tine Lines™ Whitetail Deer Antler Tee
Price range: $26.99 through $29.99 Select options This product has multiple variants. The options may be chosen on the product page
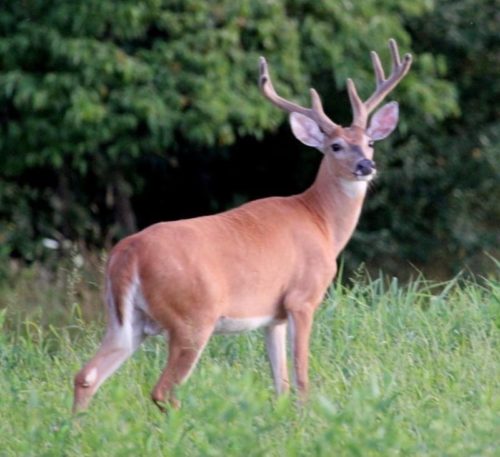
So, what is a quartering away shot anyway?
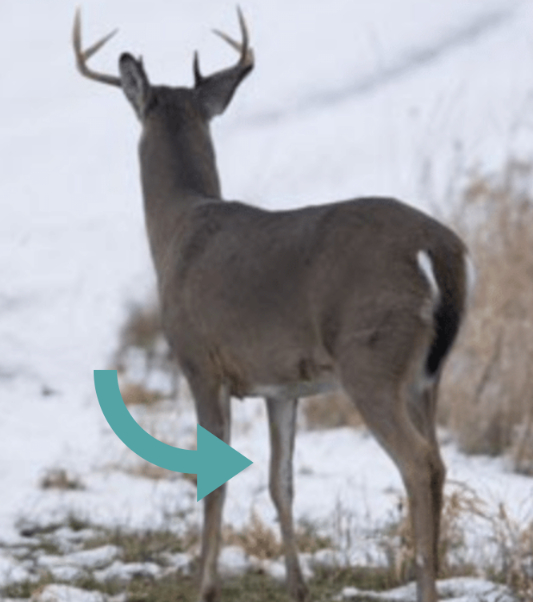
If a deer is facing away from you and you can see daylight between its front legs… it’s quartering away.
First, let’s make sure we all understand what “quartering away” looks like. Since a large number of bowhunters are after whitetail, that is the example I will use.
Yeah, Yeah, there can be severe quartering, or more toward broadside but quartering. Here’s the simple way to know IF THEY are quartering. Look at the front legs. If you see daylight, it’s quartering.
Why the quartering away shot is best
Now that we have that settled, let’s discuss why this shot is the best shot angle. I’ll set this up in order of operation.
They are looking away
Put simply, the act of drawing a bow requires movement. The animal is looking away from you, so that puts you at a significant hunting advantage.

The ears are pointed the other way
So, there’s some debate on a quartering away shot being better because a deer’s hearing would be reduced with its ears pointing away as well. A deer’s ears are cupped, so theoretically, if you make noise, this position would in fact be better.
My example above, of course, has an ear rotated back, just to keep me honest. Anyway, the ears aren’t toward you and that can’t be a bad thing!
The lethal part of the critter, any critter, is exposed in a quartering away stance
In the quartering away stance, there are no shoulder blades or ribcage to hit in most cases, even from a treestand. But, the big “kicker” here is that the arrow is traveling forward. Physiologically, and FACTUALLY, the arrow will be moving toward the more lethal parts of the animal.
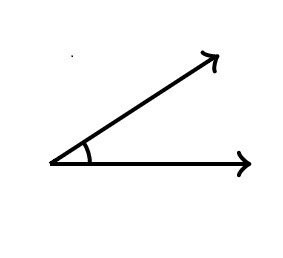
So, a little anatomy lesson.. Below is a basic diagram of the broadside of a deer:
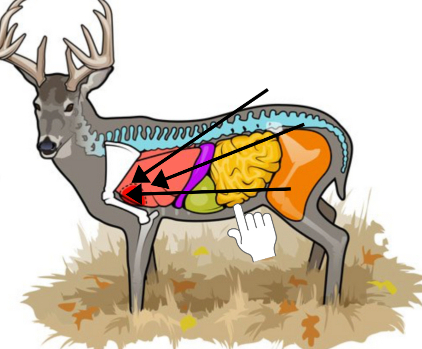
Now, you’re going to have to play along with me in this diagram and just imagine the deer is quartering away.
Each “arrow” represents a shot angle (from top to bottom), i.e. a tree stand, low tree stand, or downhill and ground level. That’s why I have the “arrows” as long as they are. They represent a possible wound channel.
But, no matter if the arrow hits the rear of the lungs or the middle of the lungs, the arrow is constantly moving toward the heart, lungs, and major vessels. This is key to WHY!
So, why does this matter Fowler??
Well, I’ll tell you.
Keep things moving forward, folks
The most forward part of the animal, (where all 3 “arrows” intersect and I have placed the “broadhead” in the picture above), include much larger vessels and airways.
Put simply, “it’s legit,” but it’s a bit more complex than that. So, here’s the redneck version…
Your potential to cut “bigger stuff” increases exponentially every inch that the arrow moves forward (let’s hope you’re shooting an adult arrow and hitting the Earth after blowing through).
Anyway, with the quartering away shot, Joe Bowhunter’s success percentage goes up and tracking distance goes down. WIN!

The wound channel is long
It’s pretty simple: The wound channel of a quartering away shot is long.
I laugh when I see these “wound channel” measurements. Mostly to justify a 3” wide mechanical penetrating only 9”.
Mathematically, sure, I get that. But come on man. Can’t we just shoot through a deer?
-
N1 Outdoors® N-Tune™ Nock Tuning Reflective Arrow Wraps – Dropp’N Hammers™
Price range: $18.99 through $27.99 Select options This product has multiple variants. The options may be chosen on the product page -
N1 Outdoors® N-Tune™ Nock Tuning Reflective Arrow Wraps – Silent Smash™
Price range: $18.99 through $27.99 Select options This product has multiple variants. The options may be chosen on the product page -
N1 Outdoors® N-Tune™ Nock Tuning Reflective Arrow Wraps – Flame Thrower™
Price range: $18.99 through $27.99 Select options This product has multiple variants. The options may be chosen on the product page
Anyway, this next part does apply to “flappers” (mechanicals) and low penetration systems. As you might know, I advocate for maximum penetration because that’s all an arrow can do… penetrate.
Because an arrow only gets one try, long wounds increase damage.
Let me step off the soapbox now and give 2 examples that will be pretty clear.
So, let’s get down to my level.
I am a simple guy. Below is a basic sponge. It’s an excellent lung example because it’s full of air and holes that represent blood airways and blood vessels, they’re longer than they are wide, and because, well, everybody has handled one.
A perfectly normal lung, with no damage, would feel very similar when compressed.
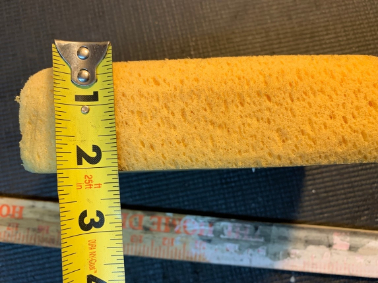
This sponge and tape measure help to illustrate wound channel length during a broadside shot.
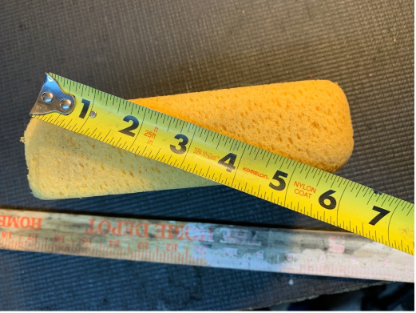
And now, using the same methodology, a quartering away shot. The wound channel on a quartering away shot is longer than that of a broadside shot.
As you can see in the picture above, we get really long wounds with a quartering away shot. Again, the larger vessels and heart are forward, so that’s improving per the “lethal part of the critter” discussed in #3 above.
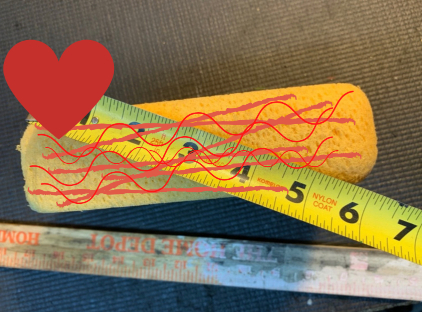
I’m not saying that broadside shots are bad, so stay on the rails here, this is a quartering away discussion!
But, just look at that wound length. I think it’s pretty clear.

Why the longer wound channel matters
Now, another thing your favorite professional bowhunting guru doesn’t recognize is basic physiology. Now, to be fair, few of them have had a cadaver to help clarify why this works.
The largest percentage of vessels in the deer or other animal are going lengthwise, (i.e. front to back in the lung), and have a little wrapper around them.
Imagine that sponge is inside a balloon but yet stays the same shape. The balloon is perfectly adhered to the outside of the sponge. This means all the air and blood have to enter and exit somehow. That “somehow” is tubes. And all the tubes go in and out of the front of the lungs and then to the legs, neck, head, etc.
That’s a fact. Separate systems for oxygen and blood, with their own committed tubes, running ’round God’s cardiothoracic plumbing system.
As an example, if you didn’t have pipes in your house, water would go everywhere. We have clean water pipes and plumbing pipes doing two separate things. But nope, the water comes in from the city, runs in a big pipe, then enters your house, in smaller pipes, then leaves.
A quartering away shot is more devastating than a broadside shot because the the blood vessels are running to and from the front, which is where we want that arrow headed!
In a lung, the air and blood flow is lengthwise because the entry and exit is in the front.
Just. Like. That.
Where to aim on a quartering away shot | Tic-Tac-Toe!
So, you can use this simple example for any shot angle.
Imagine the board from tic, tac, toe. The front legs are the vertical posts. Imagine a line running on the spine (we prefer not to hit that). Then, another line on the brisket.
Now, shoot the middle of middle box. On any angle, the middle box widens or narrows. Shoot the middle of the middle box.
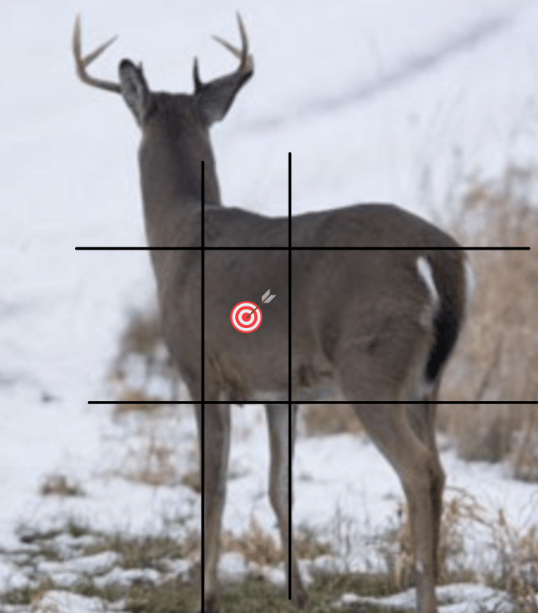
An imaginary tic-tac-toe board can help provide guidance on where to shoot when taking a quartering away shot.
Conclusion
Ok, I hate to be so brief and leave so soon, but it’s really that simple. Of all these concepts, the long wounds are the most important.
Arrows do NOT have any cavitation or expanded wound channel by sheer velocity and shock waves.
Not one.
Not even the broadhead companies that claim to have cavitation, actually have cavitation.
100% fake news!
So, the best thing an arrow can do is travel as far as it can, cutting as many different airways and blood vessels as possible and then exit.
Wait, that’s not the best thing, it is the ONLY thing!
One note, if you have dull broadheads, or just trust your brand to be hunting sharp and you don’t check them, that’s on you. Please take the responsibility to sharpen your broadheads!
The quartering away shot has many advantages. It’s certainly the best shot angle.
Now, if your arrow system fails, none of this matters, so…