There’s nothing like the adrenaline rush of being in close to a deer or other wild game and releasing an arrow that finds its mark.
But, what if you’ve never felt that rush? What should you know to begin the quest of being a successful bow hunter?
In this article we will do our best to get you started in the right direction. Let’s just call this N1 Outdoors’ Bow Hunting For Beginners 101.
Check out the the diagram below to learn all the parts of a compound bow!
So, What Brings You To Bow Hunting?
Maybe you’ve always hunted with a rifle or other firearm. Maybe you’ve mastered gun hunting and simply want to try your hand at a new challenge.
Or, maybe you’re totally new to any type of hunting and just want to learn what this bow hunting thing is all about.
Whatever your situation or age, we think you’ll find that bow hunting is not only fun (you’ll want to say “Bowhunt Oh Yeah!”), but helps teach patience, discipline, attention to detail and focus. And, there is certainly a special sense of accomplishment knowing you have been able to take an animal at close range and provide meat for your family and friends.
Learn The Parts Of A Bow
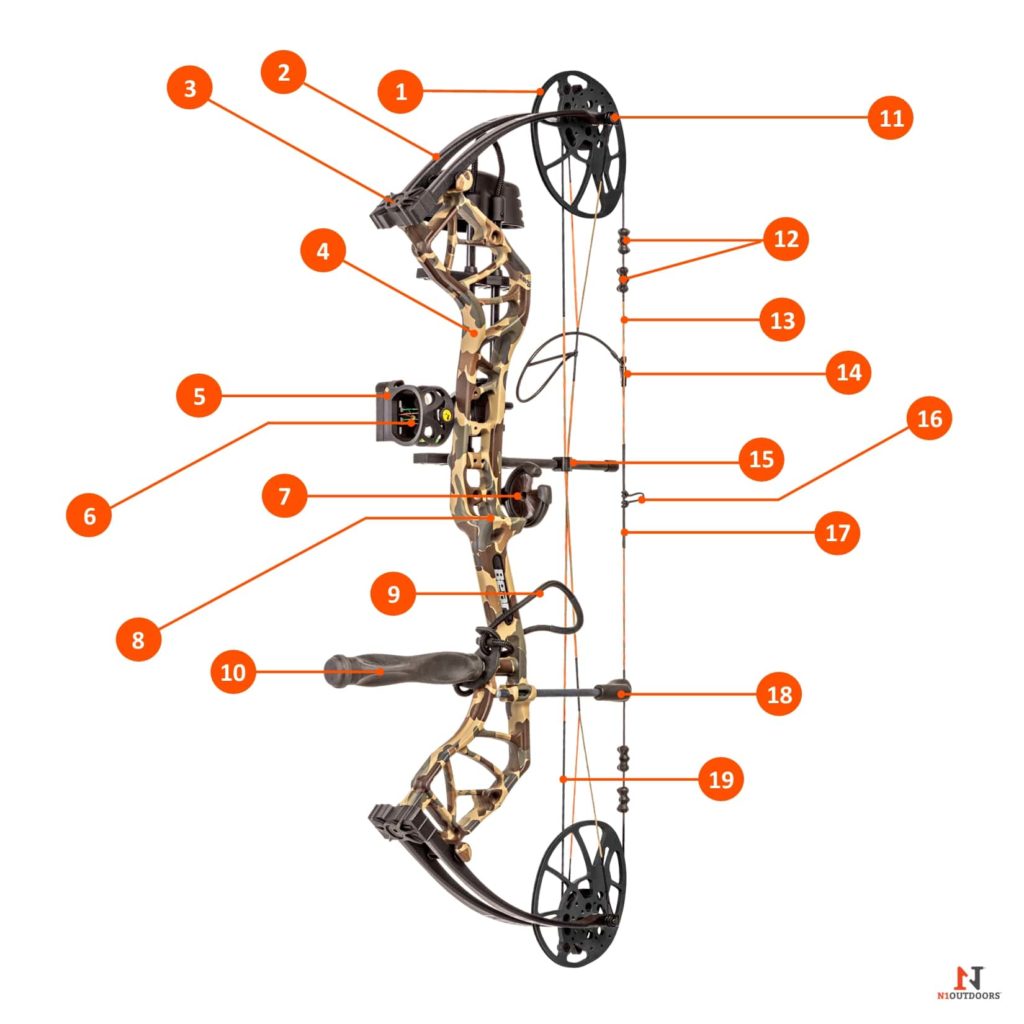
In the diagram above, parts of a compound bow are numbered. Read below what each part is called:
- Cam
- Limbs
- Limb Bolt
- Riser
- Sight
- Sight Pins
- Arrow Rest
- Arrow Shelf
- Wrist Sling
- Stabilizer
- Cam Axle
- String Dampeners
- String
- Peep
- Cable Guard
- D-Loop
- Serving
- String Stop
- Cable
-
N1 Outdoors® Bareback Bowhunter™ Tee
Price range: $28.99 through $32.99 Select options This product has multiple variants. The options may be chosen on the product page -
Just Pass’N Through™ Tee featuring Iron Will (Various Colors)
Price range: $24.99 through $28.99 Select options This product has multiple variants. The options may be chosen on the product page -
Sale!
Just Pass’N Through™ Tee (featuring Magnus Black Hornet Ser-Razor Broadhead)
$15.00 Select options This product has multiple variants. The options may be chosen on the product page
Hunting Education And Safety
If you haven’t taken your state’s hunter safety course, be sure to sign up and do that the first chance you get. This will help you learn safe hunting practices whether you are hunting with a bow or a gun.
You will also learn the hunting laws and regulations of your state, deer hunting tree stand safety, as well as learn how to identify game.

Study, Study
It’s possible that if you’re interested in learning to bow hunt, that you’ve already been watching videos or TV programs about bow hunting. But, if not, there is certainly no shortage of videos about bow hunting tips. And, while videos are great visuals to learn from, don’t discount the wealth of knowledge you can glean from bow hunting blogs and articles.
When getting started in archery, it’s a good idea to talk to your local bow shop for recommendations on what type of archery equipment and supplies you should begin with.
You may also find it interesting to learn about the history of archery as well. It may help you appreciate the skill you are about to begin learning.
Go Local
Your local bow shop is a great resource for anyone wanting to begin their bow hunting journey.
You don’t have to look long on social media to know that there are more than a few companies pushing their archery equipment and supplies. Of course, they all look good and sometimes it’s difficult to know what exactly you need.
Broadheads And Arrows And Bows, Oh My!
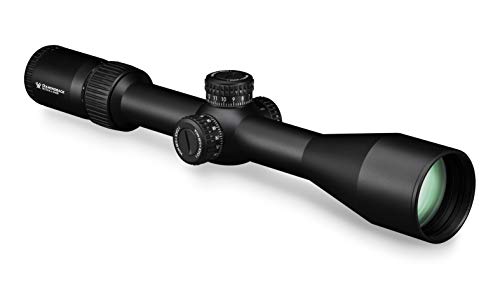
As a bow hunting beginner, you may be overwhelmed with the choices of bow hunting equipment that is currently on the market. Your local bow shop can help you find your way through the sea of bow hunting advertisements to equipment that’s right for you.
For example, what is your draw length? What should the poundage be on your bow? And, of course, there are so many choices when it comes to broadheads, light or heavy arrows, arrow rests, sights, releases, bow strings, fletches and targets. And, of course, these things can be affected by what species of game you will be pursuing.
The bottom line is that your local bow shop should provide you with a wealth of information when it comes to figuring out your equipment needs. And, of course, it’s always great to support local business, right?

Inspect Your Archery Equipment
Once you have decided on and purchased your bow hunting equipment and supplies, it’s time to do some target practice! But, before you sling an arrow, you need to inspect your equipment. Be sure you don’t have any cracks in your bow limbs, fraying of your bow string, or nicks or cuts in you bow cams . Also, be sure you have waxed your bow string recently.
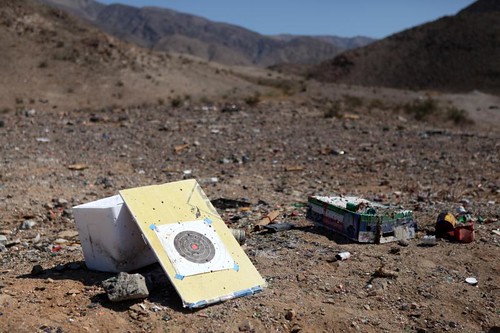
Target Time
You may have a local range or archery shop to shoot at, but you may also choose to buy your own target for practice at home.
If you choose to shoot at home, always be sure you set up your target in a safe location where there is no chance of an arrow shooting toward any individual. This includes never shooting towards houses, streets, sidewalks or any other location where people may be standing or passing by.
It’s also a good idea to place a backstop of some kind behind your target. This will help to block an errant arrows that miss the target. Be sure your backstop is much larger than your target.
Be sure to always put a back stop behind your target when shooting.

Practice, Practice and Practice!
Once you have set up a safe target location and inspected your equipment, you are ready to begin practicing!
Be sure you don’t nock an arrow until you’re ready to shoot. When you nock your arrow, be sure to point it toward the ground while nocking.
In short, never point the arrow at anything you are not prepared to draw on and shoot. Also, if possible try to be shooting toward your target at a downward angle.
-
N1 Outdoors® Blaze Orange Leather Patch Hat
$26.99 Select options This product has multiple variants. The options may be chosen on the product page -
N1 Outdoors Just Pass’N Through™ Leather Patch Hat (Grey/Lt Grey)
$29.99 Select options This product has multiple variants. The options may be chosen on the product page -
Multicam Camo N1 Logo Leather Patch Hat
$26.99 Select options This product has multiple variants. The options may be chosen on the product page
Once you have gotten familiar with the operation of your new bow hunting equipment by shooting at a target, you can start to prepare for various bow hunting scenarios.
While shooting at a stationary target is certainly something to master, deer and other game animals don’t always still and broadside, allowing you to take a perfect shot. So, you should practice shooting your bow from various positions, including inclines, declines and sitting positions.
You should also practice shooting in a way that mirrors the various angles that your game may be standing. For example, a shot on an animal that is quartering away from you will require you to shoot further back, so that the arrow passes through the vitals, so that you can take an ethical shot that results in as clean a kill as possible.
Don’t Forget Your Hunting License
You may already be a hunter that is learning to bow hunt. But, if this will be your first hunting trip, be sure before you get your hunting license before your first trip.
You can contact your state’s Department of Natural Resources to purchase a license. Some local outdoors shops also sell hunting and fishing licenses. You can also go online to purchase a license for the state you live in.
-
N1 Outdoors® N-Tune™ Nock Tuning Arrow Wraps – Flo Duck Camo (Various)
Price range: $18.99 through $27.99 Select options This product has multiple variants. The options may be chosen on the product page -
N1 Outdoors® N-Tune™ Nock Tuning Reflective Arrow Wraps – Lumber™
Price range: $18.99 through $27.99 Select options This product has multiple variants. The options may be chosen on the product page -
N1 Outdoors® N-Tune™ Nock Tuning Reflective Arrow Wraps – USA Antler™
Price range: $18.99 through $27.99 Select options This product has multiple variants. The options may be chosen on the product page
Time To Hunt
As you get ready to take your new bow hunting skills to the field or the woods, continue learning as much as you can from experienced bow hunters. Be teachable. Your learning curve will be much less steep if you listen well and put into practice what you’ve learned.
Just as when you practiced target shooting, check your bow hunting equipment thoroughly, including your broadheads, before taking into the field.
You may feel that learning the basics of shooting your bow will surely lead to instant success. We certainly wish you bow hunting success.
However, there is much to learn when trying to take an animal with a bow at close range. For example, you must pay close attention to wind direction as well as learn when to use certain entry and exit routes to access your deer stand.
And remember, even after your hunts, be sure to continue educating yourself on hunting tips with relevant blogs and videos. And, also be sure you know the distinct characteristics of the type of deer and other game you are hunting.
Hopefully this bow hunting for beginners article has provided you with the information you need to get started on this new adventure! We wish you success and hope you have an arrow that’s Just Pass’N Through!