Tooth of the Arrow broadheads have been around for while, but I was intrigued and finally got my hands one so I could test it.
Tooth of the Arrow… it’s a cool name, but how do their broadheads perform? Let’s find out!
You can jump straight to the testing of the Tooth Of The Arrow heads by clicking the links below:
Tooth Of The Arrow Broadheads | An Overview
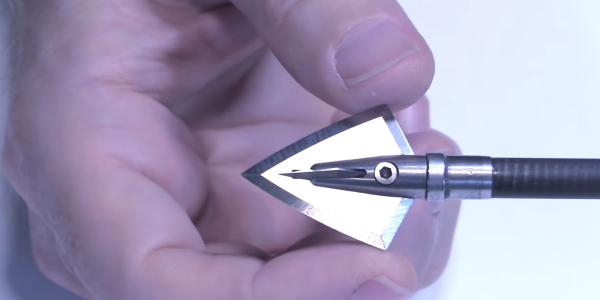
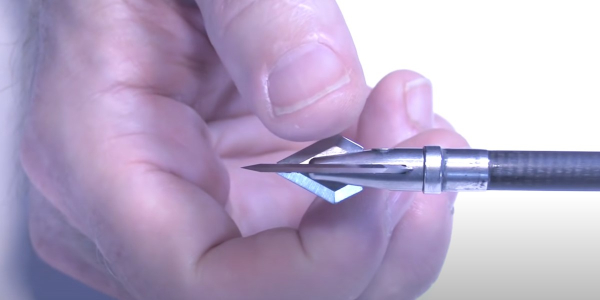
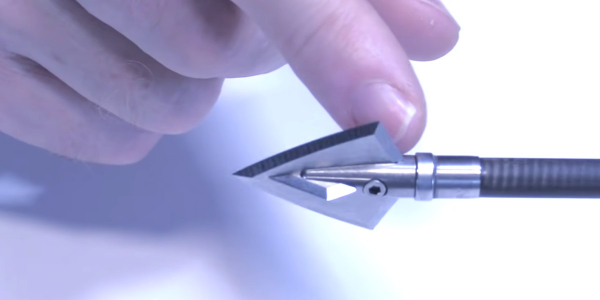
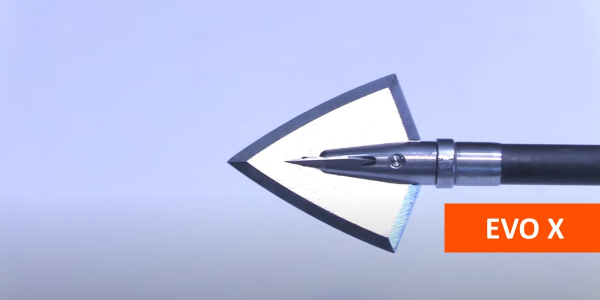
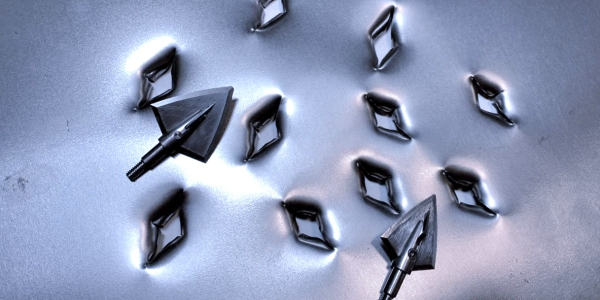
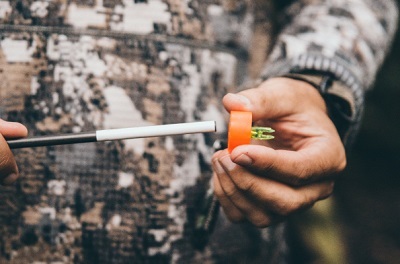
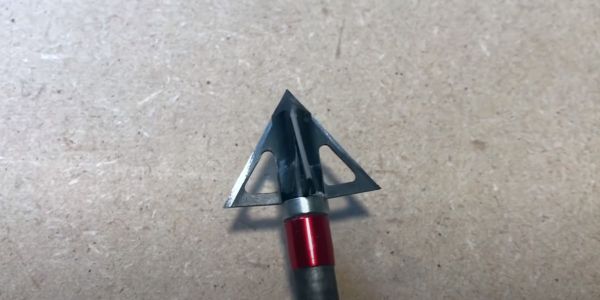
The Tooth of the Arrow broadhead is a 4-blade head that is similar to a Slick Trick head.
Each of the blades are exactly the same cutting diameter, so it’s a true 4-blade head. It’s a little bit bigger than a Slick Trick Magnum. But, rather than being 1 and 1/8-inch cutting diameter like the Slick Trick Magnum, this is 1 and 3/16 cutting diameter. So, it makes a little bit wider hole.
For the testing, I shot 450-grain Bishop mammoth arrows, using my Bowtech SR6 which is a 27 inches and 72 pounds.
What makes this head unique is that this is machined out of a single chunk of high-carbon steel. So, there are no blades to be replaced. It’s just one solid chunk.
So, as a negative, you can’t just replace the blades and put in new sharp ones. As a positive way, it’s a pretty stout, strong design. And, with it being such high-carbon steel, it’s not too difficult to sharpen. So, it’s intriguing to see this.
The Tooth of the Arrow XL is a 4-blade head that is machined out of a single chunk of high carbon steel.
I’ve spun these heads and they spin very true. They also fly well for me. I’ve not tested them at super long ranges but they do – well, I think through a well-tuned bow, they should fly well at longer ranges.
I’d heard really good things about the smaller, standard head.
But, I’ll start off by testing the XL, which intrigued me the most because I just like to make a big hole if I can! I was excited to see how it performed.
So let’s see how the Tooth of the Arrow XL did. (Further down I’ll do a head-to-head battle between the XL and the original, so check that out as well!
-
Sale!

N1 Outdoors® Just Pass’N Through™ Arrowhead Tee (Various)
$19.99 Select options This product has multiple variants. The options may be chosen on the product page -
N1 Outdoors® “Outdoor Npressions™” Boot Print Tee
Price range: $24.99 through $28.99 Select options This product has multiple variants. The options may be chosen on the product page -
Sale!

N1 Outdoors® Licking Branch Buck LS Tee
$19.00 Select options This product has multiple variants. The options may be chosen on the product page
Vented Penetration Testing
Below I test the Tooth Of The Arrow vented broadheads.
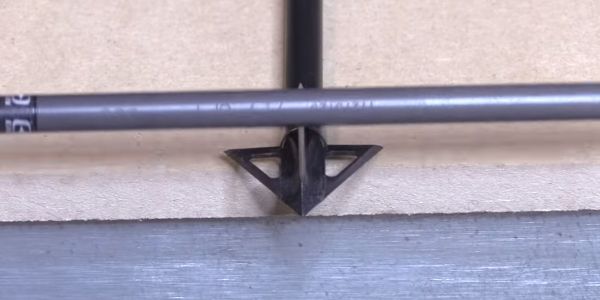
I shot it into my broadhead box where I’ve got four layers of MDF and they’re half inch each, and two of those layers have a rubber foam layer in front to simulate hide and a little bit of soft tissue there in the beginning and the end.
Penetration wise, the XL did just about like most of the heads I’ve tested. It went well into the second layer of MDF. So, it went through that initial rubber foam mat and then through the first layer and then it almost buried the blades all the way into the second layer. You can see it protruding out, bulging out the backend there. It didn’t actually breakthrough the blade but it pushed the board out there just quite a bit.
OK, it’s 1 and 3/16 this way, 1 and 3/16 this way. So it’s a total of 2.75 inches of tissue being cut. Comparatively, the QAD Exodus has a total tissue cut of 1.875. So, with the 3 blades of an Exodus and 1 and 1/4 inch cut, it’s 1.875 total tissue being cut, whereas, with the Tooth of the Arrow here in their XL model, it’s 2.75. So, it penetrated just about as well the Exodus, and better than the other heads that I’ve tested so far and yet the total cut is about an inch more than most of those heads. So that’s pretty remarkable.
If we examine the head after it went through the wood, it held up extremely well. The blades are in great shape. They are still remarkably sharp. They bite into my nail. It doesn’t look like they were dulled at all. Now, I should add as well that because it’s 4 blades and two blades covers a diameter of 1 and 3/16 inches, that means the total tissue being cut is 2.75 inches.
Angled Shot Penetration
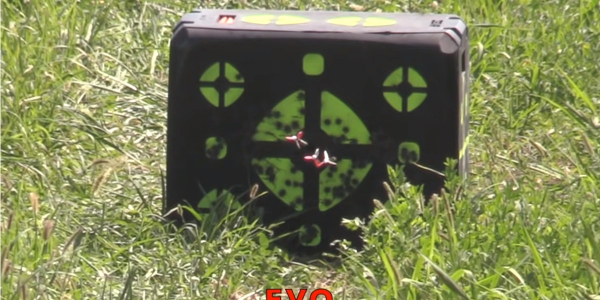
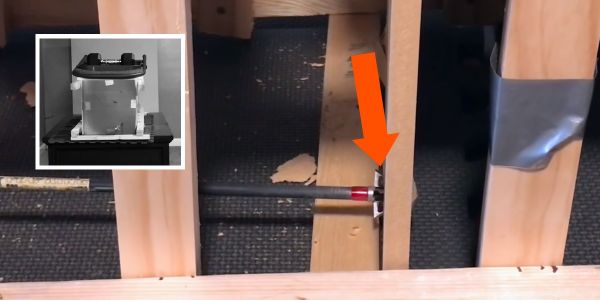
Next, I shot it at a 1/2-inch MDF board at a 45-degrree angle to see how it would do through that.

Here is the head sticking out just as it went into the Rinehart target behind it. It protruded that far, which is very similar to the SIK F4 that I tested a while ago. You can see that in a video. However again, this has about almost 1 inch more cut than the SIK F4. So to penetrate that well, again, is pretty impressive and the blades are extremely sharp. There’s no nicks. Looking really good.
Durability Testing
I shot the Tooth Of The Arrow head into a 22-gauge steel plate to see how it would fare.
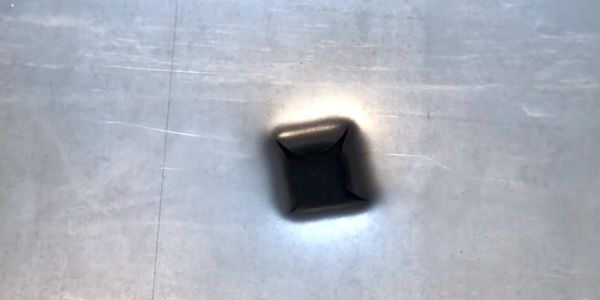
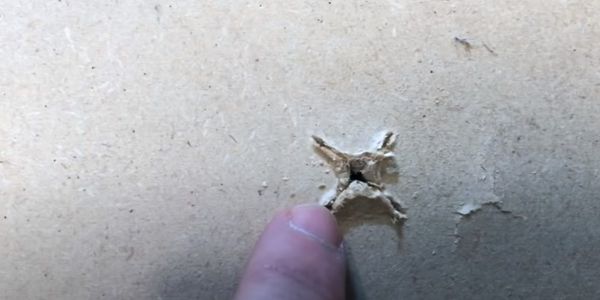
Look at the hole that this thing made. I have to say, I was pretty impressed with that. It’s like a giant square was cut out of the steel. I’ve never seen anything like this. What a hole!
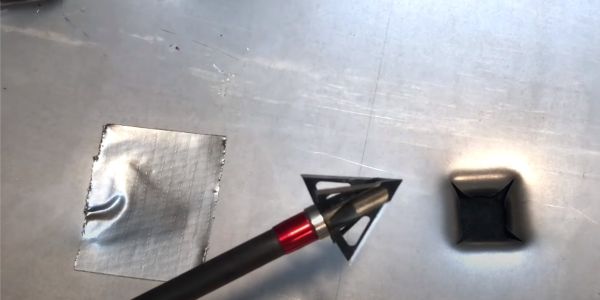
The blades still look pristine. They are in very, very good shape. There are no nicks. They still cut into my thumbnail. Really good. Impressive.
Cinder Block Test
The cinder block is the final test that I do with the fixed-blade heads.
I don’t do this test or the steel plate test typically with the mechanical heads, but when you’re using a fixed head, you’re typically doing so because you really want to have some structural integrity and blade strength that’s above and beyond what a mechanical can do.
So, I just like to test the limits. Not many heads hold together after hitting the cinder block. A lot of them take chunks out, but then just kind of bend or fall apart. Very few heads hold together. There have only been a few that have made it. Let’s see how the Tooth of the Arrow did.
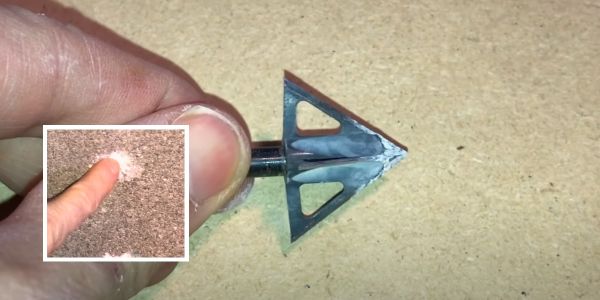
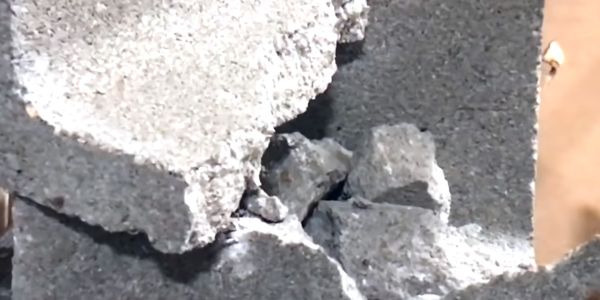
Here’s the chunk that it took out of the cinder block. A finger goes right into it. And then if you look at the head itself, it did remarkably well, completely holding together. The nose got covered in concrete and got a bit nicked up there from the concrete.
I would say this head is amongst the top few in terms of structural integrity that I’ve tested. It’s right up there with the QAD Exodus and the Muzzy Trocar and the Trophy Taker A-TAC.
I think the only ones that may have done better are the Bishop Archery and also the Iron Will.
Man, for the price, the Tooth Of The Arrow XL is one impressive head. I have to say, I’m pleasantly surprised. I give it an A+ in all categories.
-
N1 Outdoors® N-Tune™ Nock Tuning Reflective Arrow Wraps – Buck Buster™
Price range: $18.99 through $27.99 Select options This product has multiple variants. The options may be chosen on the product page -
N1 Outdoors® N-Tune™ Nock Tuning Reflective Arrow Wraps – Flatliner™
Price range: $18.99 through $27.99 Select options This product has multiple variants. The options may be chosen on the product page -
N1 Outdoors® N-Tune™ Nock Tuning Reflective Arrow Wraps – Flame Thrower™
Price range: $18.99 through $27.99 Select options This product has multiple variants. The options may be chosen on the product page
Comparing the Tooth of the Arrow Original to the XL [Broadhead Battle!]
I wanted to compare the Tooth of the Arrow Original vs the XL version.
Now, I’ve done this in some other instances, like with the Magnus, where I tested the Stinger compared Black Hornet. And in this case, I tested the two models of Tooth of the Arrow broadheads.
The Tooth of the Arrow broadheads are 100% made in the USA.
I tested these heads for long distance flight (I was able to pop a balloon at 80 yards) and I’m going to test them for edge sharpness and retention, for penetration, and for durability.
Let’s see which one prevails!
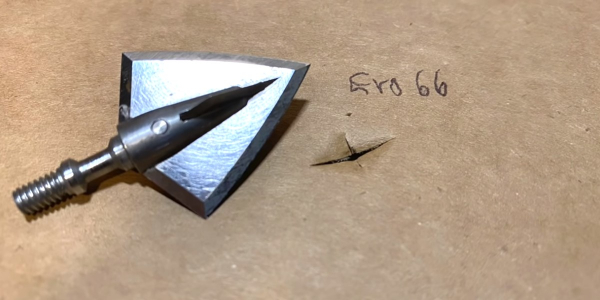
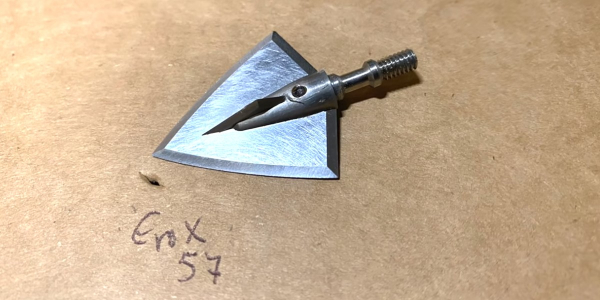
On the right is the Tooth Of The Arrow Original, and on the left is the XL. These are the 125-grain models of these heads. The Original is 1-inch, while the XL is 1-3/16 inches. They are machined from a solid bar of 11L41 steel, so a high carbon steel. They’re brought to a Rockwell hardness of 45. As you can see, they are plated with a black oxide to cut down on glare in the field.
With the Tooth of the Arrow Original, more than 85% of the weight is kept within the diameter of the arrow shaft. That’s going to really help in long range flight and spinning. With the XL head, more than 80% of the weight is kept within the diameter of the arrow shaft.
These heads have a unique feature about them, in that they keep a lot of the weight within the diameter of the arrow shaft.
Out of the box sharpness comparison
I tested the Tooth of the Arrow broadheads for out-of-the-box sharpness. The purpose is to see if they can still cut paper after a stroke of a carbon arrow shaft. Because both the Original and the XL have the same blades, I only tested one of the heads.
I gave the broadhead arrow shaft strokes to see how well it would maintain its sharpness.
The Tooth of the Arrow broadhead was able to cut paper still after 5 strokes of the arrow.
Penetration comparison
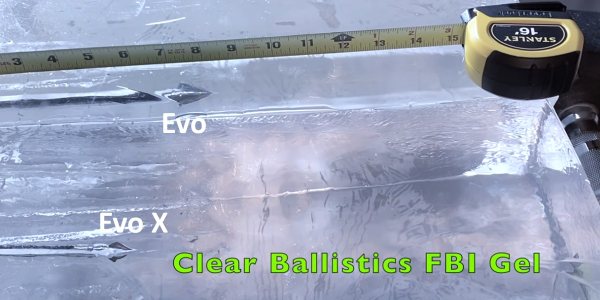
I tested the Tooth of the Arrow Original and the XL for penetration. My medium was ballistic gel that was fronted with a rubber mad and 1/2″ MDF board.
The XL penetrated 8 inches. Tooth of the Arrow Original penetrated 9 inches.
Durability comparison
I shot both heads into a 22-gauge steel plate 5 times to test the durability. Check out the holes these heads made in the steel plate!
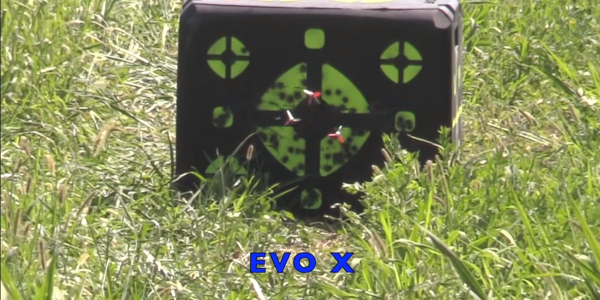
The holes themselves are really what sets the Tooth of the Arrow apart. OK. Here you can see the holes from the XL. OK. They are just bit squares. They are not just like four crosses or two crosses, four little slits. They are true squares!
Here is the Original, the 1 inch. So the 1 inch, the 1 3/16 inch, and you can see even with that, it’s just a nice chunk of a hole.
In the steel plate test, there are very heads that are able to punch a chunk out like that. The Exodus does it in a triangular shape. And, as you can see here, the Tooth of the Arrow does it extremely well in a 4-blade shape. So that’s going to be a really difficult hole to close up in an animal.
You can only see on one of the XL blades a little bit of cosmetic marking. I don’t even know if you can pick that up in the picture below. It’s very hard to see.
These heads have extremely impressive durability. Some of the very best that I’ve tested.

Here are the heads after they’ve gone through the 22-gauge steel plate 5 times. And as you can see, they look brand new. As a matter of fact, it’s hard to tell that these were even shot at all, let alone shot through the steel plate as well as in the penetration test through the MDF. Really impressive durability and edge retention through that really hard medium.
Now, I have heard some reports of people shooting them and hitting them into a big heavy bone and one of the blades bending or shearing off. That can happen with any broadhead.
There are all kinds of crazy things that can happen in the field as you hit heavy bone at different angles. But through the steel plate as you can see in the picture below, they faired extremely well.
Cinder Block Test
Let’s look at these heads and see how they did after being shot into the cinder block.
The cinder block didn’t fare too well!
Here’s the Tooth of the Arrow after going into that center block and busting it apart. It’s just in incredible shape. It spins perfectly true. The tip is still super pointy and didn’t bend over at all. The blades are in great shape. They only got a just a little bit nicked up on the top of each blade, but they could be sharpened again.
I spent about 5 minutes touching these blades up just to show how easy it is to do it. And I understand they have a sharpener that you can purchase on their website. I don’t have one of those. But, honestly, I do really well with just a little sharpener. This is the thing that I use. It fits in there perfectly.
This sharpener is from a Spyderco, but you can use any brand. This is like a little file. I just sharpen the blades individually, about 10 strokes on each blade. And, then on the tip, I just use the same thing but I just use it flat ways to cover both blades at once. I don’t know if you’re supposed to do that but it sure worked well for me. And this head, it’s now like shaving nail. I mean it’s just like it was. The tip was super sharp. And this is right after going into that concrete block.
Final Thoughts On The Tooth Of The Arrow Vented Broadheads
So, what do you think of this broadhead battle, the Original versus the XL?
Each of them has their distinct strengths. In terms of overall flight, the Original flies incredibly well. It’s one of the very best flying and forgiving broadheads I’ve ever tested.
In terms of penetration, the Original penetrated much more deeply. But, in terms of hole size, man, the XL really ruled in that department, though both of them really made a nice square hole in the mediums that I shot them through.
And the winner is…
In terms of which one is the winner, really, it’s a toss-up. I have to call it a tie. I hate to do that. But, this really is a draw. It just depends on your personal setup and what you’re hunting.
If you’re going after a really big animal where penetration is the most important thing then man, the Original is the way to go. If you have a lighter setup and you’re concerned about your penetration, then the Original is the way to go.
If you are going after a really long range shot like a pronghorn or something like that that you’re going beyond 60 yards, then the Original is the way to go.
But, if you are going for a shot under 60 yards and you really want to make a nice big hole and you have the kinetic energy to drive it through, (and honestly, it really doesn’t take that much kinetic energy to drive it through), then man, the XL is the way to go. For whitetail and hog shots under 50, 60 yards, I would definitely choose this one.
What I think is the best combination is to have a few of both in your quiver. If a shot is going to be longer, then you pull out the original. If the shot is going to be shorter, use the XL. And that way, you’re ready for any situation, and honestly, any animal as well.
There are several things to consider when choosing a broadhead. These heads have it all. They are fantastic broadheads.
Great job, Tooth of the Arrow!
Tooth Of The Arrow Solid Broadheads Review
Below I will test the solid version of the Tooth Of The Arrow broadheads…
Originally, Tooth of the Arrow only made the 100-grain and 125-grain in a vented version.
But they also have a solid, non-vented version in 100-grain and 125-grain.
Interesting Ferrule Design On the Solid Version
So let’s zoom on in here and let’s check out this new Tooth of the Arrows Solids.
Here’s a good look at the Tooth of the Arrows Solid in the 100 grains. Just like the vented version, it’s machined out of a single bar of steel, brought to a Rockwell hardness of 40-45.
What’s interesting in this solid model is that most of the specifications are exactly the same as the vented model.
The overall length is the same, 0.77 inch, making them to my knowledge the shortest single piece for blade steel broadhead that there is, which is just going to aid in flight.
The blades are also the same thickness as the vented model. They are 0.040 inch thick. The blade angle is the same at 45-degree blade angle to maximize the penetration.
And so, the same short profile, the same cut size of 1 inch, and 2 inches of total cut.
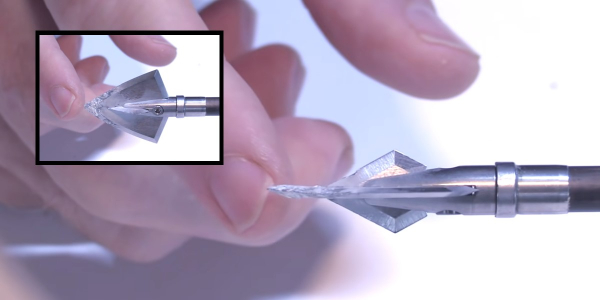
So, many things about the solid are the same as the vented model. But, what’s different is they’ve taken up the weight from the ferrule itself on the solid version. They’ve taken some grooves out of the ferrule and that’s all that has made the extra weight. So, that is really interesting.

Here’s the 125-grain model vs. the 100 grain, and you can see that everything is exactly the same as the vented, same as the 100-grain, but they’ve taken a smaller scoop out of the ferrule to make up for the weight. So with the 100-grain, they’ve taken a little bit bigger scoop and you can compare right down. You see the line of the scoops, you can see. So the 100-grain, they just took a bigger scoop. Other than that, they are exactly the same.
Why A Solid?
So, why come out with a non-vented blade, a solid blade?
Well, many people prefer solid blades over vented blades because they do have some advantages.
One of the advantages is less noise in flight than with vented brodadheads. You have air passing through that hole and it can make whistling or a wheezing sound as it rotates and flies at really high speeds.
So, the solid heads will definitely be quieter.
In addition, a solid can be more durable because there’s not that venting that creates a thin area in the blade that could be more prone to bending or breaking than a solid one. So, that’s the primary reason for doing it.
But, I wondered how it would affect flight and penetration?
In some ways, you might think, “Well, it’s going to fly better, because with these grooves, it’s going to be more aerodynamic in flight.” But, the opposite side of that is, “well, there’s more exposed surface blade than there was in the original, because so much of that blade was covered by the ferrule.”
So, I was curious to see what the flight would be like.
And, same with the penetration. On the one hand, I can say, “well, with this groove, it might penetrate better.”
But, on the other side of that, I go, “well, I’ve noticed that there’s a really thick ferrule. It often opens up a hole for the shaft to just glide through really easily, and those broadheads penetrate more effectively than the ones with a smaller ferrule.”
So, I was really curious to see how all of these things compare.
I tested the 100-grain solid, the 125-grain solid, and for a comparative sake, I compared it to the 125-grain vented.
Initial Sharpess Test Of The Solid
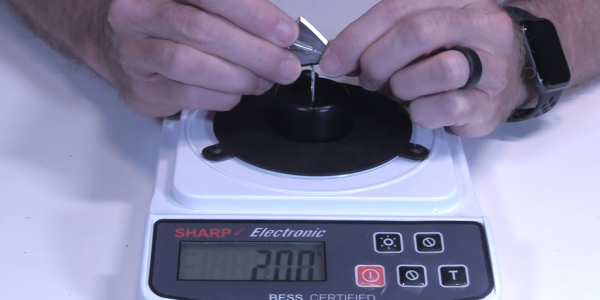
Initial Sharpness: 200.

Penetration Test 1 Of The Solid:
The 100-grain solid penetrated 7-5/8 inches and the 125-grain solid penetrated 8 inches. And, the 125-grain vented penetrated 8-1/4 inches.
Edge Retention Test: (sharpness after Penetration Test 1) Of Solid
Sharpness after ballistic gel penetration test: 300
Penetration Test 2 Of Solid: (layered cardboard)
The 100-grain solid penetrated through 72 layers. The 125-grain solid penetrated through 69 layers. The 125-grain vented penetrated through 73 layers.
Durability Test Of Solid: (22 gauge steel plate, max 2 shots)
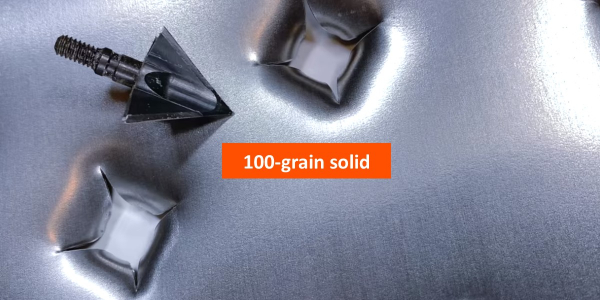
Here, you can see the 100-grain solid after going through the MDF 3 times and the steel plate 2 times And, I’m only testing the durability of the 100-grain, because if anything, that’s going to be the weaker one and really everything else is virtually identical for these durability tests. But here, you can see it looks pristine. I mean, it almost looks brand new, even after going through the steel plate twice. And you look at these holes and they are the classic Tooth of the Arrow squared chunk holes, not just a little round hole with 4 slits coming out of it like you see in many 4-blade heads.
.
Durability Test of Solid: (Concrete Block)
Here’s the head after impacting the concrete. And, as you can see, it held up really well. There was a slight wobble to it, but that could just be the concrete that got fused to it as well. Really impressive durability.
Final Thoughts On Tooth Of The Arrow Solid Broadhead
The solid is going to be a little bit quieter in flight than the vented version and I think the blades are going to be a little bit more durable, because they have that extra support.
However, I think maybe the vented models are going to penetrate just a little bit better and you saw that in the testing. And, I think they might be a little bit more forgiving in really long range flight.
But again, that may be all within the margin of error.
There may not be differences at all in those areas because I think all of them, both the vented, the non-vented are really durable. They fly really well and they penetrate really well.
Tooth Of The Arrow 3-Blade Broadheads
Below are the details on my test of the Tooth Of The Arrow 3-Blade Broadheads!
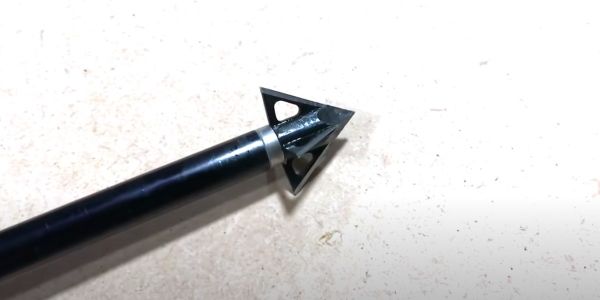
All right. Let’s zoom on in here and check out this Tooth of the Arrow 3 Blade and then put it to the test.
So here’s a good look of this broadhead, just a no-nonsense one piece construction, 3-blade design. For the materials, it’s machined out of a single chunk of 11L41 steel and brought to a Rockwell hardness of 45, which they like, they find it’s the balance of being able to resharpen it and not have the blades be too brittle as well as good enough, hard enough to hold its edge in an animal in penetration.
The blades of the 3-blade head are a 0.040″ thick and the overall length beyond the end of the arrow is 1.03″ so decent thick blades and a really short overall profile. The cutting diameter is 1-1/8″ which is pretty standard for a 3-blade, single piece construction head like this.
What I really like about the 3-blade is that it’s solid, not vented, and that’s just going to aid in having more durable blades and not going to sheer off as readily. And I think they’ve saved some of the weight in doing that in this 100-grain model by taking a bit out of the ferrule there, so that’s kind of a cool design.
The 3-blade has this pyramid tip that just adds a bit more stoutness and durability to it as opposed if it continued all the way. If they just continued that line all the way to the end, it would be a little bit more pointy and a little more subject to break off. But, this is probably not going to break off very readily. For resharpening, you can just lay it flat on any surface. I like using the Stay Sharp Guide Diamond plates. I mean they really work like a charm with these broadheads.
Flight Test
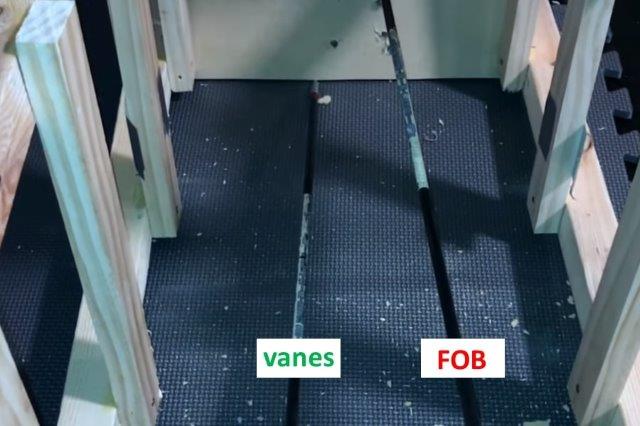
I shot one field point and one broadhead at 30 yards with a Killer Instinct SWAT X1 Crossbow and a 675 gr Bishop Bolt at 300 fps. Here’s a look at the broadhead shot.
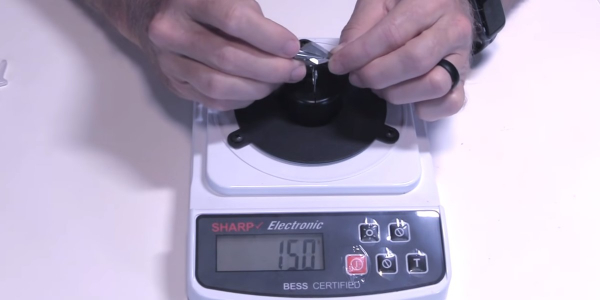
Initial Sharpness Test, (Grams of force to cut copolymer wire):
It took 319 grams of force to cut through the wire which is an 8.81 on a 10-point scale.
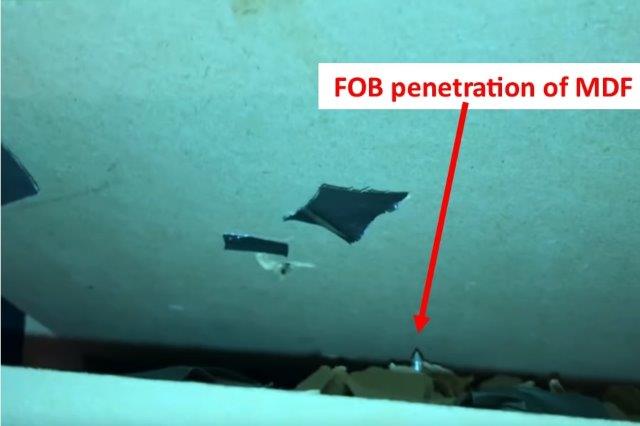
Penetration Test 1, (2/3″ rubber foam mat, 1/2″ MDF, FBI Gel):
It‘s hard to tell it in this picture, but the 3-blade penetrated 8-1/2″.
Edge Retention, (sharpness after Penetration Test 1):
It took an additional 73 grams of force to cut through the wire, which is an 8.54 on a 10-point scale.
Penetration Test 2, (layered cardboard):
The 3-blade penetrated through 59 layers of cardboard.
Durability Test 1, (3 shots 1/2″ MDF):
After 3 shots into the MDF, the 3-blade was in perfect shape!

Durability Test 2, (2 shots 22 gauge steel plate):
And it’s still in near perfect shape after the two shots to the steel plate. Maybe the tip got a little bit blunted but I’m kind of splitting hairs there. And then you can see the holes. It makes really nice triangular punch holes, not just like a little circle with three slits coming off of it.
Durability Test 3, (1 shot cinder block):
So here it is after all the durability testing. Man, it just did fantastic through the MDF, the steel plate, and then into the concrete as well. Very impressive durability.
Final Thoughts On The Tooth Of The Arrow 3-Blade
So what do you think? Man, I tell you, they did a good job with this 3-blade!
The 3-blade performed well in every area and got an overall score of 9 golden arrows!
So, if you’re looking for a solid one piece, super tough, 3-blade broadhead with this cutting diameter, man, you ought you to check this Tooth of the Arrow head.
I really like the 4 blades that they’ve put out, but I can understand the niche in the market for this one as well and they’ve done an outstanding job with it. So, great job Tooth of the Arrow. I look forward to more stuff that you’ll come out with in the future!