In this review, I tested a classic broadhead… the NAP Thunderhead!
These heads have been around for a long time. I actually like testing these older broadheads like this one, just to see if the newer designs have passed them by or if they really are still holding their own.
For these tests, I used my Bowtech SR6 set at 72 pounds, 27” draw. I’m using Bishop FOC King Arrows for most of the shots, but then the Bishop FAD Eliminators for the really hard impact ones.
So, let’s go through some of the design features and specifications and then put them to the test!
The NAP Thunderhead At First Glance
Let’s zoom in and check out the Thunderhead and then put it to the test.
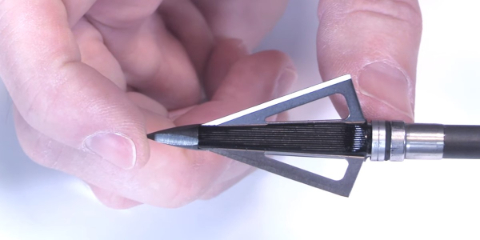
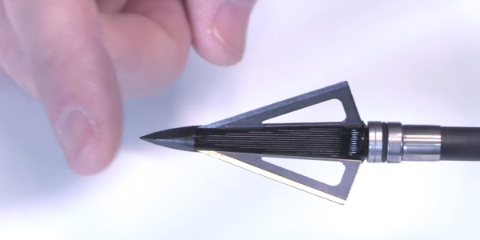
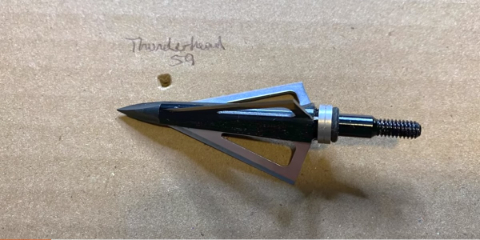
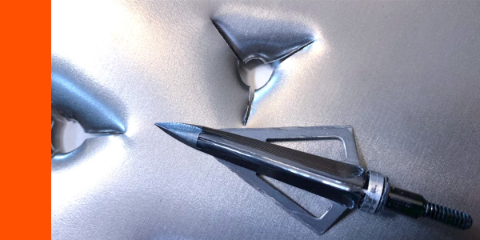
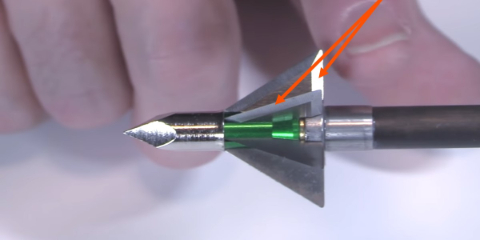
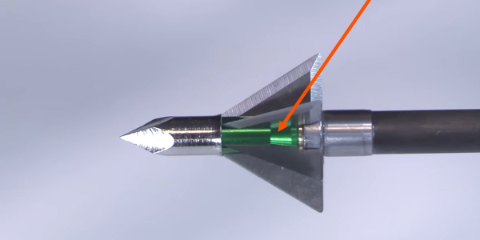
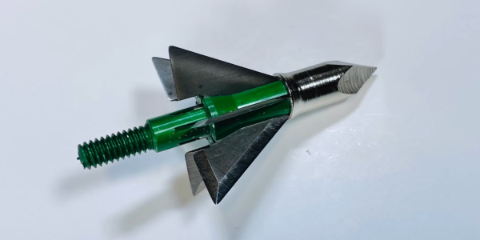
Here’s a good look at the 125-grain Thunderhead. It’s a petty cool, classic design. It has a cutting diameter of 1-3/16”. It has an overall length beyond the ferrule of 2”, so it’s pretty long by some of today’s fixed-blade standards, especially for 3-blade heads.
It has steel blades that are 0.027” thick, which are pretty thin by today’s market standards.
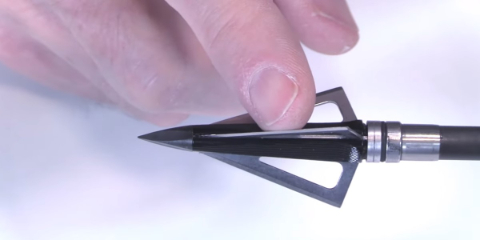
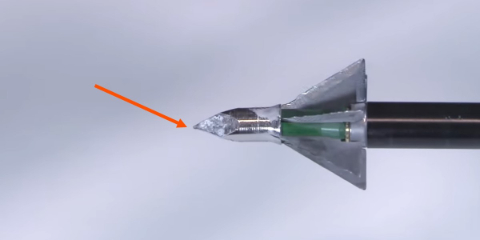
The tip is a hardened steel, chiseled tip that’s really pointy. I really like this chiseled tip. The ferrule is made out of aluminum.
Notice that the ferrule of the Thunderhead has micro-groove channels in it.
The micro grooves in the ferrule are supposed to aid in flight as it carries the air around with it and it rotates, which is supposed to aid in penetration. This is similar to what the dimples on a golf ball do.
So, I was really eager to put the Thunderhead to test and see how it would hold up, especially since it has been around so long and has such a loyal following. Let’s see how it did!
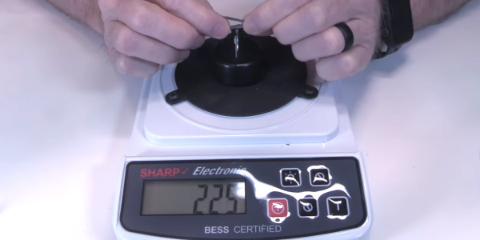
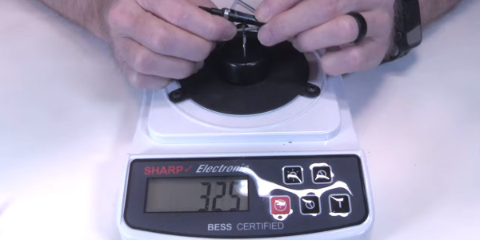
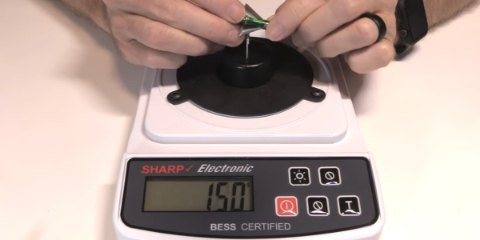
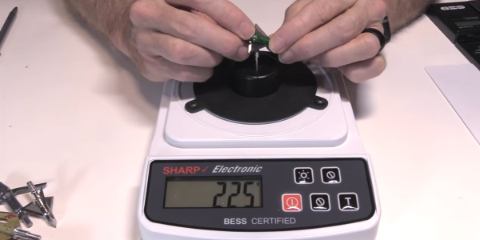
To test the “out-of-the-box” sharpness of the Thunderhead, I tested how muchpressure it would take for the blade to cut through a metal wire (the lower the number, the sharper it is). It registered 225.
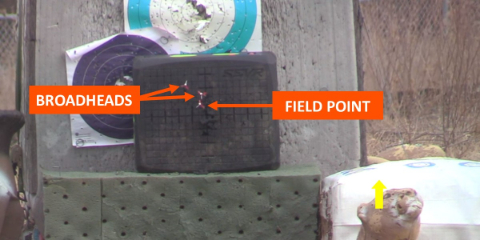
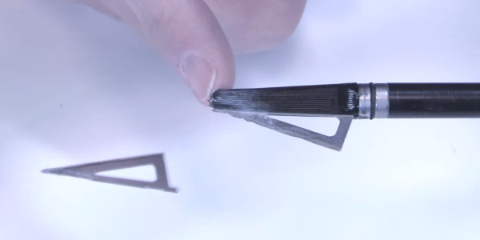
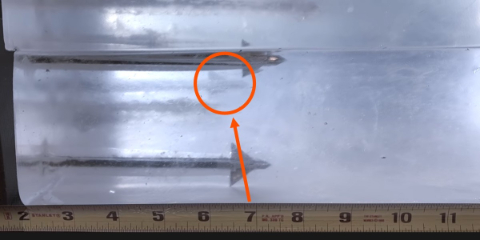
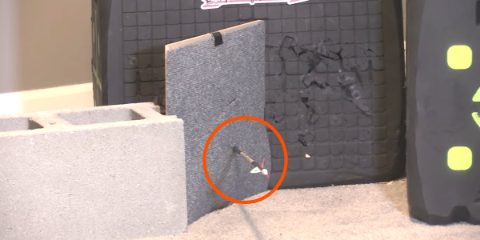
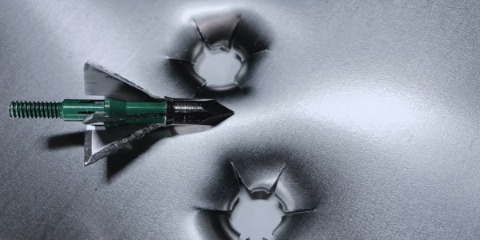
In this durability test, I shot the Thunderhead into a .22 ga steel plate (max 2 shots) to see how it would hold up.Here’s the head after going through the steel plate two times.
The Thunderhead looked brand new after going through the MDF and the steel plate and it still held up really well. But, the blades got a bit nicked up (“edge chatter”).
And then you can see the hole. You can see how it looks like just a ferrule hole with 3 slits coming off of it.
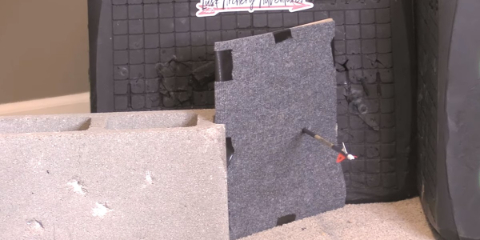
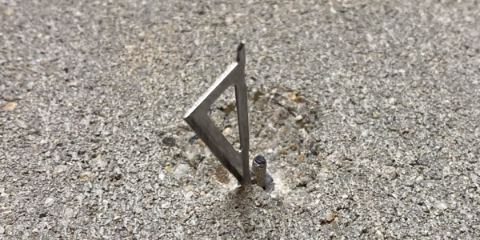
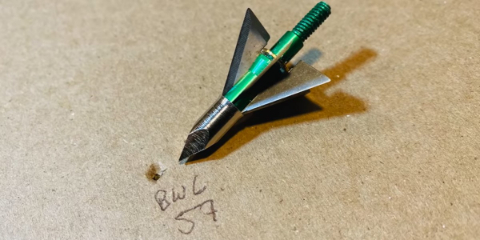
I shot the Thunderhead into a concrete block to see how it would hold up. The tip embedded really deeply into the concrete and I couldn’t get it out. I didn’t want to mess up my concrete by digging it out. And, this one blade got stuck right in the end into the concrete as well.
Here’s the Thunderhead after being shot into the concrete. As you can see, the ferrule just broke off right there. The other two blades just stayed intact. They got a little bit nicked up there at the end but they still stayed in place.
And overall, after the concrete block test, it still spun decently, but it did just break in half. Now, that’s after going through the MDF 3 times and the steel plate twice. So overall, fairly impressive durability.
When my buddy told me he was going to send me a pack of these, I was intrigued. I like to test every head. But, at the same time, I thought, “They are so old school. The newer stuff is going to be blowing it away.”
So check out the score sheet in the description box and see how it performed in the areas that matter to you the most and see if it might be a good fit for you.
The Thunderhead received 7 out of 10 golden arrows.
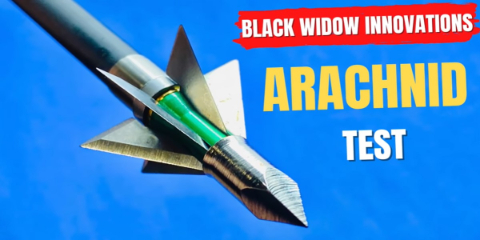
In this review I tested the Arachnid broadhead from Black Widow Innovations.
Now, this is a really cool head!
So, let’s check out this Arachnid and then put it to the test.
I’m using Bowtech SR6 set at 72 pounds and I’m using Bishop FOC King Arrows for most of the tests. But, on the really hard impacts tests, I’m using the Bishop FAD Eliminator.
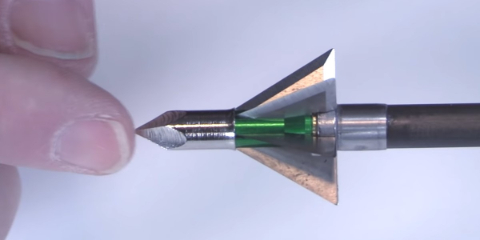
A close look at the Arachnid Broadhead from Black Widow Innovations
Below is a good look at the Arachnid. Now, it doesn’t make a really wide hole but I imagine it’s going to cut a lot of tissue and open up that 1″ hole fairly well in an animal.
This is a cool-looking head and it has got some really unique features. First of all, it’s 6 blades with a 1-inch cutting diameter, giving you a total cut of 3 inches.The blades are made out of stainless steel.
The tip is made out of A2 steel, which is much more resistant to impact than typical stainless steel, about double the resistance to impact. So that’s going to make that tip extra durable and strong.
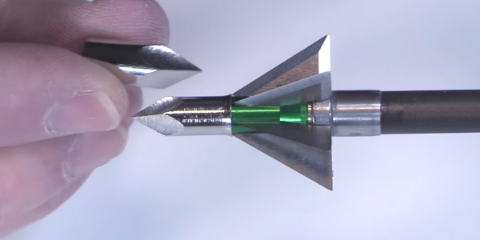
Now, another neat thing about the Arachnid heads is that they come with 3 extra beefy chiseled tips that are made of A2 Tool Steel, just like the blades.
And they are really big!
The Arachnid comes with three heavier tips made of A2 tool steel.With these you can up the weight from 100 to 125 grains.
So, you can either shoot it in a 100-grain or in the 125-grain, just by unscrewing and screwing in the other beefy, chiseled tip.
So, I like that modularity, and I like that 125-grain head makes up that weight not just by adding a heavier washer, which really doesn’t do anything to strengthen the head or make it fly better.
The blades are also single bevel, on the front and the back of the head, which is really interesting. It’s probably done so that they don’t get too narrow, too thin. If they were double bevel at 0.027″ thick, they might be too thin.
The ferrule is made out of 7075 aluminum, so it’s a pretty short ferrule and it’s a pretty stout aluminum. So, I thought the durability would be relatively good.
Now, one thing I will say is, when you’re putting the head together or when you unscrew it from your arrow, those blades can fall out really easily; a lot more easily than a lot of different designs.
And so, you have to be extra careful. They come with bases that you can screw on when they’re not in the end of your shaft just to keep the blades in place.
And, you really want to use those because it is pretty frustrating trying to get them all lined up and get them snagged on your arrow.
Here’s the head after 2 shots through a .22 gauge steel plate.
It held all of its blades perfectly. None were lost. None were bent. The edges did get pretty mangled up as you can see. And, the tip got a little bit blunted. But again, they all held in place and they made really nice holes in the steel plate (that’s pretty cool hole with those 6 blades and a really round circular hole in the center!)
In the final test, I shot the Arachnid into a concrete block. Below is the Arachnid after that test.
Now, at this point, it had already gone through the MDF 3 times and the 22 gauge steel plate twice. There was a bit of a wobble to it after the concrete test. The ferrule also got a little bit bent.
But, other than that, man, it held together very well in this zero penetration test.
Finally, I shot the head into a concrete block…. The tips got bent somewhat and it had a slight wobble in the spin test.
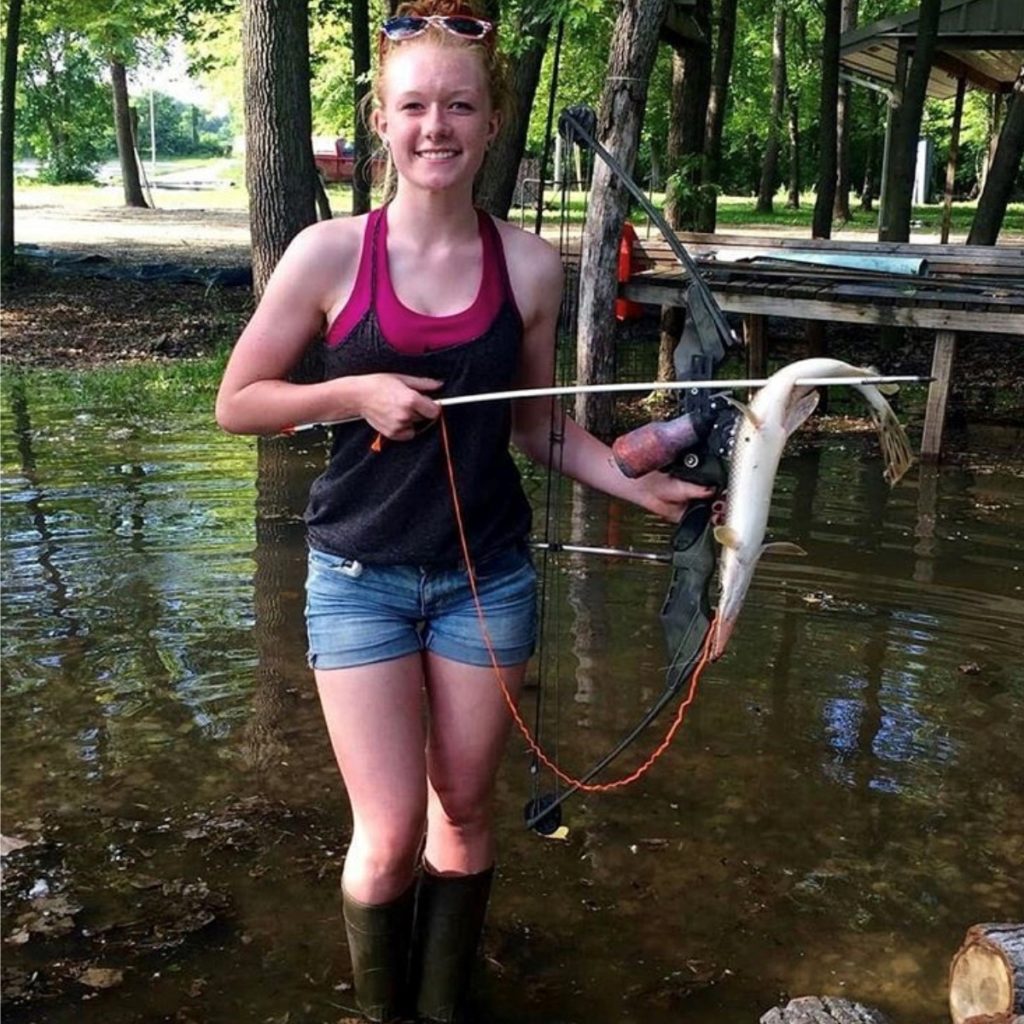
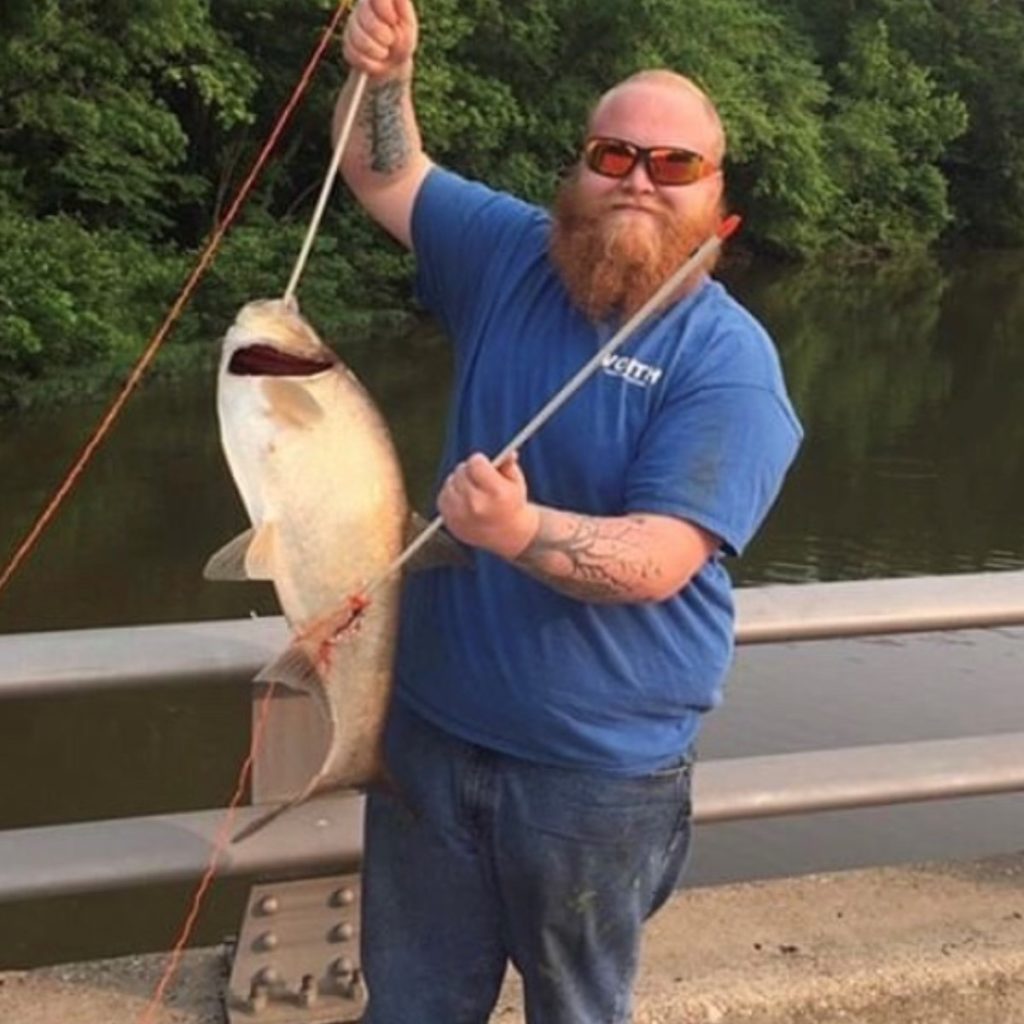
Let’s talk about some bowfishing tips that every bowfisher should know for this new-age of the “eOutdoors” (the term is a slight exaggeration, but hopefully it drives home the point).
Check out the bowfishing tips below as well as what you’ll need to get started bowfishing!
A big step in this growth process of bowfishing is gaining acceptance and coordination within the outdoor community before broadcasting to new audiences. To do this, we need to improve our reputation collectively.
Some farmers or local zoos may be interested in fish harvested while bowfishing. Never dump them in public areas of boat ramps.
These first two tips (“rules”) are dedicated to improving the reputation of the sport of bowfishing. And, if you’re new to the sport, these first two are especially important. But, even if you’re a seasoned bowfisher, a refresher is certainly always helpful.
Tip 1: Don’t dump fish in public areas or boat ramps.
Dumping fish in these areas gives bowfishers a bad reputation. Additionally, doesn’t help make the public water access points smell particularly inviting.
One alternative solution would be to find local farmers who may want to use the fish for fertilization purposes. Another option is to dump them on a large plot of personal private land where the smell would not bother anyone.
There are plenty of legal pitfalls when it comes to bowfishing, and you want to make sure all of your ducks in a row so no one is enjoying the sport illegally.
If you want to get really creative, look for a local organization that may be interested in taking on the fish. For example, some local zoos encourage bowfishers to donate excess fish to feed birds and other animals.
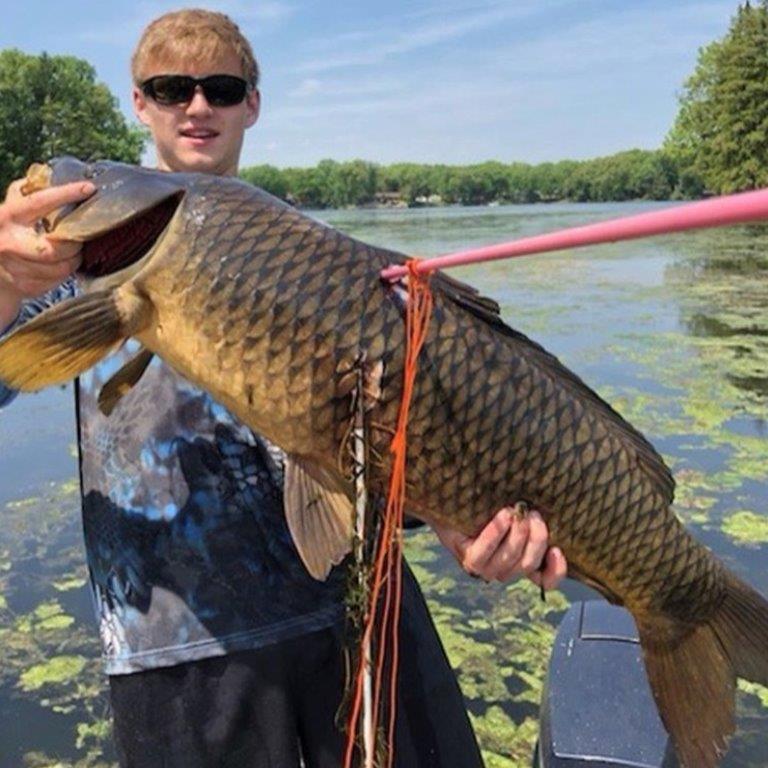
You could also eat the fish. But, if the sound of gar fish doesn’t exactly sound inviting to your taste buds, it’s good to know there are still options.
Tip 2: Know the laws in your area regarding species, bag limits and seasons
Be sure to call your local game warden, and they will (usually) be more than happy to let you know what the bowfishing laws are in your area before you have the chance to make a mistake.
If your game warden isn’t accessible, or the thought of doing so seems like too much of a hassle, there are tons of online resources you can find on the subject with a quick Google search.
The final tip relates to all bowfishers both old and new. This is one that was relevant years ago, but it is especially critical now.
Not only does it involve preserving a positive reputation for bowfishing in the outdoor community, but it involves setting a positive example for the rest of the world as well.
Guess what? With the rise of smart phones, everyone has a camera on them all hours of the day, and the internet loves to amplify bad choices.
We lecture kids on this topic quite a lot, but they are growing up in a social media-centric world and it’s just modern-day life. To be honest, adults need a refresher in this course just as badly as the younger generation does.
Those who bowfish should always be sure to be courteous of other boaters and those who may live nearby.
All it takes is one video of someone doing something they’re not supposed to for public opinion to shift on an outdoor activity like bowfishing.
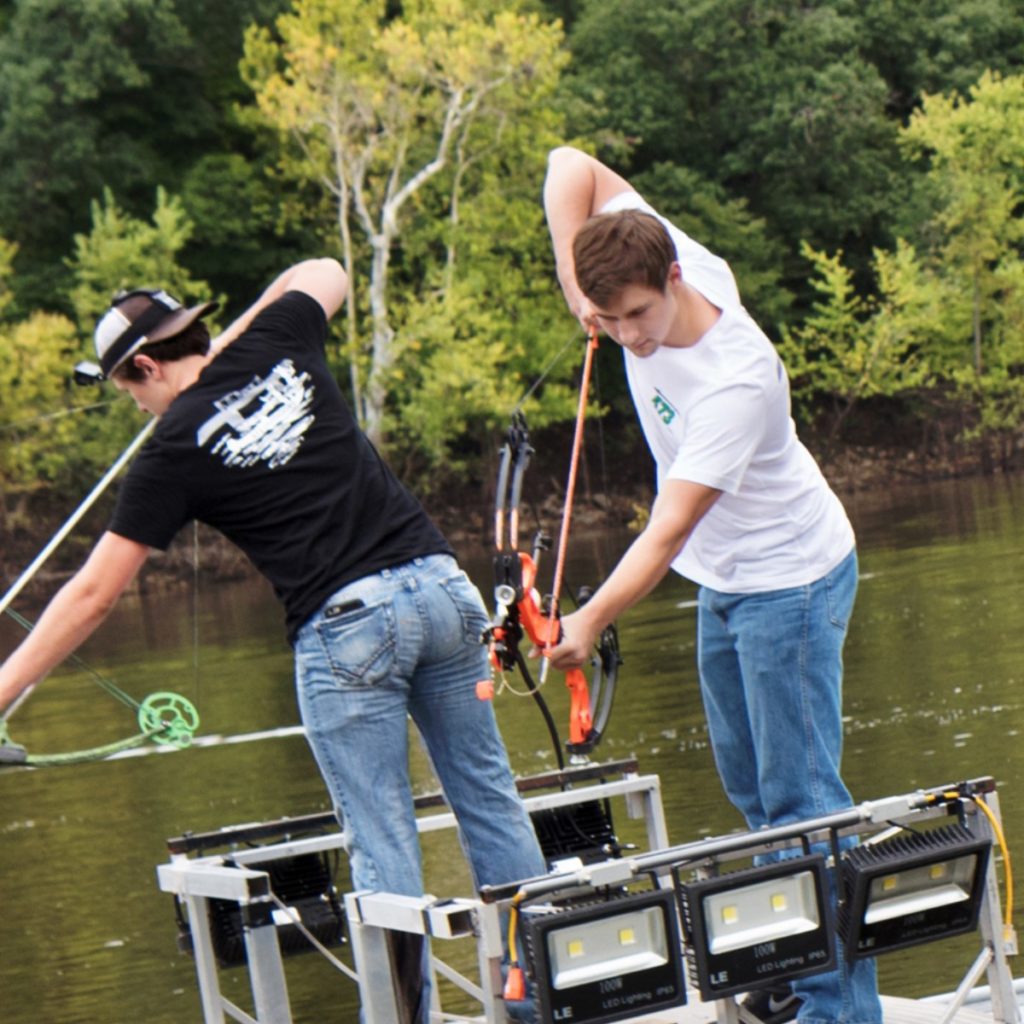
This tip has a second relevant component as well. Try to avoid fishing heavily populated areas (especially at night). And, if you must be near houses on a crowded lake, try to be conscious of where you are shining your lights.
The same can be said about music. By all means, play whatever you like until your heart is content, but be sure to turn it down for temporarily when you are near houses at night, or when passing another group of boaters.
These things are simple, common courtesy. And, as human beings, we should really try to bring more of this back into this divided world. Lead by example and don’t follow the norm, especially if it’s not the standard your parents raised you by.
Now that we have covered the “dos and don’ts” of bowfishing in this new age, let’s talk about what you need to get started.
What you need to get started bowfishing
If you’re already an avid bowfisher, you can probably skip this next section. But, if you aren’t already bowfishing on a boat surrounded by LED lights and a pricy bow, you may want to stick around.
One of the big concerns we hear with bowfishing is that it’s expensive to get into. However, this is not necessarily the case. Below is another three-step process for getting into the sport.
You can get started by bowfishing from the banks of lakes and waterways in your area. But, should you decide to invest in a boat, you can start by searching Facebook or Craigslist.
We earn a commission if you make a purchase, at no additional cost to you.
07/18/2025 07:00 pm GMT
Next stop: A boat
Secondly, once you and your buddies are comfortable with the sport of bowfishing and know it’s something that you will continue to enjoy, you can start the process of looking for a boat.
Obviously, boats can be expensive. But, you can keep things pretty cheap if you hunt for deals on Facebook Marketplace or Craigslist.
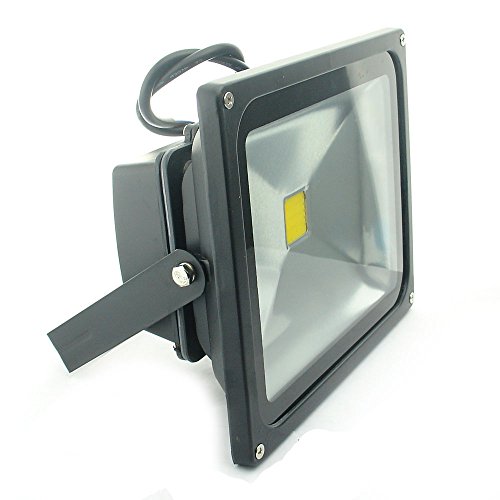
Once you have acquired a boat, all you will need is a trolling motor and some cheap LED lights you can buy off Amazon to put on your new boat (even if it’s used, it’s new to you, right?)
A quick search shows us you can get a two-pack of 40-Watt LED lights for around $40. Buy three of these, and you are all decked out and ready to go!
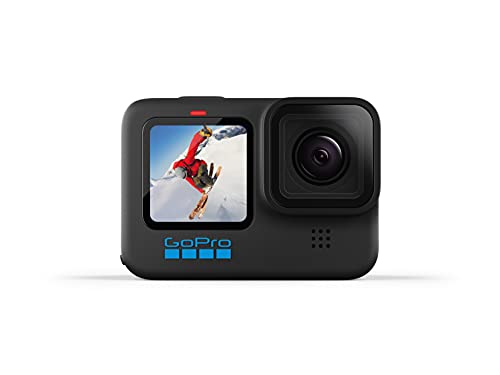
The great thing about the evolution of technology is that you can get your start creating content with your smartphone.
You don’t have to start off with fancy cameras and GoPros. Just download some editing software onto your phone and start making movies about your life. Once you’ve gotten comfortable with this, then you can invest in some nicer equipment.
Here’s how you can spread the word about bowfishing:Create great bowfishing content and share it with the world!
If you make videos, we guarantee it will be worth the investment.
When we started 573 Outdoors, we sat at a kitchen table and realized that documenting our lives wouldn’t just be for other people. All of our biggest catches, failures, and unforgettable experiences in the outdoors could be for us to cherish forever as well.
It is something we can show our kids someday and say, “look how ridiculous we were.”
You can’t put a price tag on documenting memories with your best buddies.
You can still send in your favorite clips to different pages to promote (and we definitely love to see that content pour in), but it is important for you to start stitching together your own videos as well.
Our fans are who have built us up so rapidly, But, we feel like it would be selfish to suggest you should send all of your experiences only to us. We care more about the longevity of the sport of bowfishing than we do our own business.
Today, you can flip on the Outdoor Channel and see all sorts of activities. From bass fishing to buck hunting, the new age of technology has done wonders for the outdoor community via television and online streaming.
Some of the critics of the sport of bowfishing think that it’s too barbaric.
More money and notoriety continue to flood these sports which when coupled with new-age platforms, allows content creators like LunkersTV, John B, Lojo Fishing, and many more to reach audiences one would have never thought possible until recently.
In the early 2000s, most people were only going to discover hunting or fishing was if their family member or friend introduced them to it.
Now, you can type “fishing” into the YouTube search bar and learn all about traditional and lesser-known types of fishing from scratch within hours. This opens up an entirely new world of possibilities for kids who aren’t fortunate enough to grow up in the great outdoors.
While these are certainly exciting times in the outdoor industry, one outdoor sport has been slower to gain an online identity… bowfishing.
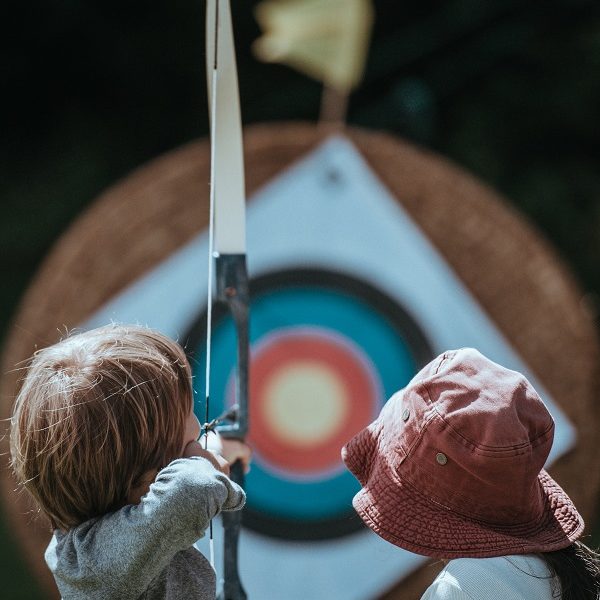
Kids are starting younger than ever to learn the sport of archery, which positions the sport of bowfishing for future growth.
This is not to say that bowfishing content isn’t accessible, but the people who are primarily posting online content about it are hunters and bass fishermen who try to shake things up for their fans while enjoying the occasional bowfishing outing.
While technology has allowed many hunting and fishing content creators do a great job, the sport is really missing its own creators dedicated solely to bowfishing, just as there are many YouTubers, bloggers, and podcasters dedicated to bass fishing or deer hunting.
This could be due to stereotypes that often plague the sport, or simply because no one has taken that leap of faith yet into uncharted territory.
So, let’s talk about why bowfishing has a bright future and why it should thrive online.
If you’ve heard about or seen videos of bowfishing, but aren’t familiar with the sport, you may be thinking “It’s far too barbaric to last; especially as society’s attitudes shift.”
However, bowfishing is better prepared to survive than it may seem at first glance.
Most of the pictures submitted to us are from kids who are still in high school or are recently graduated.
In addition, archery is one of the fastest growing high-school and college sports in the United States. So, although archery has been around for thousands of years, the younger generation is developing the skills needed to bowfish more than ever before. This bodes well for the future of a sport that relies on archery technique. Bowfishing is a much more daunting sport if you don’t have an archery and/or bowhunting background.
“Okay, so we know people can do it, but it’s just so brutal. I mean, modern media can handle hooking some fish, but we are much more environmentally sensitive now, right?”
We are certainly more environmentally sensitive than in the past. But, that’s exactly why bowfishing can find acceptance.
Many of the fish we shoot are invasive species that pose a threat to the balance of the ecosystem. Even many of the other “non-invasive” targeted fish need some level of population control so that the “game fish” we all love to reel in can thrive.
Much like with deer hunting, bowfishing can serve as a means of maintaining balance in our waterways. Since bowfishing can be a powerful tool for conservation, there are not many restrictions in place currently pertaining to the number of fish one can shoot.
This is something we think people could get behind and support, or at least accept out of necessity.
“If bowfishing can grow with the times, and has a built-in future generation of capable participants, why can’t we just leave it be and hope this will be enough to carry the sport?”
In the early 2000s, bass fishing was doing well, but there was a pretty clear divide between recreational participants and its professionals.
Instead of being a passion that someone could pursue, it was deemed more of a hobby for country folk after a hard day at work or in school.
But, then YouTube came along, and before you know it, content creators emerged from the woodwork and took the sport by storm.
One of the benefits of bowfishing is that it helps to control the populations of invasive species.
Many individuals from different walks of life took up the sport. (Remember what we said about archery being one of the fastest growing sports in the U.S? Well, bass fishing is right there as well, thanks to these YouTubers and many others in the sport).
In fact, the founder of our company got into bass fishing, not by watching professionals on TV, but by watching ordinary people take on the sport with a camera in their hands or on their heads.
Sponsors have taken notice of this trend, and more attention is on the sport than ever before. Many of the tournaments can be watched on a live-feed, and before you know it, we are going to have a generation of kids that saw fishing for the first time on a phone screen.
Just like traditional fishing and hunting exposure has grown with the rise of social media, bowfishing will continue to grow as the outdoor community continues to be exposed to the sport.
But, regardless of how fast bowfishing may grow during this generation, we must be careful not to lose that peaceful connection with the outdoors that makes it so special in the 21st century.
We started 573 Outdoors to celebrate our friendship, become a part of a fantastic community, and to start a revolution in the world of bowfishing. To do that, we can’t be the only ones out here. We want to create a lasting impact on the sport.
While we love amplifying other people’s content in conjunction with our own, we don’t want to be the only ones (or one of an elite few) shouting to the masses forever.
If we can get people on board with this and gain some traction, the money will arrive and be put into the sport, leading to more popularity and more eyes.
Maybe there can even be a Major League Bowfishing tour someday as there is with bassfishing. It all starts with this next group of content creators, and if we leave a good reputation and try to make a difference, we can leave this thing a heck of a lot better off than we found it, and our sport can grow for the better.
Now, who is ready to jump into the sport of bowfishing with us?