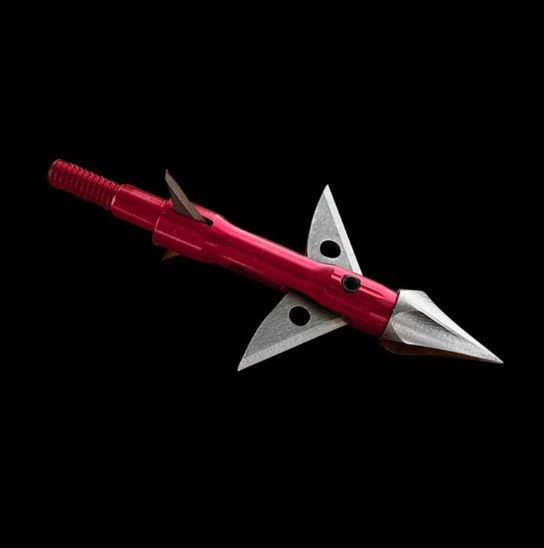
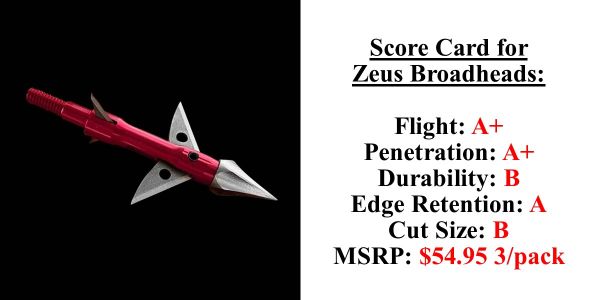
In this broadheads review, I tested a really creative broadhead on the market – the Zeus, by New Era Archery.
When you read the package, it says, “Zeus Broadheads – Smart Head Technology – Cut The Zeus Loose.”
So, what is a Zeus broadhead?
When I first saw these, my first thought was, “what in the world is that? Is it a mechanical? Is it a fixed? What is it?”
It never ceases to amaze me how creative people can be in designing broadheads. How creative can you be just putting a sharp object on the end of a stick?
Well, apparently, you can be really creative. And, the Zeus is about as creative as they come.
Zeus Broadheads Smart Head Technology
Zeus broadheads refer to “Smart Head Technology.” What that means is you’re getting the best of both worlds of a both a mechanical broadhead as well as a fixed blade broadhead.
Let me explain…
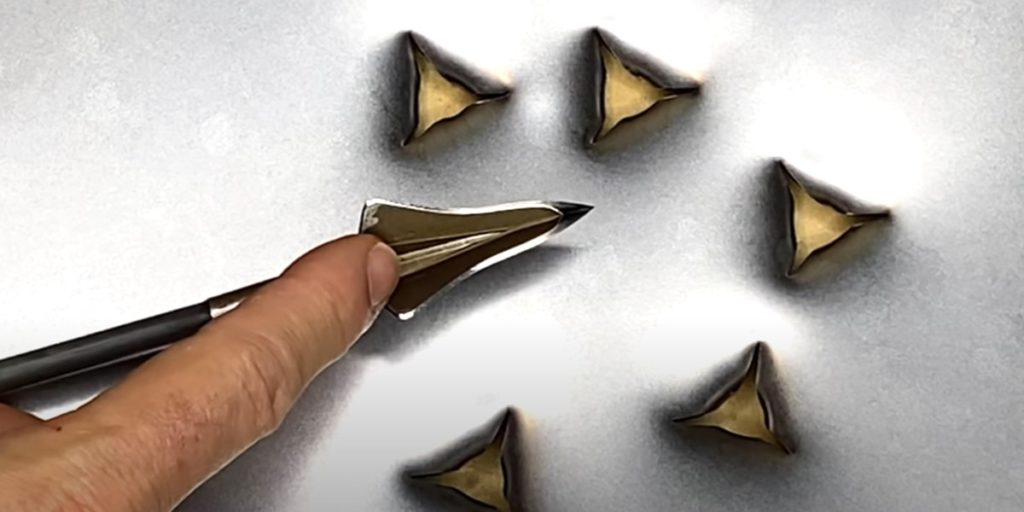
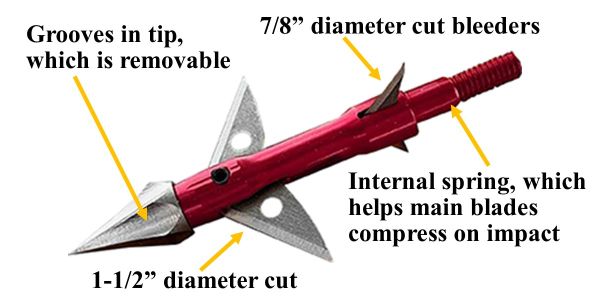
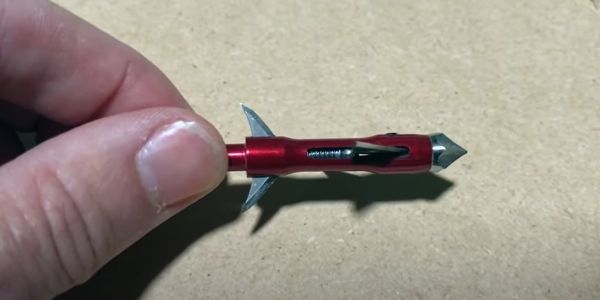
First of all, the diameter of the upper fixed blades is 1-1/2 inches. Then, the bleeders are 7/8 of and inch wide. So, you’ve got 1-1/2-inches in one direction, and 7/8 of an inch this way, providing almost 2-1/2 inches of total cut.
Now at the same time, the profile of these blades is really small. So, in theory, they would fly really well, like a mechanical.
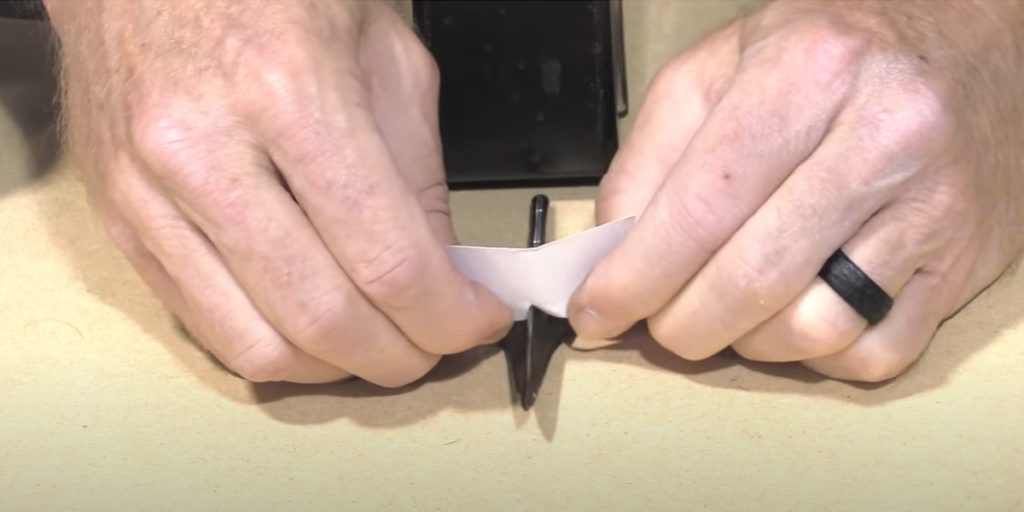
Additionally, they have a tip containing many little grooves.
And so, it’s designed to fly through the air, and as it spins, to circulate the air around it, much like a golf ball with dimples prevents a vacuum on the back of the ball from making it fly off course.
Similarly, the grooves on the tip help prevent a vacuum on the broadhead. And so, as the head rotates, it rifles and stays right on track, thus flying more like a mechanical.
-

N1 Outdoors® N-Tune™ Nock Tuning Reflective Arrow Wraps – Sending™ 2.0
Price range: $18.99 through $27.99 Select options This product has multiple variants. The options may be chosen on the product page -

N1 Outdoors® N-Tune™ Nock Tuning Reflective Arrow Wraps – Inferno™
Price range: $18.99 through $27.99 Select options This product has multiple variants. The options may be chosen on the product page -
N1 Outdoors® N-Tune™ Nock Tuning Reflective Arrow Wraps – Nock Solid™
Price range: $18.99 through $27.99 Select options This product has multiple variants. The options may be chosen on the product page
Penetration
Additionally, the way the Zeus broadhead penetrates is interesting.
In the wide-open position, it penetrates through normal tissue with that 1-1/2-inch cut. But, when it encounters a hard medium, the upper blades retract. (It takes 48 pounds of pressure to compress the internal steel spring). Once that amount of pressure is achieved, the blades compress all the way down to 7/8 of an inch, the same diameter as the lower bleeder blades.

So, say if they compress all the way into a bone and you go, “Well, then I don’t have a blade.” No, you still have 7/8 of an inch this way and 7/8 of an inch the other way. It’s not that much different from a Slick Trick standard. So anyway, it’s designed to do that.
But, after it cuts through whatever hard surface it has encountered, the spring forces the blades back open to their full 1-1/2″ diameter.
Before testing, I was thinking, “Oh, that’s creative!” But, to be honest, I was a bit skeptical, so I wanted to put these broadheads through the wringer and see how they performed.
So, again, the thought here is that you get the best of both worlds. You get deep penetration due to the the blades compressing when they hit a hard surface. But, you get a larger cut through softer mediums like animal tissue and hide.
I realize that some might say, “Hey, I don’t care about that test, because I don’t hunt MDF and I don’t hunt steel plates.” Good for you. They would be kind of hard to eat anyway!
But, my goals are to provide hunters with data points so that you can make decisions that hopefully make you a better hunter. I don’t have a live deer during tests to shoot an arrow through. I shoot through wood just to give you a data point.
It’s easy to read the back of a package and gain some information on the specs of a broadhead. And, you can certainly read magazine ads about a head or look online to get info. But, if you’re like me, you want to know, “How well is this head going to hold up and how well does it penetrate?”
Well, hopefully my testing will give you some data points to consider as you are selecting your broadhead.
Broadhead Specs
In terms of materials, the Zeus broadhead tip is really interesting. It’s constructed of 441 steel, so it’s a really strong, hardened steel. The ferrule is 7075 aluminum. So, it’s stronger aluminum than any other broadheads are using right now.
All of the blades are stainless steel. The tip of the head unscrews. You can take out the 100-grain hardened tip and then screw in a longer tip that weighs 25 grains more, thus making it a 125-grain broadhead. I like that.
And the 125-grain tip is a lot longer and looks like it would penetrate really well.
The Zeus head looks to be of good craftsmanship. It also spins true.
The creativity of the Zeus broadheads design is off the charts, but how would it test?
Let the tests begin
As in all my tests, I shot the Zeus head with my Bowtech Realm SR6 set at 73 pounds with a 27-inch draw length.
I shot the Bishop Mammoth FOC King Arrow, which can handle pretty much anything.
-
N1 Outdoors® Stain The Vanes™ Bowhunting Tee
Price range: $24.99 through $30.99 Select options This product has multiple variants. The options may be chosen on the product page -
“Edge of the Outdoors™” Tee featuring Tuffhead Evolution Broadhead (Various)
Price range: $24.99 through $28.99 Select options This product has multiple variants. The options may be chosen on the product page -
Sale!
N1 Outdoors® Est. 2014 Vintage Camo USA Tee
$15.00 Select options This product has multiple variants. The options may be chosen on the product page
Zeus broadheads flight test
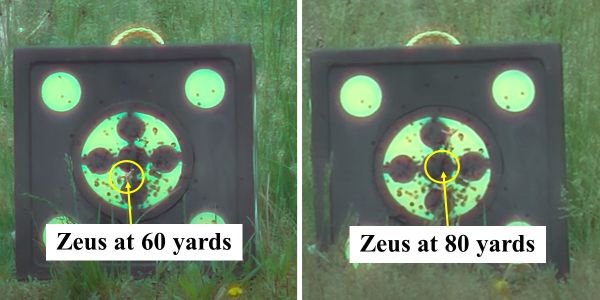
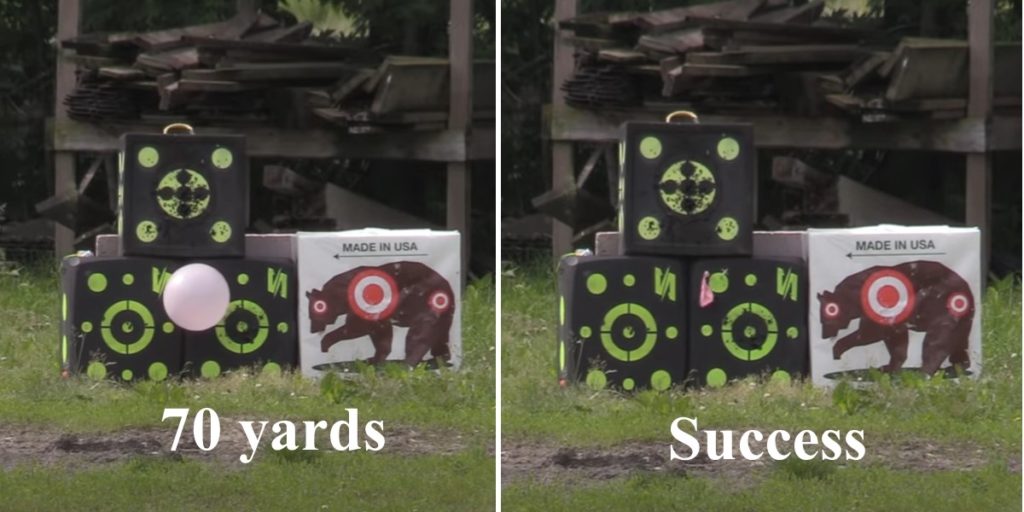
The Zeus flew extremely well at both 60 and 80 yards.
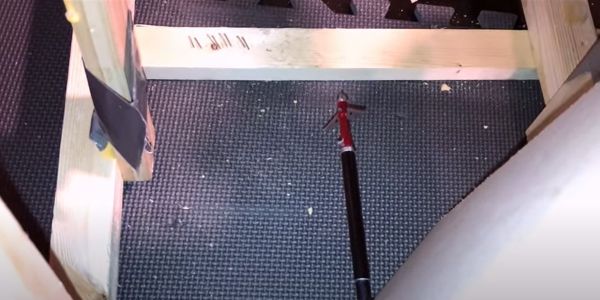
Direct Penetration Test
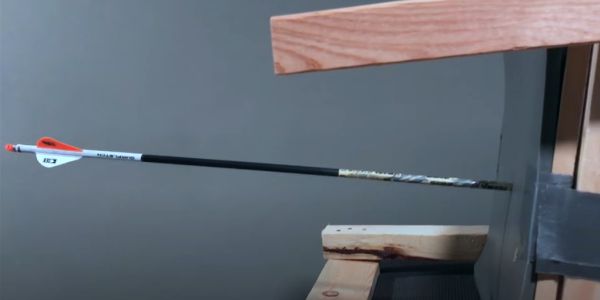
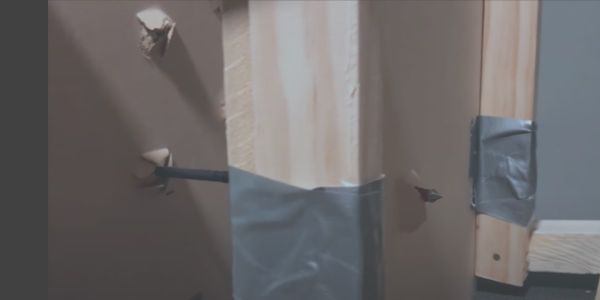
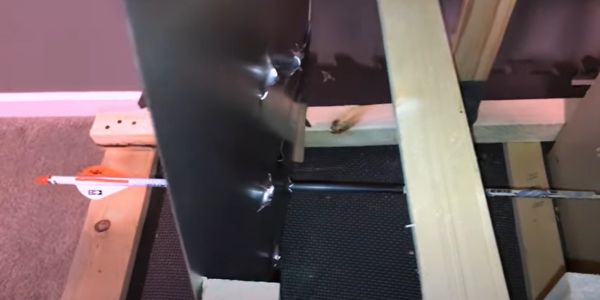
In regards to total penetration, these heads did really well. They blew all the way through two boards there and completely came out the back board.
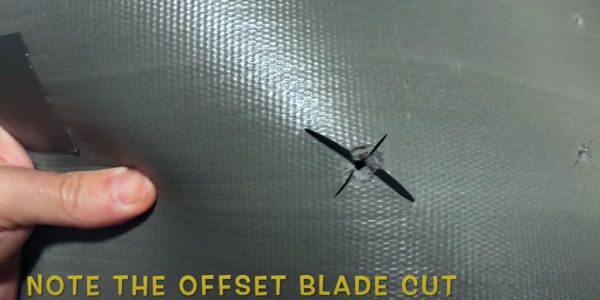
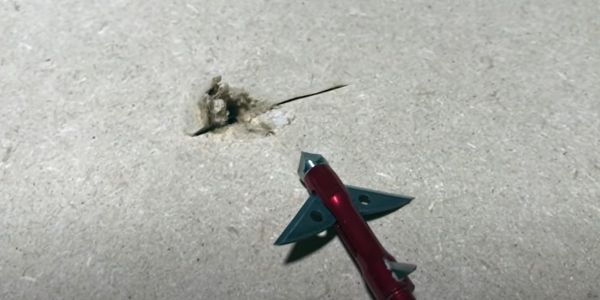
Now, as we examine the impact of the broadheads into the rubber mat, we see in the entrance there a perfect entrance and that is 1-1/2 inches by 7/8 inch just as the blades themselves are. Those main blades did not close in.
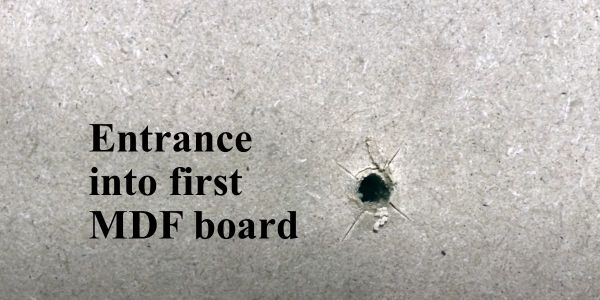
Then as we look at first board, you can see the blades cutting right there and the main blade was an inch upon impact there. The bleeders is a 7/8 of an inch cross ways.
The Zeus blew right through the first MDF board.
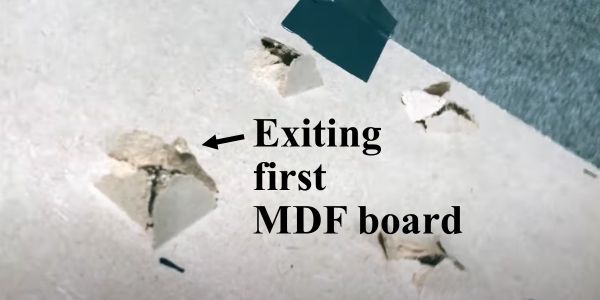
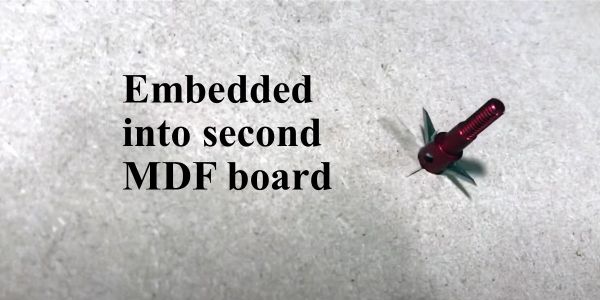
As it came out, it made a nice hole coming out of the second MDF board as well.
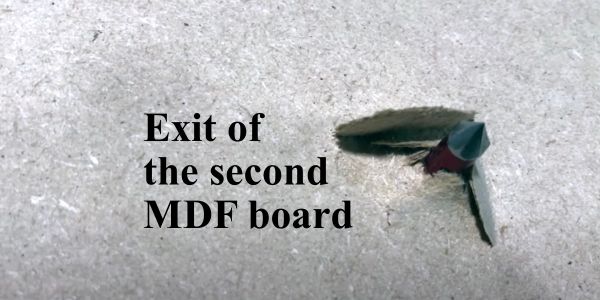
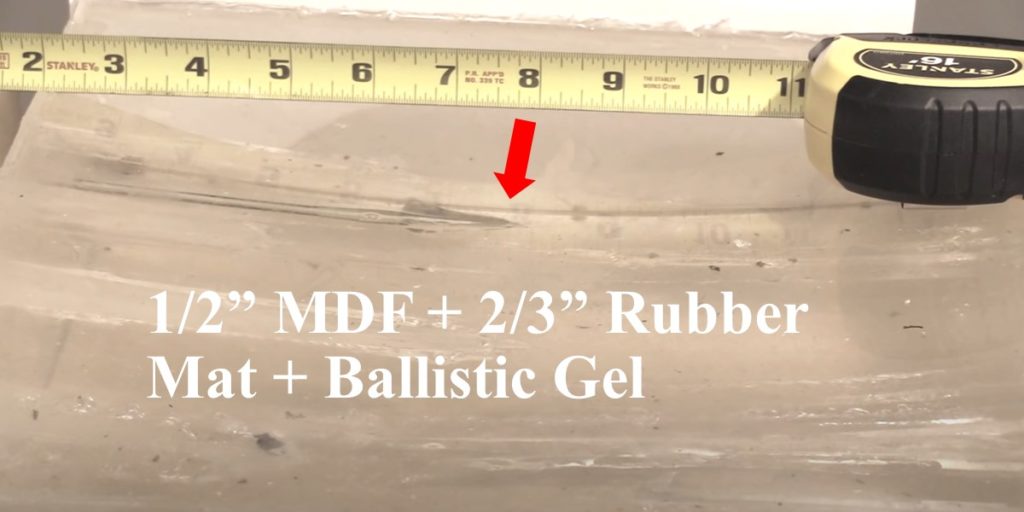
This picture shows the Zeus poking through here. None of the blades made it all the way through, but the head got really deep penetration.
And then it embedded in the final board. Here, you can see the bleeders didn’t quite go all the way into the board, but the blades had reopened up after they closed in the previous boards. So, that spring opened them back up a bit and you see a little less than one inch of cut right there from the main blades on this board and didn’t reach to the bleeders.
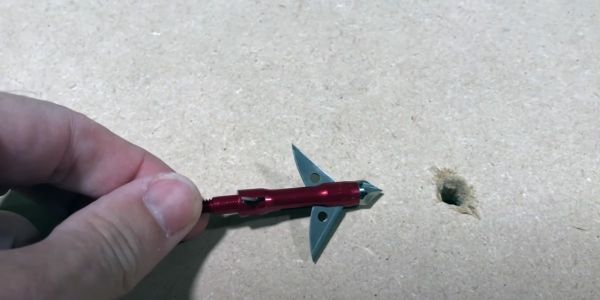
Here’s the Zeus after it went through those MDF boards. It wasn’t easy to get out. I had to push it all the way through which put a lot of extra pressure on it and it still held up remarkably well. The blades are just – it seems like just as sharp as they were. They are still shaven nail. They didn’t bend. The ferrule spins through. Everything held really well. The spring contracted a bit extra in there to where they are just a little bit – the blades are a little bit looser so they collapsed a little bit more than the original 1 1/2 inch. You can see there, it’s about 1 1/4 inch. But other than that, they just help up remarkably, and honestly, surprisingly well.
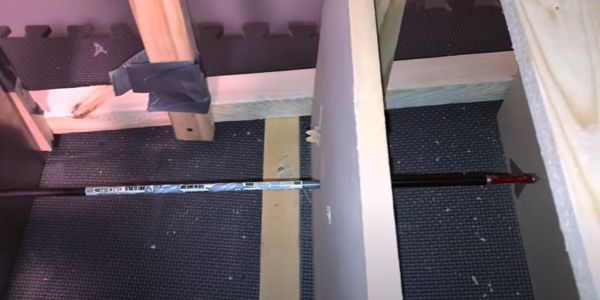
Angled shot penetration test
In the angled shot test, I set up boards at a 45 degree angle. Let’s see how the Zeus broadheads did in this test…
In the angled penetration test, the Zeus stuck in really well. Here you see the impact of the angled shot. As for penetration, it stayed on course. It stayed straight and penetrated right through very easily. The blade and the head help up really well.
You can see the hole in the entrance hole that the head made in the angled shot and it blew right through. The blades contracted as designed and then it continued to penetrate right after it got through that board. The blade sprung back open and here they are at their full deployment again of 1 1/2 inches. And as for durability, it held up super well. The spring is fully intact. The blades are just as sharp as they were, and still able to shave my fingernail. nail. The head still spun true. A very good performance in the angled shot.
Steel plate penetration test
Out of curiosity, I wanted to see this head would do on a steel plate…
The head easily penetrated the steel plate.
The penetration here was amazing. It went through the steel plate, blew through the second half inch MDF, and then almost made it to the third.
Here you see the head after it went through the steel plate and then another layer of MDF (and also after the angled shot). You can see that it held up remarkably well. The blades are a little bit loose because that spring is a little bit contracted. They are not the full 1.5-inch. They contracted just slightly. And you see those bleeder blades bent just a little bit. But, they did surprisingly well. A little bend like that big of an issue because they’re continuing to cut as they go in.
Conclusion
I’ll be honest. This head surprised me. When I first was reading about it, I thought, “Oh man, what kind of a newfangled weird thing is that?”
But, as you saw, even at 80 yards, it flew just like my field points. I was really impressed. It flies extremely well, just as advertised.
I was also a little suspicious of the durability. But, shooting it into two half inch sheets of this MDF, it held up really well. The blades were like brand new.
And then I shot it through another layer of MDF that was preceded by a stainless steel plate. And, it held up well to that as well. There was a little bit of bending in the bleeders, but that’s a lot better than breaking. If they bend, I can live with that. If they break off, I get concerned about that. And the tip, of course, held up well.
The blades still stayed in great shape as well.
The spring got some damage, causing the blades to collapse a little bit more than the full inch and a half. But, they are coming out with a little assembly package where you can put in a new spring there and get it replaced like that.
So overall, I would say this is a really creative head. Penetration wise, it did really well. The penetration is the best I’ve tested so far in terms of this medium.
To this point, I’ve been shooting this medium of MDF with the foam in front of it on a dozen different broadheads. The Zeus penetrated the best of any of them.
Now, I will say, the blades collapsed. So, by design, it didn’t cut all that tissue as it’s going through all those mediums. But, it did penetrate deeply.
This head will give you a deep penetration, but if you hit that bone, it’s not going to cut the bone all the way through, but then again, that’s what’s going to allow it to penetrate more deeply, right? So it’s a good tradeoff. I
So smart technology, indeed it is. Worth a try? Definitely.
Good job, Zeus. I appreciate the creativity.