tuffhead evolution 3 blade broadhead test

Tuff Enough? | Tuffhead Evolution 3 Broadheads Review

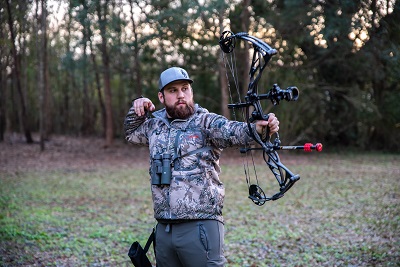
In this broadhead review, I put the Tuffhead 3-blade broadhead to the test.

The Evolution is Tuffhead’s series of broadheads that crosses over into the compound bow market. They already have a great reputation for what they’ve done in the trad archery market.

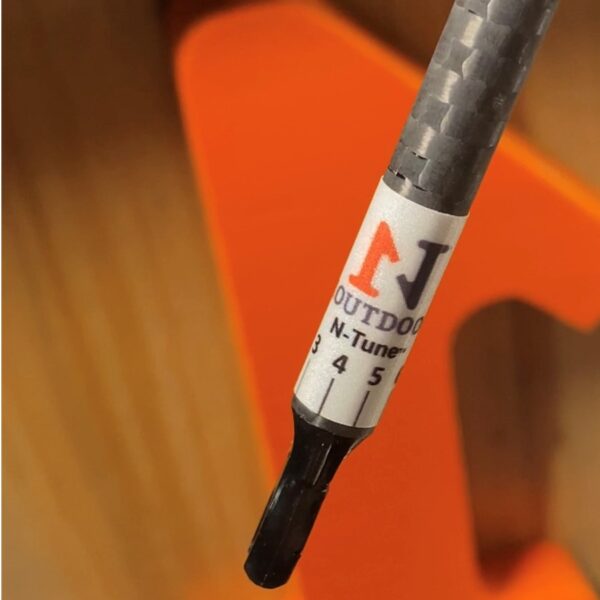
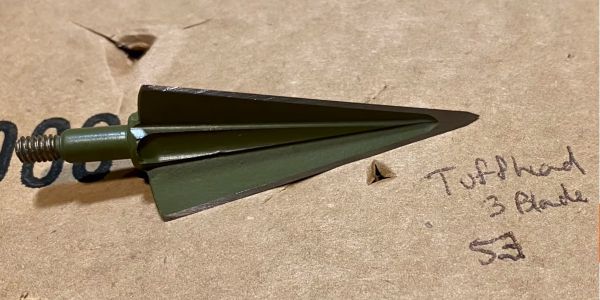
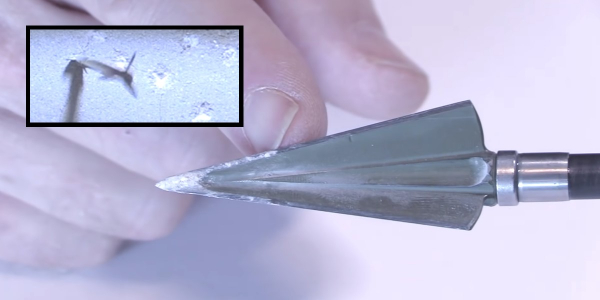
Tuffhead Evolution 3 up close and personal

Below is a really good look at the broadhead close-up. The Tuffhead Evolution 3-blade has a double bevel to it. It’s constructed and machined out of a single piece of S7 tool steel, which is an excellent steel to use in a broadhead application because of its incredible resistance to impact. As a result, it is super durable and its resistance to impact is many times greater than that of typical stainless steel.

tuffhead evolution 3 blade broadhead

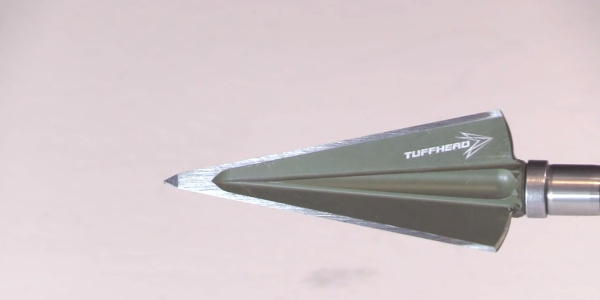
This is the Tuffhead Evolution Series 3 Blade Head, which has some really unique features…

I want to note here that when I previously tested the 2-blade version of this broadhead, the tip of that head rolled over when it impacted the concrete block.

The Tuffhead owner saw that and he asked me to send the heads back, because he feared there might have been an error in the hardening process.

And, after testing them, he found that was indeed the case. The Rockwell hardness was supposed to be 55 on those heads, but in that particular batch, it was only 48.

So, when I get some more of the 2 blades, I will retest them in that hard impact test. But the 3-blade heads in this test DO have the correct hardness of 55 on the Rockwell scale.

Now, the head I tested in this test is the 200-grain model (there’s also a 300-grain model).


tuffhead evolution 3 blade cutting diameter

The cutting diameter is 1-inch. So that’s relatively small. A 1-inch cut is not going to be a very big hole but the overall goal is to maximize penetration. This head will do that by just having a 1-inch cut. But, remember, this head has 3 blades, so you’re actually getting an inch-and-a-half of tissue being cut.

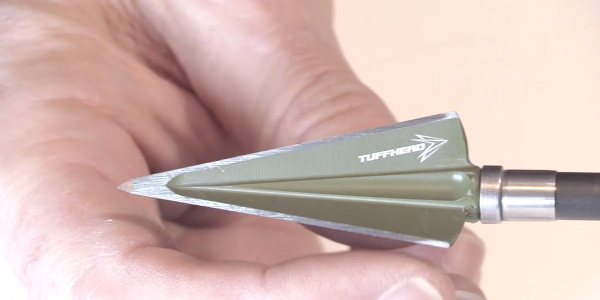
The blades of the Evolution 3-blade are 0.042 inches thick. The head is 2.1 inches long.

tuffhead evolution 3 scooped ferrule

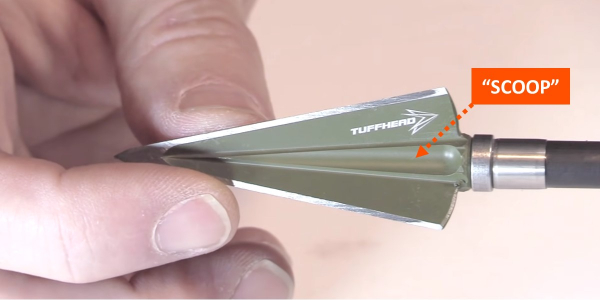
Notice here that the ferrule has a “scoop” design to the ferrule. This aids in flight as well as penetration. It also helps create a nice wound channel as it goes through an animal.


Tuffhead Evolution 3-Blade Testing

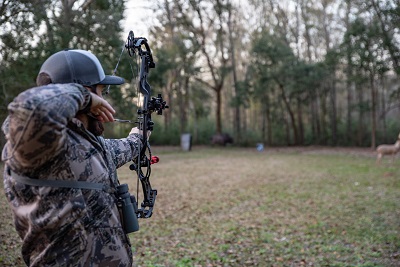
So I was really eager to put this head to the test and see how it performed!
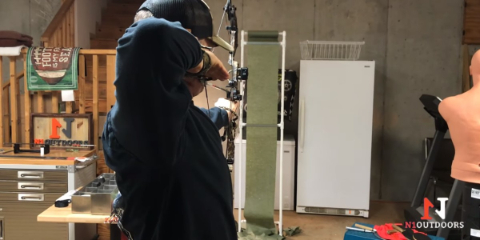
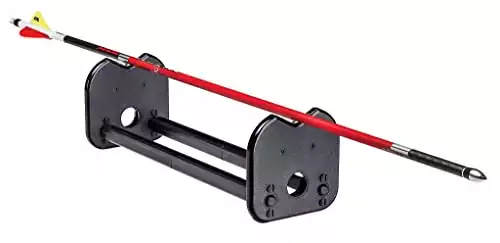
40-Yard Flight Test

tuffhead evolution 3 blade head long range shot

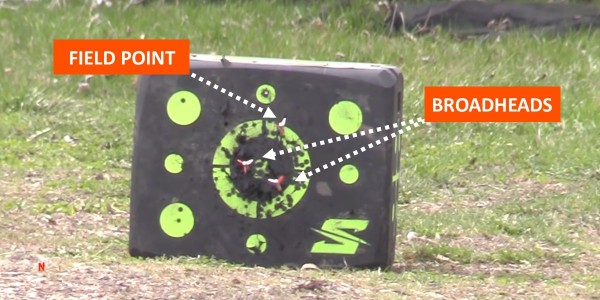
I shot one field point and two of the Tuffheads at 40 yards (you can see that I shot high on the field point!)


Initial Sharpness Test

The sharpness tester evaluates how much pressure it takes to cut through a wire. The initial test result was 400.

initial sharpness test tuffhead evolution 3

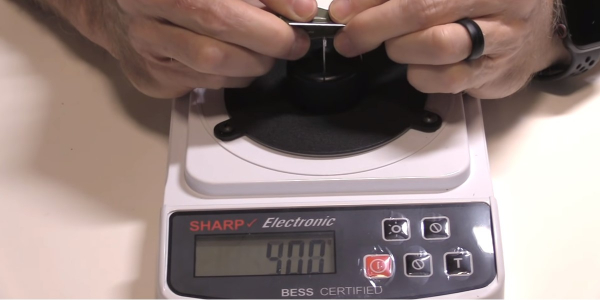
Initial sharpness test: 400.

Ballistic Gel Penetration Test


I shot the Tuffhead Evolution 3 into ballistic gel that was fronted with 1/2″ MDF and foam matting.

tuffhead evolution 3 blade head penetration of ballistic gel and mdf board

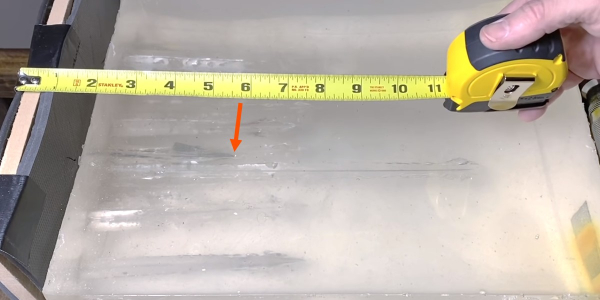
The Tuffhead Evolution 3 penetrated the MDF and ballistic gel 5-3/4 inches.


Edge Retention Test

tuffhead evolution 3 sharpness test after ballistic gel test

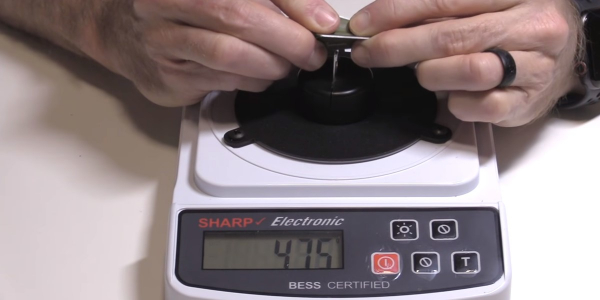
Sharpness test result after the ballistic gel penetration test was 475.


Cardboard Penetration Test

tuffhead evolution 3 blade broadhead after cardboard penetration test

I shot the Tuffhead Evolution 3-blade penetrated through 53 layers of cardboard.


Steel Plate Test

Below you can see the holes in the steel plate and you can see that they’re nice triangular holes that often come with a one-piece steel head like this. So even though they’re only 1-inch in cutting diameter, they are nice holes and not just three slits.

tuffhead evolution 3 blade head steel plate test

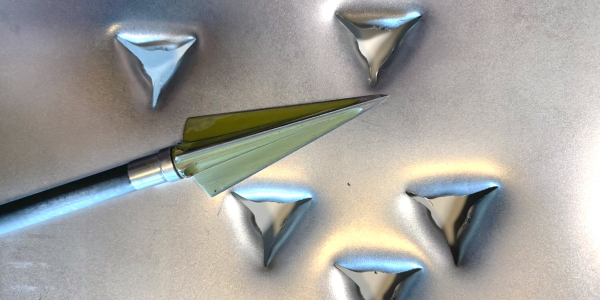
I shot the Tuffhead through a steel plate 5 times to test durability. It made nice triangular holes.


tuffhead evolution 3 after steel plate test

Here’s the head after going through the steel plate five times. Spins perfectly through. Blades are pristine. Just no signs of wear, maybe some slight cosmetic things. But man, incredible durability.


Pine Ridge Archery The Arrow Inspector, Black
$29.99
Buy Now
We earn a commission if you make a purchase, at no additional cost to you.
03/06/2024 08:50 pm GMT

Cinder Block Test

I shot the Tuffhead into a cinder block to see just how tough it really is!

tuffhead evolution 3 after cinder block test

Here’s the Tuffhead 3 Blade after the concrete as well as after the steel plate and it’s just in pristine condition. Excellent, excellent durability! Penetrated very well into the concrete and the tip is still very sharp. There was no rollover and the edges are still sharp as well.


Final Thoughts On The Tuffhead Evolution 3-Blade Heads

So what do you of the Tuffhead Evolution Series 3 Blade? Man, it performed very well.

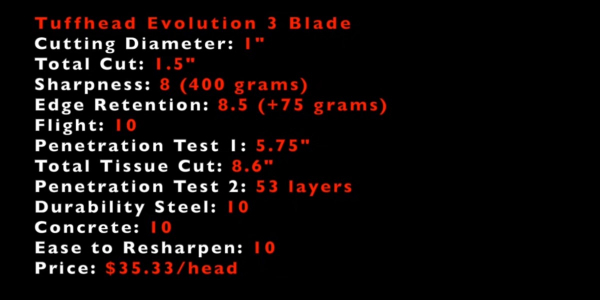
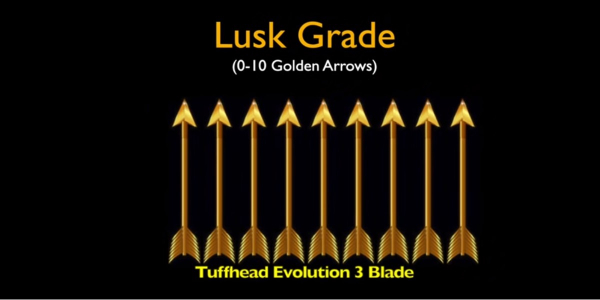
Check out the score sheet and see how it did in the areas that matter to you the most for your hunting purposes.

But, if you are looking for a deep-penetrating super durable head, this one is definitely worth a look. I would say those are its greatest strengths.


On the weakness side, if you call it a weakness… I’m not a huge fan of really long broadheads like that because it does adversely affect flight a bit. However, they’ve designed this really well to help make up for some of that.

Also, the cut size is not very big for what I really like in a broadhead but that allows it to penetrate more deeply. And for a lot of people, that’s what they’re really looking for.


So again, check out the score sheets below and see what matters to you the most. But this head is definitely worth a look. Tuffhead has definitely made huge strides from the trad archery market to the compound bow sector. Great job, Tuffhead.

socrecard of tuffhead evolution 3 blade broadhead
lusk grade of tuffhead evolution 3 blade broadhead
bow hunting tips picture of man with bow and arrow

Draw length made easy [draw length calculator!]

Are you wondering how to determine the draw length you need for bowhunting? Check out our draw length calculator below to easily and quickly determine it!

Draw Length Calculator
Wingspan (take a measurement of your wingspan between the fingertips of your middle fingers)
move slider or enter value
inches
Draw Length:

#ad


What is draw length?

With traditional bows, you can basically pull back as far as you are able, based on the draw weight of that particular bow. The same is true for a recurve bow.

bare shaft tuning arrows through paper when arrow building

Draw length is an extremely important component to good form and repeatable shot mechanics.

However, you will typically find that draw length is discussed in regards to compound bows. This is because a compound bow has a set maximum draw length, once you hit the “back wall” of the draw cycle (the back wall is the place in the draw cycle where you can no longer pull the bow any farther.)


How to find your draw length

Time needed: 1 minute

If you don’t want to use the N1 Outdoors draw length calculator above and instead want to figure your estimated draw length with good ‘ole mathematics, the first thing you need to do is measure your armspan (or wingspan).

  1. Spread out

    First you need to determine your armspan. Simply spread out your arms (don’t over-stretch) with your palms facing forward.

  2. Measure

    Measure the distance from the tip of one middle finger to the tip of the other middle finger.man measuring armspan for bowhunting

  3. Do some old school calculating

    Take the measurement from step 2 and divide it by 2.5. This will provide you with a fairly reliable estimate of your appropriate draw length. Check with your local bow shop to help you fine tune.


Here’s what the Archery Manufacturer’s and Mechants Organization (now the Archery Trade Association) says about draw length:

“Draw length is a specified distance, or the distance at the archer’s full draw, from
the nocking point on the string to the pivot point of the bow grip (or the theoretical vertical projection of a tangency line to the pivot point parallel to the string)
plus 1 3/4”. Draw length from pivot point shall be designed at DLPP and shall be
called TRUE DRAW LENGTH.
EXAMPLE: 26 1/4” DLPP plus 1 3/4” is the equivalent of 28” draw”

AMO Standards Committee FIELD PUBLICATION FP-3, 2000

So, by this definition, if you have a “28-inch draw length”, that means that at full draw the distance from the deepest point of the grip to the nocking point of the string would be 26.25 inches.


#ad


Draw Length vs. Arrow Length

It’s important not to confuse draw length with arrow length. While they may be similar lengths, they are measured differently.

Arrow length is measured from the front end of the arrow shaft (not including the broadhead or field point) to the throat of the nock.

Your arrow length can vary depending on what you are trying to achieve regarding the FOC and spine of your arrow. (Spine is how much your arrow flexes at a set length with a set weight attached. More on arrow spine here.)

how to measure arrow length

Arrow length is the measurement from the end of the arrow shaft to the throat, or groove, of the arrow’s nock.


What is “full draw?”

When it comes to archery and bowhunting in regards to compound bows, “full draw” is when you have reached the farthest point that the bow can go in the draw cycle, reaching your anchor point.

What is an “anchor point?”

The “anchor point” is a reference point for an archer or bowhunting that they can “anchor” the bow string or the shooting hand when they are at full draw.

An anchor point helps make the archer’s shot repeatable, so that shot consistency can be achieved.


#ad

Leupold RX-2800 Rangefinder, TBR/W
$453.71
Buy Now
We earn a commission if you make a purchase, at no additional cost to you.
03/07/2024 02:26 pm GMT


For example, many bowhunters will anchor the knuckle of their index finger just below their ear lobe behind the jaw.

Others may use a “kisser button,” (of all the parts on a bow, this might be the most memorable) which is usually a small disc that is installed on the bow string, above the nocking point.

man shooting compound bow at target

Many bowhunters will use an anchor point just below the ear, resting the knuckle of the index finger in the area right behind the jaw.


Conclusion

As you can see, draw length measurement is a critical part of becoming a good archer. We hope this article and our draw length calculator has been helpful to you!

Target Panic Archery Tips Pic

Don’t Panic… It’s Just Target Panic | How I Cured It

At the time of writing this article, I have been shooting bows for about 14 years. I remember the first time I heard someone mention aiming drills because they were “panicking” when they would shoot their bow.

I thought they were crazy.

Boy, did I ever find out that my time with target panic was coming.

target panic poor groupings

Ever have this type of result when shooting your bow? Maybe you are experiencing target panic.

So, What Is Target Panic?

Target panic is basically being afraid of missing the target, thus causing an anxiety of sorts.

It wasn’t until the Summer of 2018 that I found myself having a problem with target panic. I first noticed it at one of the Total Archery Challenges. My shot process would fall apart every time that I would draw and try to take aim at one of the 3-D targets.

As I fought through the rest of the summer, I forced myself into thinking I could just ignore it, shoot more, and it would get better. I did this nonsense all the way through late fall. 


Five Steps To Fix Your Target Panic

archery target panic picture

Target panic in archery and bowhunting is a real thing… so how can you fix it? Keep reading!

The first step to curing target panic… Admit you have a problem.

Time needed: 15 minutes

Follow these steps to begin to fix your target panic:

  1. Aiming Drills

    Hold your pin on the target until you start to waver let down rest 15 to 30 seconds and repeat. Do this at least 30 to 50 times a day before you release a single arrow.

  2. Go Through Your Shot Process

    Know how to, grip, draw, anchor, aim, and squeeze the trigger. This is your shot process… master it.

  3. Stay Close

    Shoot with in 15 yards of the target and don’t go any farther for at least 2 to 3 weeks.

  4. Move Back

    Once you can go through the shot process and not experience any anxiety, then start with 20 yards and work your way back.

  5. Repeat

    Go Back and repeat steps 1 through 3.


#ad

Aimcise Performance ProJoint Supplement with Glucosamine and Turmeric | Powerful Pain Muscle and Joint Recovery, Promotes Speed - 60 Day Supply
$24.99 ($0.42 / Count)
Buy Now
We earn a commission if you make a purchase, at no additional cost to you.
03/07/2024 06:11 pm GMT


From Bad To Worse… To Missing Completely

I somehow managed to harvest an elk in early September, with one of the best shots I’ve ever made.

Looking back it was a miracle or just luck. That’s the only way to explain it with all the struggles I was having. After elk season, I didn’t shoot much for a few weeks until I was getting ready for archery whitetail season.

This is when things got worse.


Leupold RX-2800 Rangefinder, TBR/W
$453.71
Buy Now
We earn a commission if you make a purchase, at no additional cost to you.
03/07/2024 02:26 pm GMT

While shooting one day at a 3D deer target, I started missing completely at 40 yards. I was only hitting the deer every two or three shots! Needless to say, my issue was getting expensive very quickly, at the loss of several Easton Full Metal Jackets. From an archery standpoint, I was pretty much falling apart. I knew then that I had a big problem.

Obviously, everyone reacts differently, but the following is the detail on what happened to me.


Itchy Index Finger…

As I was going through my shot process, I would nock an arrow, attach my release to the D-loop, draw the bow and find my anchor.

After this is where I was a complete mess.

When I would go to acquire the target in my peep, my heart would begin to race, my mind would scramble, and the second that my pin would reach the desired spot on the target, my index finger would have a mind of its own and just yank the trigger.


Summit Treestands Titan SD Climbing Treestand
$449.99
Buy Now
We earn a commission if you make a purchase, at no additional cost to you.
03/07/2024 02:20 am GMT

This wasn’t just an errant arrow or two. Basically, I was shooting my bow the same way you would shoot at clay pigeons with a shotgun.

Those who have been in archery for any length of time know that, with all that movement, it was impossible for me to have any type of grouping. I was anticipating the shot so badly, that I simply could not be accurate.

So, If you cannot simply draw your bow, acquire and hold on your target, then squeeze your trigger without anticipating the shot, I am willing to say that you have some sort of target panic.


How I Cured It

First things first… you have to ADMIT you have a problem. When I finally came to terms with the fact that I was experiencing target panic, I began calling around to a few of my friends that have been shooting for years.  I got several different answers.  I also watched YouTube, read articles, Googled information, and tried a pile of other things.

This quick and easy to practice archery tip is helpful when working to cure target panic.

S4 Field Logic Black Hole 22 - 4 Sided Archery Target,yellow
$89.99
Buy Now
We earn a commission if you make a purchase, at no additional cost to you.
03/07/2024 12:05 am GMT

Archery Coach

Now, I’m not saying everything that I tried and learned didn’t work. For the most part, it was all great info. But, I wasn’t getting any better. Finally, once I got sick enough of not being able to hit the broad side of a barn, I got in touch with a local pro named Gregg Copeland.

Gregg is a phenomenal coach, who I had met at a few indoor, Vegas-style shoots. He had me to meet him at the local bow shop that had an indoor range, so he could see how bad things really were.


GhostBlind 4-Panel Predator Blind, Silver
$259.98
Buy Now
We earn a commission if you make a purchase, at no additional cost to you.
03/07/2024 12:00 am GMT

Thankfully, I don’t get my feelings hurt very easily, because my shooting was downright laughable. I also enjoy joking around and Gregg knew that.

After my first 3 shots he told me that he would let me shoot at him at 40 yards and not worry a bit. This is all the more funny if you’ve ever seen Gregg… he’s 6’3”, 350lbs!

“First things first,” Gregg said. “We start with aiming drills.”


Target Acquisition Drill

He placed me 10 feet from the target. He then had me nock an arrow, draw the bow, and hold the pin on the target until I started wavering. I would then let down, rest for a minute, and repeat.

I would say that we did this 20 to 30 times. By the end of the aiming drills, I was able to at least aim without completely losing my cool. A huge sign of progress already! Aiming was something I hadn’t been able to do in months!


Tension Release Drills

Next, Gregg had me tighten the tension on my bow release to as stiff as it would go. This forced me to squeeze the trigger until the shot went off, so I that I could no longer “punch” the trigger, as I had been doing.

Now, keep in mind, we never moved back any from the aiming drills. We were still only 10 feet away from the target.


We went through the release drills a good 20 to 30 times. By the end of those, I was able to make decent shots at 10 feet. At that point, Gregg could have told me to stand on my head and I would have done it, because the sequence he had me doing was working!

I was taking each piece of advice like it was gold, and to me it was.

He wanted to see how I would do if we stepped back to 15 yards. Sure enough, in that short time, I was able to repeat what he had taught me and hit right where I was aiming.

Archery Homework

After the lesson we shook hands and he left me with instructions of what to do once I got home. Gregg told me to go and set up at ten feet from a target and practice aiming drills every day before I shot a single arrow.  He also forbid me to shoot a single shot past 15 yards until I was able to make perfect shots at that distance. I did these exact drills for at least a month.

man nocking an arrow

Going through your shot process the same way every time is a critical to curing archery target panic.

So, Does It Work?

Following Gregg’s instructions, I rarely missed a single day of shooting. After about a month of nothing but the daily drills, the anxiety finally subsided and I was able to enjoy shooting my bow once again.

I am now able to shoot pie plate groups out past 80 yards. I am not saying I am currently the best that I have ever been, but I am well on my way.

One of the things that I took from shooting with Gregg was how much importance he put on the shot process.

He told me multiple times, “without a shot process, you have no shot.”  He said, “without all the right ingredients, you can’t cook what you desire, so you sure ain’t going to shoot what you desire with out the exact process every time.”

Look at it this way, if you are struggling with target panic, with the right methods, and hard work, you are only 3,000 to 6,000 shots away from it being “fixed”, and yes, it is fixable.


Final Thoughts On Target Panic

Now, I try and do things that might trigger target panic. For instance, I will shoot at a 3-D deer out to 70 yards, extremely quartered away. I also have a basket ball size target that I will try and shoot at farther distances as well.

By doing these things, I am simply just trying to make myself uncomfortable. This way, I can remember my shot process, regardless of the situation, and still make the shot smooth and clean.

You do the same things at 20 yards as you would at 80 yards, you just have to convince your brain of that. Through this process, I have learned so much about archery and have experienced a whole new love for shooting my bow.

So, having target panic wasn’t so bad after all. I guess you could say there was a silver lining. I have 100% come through target panic as a better archer. Come September, the Elk better be on their “A” game, because I will be on mine.


If you have interest in researching various types of archery broadheads, be sure to check out our in-depth broadheads blog post and also get reviews on expandable broadheads as well as fixed-blades.


Target Panic Kyle Mcdonald
Kyle McDonald, of Unguided Outdoors.