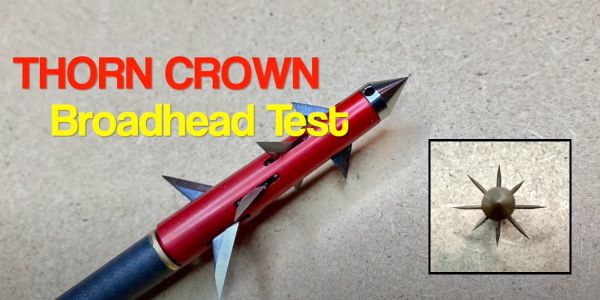
Talk about a crazy, wicked looking, innovative broadhead!
I first saw the Thorn Crown broadheads at the Archery Trade Association (ATA) show and talking with the original designer.
When I finally got my hands on them, I couldn’t wait to put them to the test to see if they were the real deal.
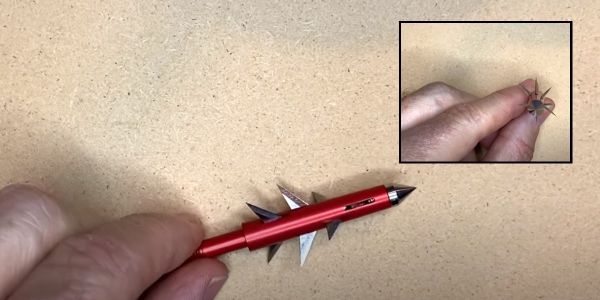
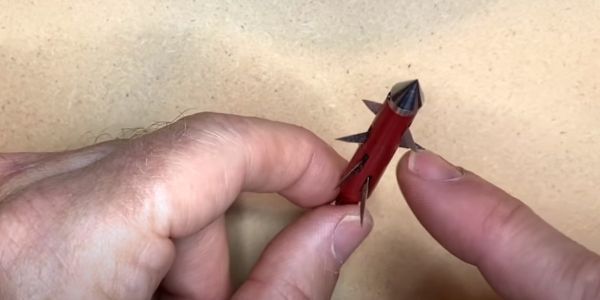
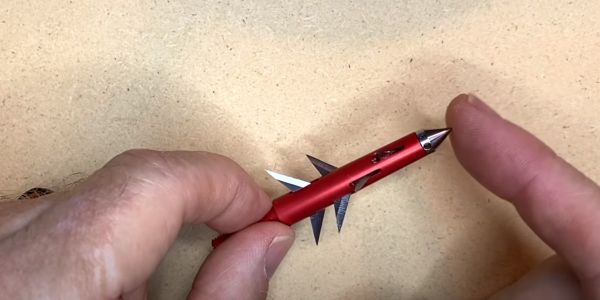
It kind of looks like a mace, a medieval weapon.
Typically, I like broadheads to have a really wide cutting diameter, rather than a concentrated cut. However, I’ve never killed anything with an 8-blade broadhead, and I’m imagining that it would make a hole that is pretty difficult to close up.
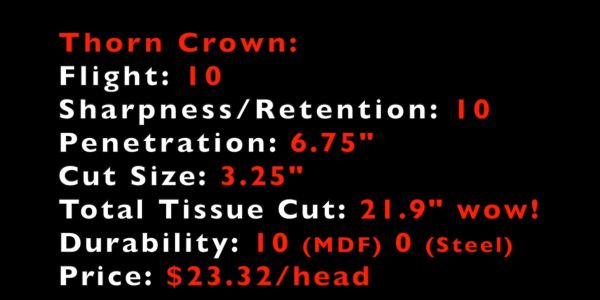
Each of the blades are stainless steel and are 0.040 inch thick. So, they are really thick blades. They are arranged with the smallest diameter first, 5/8 of an inch, then 6/8 of an inch, 7/8 of an inch, and 1-inch. So, that’s where you get the total of 3.25 inches of cut.
That’s a lot of cut!

-
Sale!

N1 Outdoors® Licking Branch Buck LS Tee
$19.00 Select options This product has multiple variants. The options may be chosen on the product page -
N1 Outdoors® Just Pass’N Through™ Broadhead Badge Tee
Price range: $24.99 through $28.99 Select options This product has multiple variants. The options may be chosen on the product page -
Sale!
N1 Outdoors® Est. 2014 Vintage Camo USA Tee
$15.00 Select options This product has multiple variants. The options may be chosen on the product page
>> Want to know what your arrow’s FOC is? Check out our FOC Calculator and find out!
Thorn Crown Broadheads Testing
I tested the Thorn Crown broadheads for flight, edge sharpness and edge retention, for penetration and for durability.
Let’s see how the Thorn Crown performed.
Flight test
I was able to pop a balloon at 70 yards with the Thorn Crown.

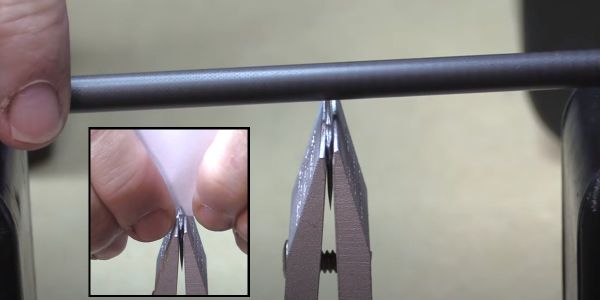
Sharpness test of the Thorn Crown
I tested the Thorn Crown for out-of-the-box sharpness. It was able to still cut paper after 5 strokes of a carbon arrow shaft.
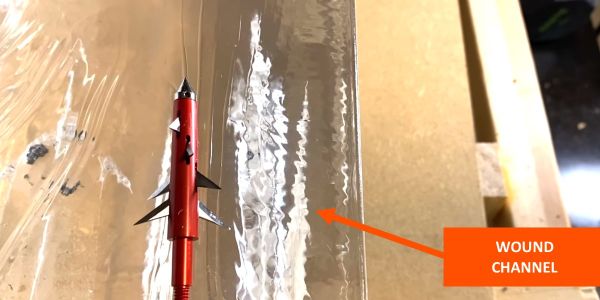
Penetration Test
I tested the Thorn Crown for penetration by shooting it into ballistic gel, fronted by 2/3-inch foam matting and 1/2-inch MDF.

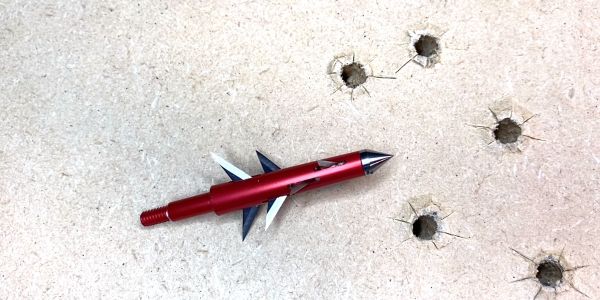
Durability Test
I shot the Thorn Crown into 1/2-inch MDF five times. Below is the result.
-
N1 Outdoors® N-Tune™ Nock Tuning Reflective Arrow Wraps – Color Fade (Various)
Price range: $18.99 through $27.99 Select options This product has multiple variants. The options may be chosen on the product page -

N1 Outdoors® N-Tune™ Nock Tuning Reflective Arrow Wraps – Speed Spear™
Price range: $18.99 through $27.99 Select options This product has multiple variants. The options may be chosen on the product page -

N1 Outdoors® N-Tune™ Nock Tuning Transparent Arrow Wraps (Non-Reflective)
Price range: $16.99 through $25.99 Select options This product has multiple variants. The options may be chosen on the product page
Final Thoughts on the Thorn Crown Broadhead
So what do you think of the Thorn Crown?
Like I said, I’ve been wanting to test it because it’s just so unique.
A wicked cut
Cut is one of the many factors to consider when selecting a broadhead.
I typically want a wider cut out of my broadheads, because wider cuts tend to produce a better blood trail.
There’s more likelihood that you’re going to reach that extra artery and the holes are typically harder to close up.
But, I’ve never shot an 8-blade head before now. And, I’ve got to tell you, when it went into the target, or went into the gel and I pulled it out, man, it just ripped them apart.
So this is a wicked wound channel that honestly, I want to shoot into an animal just to see what happens.
Great flight and durability
I was really impressed with its excellent flight. It was very accurate.
I chose ahead of time to test this for the durability compared to a mechanical. And the reason I did that is that it has eight blades. Each of those four individual 2-blade heads would be hitting the steel plate that I typically use for fixed-blade broadheads.
I thought, “There’s no way that’s going to hold up to the steel plate.” But given it’s such a big cut size, let’s test it as I would a mechanical. And as you saw, it did extremely well for the mechanical test.
Now, I was curious and I want to see what would happen through a steel plate so I shot it into the steel plate as well and it punched a really nice 8-blade hole through the 22-gauge steel plate. But as expected, the head itself just did not hold up to the steel plate.
But honestly, that wouldn’t hold me back from using it in a hunting situation given its flight and given just the wicked wound channel and the way it held up to the MDF.
This broadhead is not a gimmick. This is something that really could do some serious damage.
So great job, Thorn! Love the innovation. Keep it up. Great job.
Other fixed-blade reviews:
- Afflictor Fixed Blade Broadheads
- Cutthroat Broadheads
- Dirt Nap DRT broadheads
- Bishop Holy Trinity Broadheads