-By John Lusk
In this broadhead review, I tested broadheads from SEVR; The SEVR 1.5, 1.7, 2.1 and Ti 2.0.
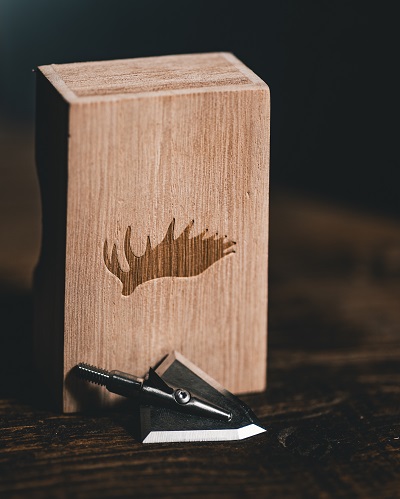
- SEVR 1.5
- SEVR 1.7 (now discontinued)
- SEVR 1.75
- SEVR 2.1
- SEVR Ti 2.0
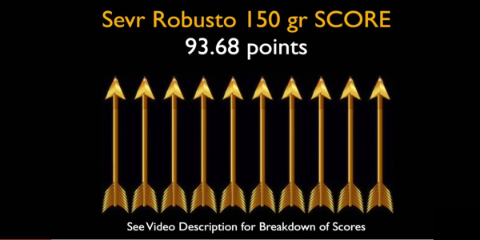
- Sevr Robusto
- Sevr 1.5 Hybrid
- Sevr 2.0 Hybrid
SEVR Broadhead Offerings
SEVR originally came out with a broadhead that had a 2.1” cutting diameter. It was a great head with fantastic flight and it was tough. But, the penetration is about what you would expect from a 2.1” broadhead and it was a bit lacking in kinetic energy for my purposes.
For a deer, or even for smaller game like turkey, if your number one goal is a big hole, the 2.1” SEVR is going to deliver. But to round out their lineup, they’ve come up with two additional offerings.
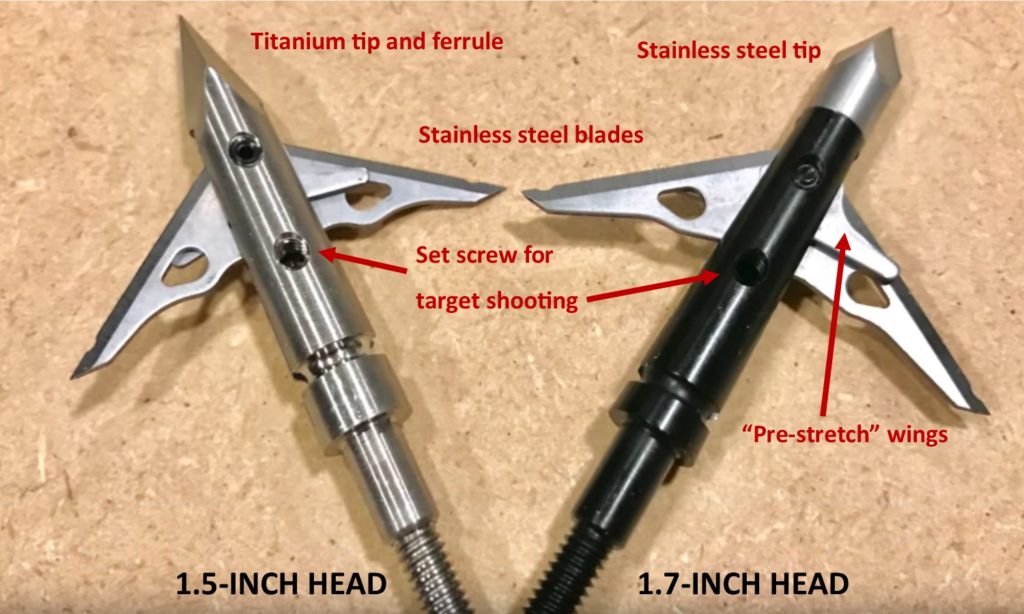
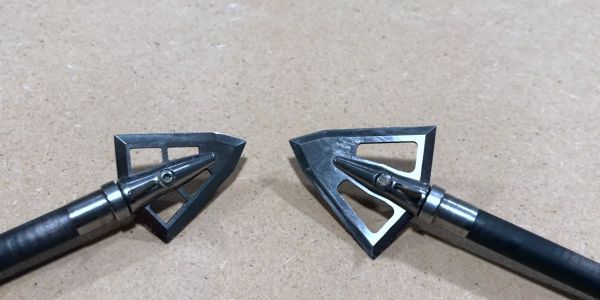
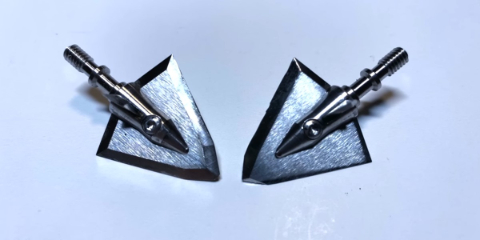
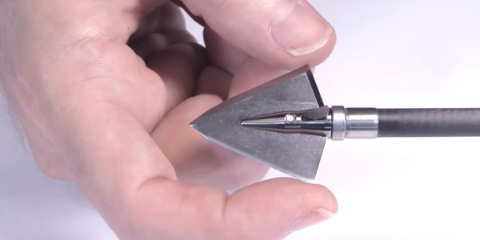
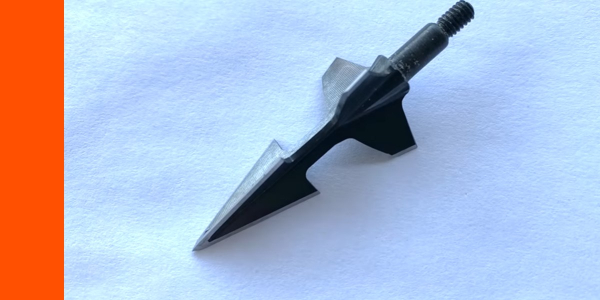
The 1.5-inch and 1.7-inch SEVR broadheads look the same in shape, but with some subtle differences in head and ferrule composition.
SEVR 1.7-inch Broadhead
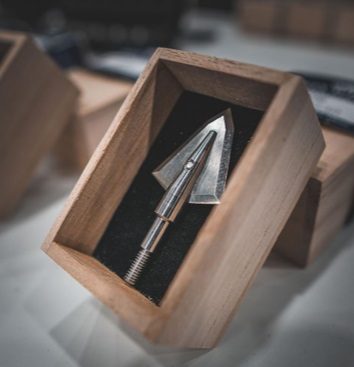
To compliment their original broadhead, SEVR introduced a 1.7” head. It has a stainless steel tip and it has got a good grade aluminum ferrule. It has rear deploying blades that lock in place, which I love.
The 1.7” cutting diameter provides decent penetration and is a good all-around broadhead offering for pretty much any kind of game.
SEVR 1.75-inch Broadhead
The SEVR 1.75-inch head replaced the 1.7-inch version, which has been discontinued.
SEVR 1.5-inch Broadhead
SEVR also introduced the 1.5-inch head. The 1.5-inch operates just like the 2.1-inch with a few design differences.
On the 1.7-inch head, the tip is not quite as big as the 1.5-inch head and also has a smaller ferrule. The 1.7-inch head only comes in a 100-grain and is a little cheaper, while the 1.5-inch head comes in a 100-grain as well as a 125-grain.
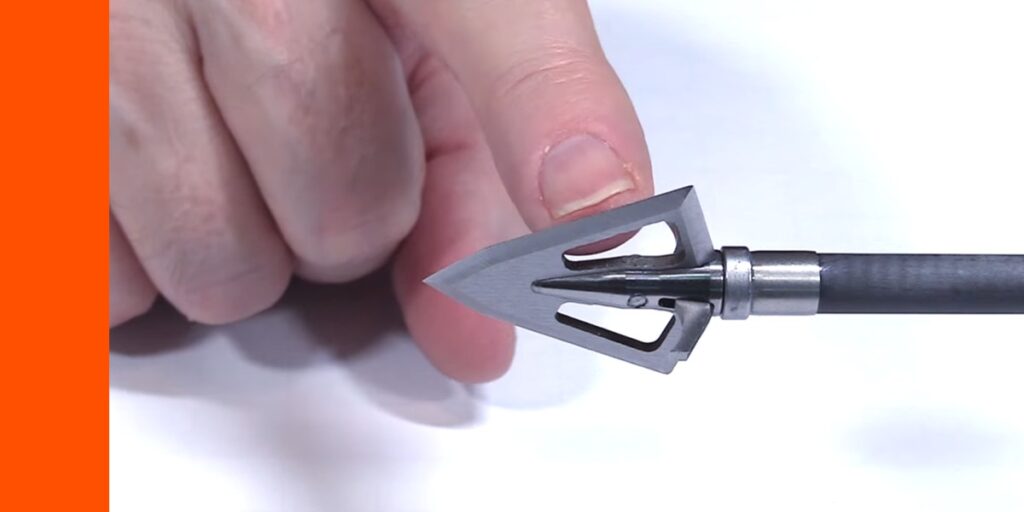
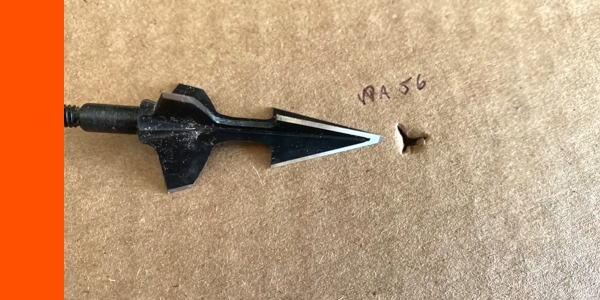
SEVR 1.5-inch and 1.7-inch heads | The details…
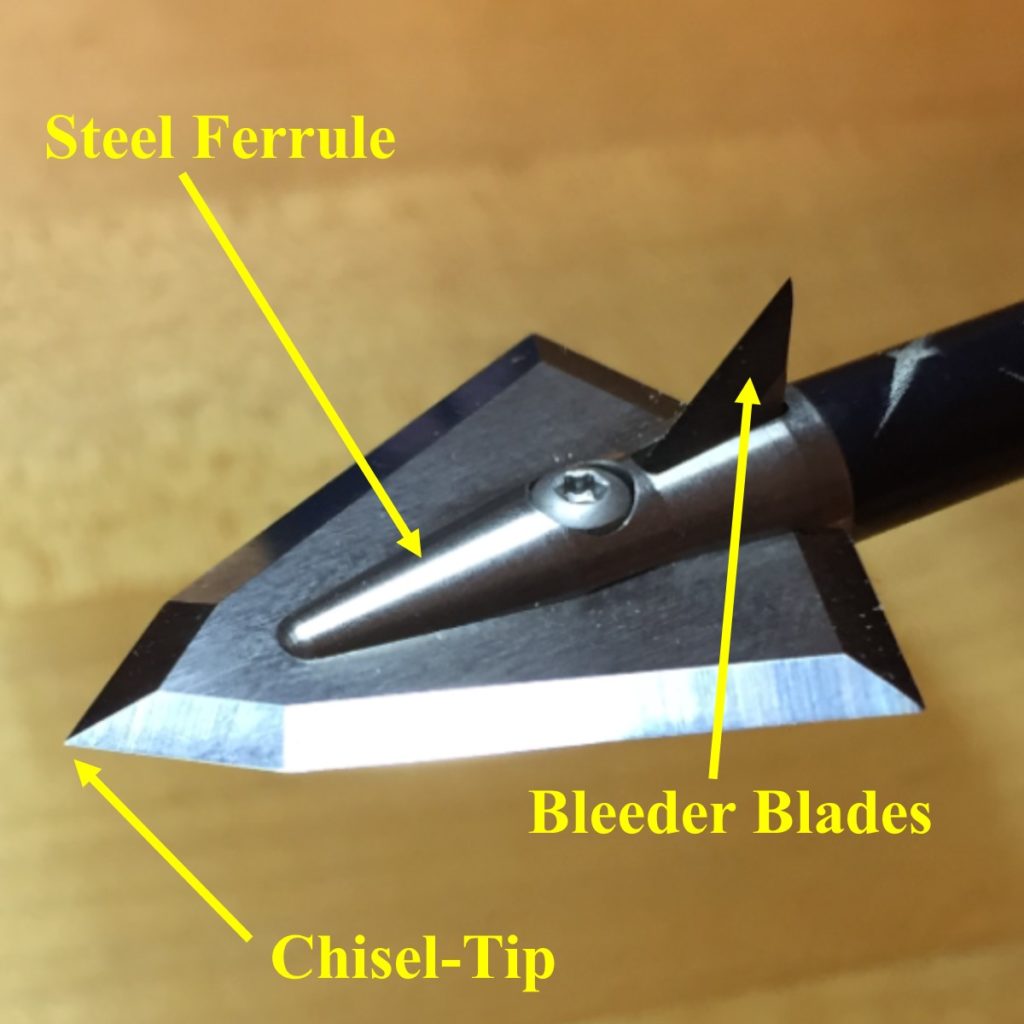
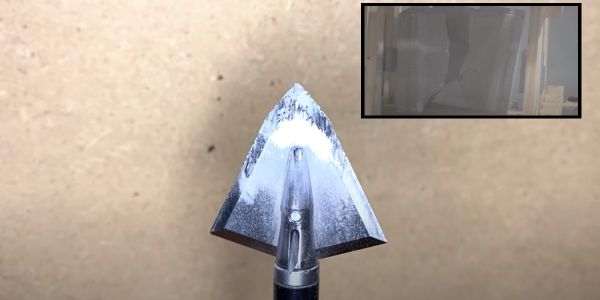
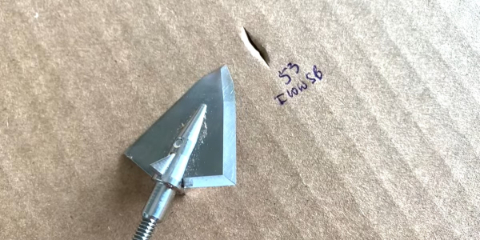
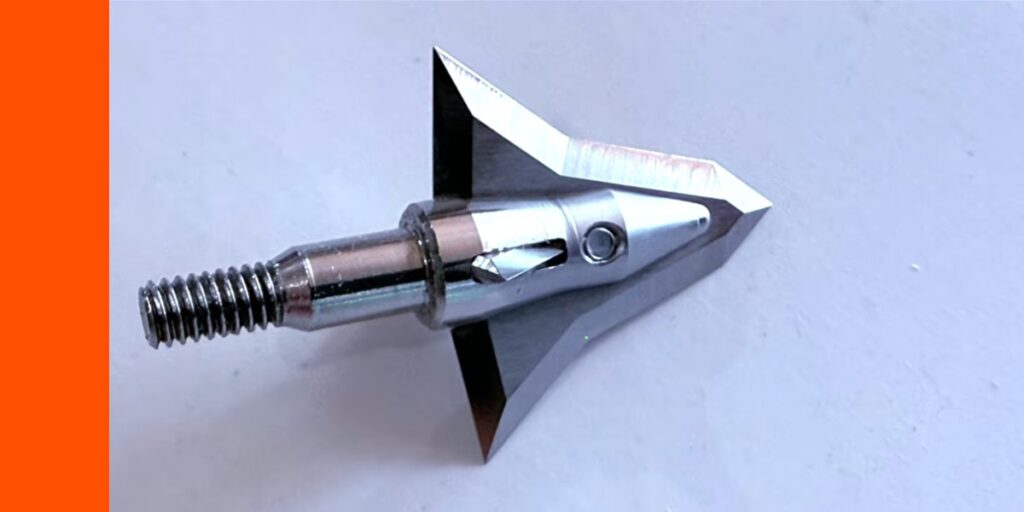
Firstly, just as the name implies, the 1.5-inch head has a 1.5-inch cutting diameter. Also, the ferrule and tip on the 1.5-inch head are titanium, as opposed to the stainless steel tip and aluminum ferrule of its 2.1-inch predecessor.
The blades of the 1.5-inch head are stainless steel and lock into place just like the 2.1-inch head.
The 1.5-inch head is designed for big-bodied, heavy-skinned animals. It is also better for longer distance shots, due to the smaller cutting diameter.
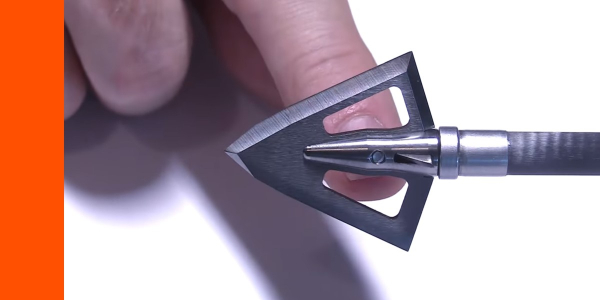
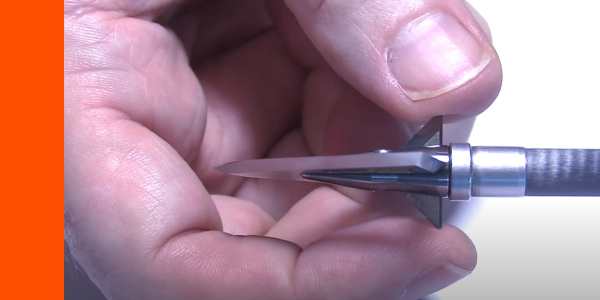
Although the cut is 1.5” wide, the chiseled tip itself is approximately 5/16-inch wide. So, with the 1.5-inch width cut in one direction and the 5/16-inch wide tip cut in the other direction, you get a total of a little over 1-3/4 inches of cut with a 1-1/2-inch hole.
Pricing
SEVR has a direct-to consumer approach, so you can only order them from their website. You can purchase them by the eaches, but you can get a better deal if you buy higher quantities.
At the time of this article’s publishing, the 1.7-heads are $11.99 each. The 1.5-inch head is $13.99. The 1.5 is more expensive due to the titanium head. You can purchase at SEVRbroadheads.com.
Using code LUSKFIVE will give you $5 off any order at SEVRbroadheads.com!
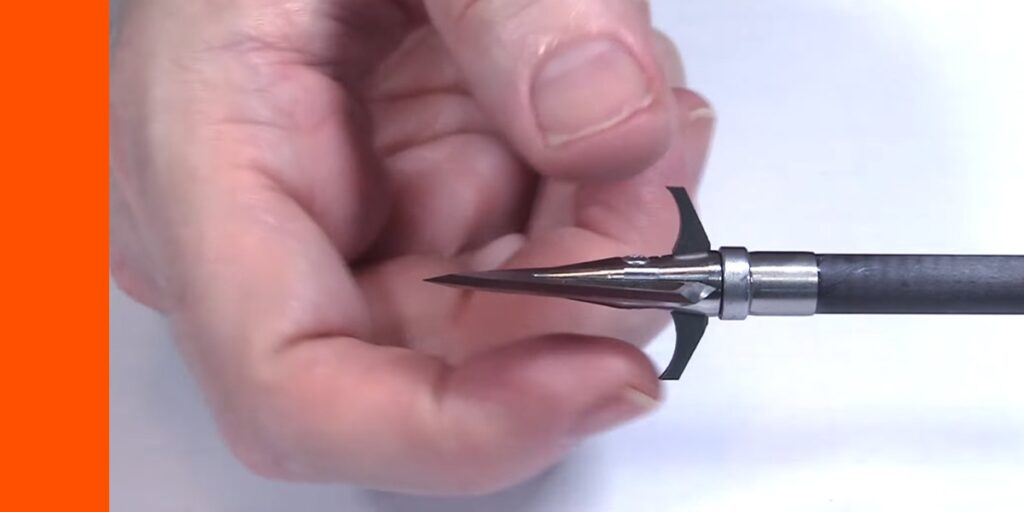
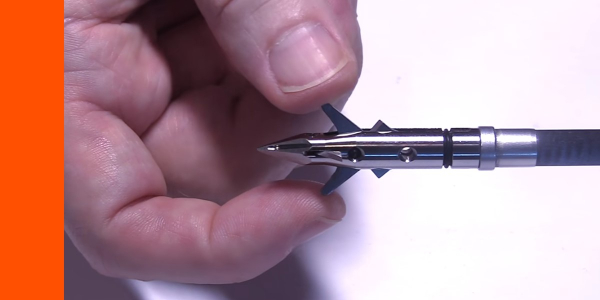
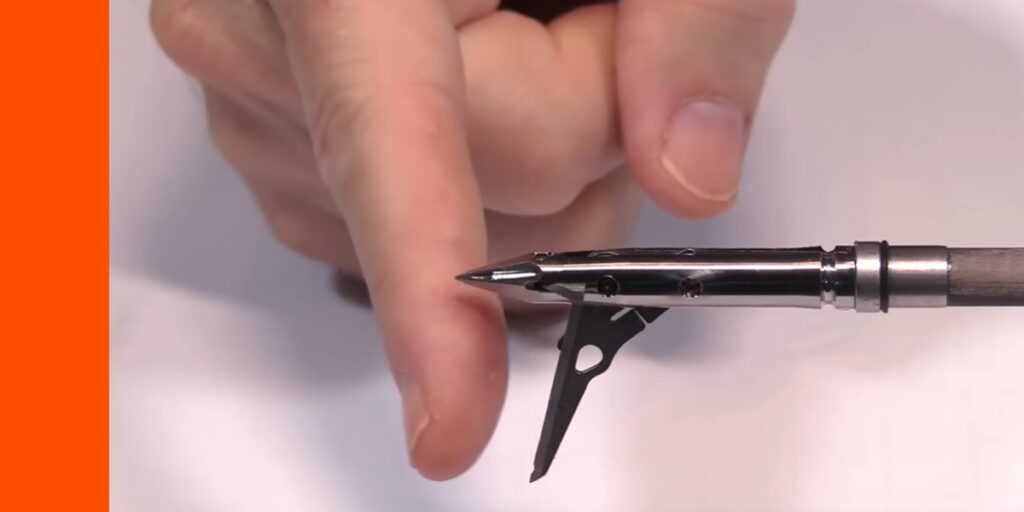
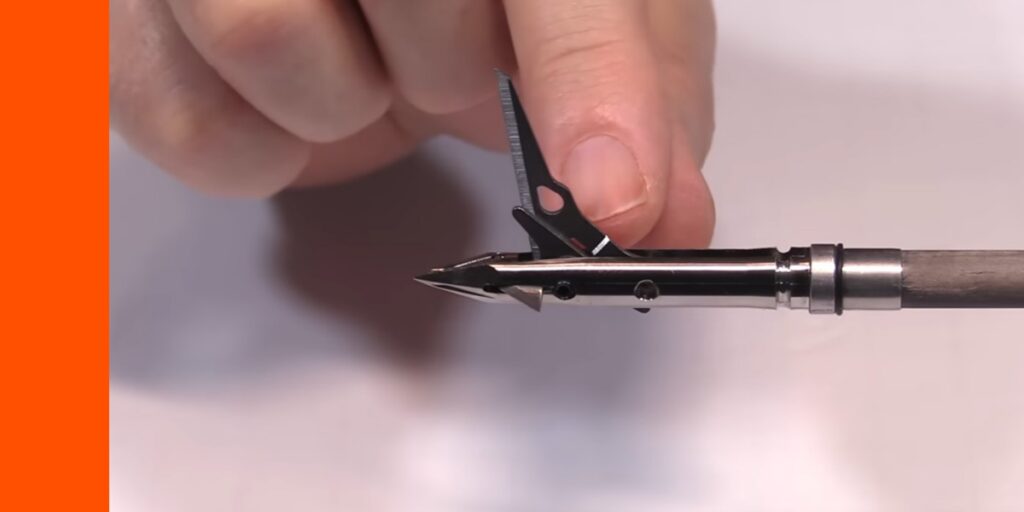
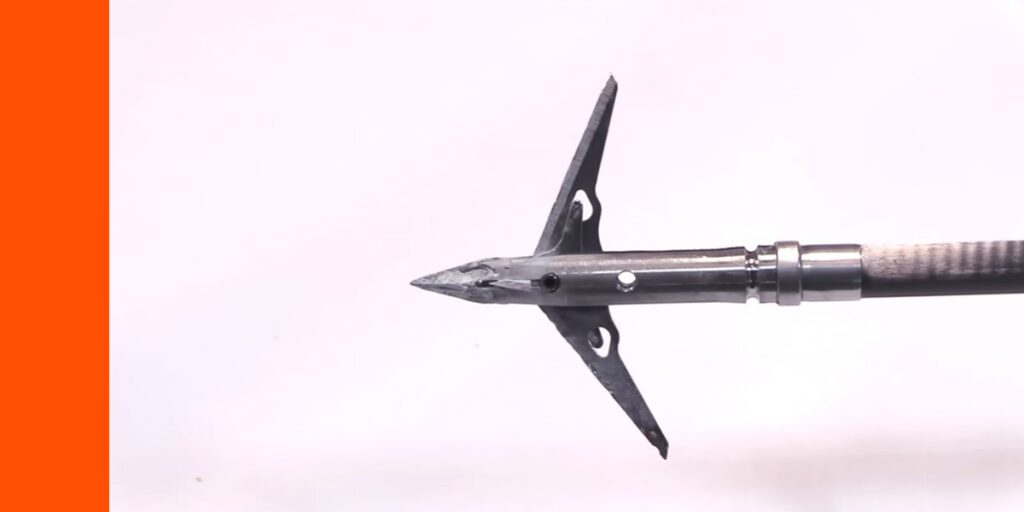
Blades and cutting features
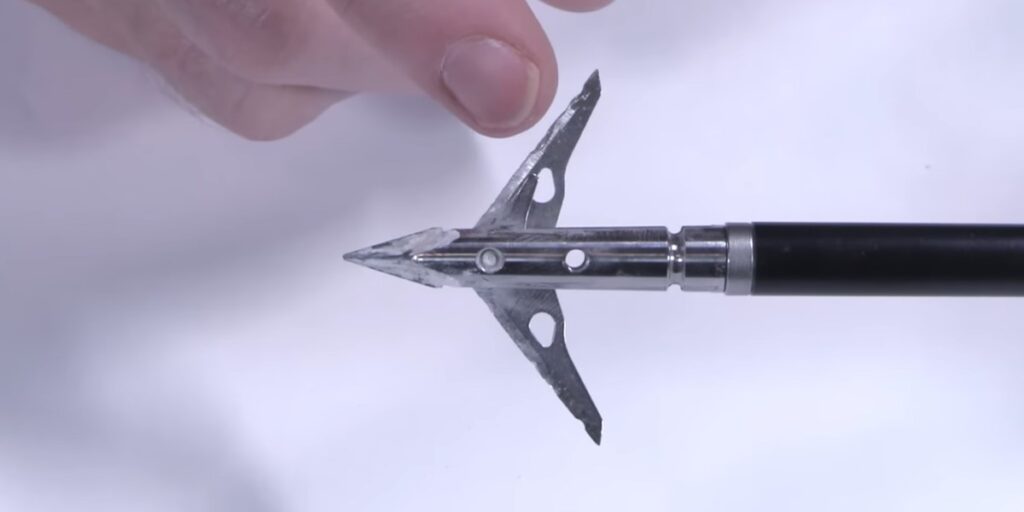
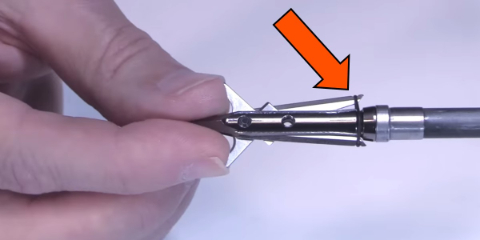
I love the way the SEVRs work. They have two small “wings” that are exposed during flight. When they come in contact with an animal, they actually “pre-stretch” the hide (skin) as the blades deploy. In theory, since the blades are rear-deploying, not only do you get a 4-cut entry, but you get a bigger cut.
-
Sale!
N1 Outdoors® Sunrise In Tineville™ Tee
Original price was: $28.99.$19.00Current price is: $19.00. Select options This product has multiple variants. The options may be chosen on the product page -
Sale!
N1 Outdoors® Whitetail Sugar Skull Tee (Black/Columbia Blue)
$19.00 Select options This product has multiple variants. The options may be chosen on the product page -
Sale!

N1 Outdoors® Bowhunt Oh Yeah™ Bowhunting Tee
Original price was: $26.99.$9.00Current price is: $9.00. Select options This product has multiple variants. The options may be chosen on the product page
>>Hunting & Fishing Shirts with a story
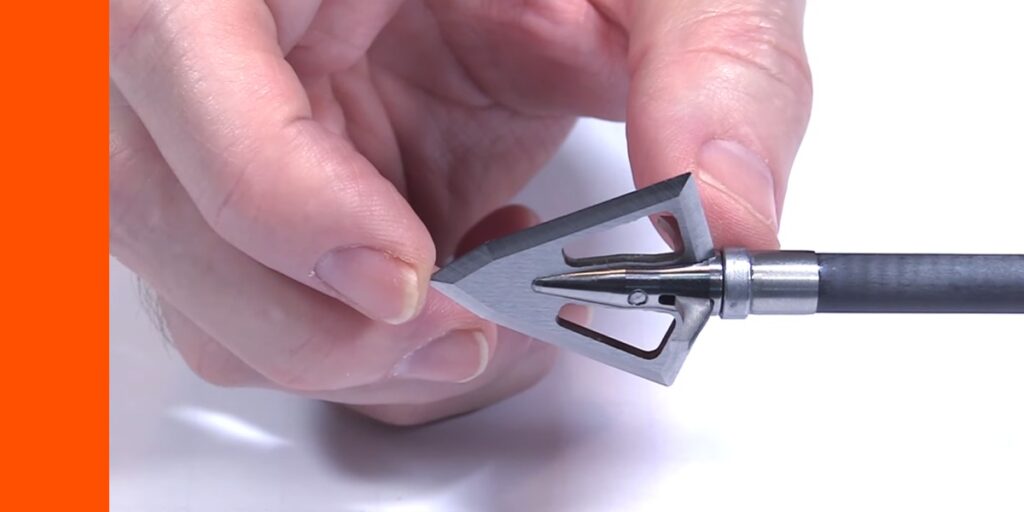
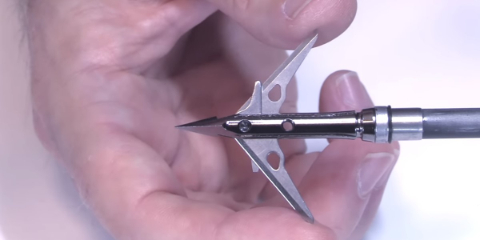
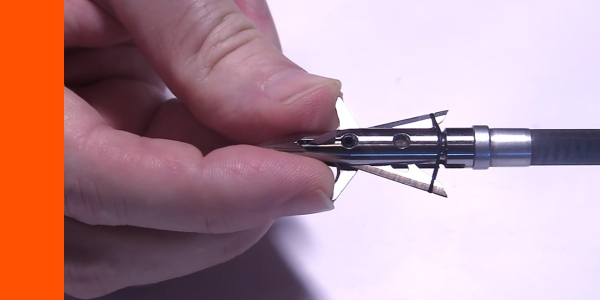
The heads of the SEVRs also lock into place. So, unlike a lot of mechanical heads that can close down if there’s not a certain amount of pressure, these heads lock in place and they stay that way in the animal.
Because they lock in place, they will not give a smaller cut than they do at their full deployment. The blades will go back into pre-deployment position when removing from the animal, but will still lock back down in deployment position.
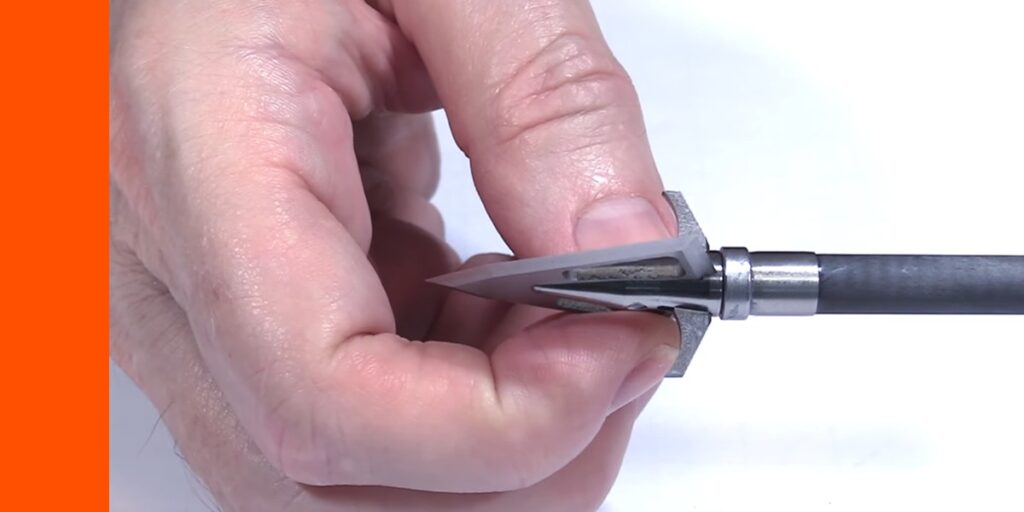
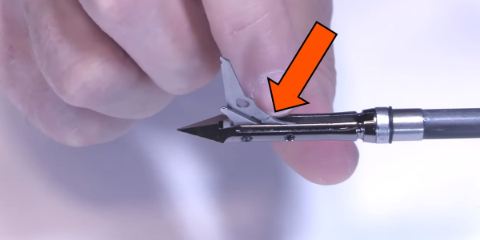
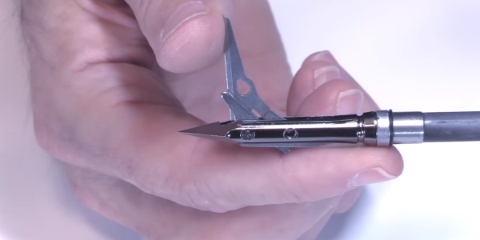
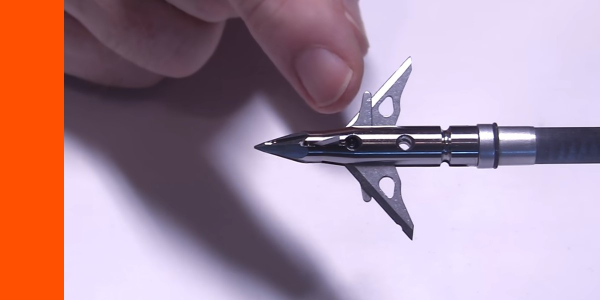
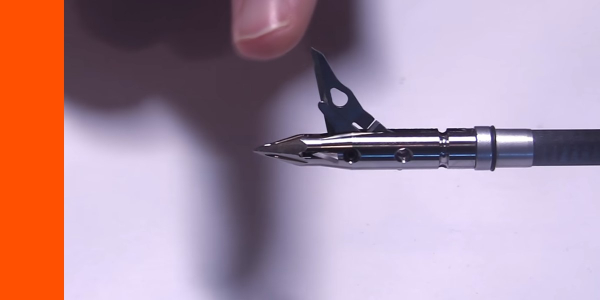
If you’ve ever shot a broadhead into a deer or other animal and hit bone, it typically deflects off course. But, the great thing about the SEVRs is that the will rotate to one side if they come they come into contact with bone or a hard medium like a rib.
The blade will simply fall to the side that encounters the bone, allowing the other blade to continue cutting and still keeps the broadhead on track.
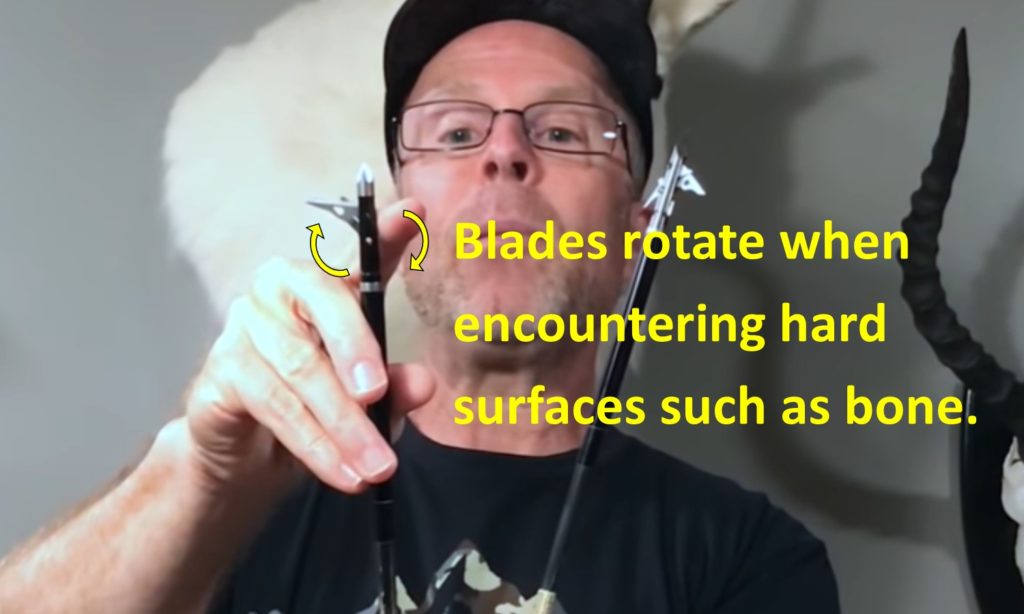
SEVR blades will rotate when coming in contact with bone or other hard surfaces, which helps prevent bending and breaking of blades and keeps heads on course.
This feature helps increase the chances of getting a good exit and getting better penetration of lungs and other vitals when the head encounters bone. And, because the blades stay locked even as they rotate, they just “dance” around the bone.
Another nice feature to the SEVR broadheads is that when there is heavy pressure on the blades – the type of pressure that might bend or break both blades – they compressed ever so slightly to absorb some of that impact. Because of this feature, they are difficult to break.

Blade Thickness
The 1.7-inch heads have a blade thickness of 0.035-inch thick. The 1.5-inch heads have blades that are 0.032-inch thick. Both heads have all the same features, locking in place and pivoting around bone, staying on track.
I was excited that they came out with a 1.7 and came out with a 1.5 because the 2.1-inch was just a little bit much for me to be able to be confident that I would be able to get a pass-through on an animal.
Although I knew I would get a big hole, I needed to be confident that I would get pass throughs. And, when hunting large animals like elk or bear, I want to be sure I get deep penetration.

Blade angle and overall cut
Another thing I like about the 1.5-inch head versus the original 2.1-inch head is that the blade angle is much less. So, penetration is not only better because of a smaller cutting area, but it’s also better because of the smaller angle.
The same with the 1.7-inch head. While it has a slightly larger cutting angle than the 1.5, it is still less than the 2.1. So, the 1.7 also gets better penetration, not only because of the angle, but because of the smaller diameter cut.
Now, you might think, “Oh, 1.5 or 1.7 inches is kind of small.” But, there are not many fixed heads that have a 1.5-inch cut. They might have a combined 2-inch cut, with 1-inch one way and 1-inch the other way.
But, what I have found with broadheads on game animals is that the wider a cut, the more effective bloodletting you will get.

On three and four-blade broadheads, although you may get more total tissue cut, you get a smaller cutting diameter. And, smaller holes tend to get plugged up easier with organs blood and tissue, resulting in less effective blood trails.
But, when you get a wider cut, even like a 1.5-inch, the hide and wound tend to stretch open as the animal moves, producing better bloodletting.
Of course, with the 1.7, you would get even more.
With the 2.1-inch head, you’re going to get a lot of bloodletting, but you are going to compromise penetration to do so.
So, with the new SEVR lineup, you have something for everyone. But, what I really wanted to see was… how do they fly? They are really the same heads, so I just tested the 1.5-inch.
-
N1 Outdoors® N-Tune™ Nock Tuning Reflective Arrow Wraps – Camo Fade (Various)
Price range: $18.99 through $27.99 Select options This product has multiple variants. The options may be chosen on the product page -

N1 Outdoors® N-Tune™ Nock Tuning Reflective Arrow Wraps – Sling’N Stix™
Price range: $18.99 through $27.99 Select options This product has multiple variants. The options may be chosen on the product page -
N1 Outdoors® N-Tune™ Nock Tuning Reflective Arrow Wraps – Time Traveler™
Price range: $18.99 through $27.99 Select options This product has multiple variants. The options may be chosen on the product page
Maybe we’re biased, but we think we have the best arrow wraps!
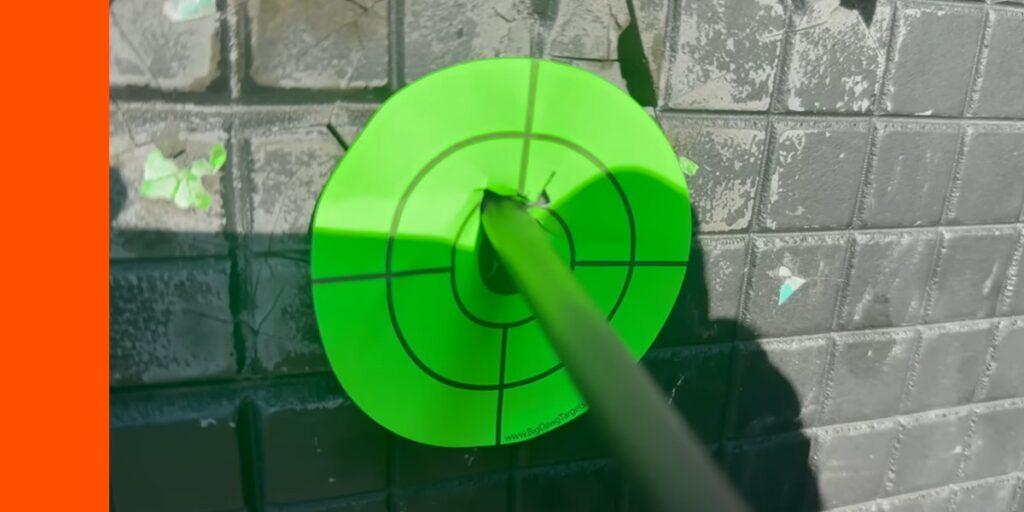
SEVR flight
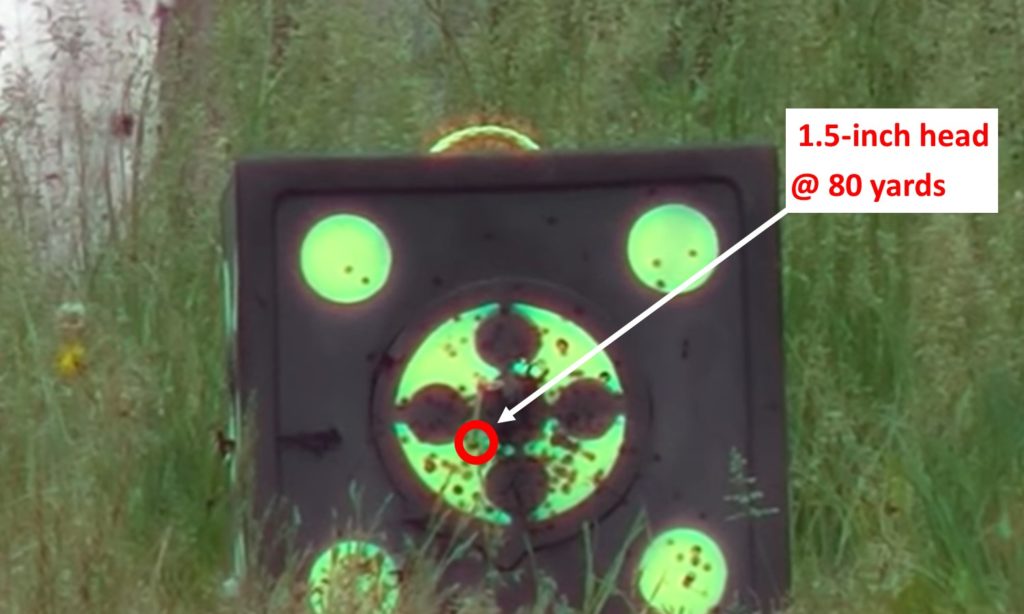
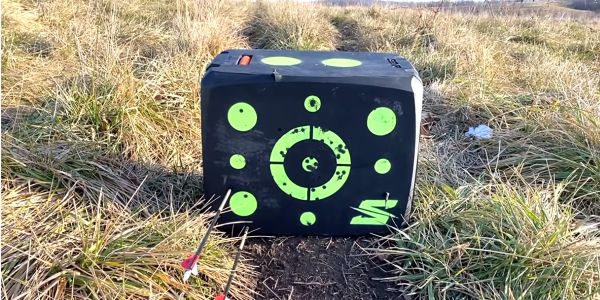
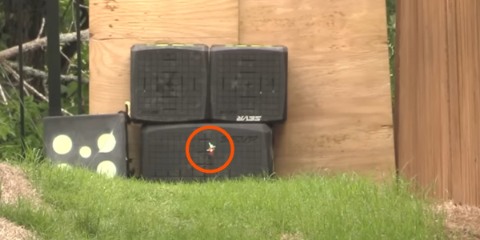
The SEVRs fly just like a field point, providing great accuracy, even at long distances.
When it comes to target shooting the SEVR heads, there is a feature that helps them stand out. Each head comes with a small set screw, so that when you shoot, the head stays in a closed position.
Because the blades do not deploy, they don’t touch the target at all. It’s very nice on your target and on the head itself.
So, in essence it makes the actual broadhead a practice head, and is easy to pull out of the target. Just be sure that when you hunt, you have removed the set screw, or the blades will not deploy.

Penetration and durability testing
For my penetration and durability tests, I shot the SEVR heads through 1-2-inch layers of MDF, with a foam mat in the front. I also shot them at a 45-degree angle on the MDF. After those tests, I shot them into a steel plate.
For testing, I shot the Bowtech SR6, set at 72 pounds, on the comfort setting. The arrows I used with the heads are the Bishop Mammoth FOC King, bsecause they are the most durable arrows made. These tests really put the arrows through the ringer and yet they don’t get damaged, as they are incredibly resilient.
-
N1 Outdoors® Put A Hook N1™ Fish Hook Leather Patch Hat (Brown/Khaki)
$29.99 Select options This product has multiple variants. The options may be chosen on the product page -
N1 Outdoors® Deer Antler Leather Patch Hat (Grey/Light Grey)
$29.99 Select options This product has multiple variants. The options may be chosen on the product page -
N1 Outdoors® Deer Antler Leather Patch Hat (Brown/Khaki)
$29.99 Select options This product has multiple variants. The options may be chosen on the product page
MDF Board Penetration Test
I shot the 1.5-inch, 125-grain head and the 1.7-inch, 100-grain head into the MDF. Both broadheads penetrated all the way through the first board and then stopped into the second board.
In the back of the second layer of MDF, the 1.7-inch bulged out a little bit. The 1.5-inch bulged out quite a bit more.
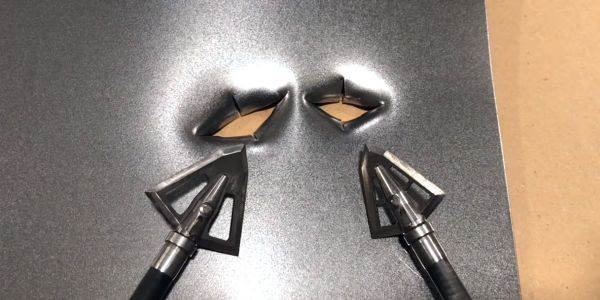
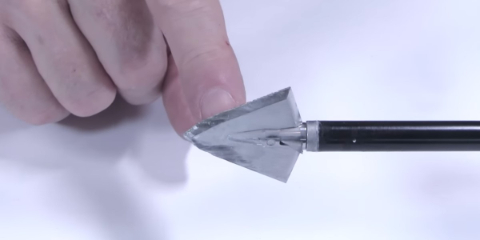
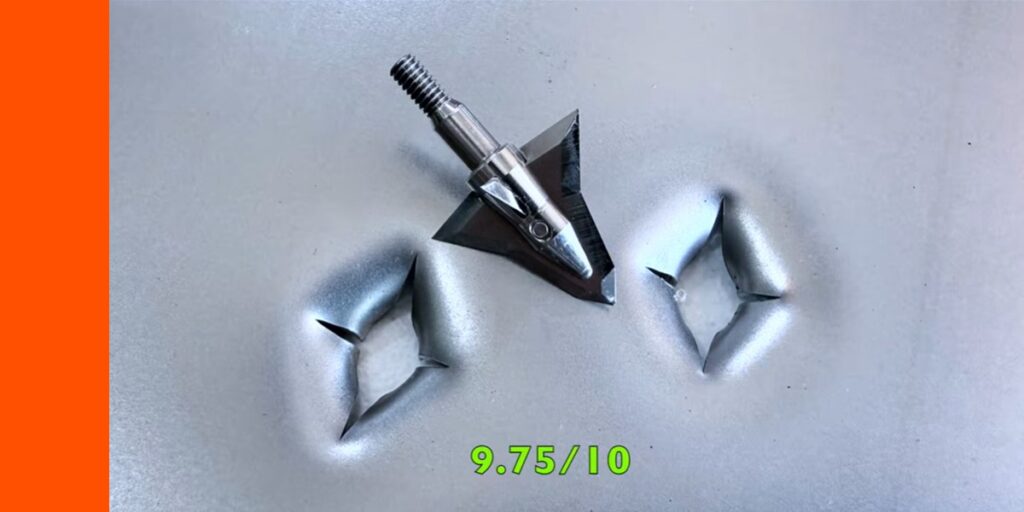
On the entrance hole, both deployed upon impact even with the soft pad over the first board and the cuts are exactly as advertised.
The 1.5-inch head opened up to 1.5 inches. And the 1.7-inch head opened up to 1.7 inches exactly.
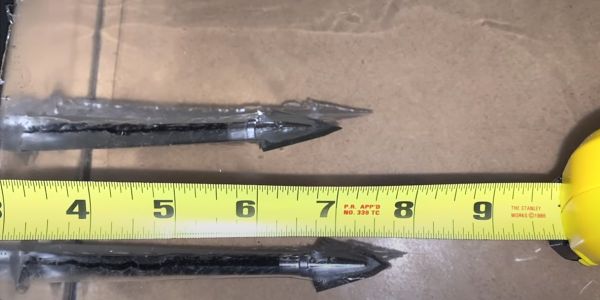
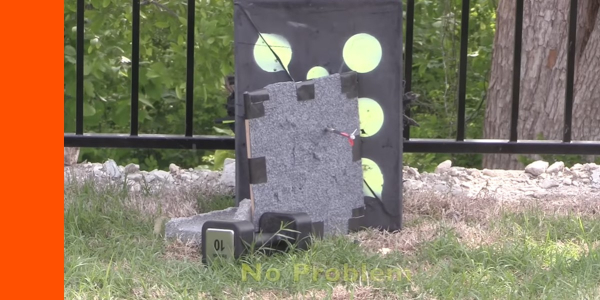
45-degree angle shot into MDF
I set up two MDF boards at a 45-degree angle and shot both the 1.5 and 1.7-inch heads into it.
Both heads penetrated precisely straight through. There was no sliding off the 45-degree angle board at all. And, the penetration was great for both of them. You see the top one was the 1.5-inch, the bottom the 1.7.
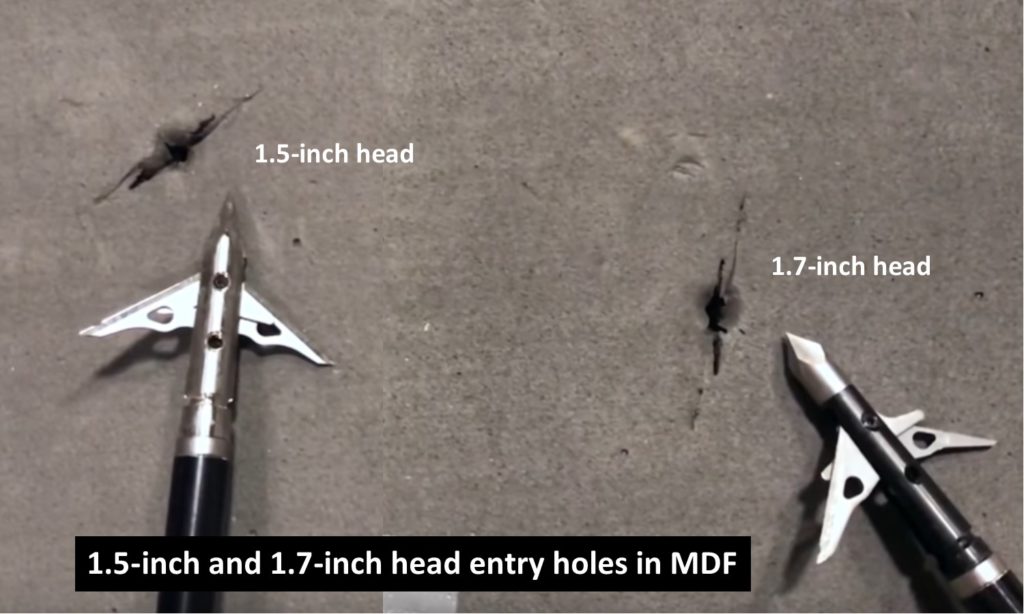
Both the 1.5 and 1.7-inch SEVR heads created their respective sized entrance holes in the foam pad and MDF board.
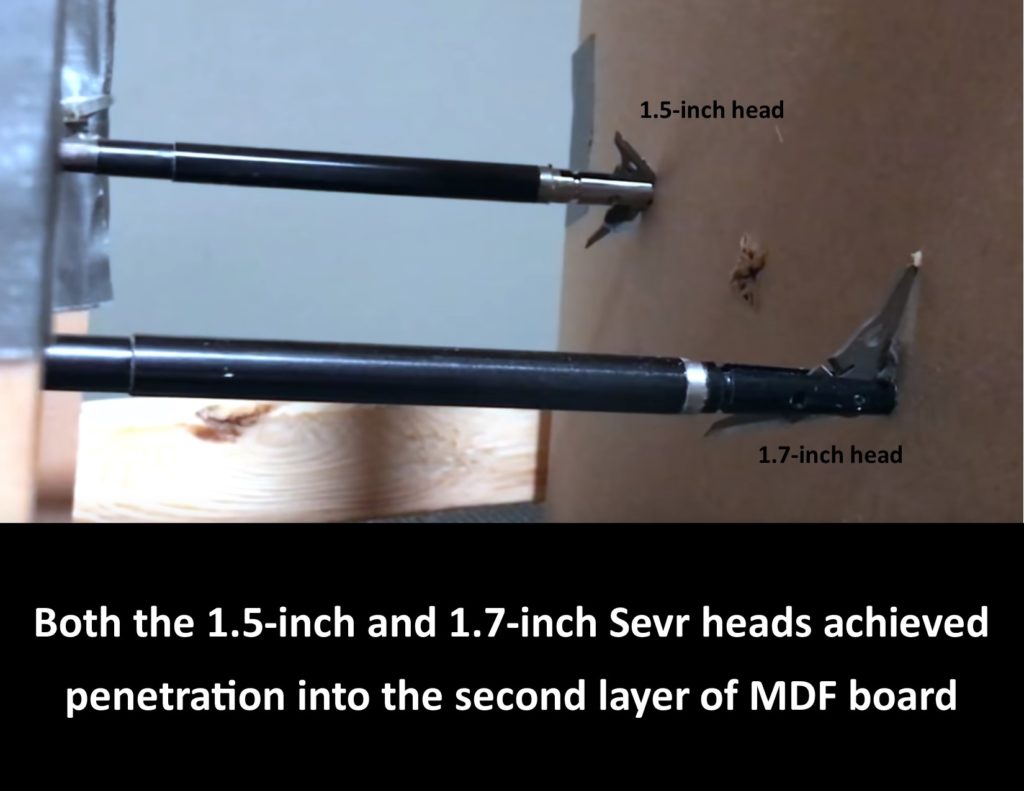
Both heads penetrated into the second layer of MDF board.
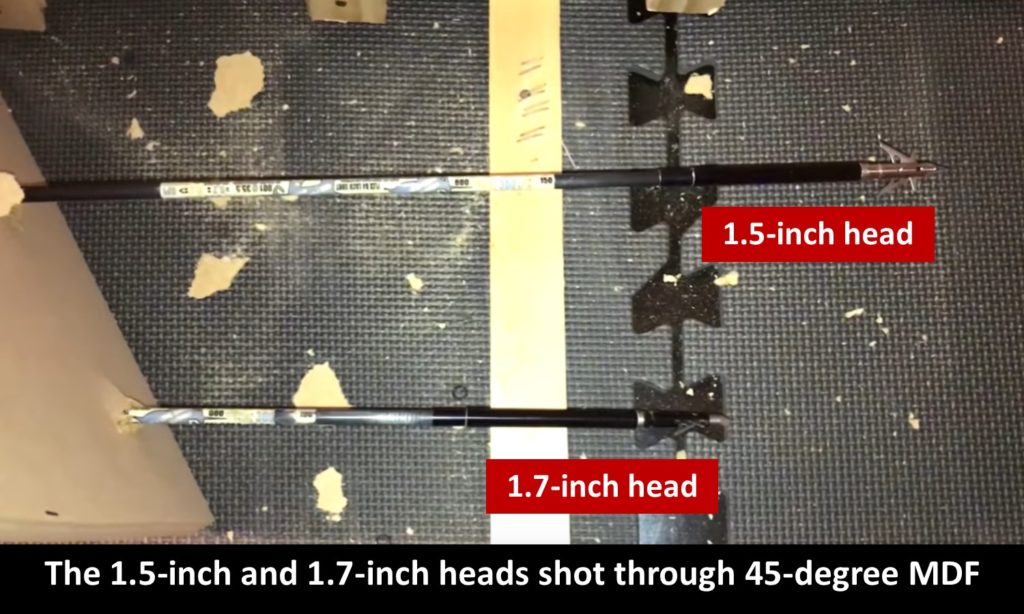
The 1.5-inch SEVR penetrated slightly better through 45-degree angled MDF board.

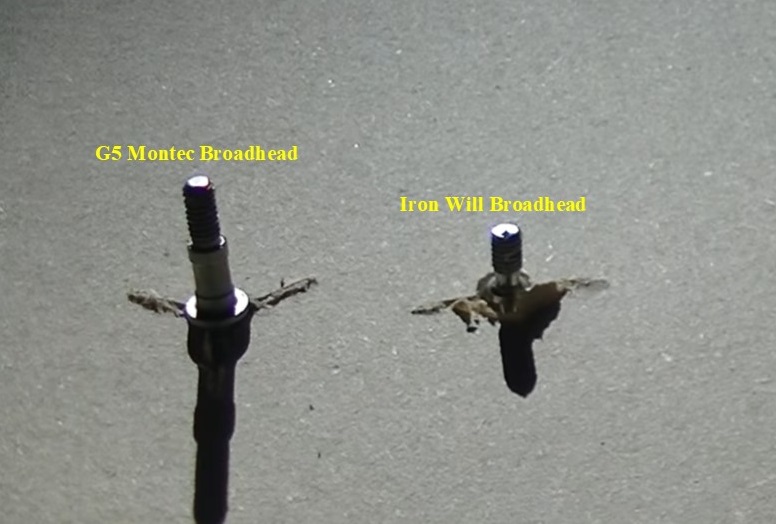
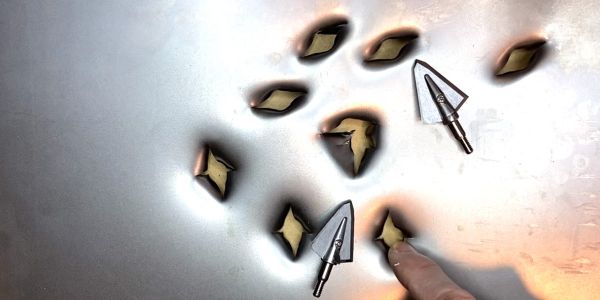
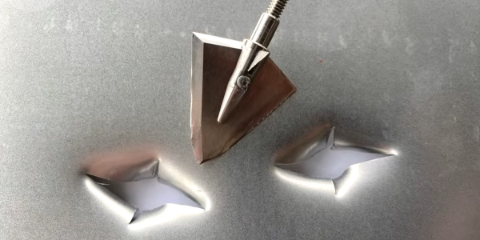
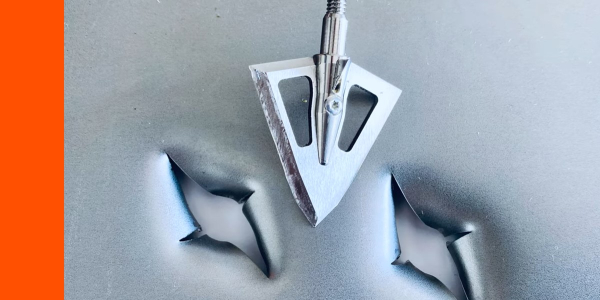
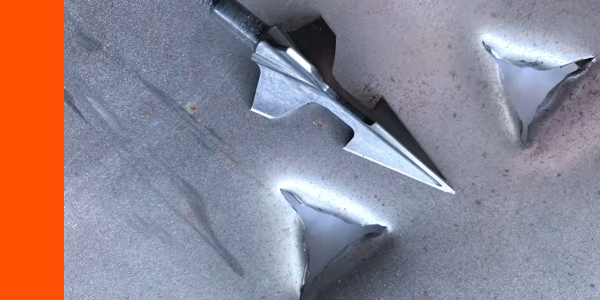
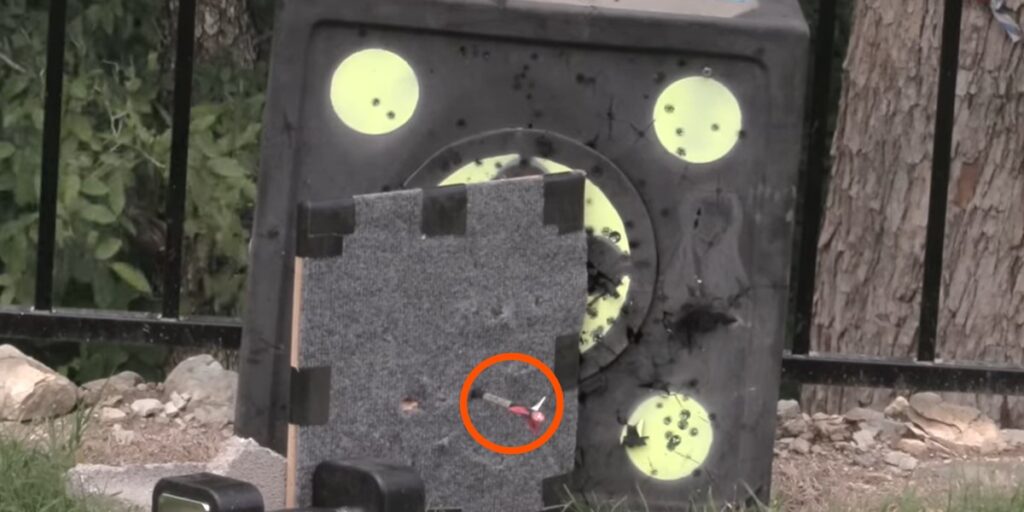
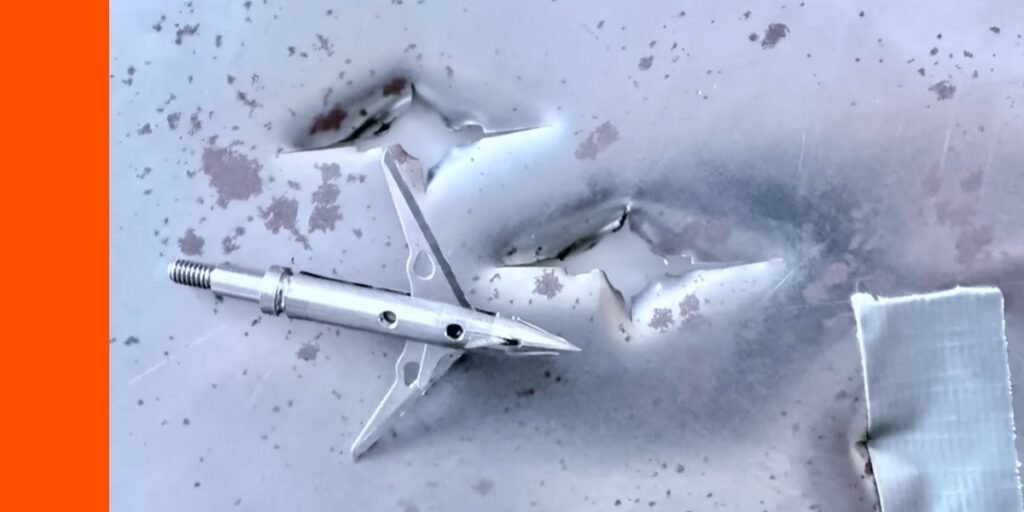
Steel Plate Penetration Test
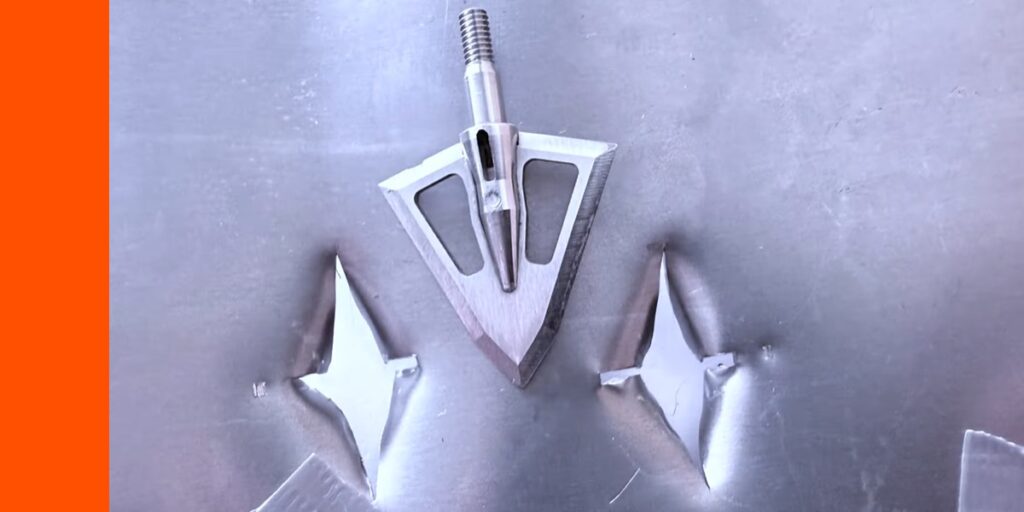
Because these heads held up so well in the MDF testing, I also shot them into a steel plate to evaluate what would happen.
I honestly wasn’t expecting them to hold up that well after all those other MDF board shots. But, they went through the steel plate and then through the second board.
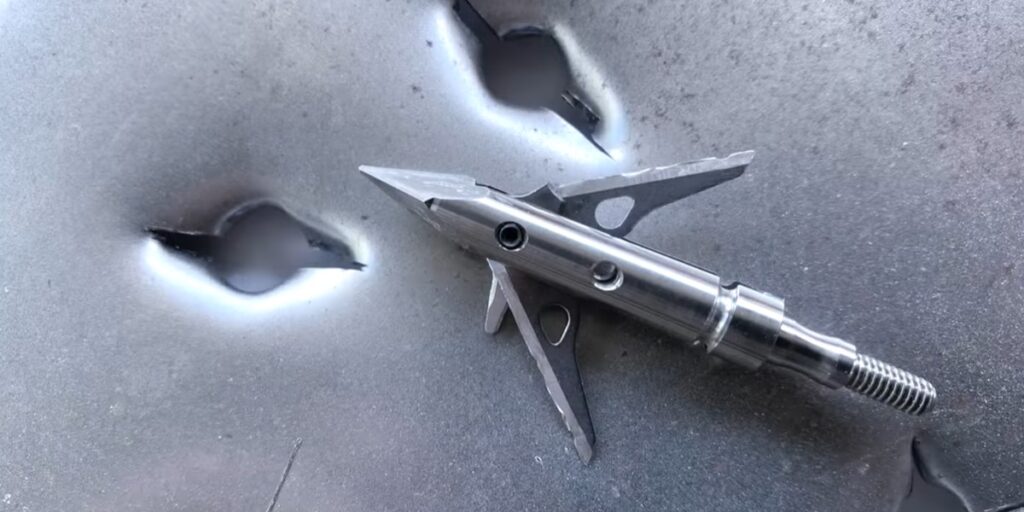
You can see that the 1.5-inch at the top, blew all the way through it. And you can see the tip of the 1.7-inch, 100-grain, sticking at the bottom.
Here are the heads after going through the initial two layers of MDF and then another layer of MDF and an angle, and then a layer of steel plate and then another MDF, half inch MDF.
All of them were half inch MDFs. And they both held up extremely well.
On the 1.5-inch, there was zero damage to the tip. The blades took very little damage, incurring only one nick. (The nick at the bottom is part of the design that holds the rubber bands in place.)
As for the 1.7-inch, they too held up really well, receiving small nicks both blades from the steel plate test.
Overall, the SEVR heads held up really well, including the blades, tips and ferrules.
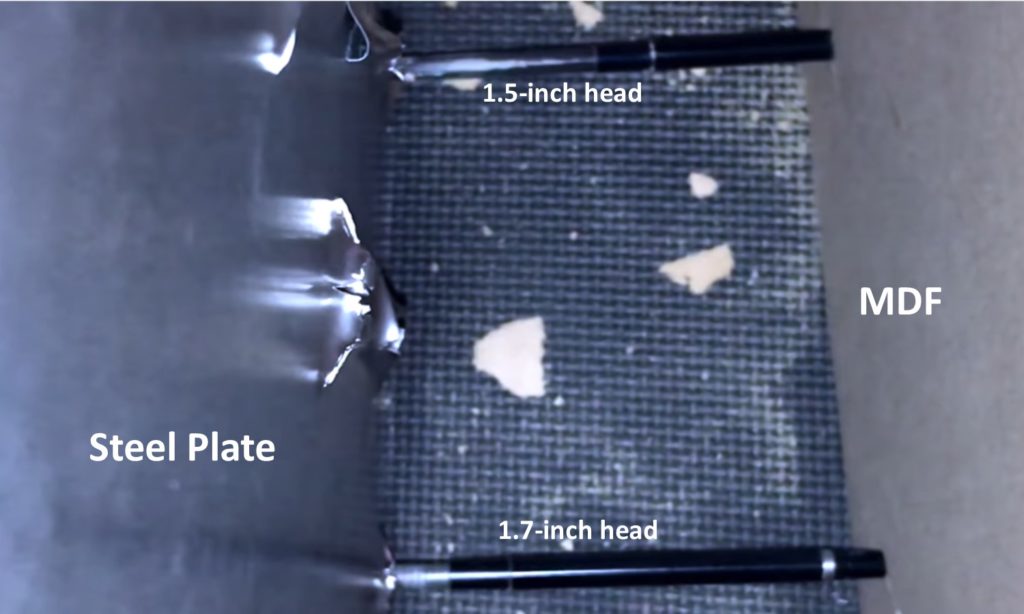
Both the 1.5 and the 1.7-inch SEVR heads penetrated the steel plate and the first layer of MDF.
SEVR 1.75 Review
The SEVR 1.75-inch expandable replaced the discontinued 1.7-inch version.
I like the 1.5 for really big animals. I like the 2.0 for a little bit smaller animals. My thoughts were that this one just might be the one to use for every animal.
Let’s take a closer look at it…
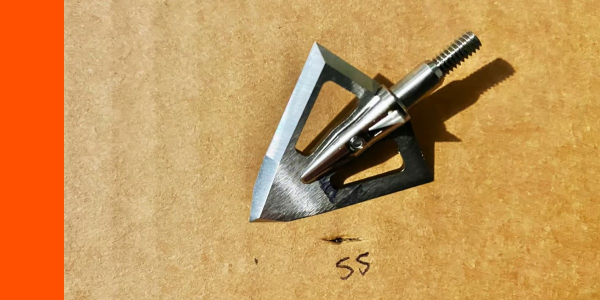
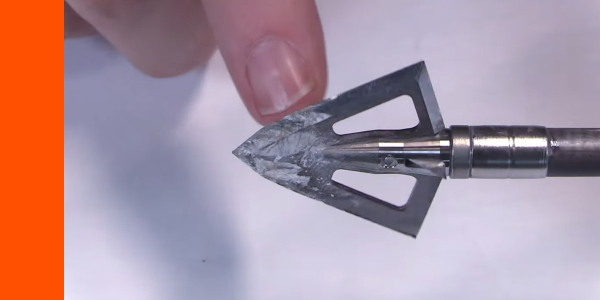
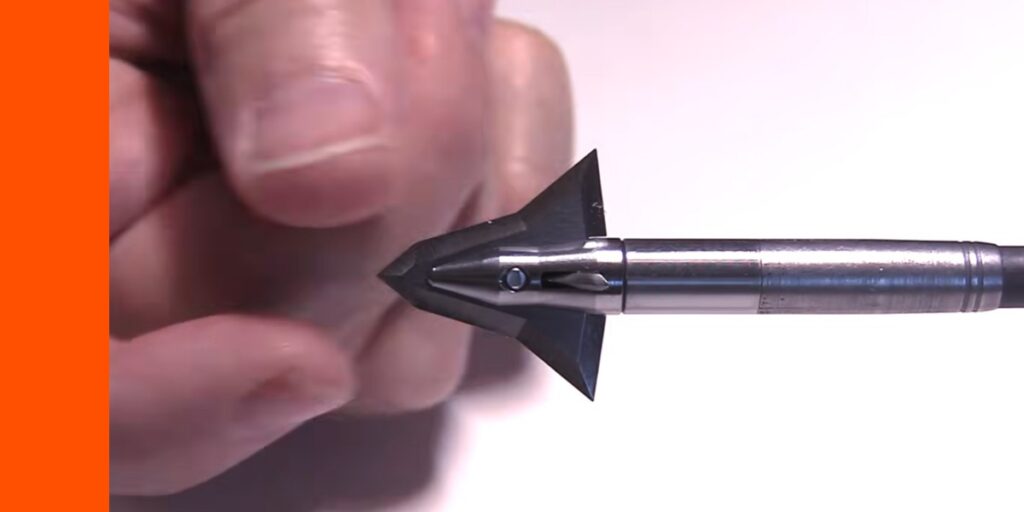
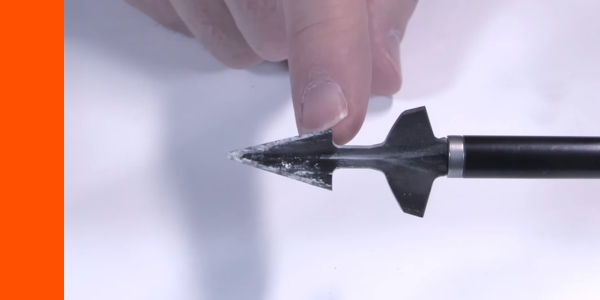
A closer look at the SEVR 1.75
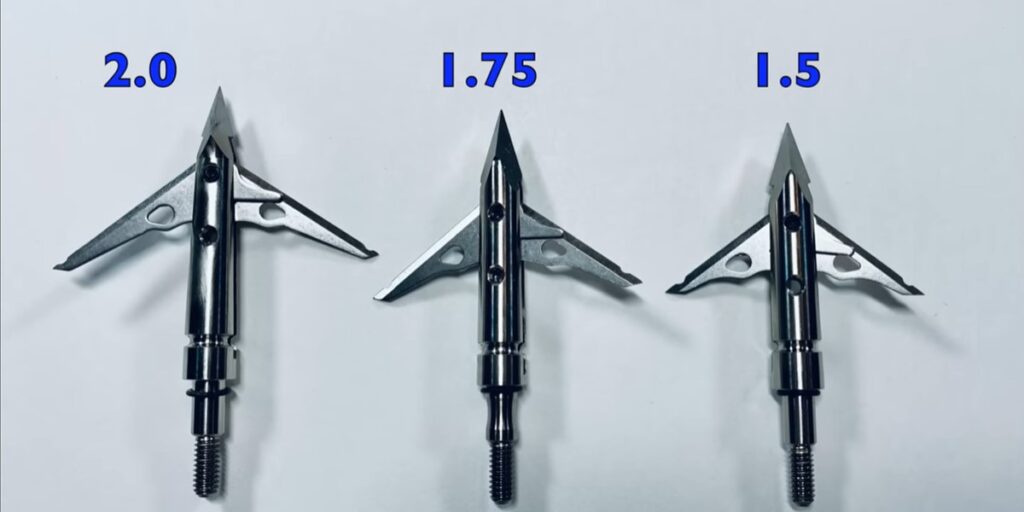
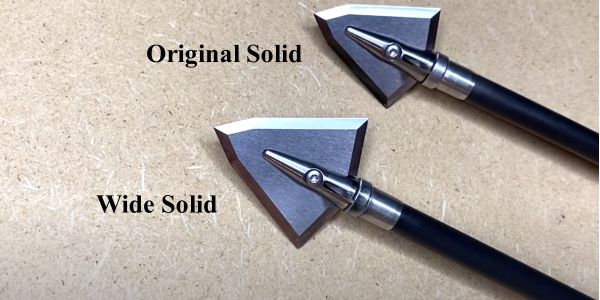
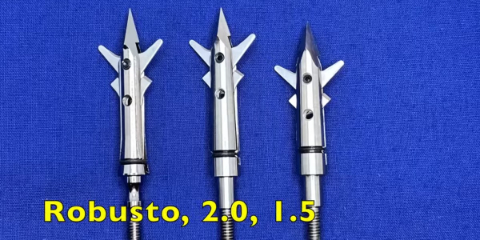
Here’s a good look at the 1.75 compared to the 1.5 and the 2.0 versions.
The body and tip of the 1.75, like the other versions, is made out of the single piece of grade 5 titanium and you notice the tip is a good stout chiseled tip. It has basically a third of an inch cut in one dimension, and then when fully open, it has 1-¾ inches of cut in that dimension. That’s why it’s called the 1.75.
The tip of the 1.75 functions like a bleeder. It opens up a cross cut to help you get a wider wound channel that is more difficult to close up.
I was really eager to put this head to the test and see how it measures up to the 2.0 and the 1.5 and just see its overall performance.
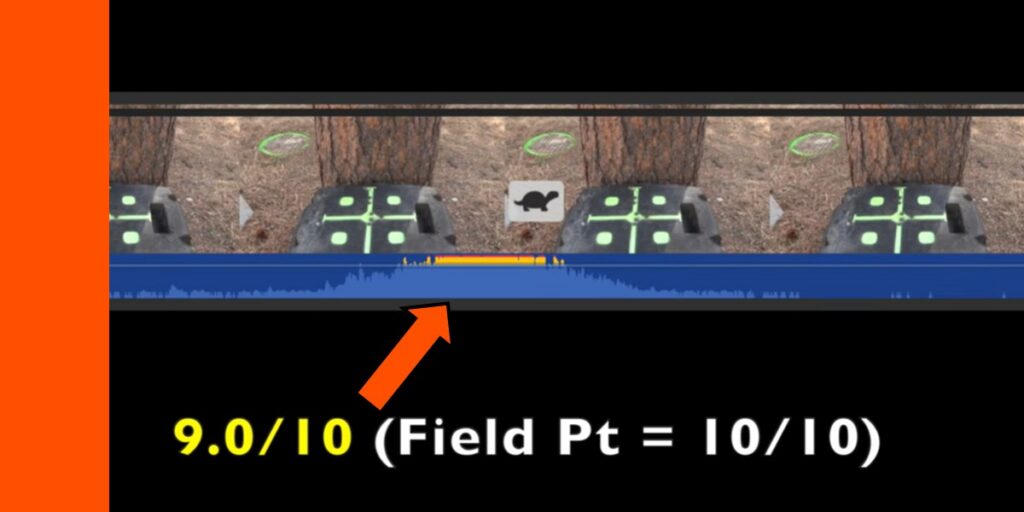
Flight Forgiveness Test of 1.75 (1 field pt then I broadhead @30 yds)
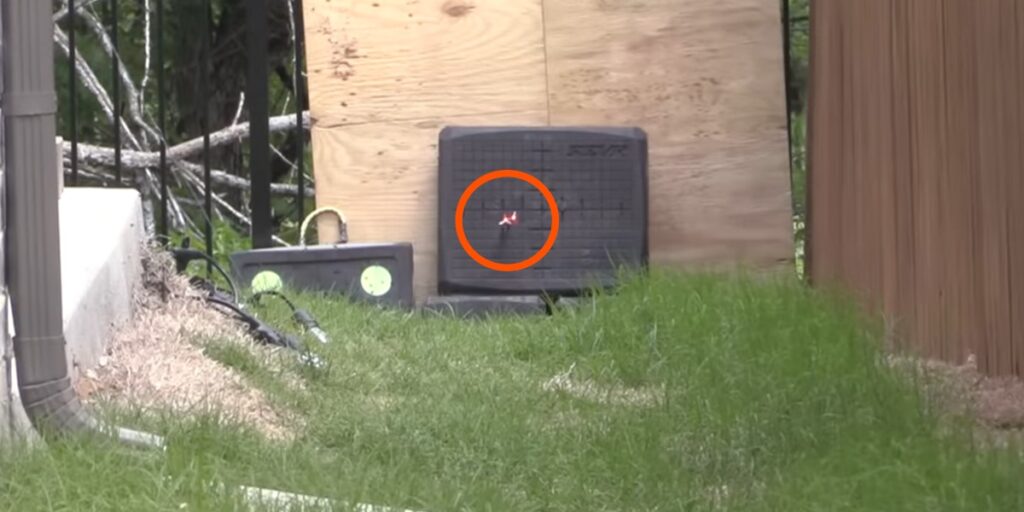
The 1.75 has incredibly forgiving flight!
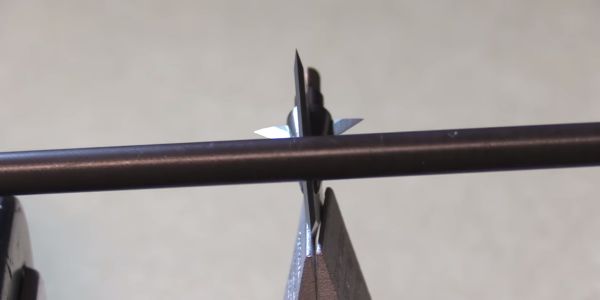
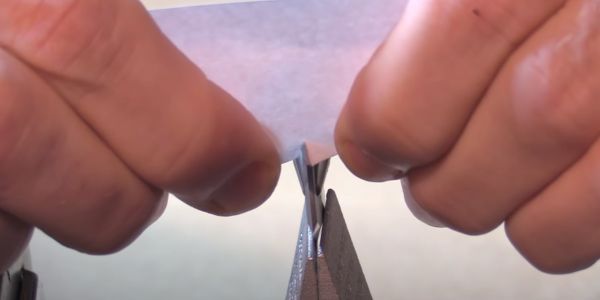
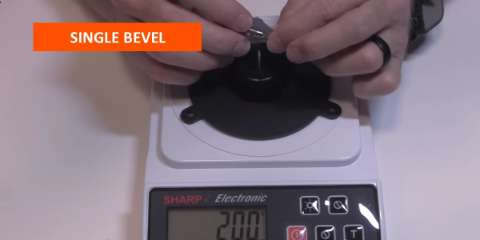
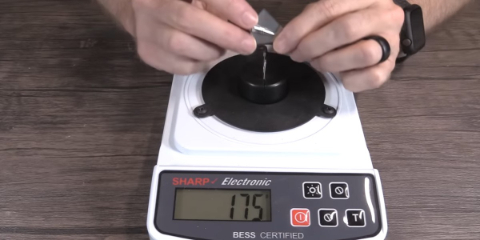
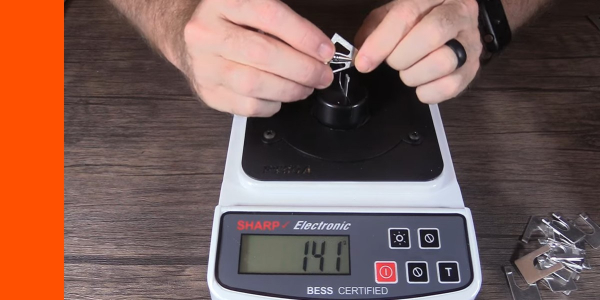
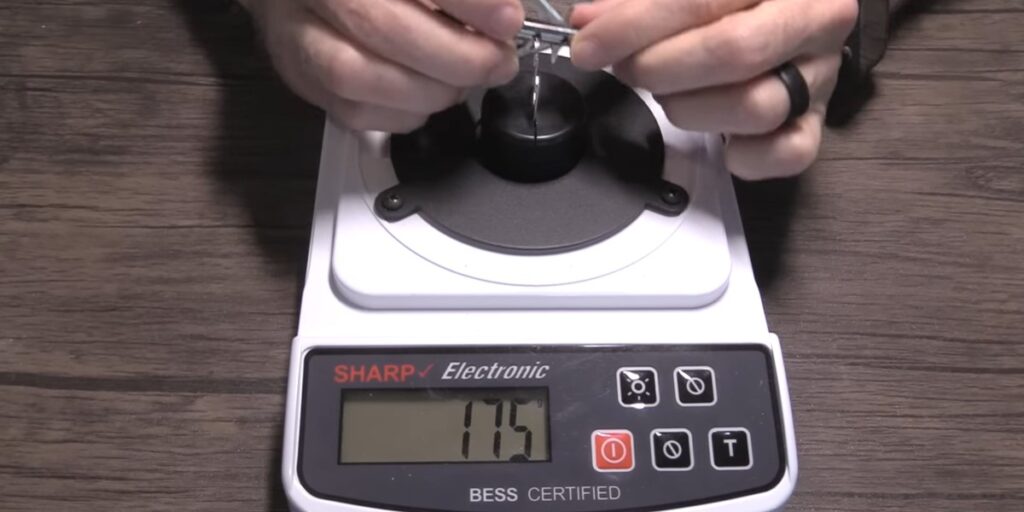
Initial Sharpness Test of Sevr 1.75
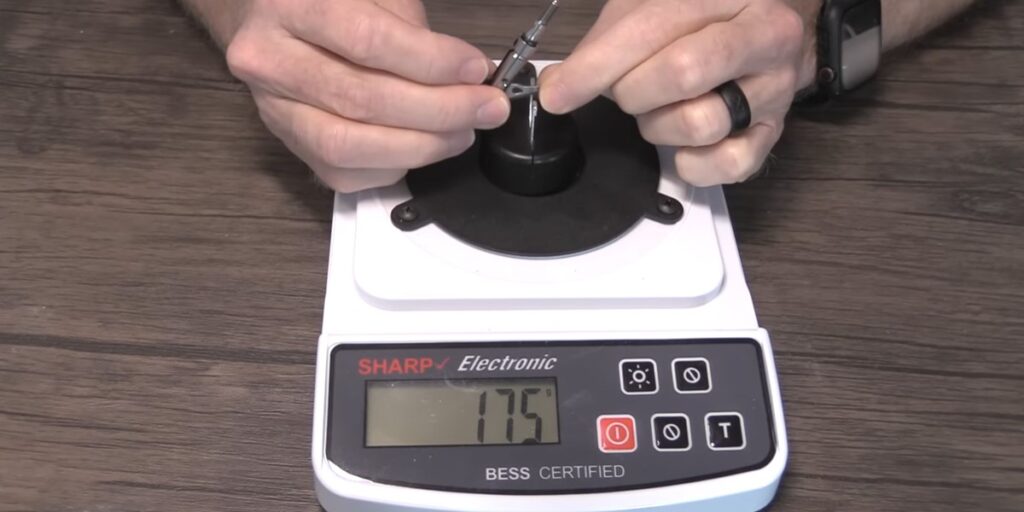
It took only 175 grams of force to cut through the wire, which is a 10 on a 10-point scale!

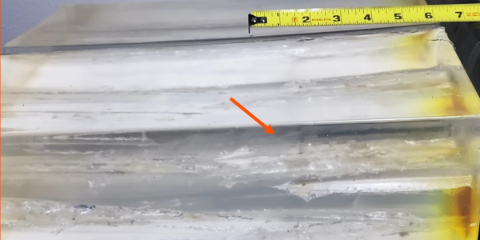
Penetration Test 1 (2/3″ rubber mat, 1/2″ MDF, FBI Gel)
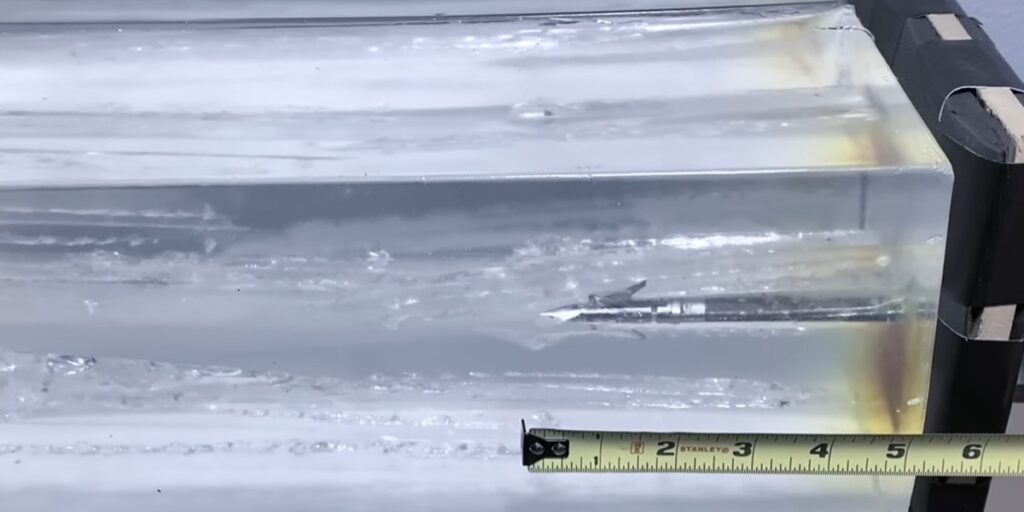
The 1.7 model penetrated 6-½ inches.
You can see that it opened to its full cutting diameter on impact, which is pretty rare for gator-style heads on this rubber foam mat, because it’s kind of soft. Usually, I have to test it on a cardboard box to see how well it opens, but this one opened very well.
Edge Retention Test (sharpness after Penetration Test 1)
It took no additional force to cut through the wire after Penetration Test I, which is a 10 on a 10-point scale for edge retention!
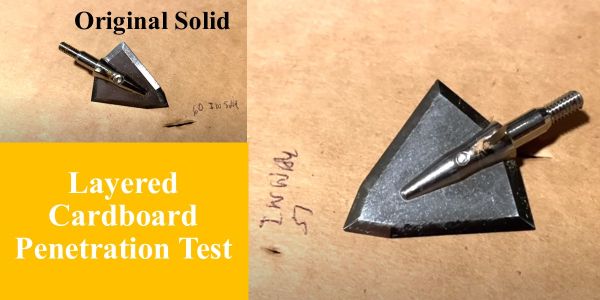
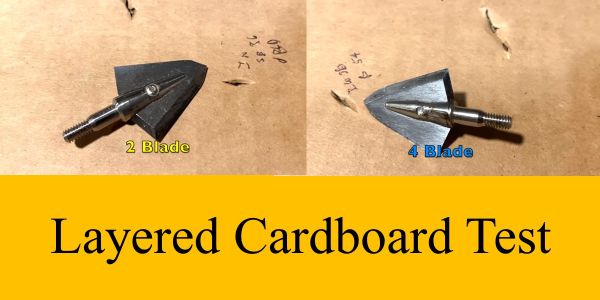
Penetration Test 2 (layered cardboard)
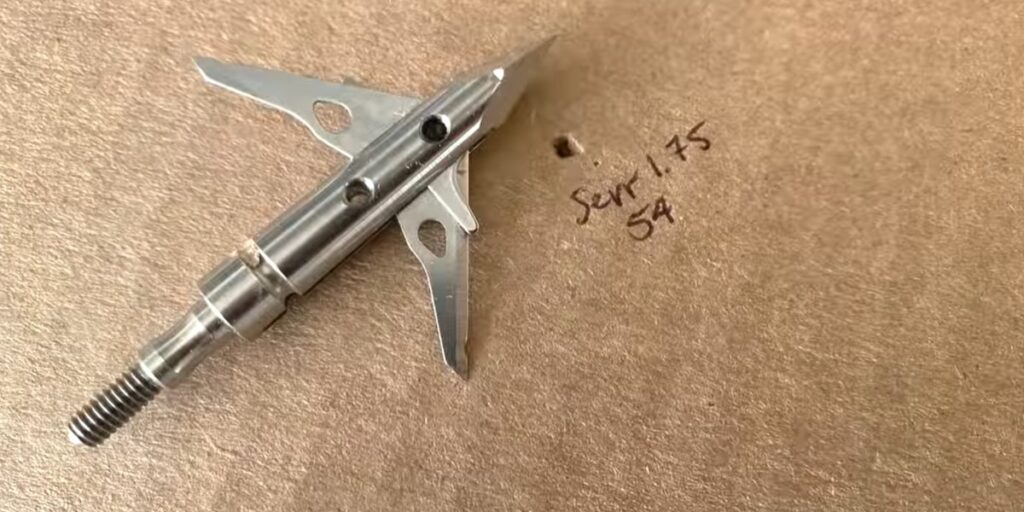
The 1.75 penetrated through 54 layers of cardboard. And,just like in Penetration Test 1, once the blades locked open, they stayed in that open position the entire way.
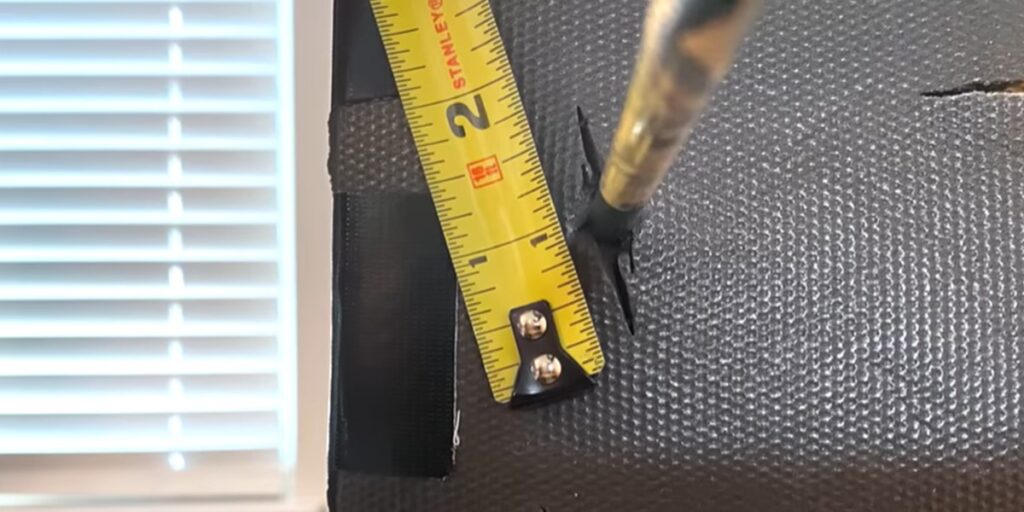
Angled Shot Test (1/4″ MDF/Carpet)
The angled MDF was no problem at all for the SEVR 1.75.
Durability Test (1/2″ MDF max 3 shots)

The 1.75 was in absolutely perfect condition after the 3 shots into the MDF.
Durability Test (22 gauge steel plate max 2 shots)
Here is the 1.75 after the second shot through the steel plate and you can see the blades experienced a bit of edge chatter and then the tip got a little bit blunted. And, then one of the little-bats sheared off on the second shot on the right side at the top. That’s the first time I’ve ever seen that happen to a SEVR head, but it was the second shot through the steel plate, and otherwise, it held together well.
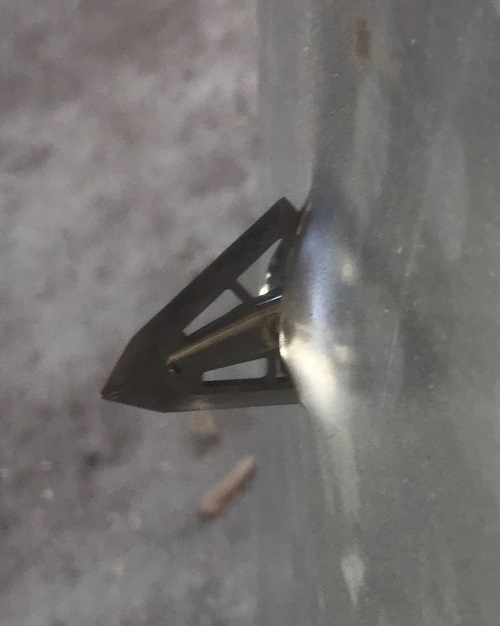
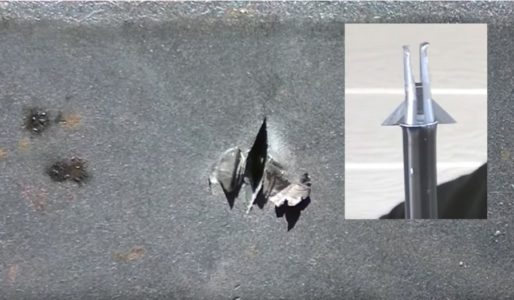
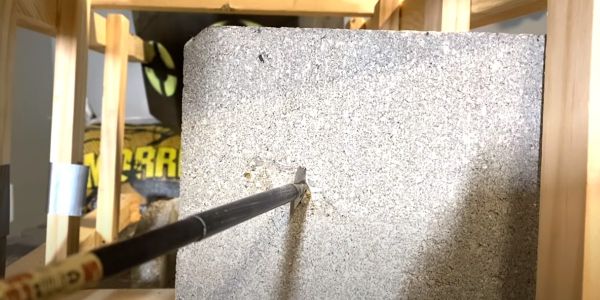
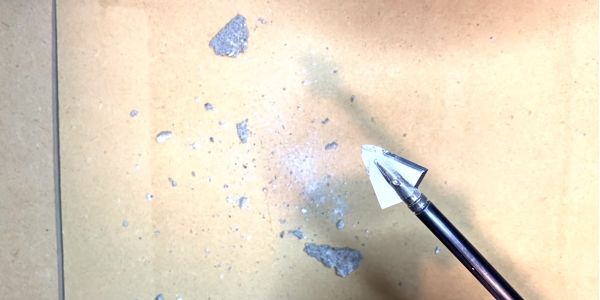
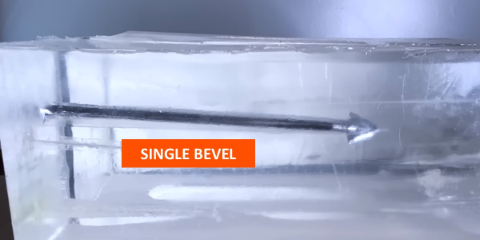
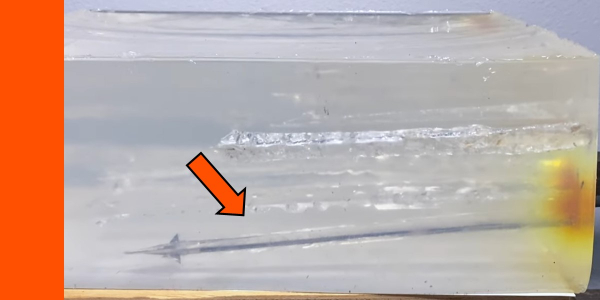
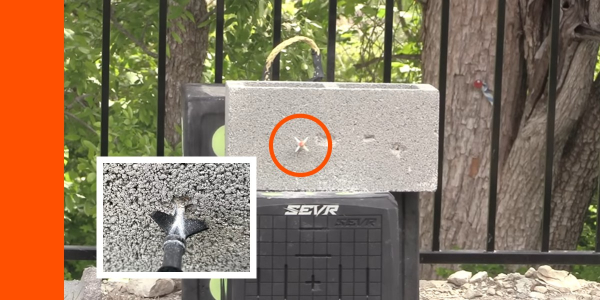
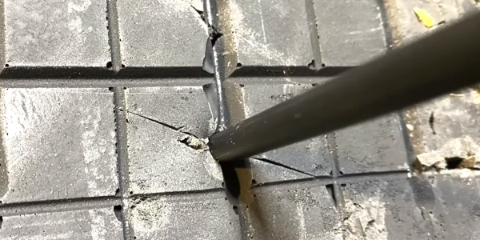
Concrete Test:
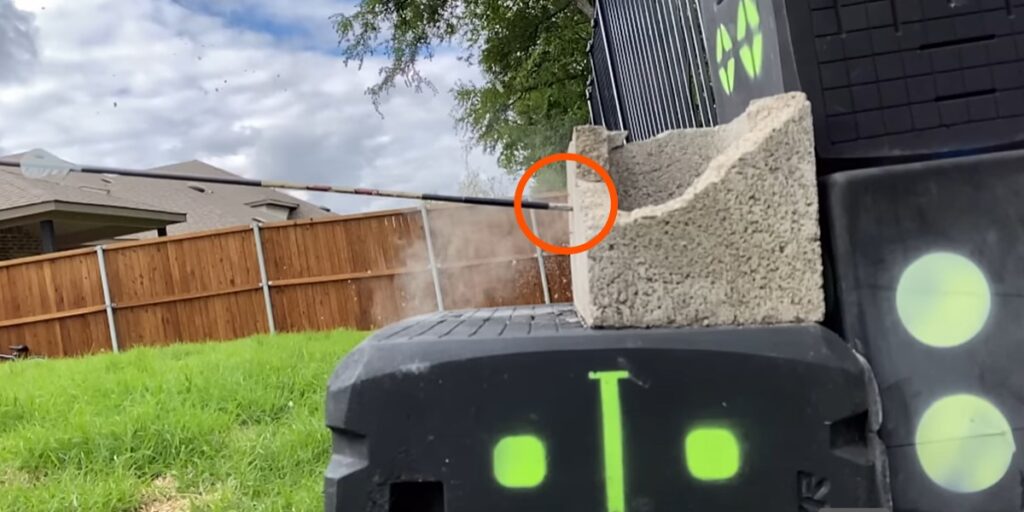
I shot the 1.75 into a concrete block…. and it stuck!
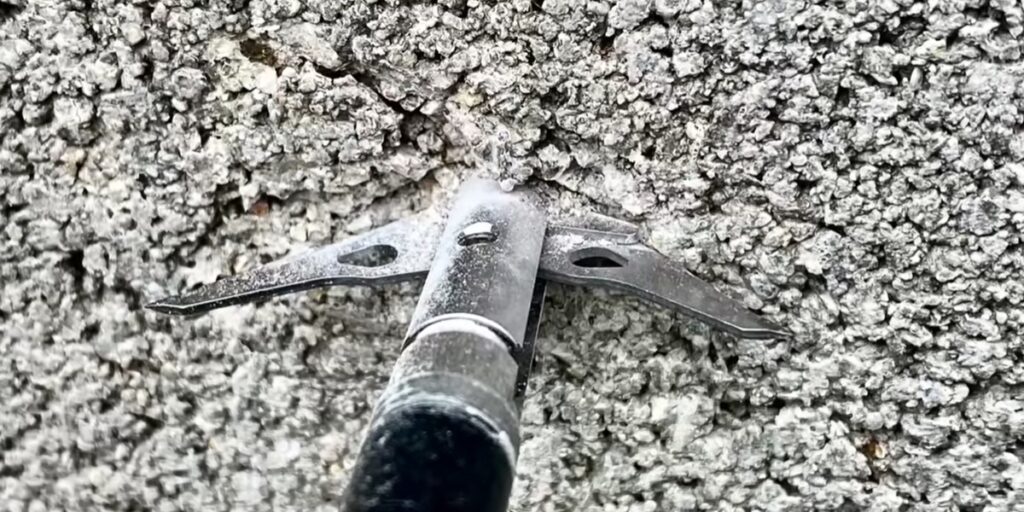
Check out how embedded the 1.75 is in the block!
Here’s a good look at the head after all the durability tests. It has gone through the MDF 3 times, the steel plate 2 times, and then it stuck really deeply into the concrete. And you can see the edge chatter that it incurred on the steel plate. And then, one of the little blades, as I noted earlier, broke off on the second shot into the steel plate. But, then it stuck really deeply into the concrete and even the blades hit the concrete a bit as you can see in that picture.
Even after embedding into the concrete, the 1.75 spun really well… Really impressive durability in this broadhead!
Final Thoughts and score on the SEVR 1.75 broadhead
So what do you think of the 1.75?
Man, it did really well. The blades were super sharp and held their edge incredibly well. And, of course, it had excellent flight. It’s simply one of the best flying broadheads out there.
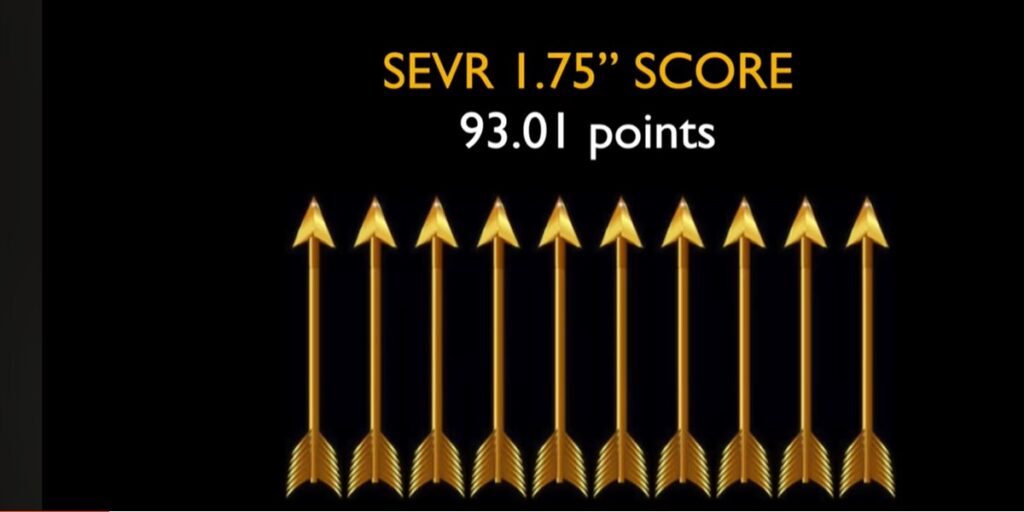
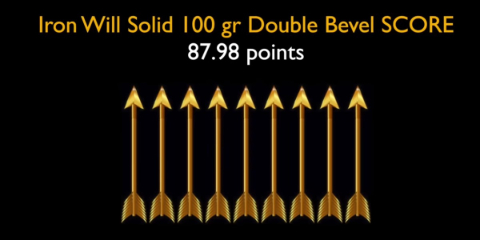
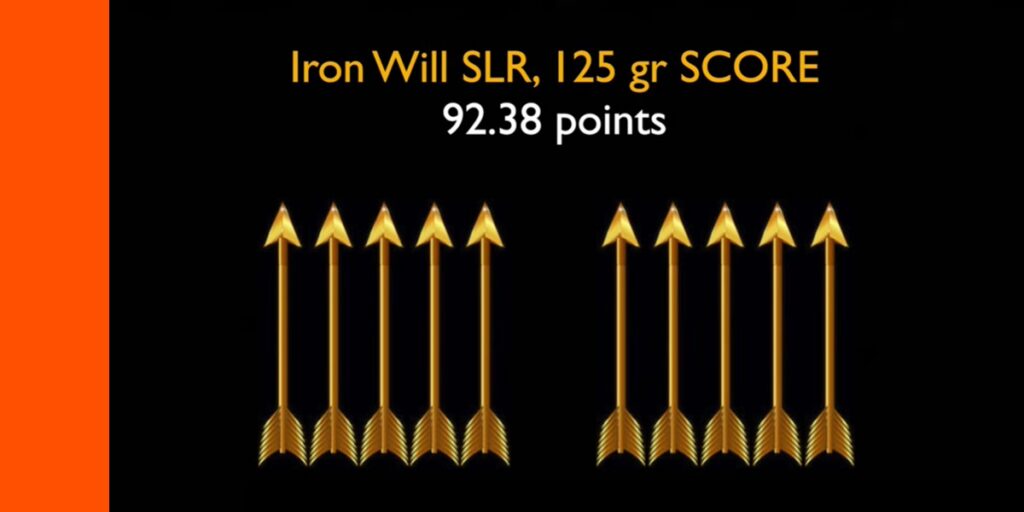
The SEVR 1.75 scored better than any head I’ve ever tested!
It has great durability.
And, this broadhead actually got the highest score of any broadhead I’ve ever tested to this point!
I think this is going to be in my quiver quite a bit in the days ahead.
BONUS: SEVR 2.0 Ti Broadheads Review
Below I’m going to show you the results of my testing of the SEVR Ti 2.0, but first, a little history behind this head…
How the Ti 2.0 came to be
SEVR originally came out with their first broadhead, called the 2.1, which was just known as the SEVR. It had a massive 2.1 cutting diameter, and some really cool features (blades pivoting around bone and a super low profile in flight, titanium ferrule, etc.)
There was a lot I liked about that head and I did some initial testing on it when it first came out.
The only drawback that I saw in that head was that it wasn’t the best at penetration. Now, with a full 2.1-inch cut, you don’t expect it to penetrate super well, but I thought it should penetrate a bit better than it did.
So since that time, SEVR came out with the 1.7 and the 1.5, which I’ve covered above. They shortened the cut a little bit in the 1.7, and 1.5 (1.7 inches and 1.5 inches instead of 2.1).
I’ve since come to love those heads. In fact, the 1.5 is one of my very favorite heads, period. It’s more durable than most fixed-blade heads and by far the most durable mechanical that I’ve ever tested. I’ve taken animals with it all over the world.
Well now, they’ve come out with another big cut model that is also supposed to maximize penetration. And that is this Ti, (Titanium) 2.0.
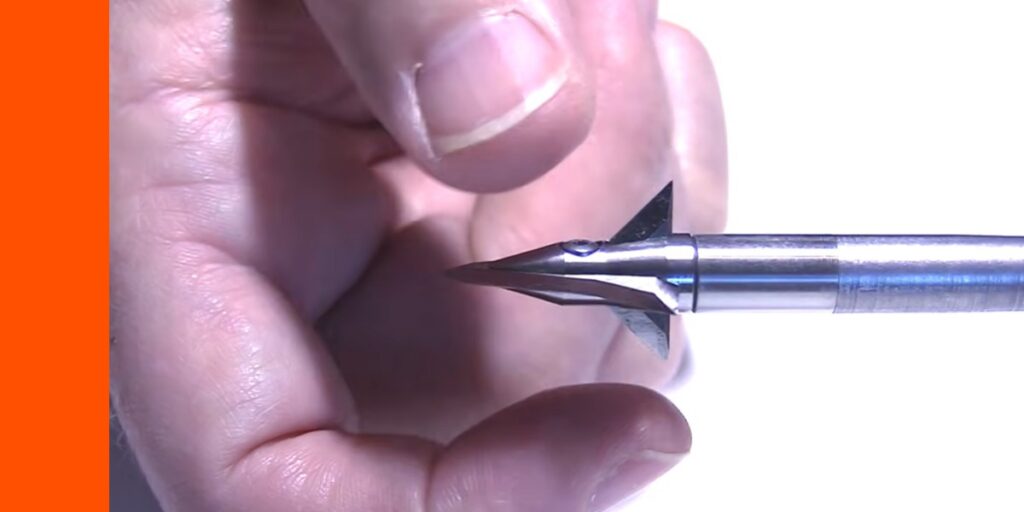
The SEVR Ti 2.0 compared to the old SEVR 2.1
I tested the SEVR Ti 2.0 for penetration, for edge sharpness and retention, and for durability.
I didn’t test the flight because I’ve already tested the flight of the SEVRs quite a bit and they fly exceptionally well. You can see the low profile. They just fly like a field point.
But I put it through all those other tests and I want to compare the 2.1 to the new 2.0 and see what the difference is in terms of penetration.
The SEVRs have a solid titanium ferrule that is grade 5 titanium and one piece all the way up, including the tip.
The blades are made out of a hardened 420 stainless steel at 0.032 inches thick. The blades are held in place by a little O-ring at the base that fits into that groove and when they’re shot and penetrate into the hide when they first made contact, the winged tips pushed the blades back and they deploy and lock into an open position, giving a full cutting diameter (in this case, 2.1 inches).
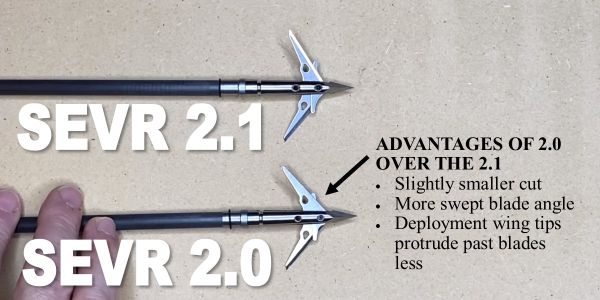
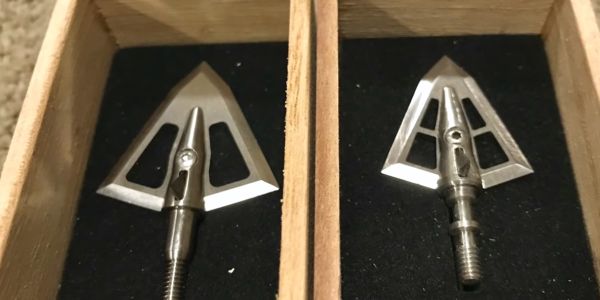
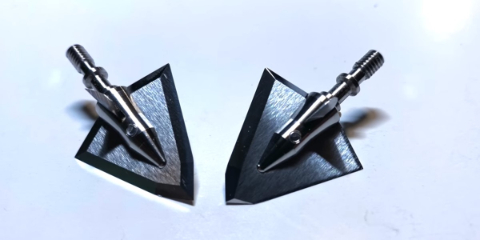
These two heads may look similar, but there are three main differences.
- The new Ti 2.0 has a slightly smaller cut, 2.0 inches versus 2.1 on the original SEVR.
- The blades of the Ti 2.0 have a more swept angle (less straightness) to them, so they’re going to get easier penetration.
- The little winged tips that caused the deployment of the 2.1, they protrude a little bit farther beyond the blade than they do on the 2.0. On the 2.0, they just slightly protrude, and that increases penetration.
So, those three changes and modifications from the 2.1 to the 2.0 are supposed to result in up to 15% deeper penetration by and large. So I was eager that to the test.
SEVR Ti 2.0 sharpness test
The SEVR Ti 2.0 was still able to cut paper cuts paper after five strokes of the shaft of a carbon arrow.
The Ti 2.0 was able to cut paper after 5 strokes of the arrow.

Ballistic Gel Penetration test comparison
I shot both the 2.1 and the Ti 2.0 into ballistic gel that was fronted by a rubber mat and 1/2″ MDF.
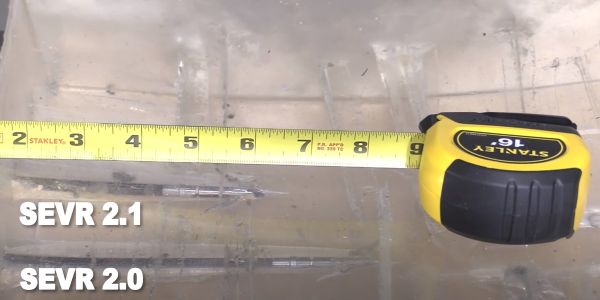
The 2.1 penetrated 6 and 3/4 inches and the new SEVR Ti 2.0 penetrated 7 and 3/4 inches.
Ti 2.0 MDF durability test
I shot the Ti 2.0 into MDF to see how it would hold up. The results were surprising.
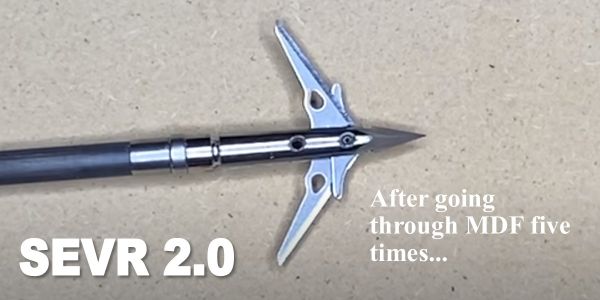
Here’s the head after going through the MDF five times. And as you can see, it looks brand new.
Then, I decided to see how it would handle a .22 gauge steel plate.

Here you can see the SEVR after going through the steel plate twice and after having gone through the MDF. You can see the blades got pretty bent up and yet, it held together. Pretty impressive.
One last thing I think is worth noting on the Ti 2.0… If you already have the old 2.1 heads, you can just order the blades for the 2.0 and swap them out. These can be used with the ferrule of the 2.1. So, it’s nice that you can do that. If you want to pick up some penetration from the 2.1s that you already have, just get the new blades and put them in there.
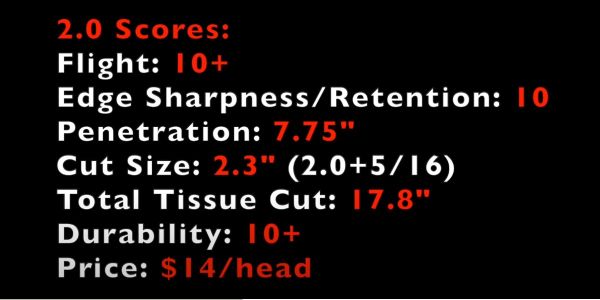
Final scorecard for the SEVR Ti 2.0
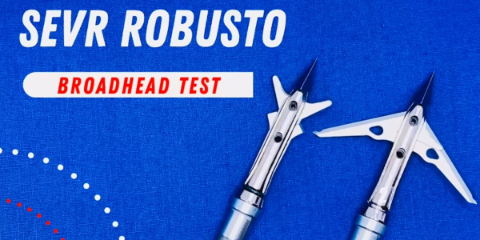
Sevr Robusto Broadhead Review
The Robusto is marketed as a crossbow broadhead, but it can easily and very effectively be to used through a vertical bow as well.
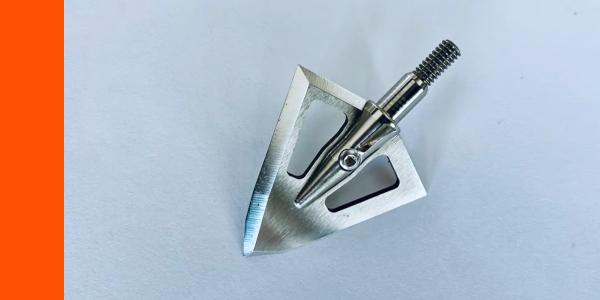
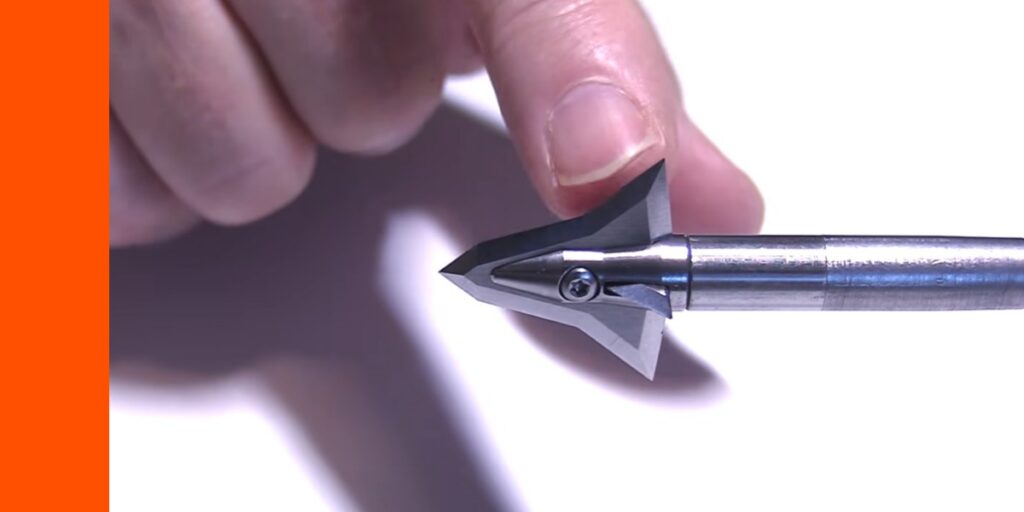
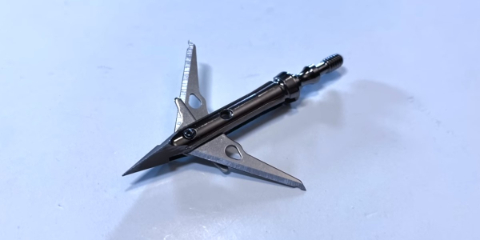
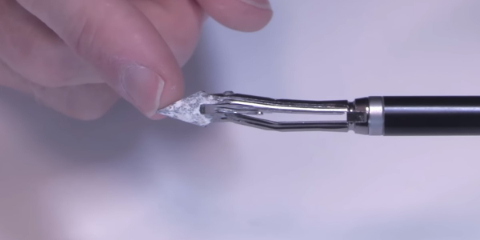
A Closeup Look At The SEVR Robusto
So, let’s check out this Robusto broadhead!
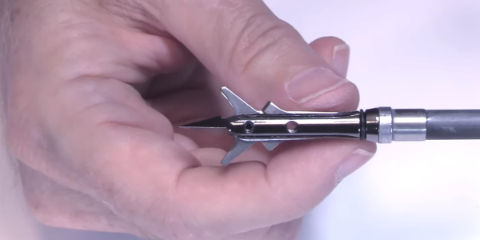
The Robusto has the same blade deployment system as the other Sevr expandables, so it will work great out of vertical bows. It’s just 150 grains, so you have to account for that extra 25 grains if you’re used to a 125-grain heads or extra 50 grains if you use 100-grain heads. But, that also increases your FOC a little bit. It increases your momentum a little bit as well. So, I like that extra bit of weight in the 150-grain.

The blades are held in place really strongly by the silicon O-ring. It’s a really thin ring, but it’s silicon, so it doesn’t dry rod or freeze. The overall profile of the Robusto is super small in the closed position. That’s what makes these one of the very best flying heads. This, just like all of the SEVRs, should fly incredibly well.
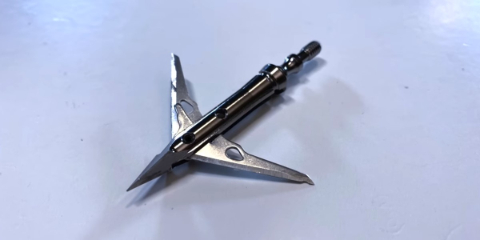
The Robusto is all-stainless steel, whereas in the 2.0 and the 1.5, the ferrule is made out of titanium. Here, it’s all stainless steel.

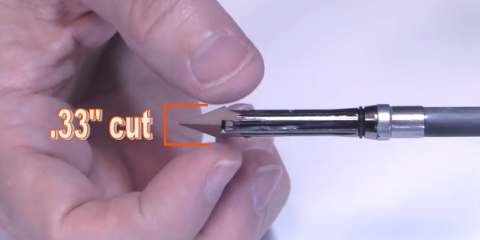
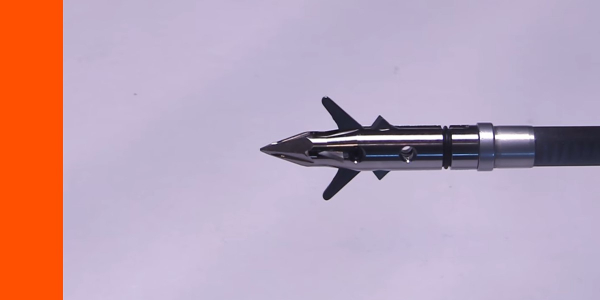
The tip, by my measurements, has a 0.33″ cut when closed. And, when fully deployed, the Robusto has 2″ of cut the other way. So overall, 2.33″, which is a pretty nice cut.
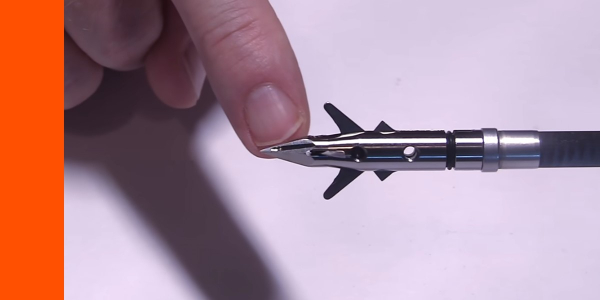
Now, you notice there is this little hole for a set screw right here. It’s in each individual pack of broadheads. And, you just screw it in. This keeps the blades in the closed position. So, you can practice with them and shoot the same broadhead that you’re going to be hunting with, but in the closed position, so you won’t dull the blades, since they won’t contact the target at all. You just have to remember to take out that set screw before you go hunting, or you’re going to be really disappointed when the blades would not open!
Also, when you’re practicing using the set screw, you don’t need to use the O-ring!
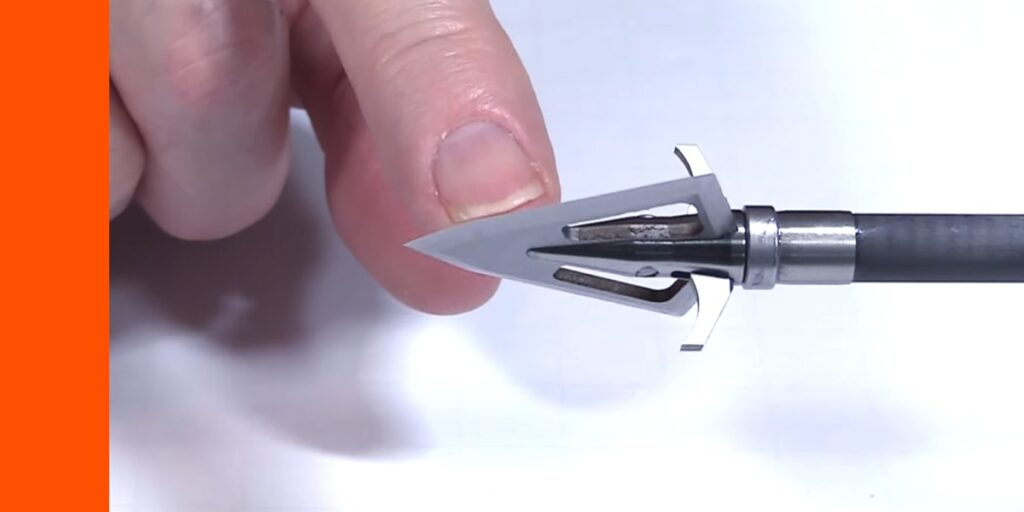
So, the way the Robusto works, is that the small deployment arms, are blunt and angled forward. As they press on a medium like animal hide, they push and indent the hide just a little bit and then the blades spring open and it gets a bit bigger cut than just the advertised 2″. That’s the theory of it.
The pressure causes that O-ring to expand and it slides back or cuts off, and then the blades come into their open position and they lock in the open position. And that’s one of the things that’s really unique about the SEVR is that blades lock. They have a little mechanism in the back where the two blades butt up against each other and they come into the lock position.
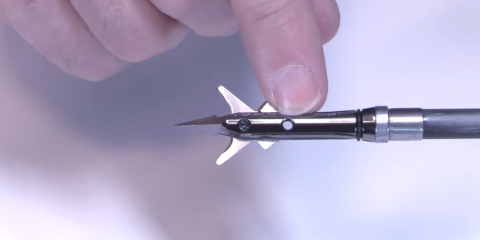
The Robusto in the fully open and locked position.
Even if there’s not pressure pushing the blades, they’re still going to stay in that open position. Whereas, most Gator Blades, if there’s not pressure, they’re just going to collapse. They’re just going to go back down. These would not due to the locking mechanism.
Another thing this does is it allows the blades to pivot, and that’s kind of SEVR’s claim to fame is to cut straight through. A lot of times, what happens with a big 2-blade mechanical, is that as it penetrates, if one of the blades hits a heavy bone, which causes a deflection, drastically changing the arrow’s direction.
And, you’re thinking, “I made a perfect shot,” but then the arrow changes direction within the animal because of that deflection, and you can end up losing the animal.
The pivot allows it to hit a bone and then the blade just folds back and it stays on course.
Now, you’re not going to get as much of a cut if that blade goes back. However, you’re going to get more than just that one blade because the blade is going to stick out. So, you’re not going to get the whole cut, but you’re still going to get quite a bit.
Now, one of the drawbacks of this can be that if it hits a bone one side right before it exits, then you might get an exit with just this cutting diameter. Now, you are still getting the 0.33″ one way, and you’re getting more than 1″ the other way, so probably about 1-1-4/” overall, which would be a smaller exit hole.
But, unless that happens, it’s going to return right back into its fully open position. But, the tradeoff is that you aren’t absorbing a lot of energy if one blade is hit, but then you might get a smaller exit.
I’ve taken many animals with the Sevr heads I’ve seen that happened one time where I had like an inch and a quarter exit hole, but it really was inconsequential as far as harvesting the animal.
The blades of the Robusto are 0.032″ thick, so pretty average thickness to the blades. But again, because of that design feature, they’ve proven over the years pretty durable.
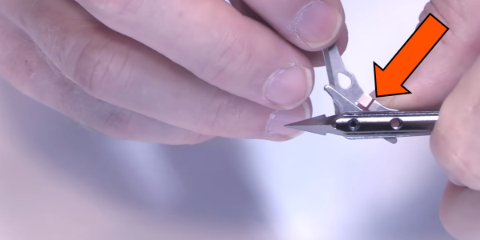
You’ll notice also there’s a little divot here in the blades. That’s just where the O-ring goes. It’s not like there’s a chip in the blade. That’s not because it contacted the ferrule or anything. That’s just where the O-ring goes so it doesn’t get cut.
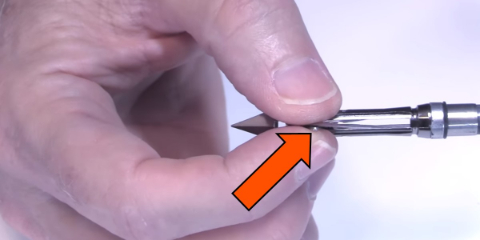
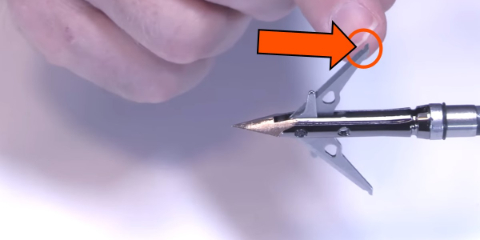
To get the blades closed, I just like to put my finger over it. I’m not even really touching the blade. And then with my thumb nail, I push up on one of these little ends of the blades and then the other one just slides under it. It comes with a little plastic tool you can do this with, but it’s just as easy to do it with your nail like that. And then there it is in the closed position. When it opens, it pops. You can hear a little snap.
For the Robusto tests, I used my Bowtech CP28 for most of the shots. I used the SR6 for one of them. And, I used Bishop FOC King Arrows for most of the shooting, and the Bishop FAD Eliminators for the really hard impact shots because they are just so incredibly durable.
Robusto Testing
I was eager to put the Robusto to the test! Let’s see how it performed!
Flight Forgiveness
I shot one field point and one Robusto at 30 yards.
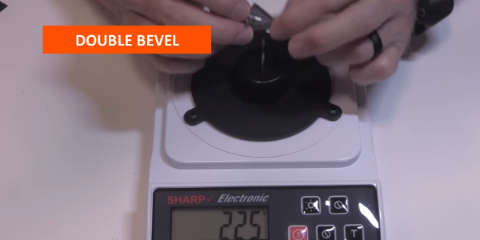
Initial Sharpness

The initial sharpness of the Robusto registered at 200.
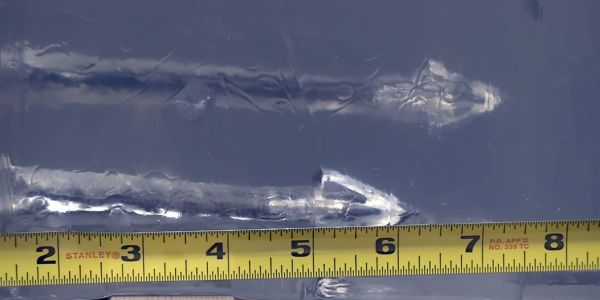
Penetration Test 1 (2/3″ rubber mat, 1/2″ MDF, FBI Gel):
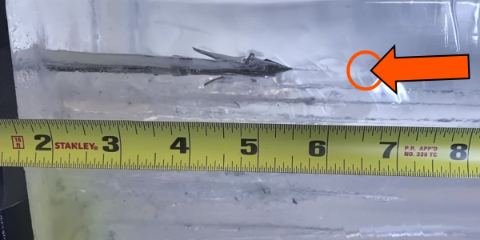
The Robusto penetrated 6-1/2″. I know it doesn’t look like that, but if you look closely, you can see this thing that happens with the gel. There is a cut that goes in front of the tip that extends about an inch-and-a-half beyond where the final resting place of the head is. And with gel, it shoots forward and then kind of compresses back sometimes. And that’s what happens. The blades opened very well and stayed opened. They’re at an angle and so it looks like they are pretty closed, but they’re actually their full cutting position.
Edge Retention Test (sharpness after Penetration Test 1): 225
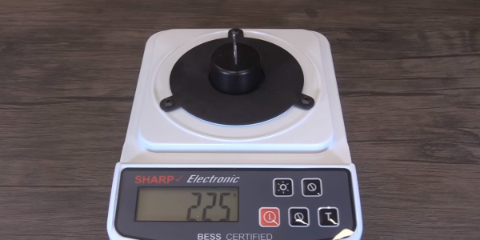
The Robusto registered 225 after the MDF/ballistic gel penetration test.
Penetration Test 2 (layered cardboard):
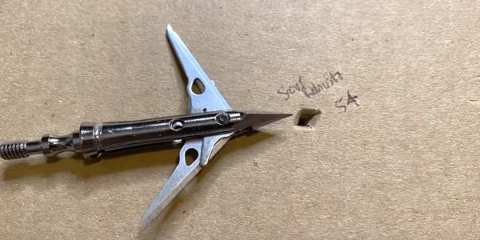
The Robusto penetrated through 54 layers of cardboard.
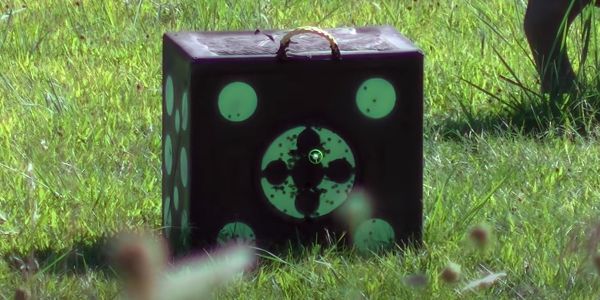
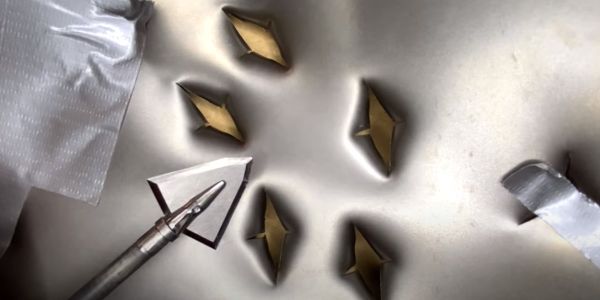
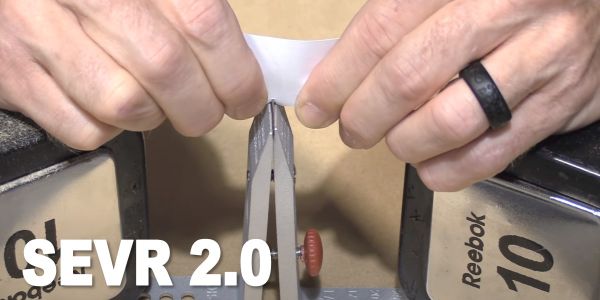
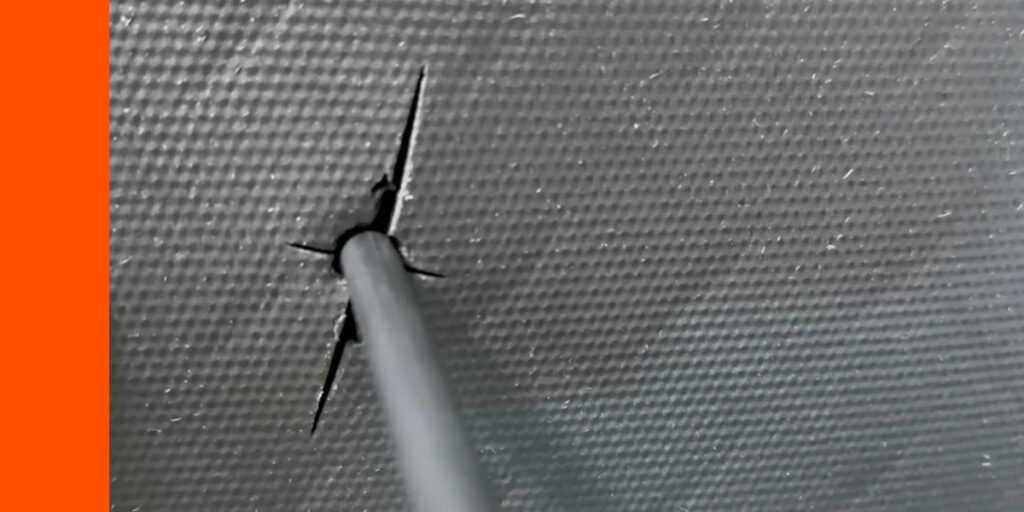
Opening Test (Leather stretched over box):
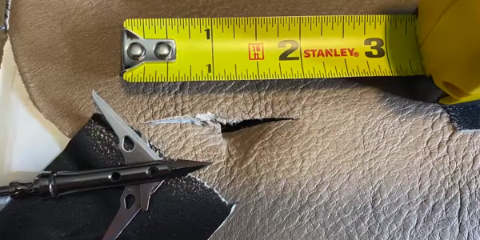
You can see that the blades opened up almost to their full cutting diameter of 2″ on impact.
And, the blades locked open as you can see the impact into the target right behind the cardboard box here.
Durability Test (1/2″ MDF max 3 shots):
The Robusto was in perfect condition after going through the MDF 3 times.
Durability (22 gauge steel plate max 2 shots):

Here are the holes the Robusto made in the steel plate.
And it’s still in really good condition after going through the steel plate 2 times. And then here are the holes in the steel plate as well.
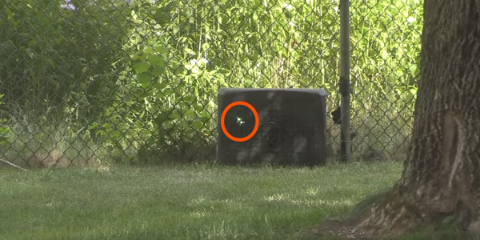
Durability Test (Concrete I Shot):
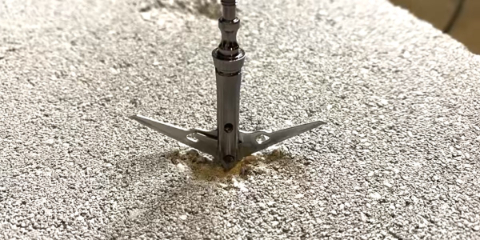
The Robusto stuck in the concrete block!
So here’s the Robusto after all the durability tests. It went through the MDF and the steel plate, and held together very well through all of those. The blades are in really excellent shape. It actually stuck in the concrete, which was really impressive. But, you see that it did get a bend to it. It looks kind of like a Concord jet. The tip is actually really pointy. It got a tiny bit of a curl to it, but stayed together really well. Obviously, it’s not reusable with that kind of a bend, but it held together relatively well considering that it’s about 750 grains being shot out of a 72-pound bow at 5 yards into the cinder block. So, for that, to hold together, stick in the cinder block and to only have that kind of damage is pretty impressive durability, especially for a mechanical.
Final Thoughts On The SEVR Robusto
So what do you think of the Robusto?
Man, I tell you, it’s another winner of a broadhead by SEVR. I love their 1.5. I love the 2.0. And I like the all-steel Robusto as well. I like the slick design to it, and that tip penetrates just a little bit better. I like that it’s all steel. You get a little bit of extra FOC and momentum by being 150 grains.
I was a little surprised that it bent and buckled a bit when it stuck in the concrete. But, a lot of fixed blades can’t do that. It did hold together but it’s the first time that I’ve shot any SEVR in the concrete and had it experience a bend like that.
So, I don’t know if it just hit an extra hard part in the concrete or what, but overall, the durability was just incredible and its performance was very good.
It actually got an even higher score than the SEVR 2.0. The 2.0 had gotten the highest score of any broadhead mechanical or fixed that I had tested up to this point. And now, the Robusto just replaced that as the highest score.
Things I Wish Were Different About The Robusto
There are a few things I wish were different with the SEVR Robusto, but the main thing is I wish the deploying arms didn’t cover up some of the blade.
You leave it open and you go, “Hey, how come these blades or these little deploying arms are sticking out like that?” People ask me that question all the time and yet at the same time, I would think that they would impede the penetration and yet, they don’t. It still penetrates quite well.
Everything in broadhead is a tradeoff. And, the benefit of having that mechanism that causes the blades to deploy properly and interlock, is the interlocking, pivoting, and strong, shock-absorbing nature of it. The drawback is it covers up some of the blades and yet, in terms of penetration, total cut size, blood-letting, and so forth, it really hasn’t been proven to be any kind of a problem.
I love this Robusto head. And, again, props to SEVR on another great broadhead!
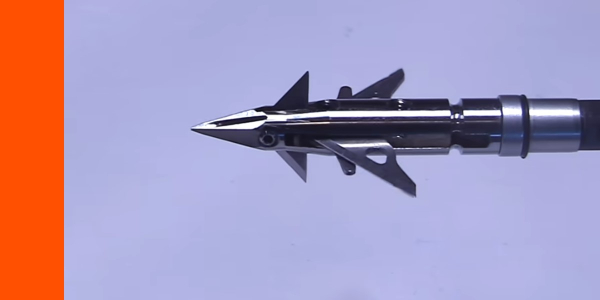
Sevr 1.5 Hybrid Review

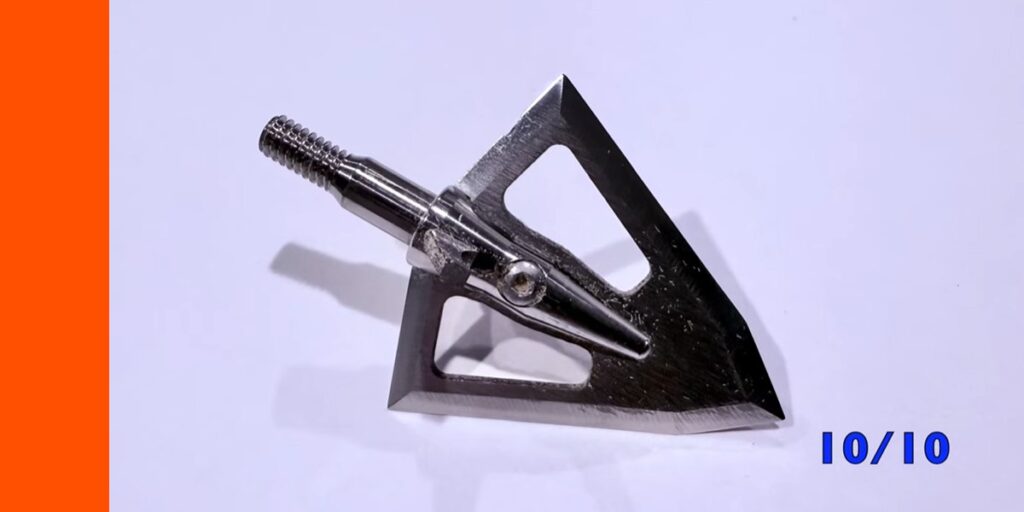
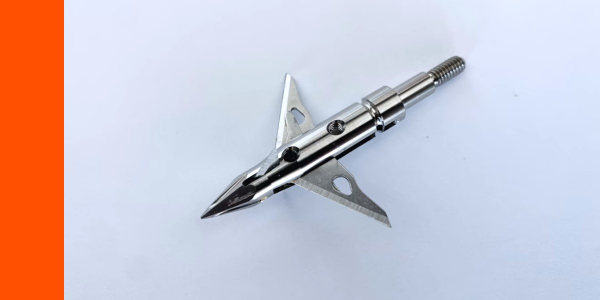
The 1.5 Hybrid has an extra little cross blade to it and I was really excited to test it and see how it performed…
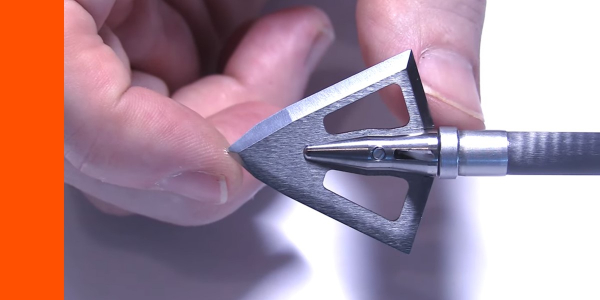
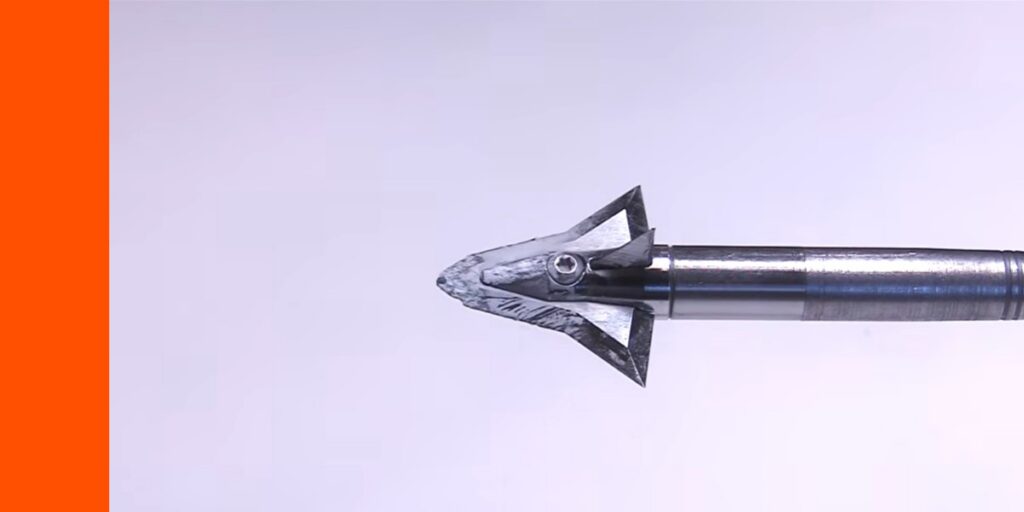
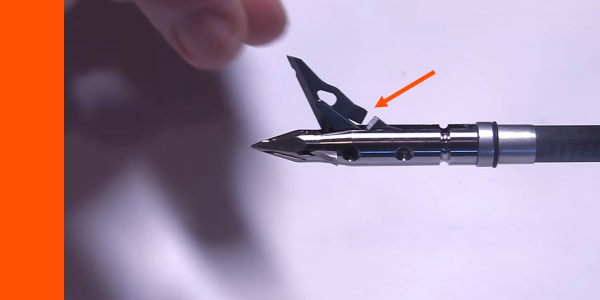
Here’s a good look at the 1.5 Hybrid. And, like every Sevr, really tight specifications. It spins extremely well. Same materials. You’ve got titanium ferrule and then you’ve got stainless steel blades.
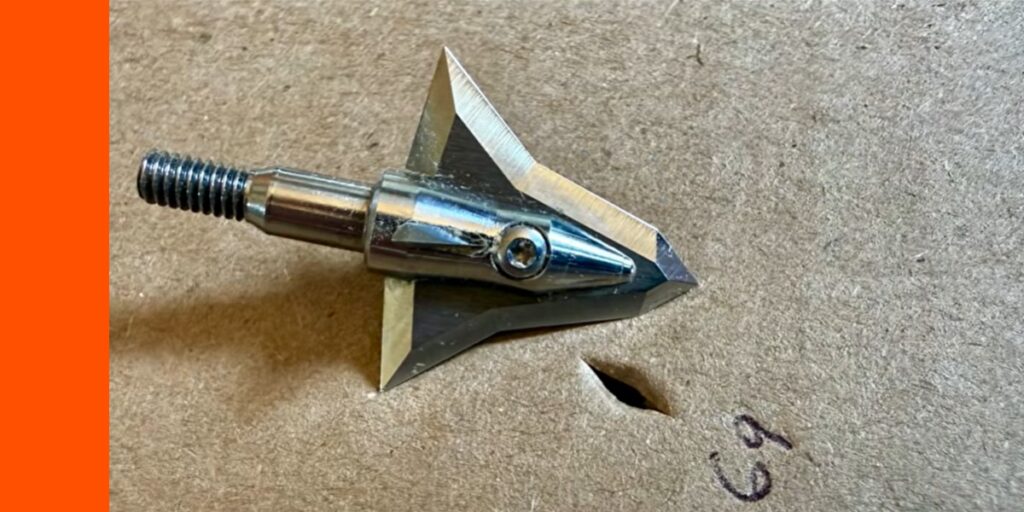
But let’s start at the tip and go through some of the modifications and upgrades that have been made in this new hybrid.
First of all, you see the tip here is a bit different. It has got 6 edges to it as opposed to 4 in the previous models. And then it has this extra groove here that probably is just more for aesthetics more than anything else and it does look really cool.
From what I had heard, this chiseled tip is just as good at busting bone and staying durable but I was going to have to put that to the test.

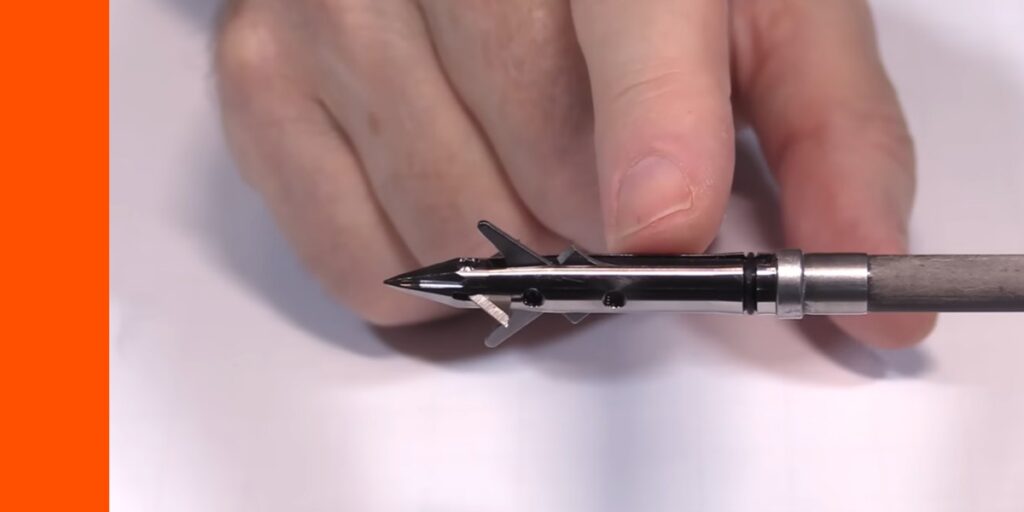
You can see the bleeder blade here. And the bleeder has a cutting diameter of 0.7″ and the blade itself is 0.039″ as opposed to the main blade at 0.032″. So, they beefed it up just a little bit and added this 7/10 of an inch so the total cut on this 1.5 is now 2.2″, 1.5″ in diameter and then the extra 7/10 of an inch there. So that really is a game-changer. It adds quite a bit of cut in the same overall package.

By my measurements, the 1.5 Hybrid is slightly shorter than the 1.5 but just a little bit. They’re basically the same.
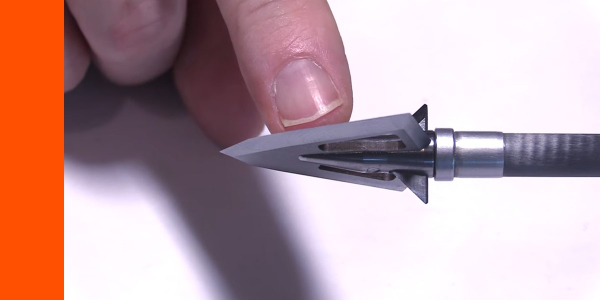
Now, another interesting thing is the bleeder blade, which has a pin like a screw that holds it in place. It’s not really load-bearing, which is nice. A lot of times when I test load-bearing pins, they just shear off. The load of this blade on impact is being supported by the ferrule itself. It’s resting on the ferrule, so that’s where the impact is going to be absorbed, not just by that pin.
The cutting diameter of the Sevr 1.5 Hybrid is basically the same as the diameter of the deployment arms, and they’re in the same basic area. Sevr says that the extra bleeder does not disrupt the flight at all because the turbulence of these little deployment arms in flight is already being disrupted by these deployment arms. So apparently, it’s supposed to fly just like the Sevr 1.5.I looked forward to testing that.
The Sevr 1.5 Hybrid is not supposed to have any rattle. They listened to some of the complaints of consumers that had experienced some rattle in the 1.5. But, they’ve modified an internal washer to eliminate any rattle.
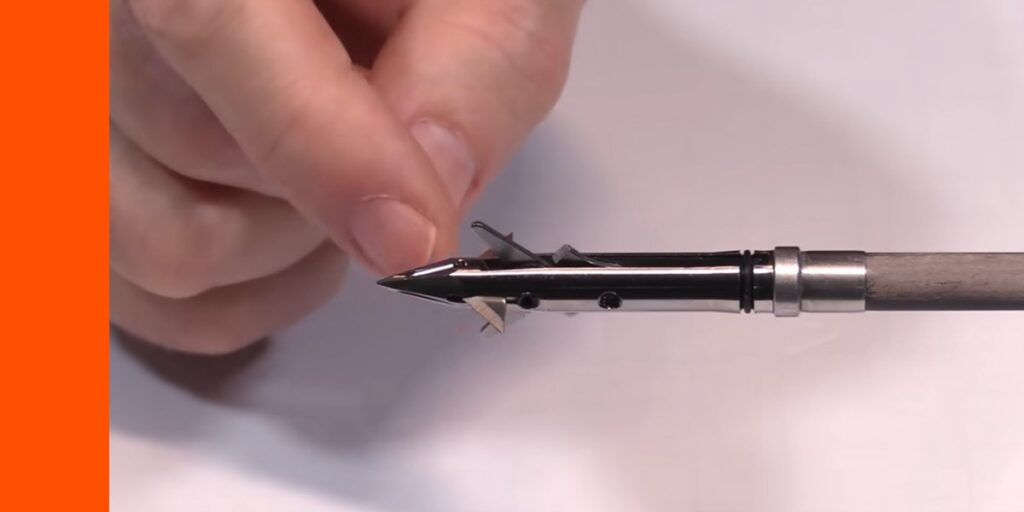
This O-ring holds the main blades in place and as these deployment arms penetrate against a medium, they force the O-ring out like this.
So here is the Hybrid in the open position and that’s where you get the cutting diameter of 1.5″. It locks open, unlike every other Gator style head. Most of them that I know of, there has to be a pressure on these deployment arms to keep the blade at its full cutting diameter. That’s not the case with the Sevr. They lock open.
As the Hybrids locks open, they have a pivot to them. And that allows them to pivot around a hard medium. when they hit a bone, rather than veering off course and stopping penetration, they pivot back, allowing one to extend farther out. You definitely don’t get the full cut at that time, but you don’t just get half either. This extends out a bit farther than it would have been. It comes all the way out like shown and it pivots around. And, then as pressure is put on it after that, it immediately pivots back into place.
I have noticed internally in animals that the pivoting action of the Sevrs takes place really quickly, so that when it pivots around a rib or something, man, it pivots right back to its full cutting diameter. I really like that.
Now, also note that due to the internal that washer making things a little but tighter and tighter specs, it’s a little bit more difficult to open than I’ve seen with the previous models.
And then one other feature that a lot of people don’t understand is that this lock in the back here if you can see that the two back-ends of the blades intersect right there and there’s a little wedge that they create. What that does is when – if there’s a medium that hits both blades at the same time and puts pressure on them, they’re a lot less likely to break because it absorbs a lot of the shock and causes one of the back-ends to slide over the other. It’s really hard to do. It takes a really hard, even force to do it. But, they slide over each other and then they still stay locked, and sometimes it’s hard to pull them apart. But, it’s a really creative way to absorb extra impact and keep the blades from breaking or bending terribly on impact.
Now, for resharpening of the main blade, the Stay Sharp Guide replaceable blade kit does a really good job on that. As for these bleeders, you can replace those bleeders, or you can just use a small file to sharpen.
Now, let’s move on to the tests!
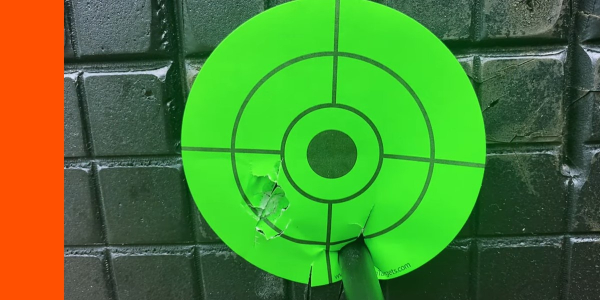
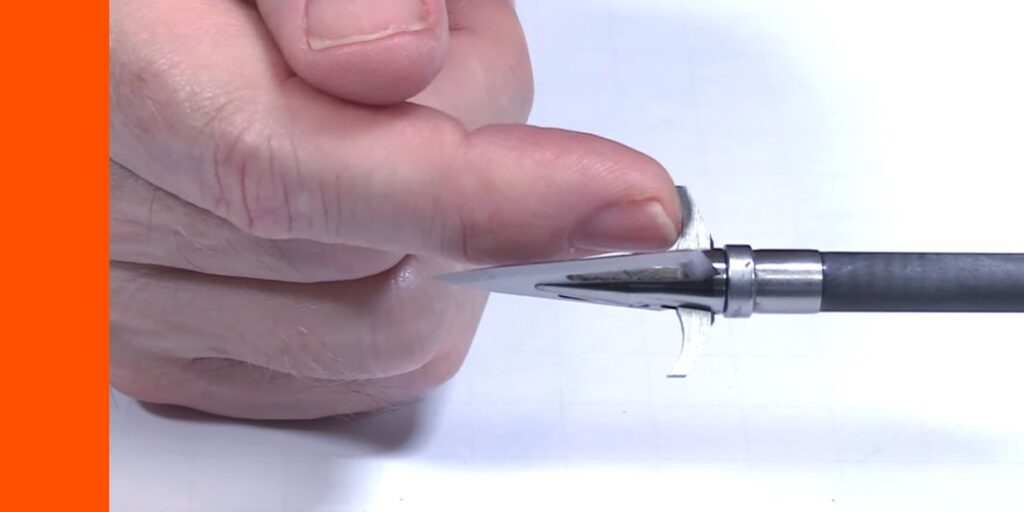
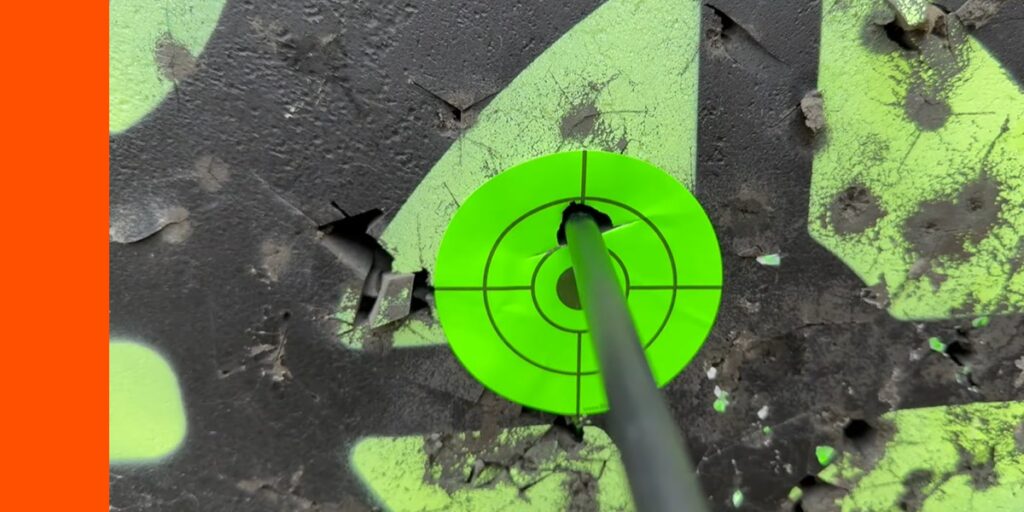
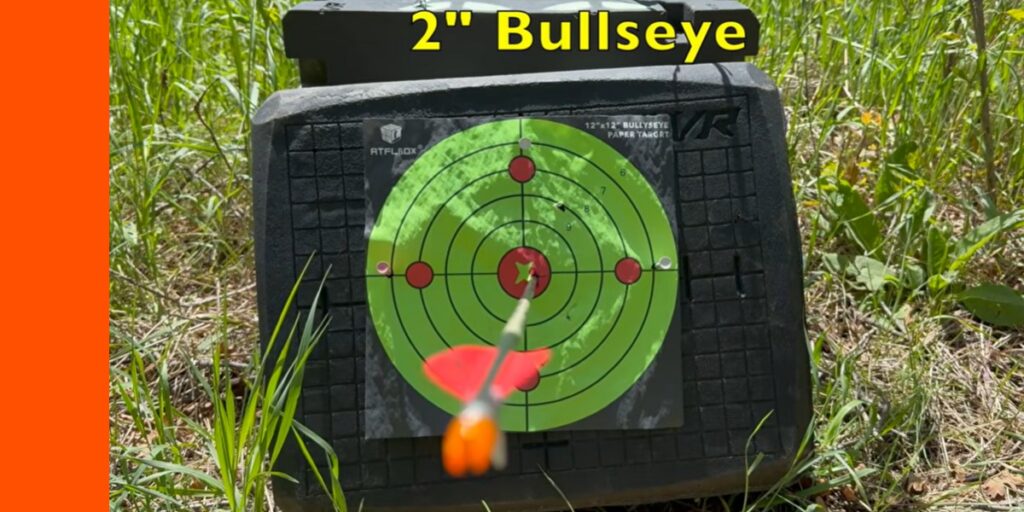
Flight Test (1 field point & 1 Broadhead 30 yards, Killer Instinct SWAT X1 Crossbow with 675 gr Bishop Bolt, 300 fps):
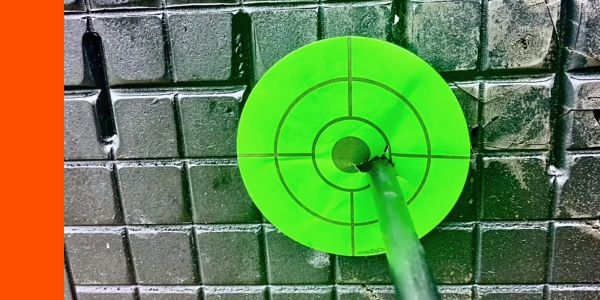
The Sevr Hybrid just clipped the bullseye.
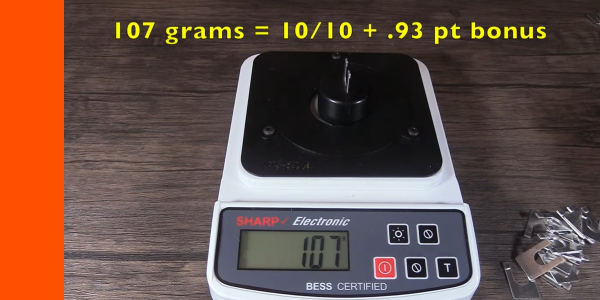
Edge Test I, Initial Sharpness Test (Grams of force to cut copolymer wire):
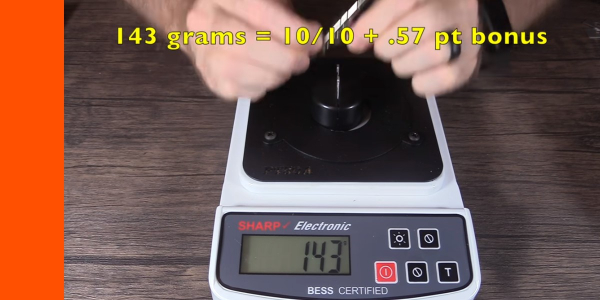
It took 143 grams of force to cut through the wire which is an 10 on a 10-point scale. Plus a 0.57-point bonus for being under the threshold of 200.
Penetration Test 1 (2/3″ rubber foam mat, 1/2″ MDF, FBI Gel):

It penetrated 9″, which is really pretty surprising. I mean I think the 1.5 penetrated like 6 1/2″. The only thing I can think of is that, that bleeder blade being in front opened up a wound channel that caused less friction from the gel on the arrow shaft, allowing it to penetrate better.
In here, you can see the entrance hole. It reached its full open position of 1 1/2″ and the blades stayed deployed the entire time.
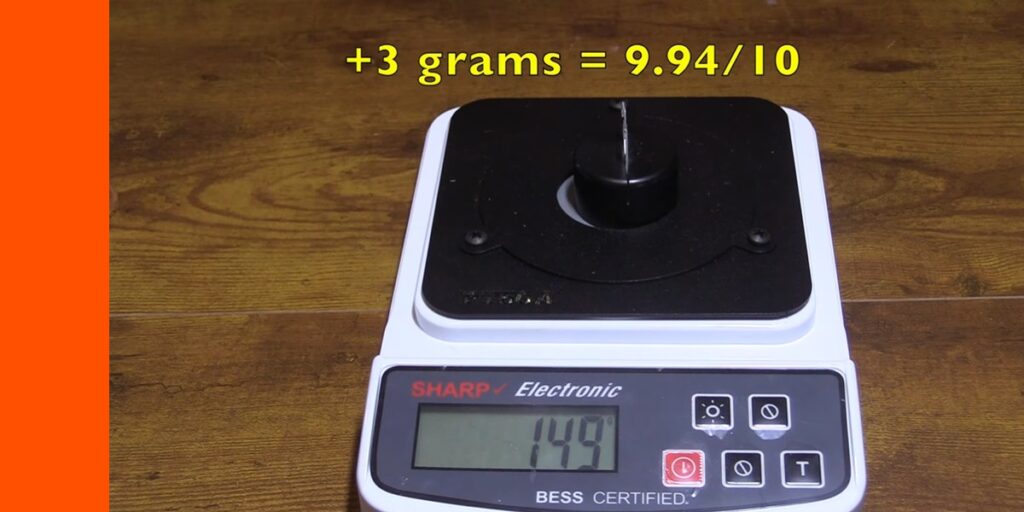
Edge Test 2, Edge Retention (sharpness after Penetration Test 1):
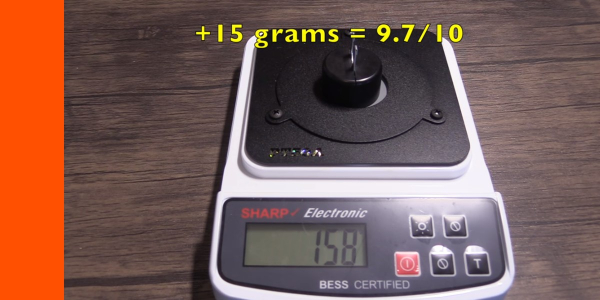
It took an additional 15 grams of force to cut through the wire, which is a 9.7 on a 10-point scale.
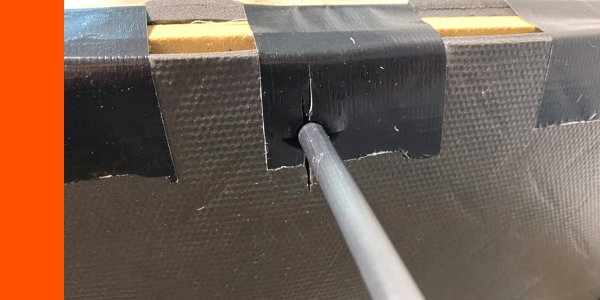
Penetration Test 2 (layered cardboard):

The 1.5 Hybrid penetrated through 45 layers of cardboard, which is a bit less than the 1.5 did. But, that’s understandable with that extra cut right in the front.
Durability Test 1 (3 shots 1/2″ MDF):
It’s in perfect shape after the three shots through the MDF.
Durability Test 2 (2 shots 22 gauge steel plate):
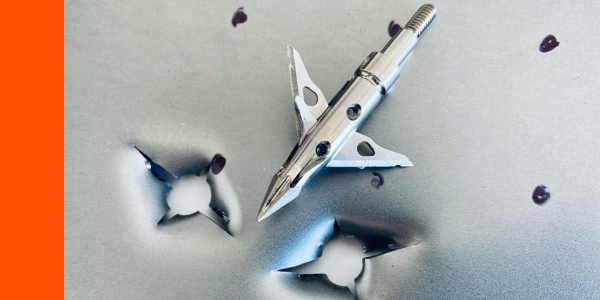
And here is the Hybrid after the two shots through the steel plate. And man, really impressive. The bleeders are actually in perfect shape and the main blades are in new perfect shape. There’s a little bit of a nick on each of the blades but not that part where the rubber band goes, that silicone ring that holds the blades close. But, there’s a couple other tiny little nicks there and the tip looks a little bit less sharp. And then you can see that it opened up nice holes. It’s not a full inch and a half of cutting diameter, but it’s close.
Durability Test 3 (1 shot cinder block):
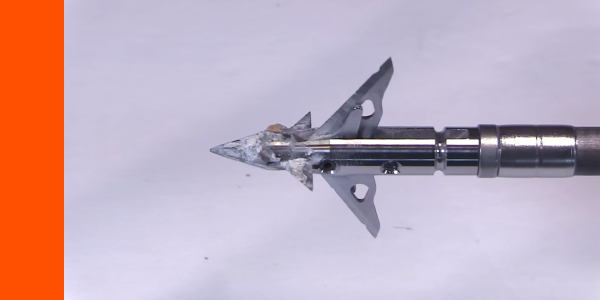
So, here it is after all the durability testing. And man, this thing did really well. Sevrs have a reputation of being super strong. I hear people complain about mechanicals all the time like, “Oh, they break up. They’re so cheap.” Man, not the Sevr! But this one, I expected the bleeders to peel off, even in the in the steel plate. But man, they impacted. I mean they stuck really deeply. Even the bleeders went into the concrete!
The Hybrid had a tiny bit of edge chatter on the blades, but otherwise, they were still in incredible condition. And if there was any wobble, it was just from the concrete that was fused to it. Really impressive durability!
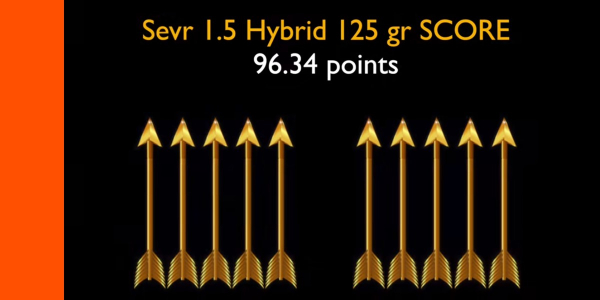
Final Thoughts And Scorecard Of Hybrid 1.5
So what do you think of the Hybrid 1.5? Man, this is a winner of a broadhead! I didn’t know how it was going to fly, how durable it was going to be. But man, it just excelled in all the testing. It got by far the highest score of any broadhead that I’ve ever tested to that point.
SEVR 2.0 Hybrid
SEVR came out with 1.5 Hybrid and it got the highest of any mechanical head I’ve ever tested. Then they came out with the 1.75 Hybrid and it got an even higher score. And now, let’s see how the SEVR 2.0 Hybrid did.
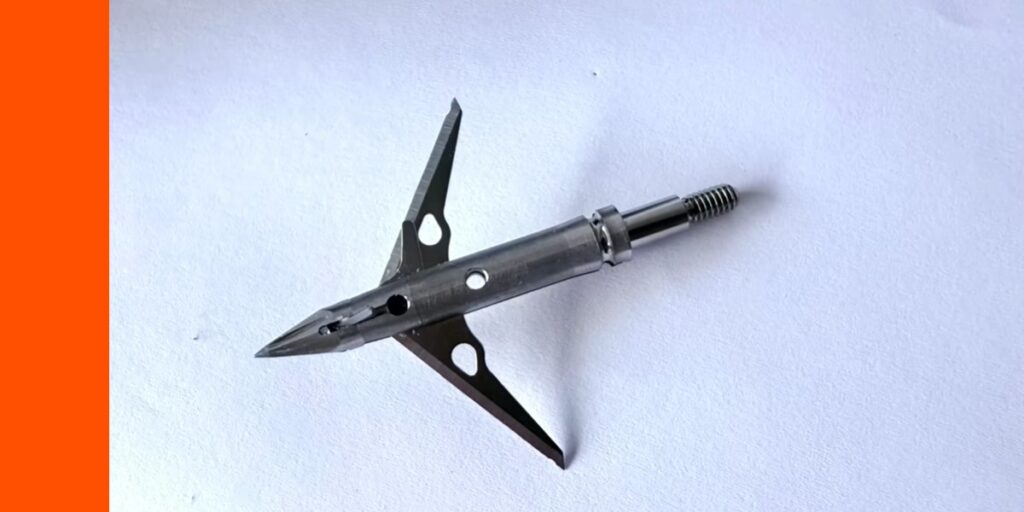
Let’s zoom on in here, go through some of the design features and specifications of this 2.0 Hybrid and then put it to the test.
Here’s a good look at this broadhead. I mean SEVRs just are known for really high quality materials and craftsmanship and you really feel that taking it out of the package. So in terms of the materials themselves, the ferrule is one piece grade 5 titanium and then the blades, it has got two different sets of blades, are 0.032 inches thick and I believe it’s 420 stainless steel but they’re definitely stainless steel.
The Hybrid 2.0 has blades in the front. They’re very sharp. I had to be careful with them. They’re positioned in the front because one, they increase a little bit of FOC, but then two, it’s in the same area as the deployment arms. So, when they’re spinning in flight, there’s not extra turbulence created by the blades than what’s already created by these deployment arms and so they fly at least by my testing, they fly identically to the SEVRs without these little blades. And so, it’s really interesting to see and it’s a very smart design.

Upon penetration, there’s a chiseled tip and leading blade that cuts. And then, when there’s pressure put on these deployment arms, you can see the back edge of the blades start to open (so they’re rear-deploying heads). And, when they open, the O-ring pops off and the blades open up and you can hear a slight little pop as they enter into a locked positioned. They overlap a little bit and there’s a little divot that they locked into an open position. So, you’re going to be getting that full cut there. I don’t know of many other mechanical blades that lock into an open position. Usually, it takes pressure on the deployment arms, continual pressure to keep them open. And when there’s not much pressure, they shrink down. That’s not the case with the SEVRs.
Now, another thing by design is because they’re locked open, the blades are allowed to have a pivoting motion. And, that’s because if one end hits a rib other bone, it could just close and the arrow shaft can continue on course and penetrate extra deeply and not veer off-course, which can happen in an animal. And, then as soon as it passes that thing, there’s pressure that just slides it back into place. It’s pretty ingenious!
Another thing that’s interesting is the way they lock open, there’s this little back edge of each of the blades that intersects with each other and holds them open. But then if there’s a lot of pressure put on them at the same time, the back ends can overlap and absorb some of that impact there so that the blades are much less prone to breaking. It’s really an ingenious design and they’ve patented this whole thing so that’s why others can’t copy it.
The 2.0 Hybrid SEVR model has the full 2-inch cut in the open position. So, you’ve got 0.7 inches of cut there with the initial bleeders, and then you’ve got 2 inches of cut with the main blades, giving you a total cut of 2.7 inches.
One of the challenges with SEVRs is sometimes is that the blades can tend to pivot, giving you a little bit smaller cut than you would like upon entrance or exit. But, having the extra 0.7 inches of cut that’s static, that’s always there, really makes up for it. So, you’re getting a lot of damage by using this broadhead with a total 2.7 inches of cut.
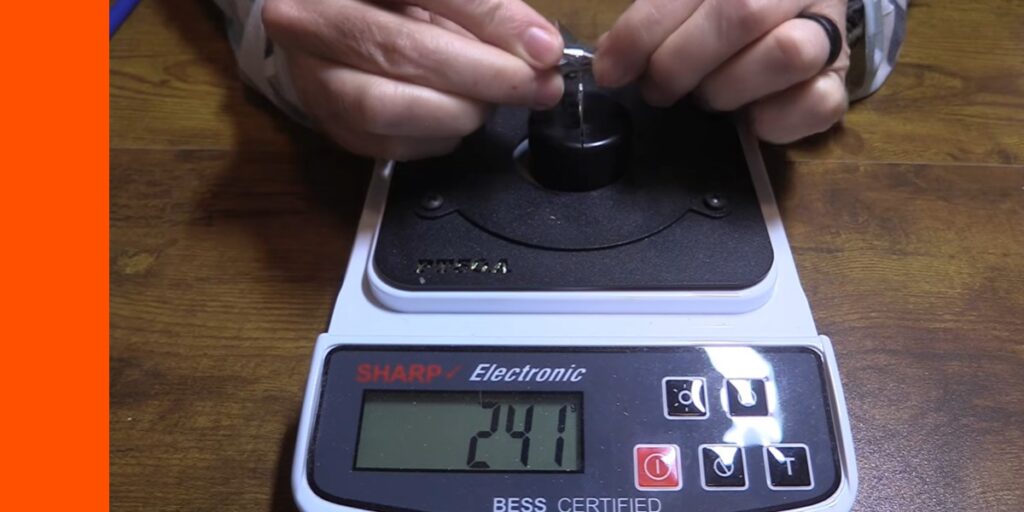
Now, each of the blades are 0.032 inches thick and the total weight on this is 125 grains. By my measurements, it came in at 126 grains.
Another thing that’s unique about the SEVRs is it comes with a little setscrew that you can close the blades and put in there and you can lock them the closed position. So, you can practice with them without dulling them as much.
Now, you’re still going to have these leading blades with the Hybrids to contend with but it’s just an extra feature to keep them in a closed position. Just make sure that when you go hunt with them, you take that setscrew out.
And then, when it comes to resharpening, I would use the Stay Sharp Guide Grey Guide. Their Grey Guide works really well with SEVRs to get this even sharper than they come out of the package. And then, touch them up afterwards to keep them extra sharp. That can work on the main blades as well as the leading blades.
Flight Test
The SEVR 2.0 got the bullseye.
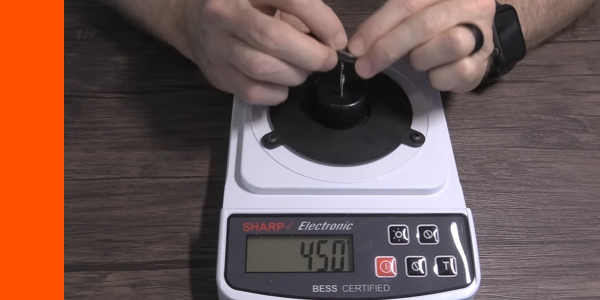
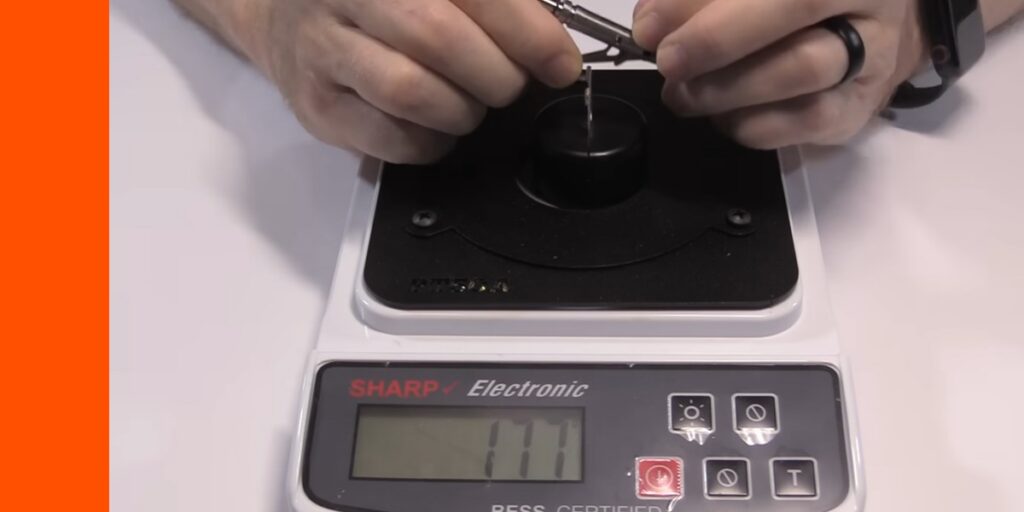
Edge Test 1 Initial Sharpness Test
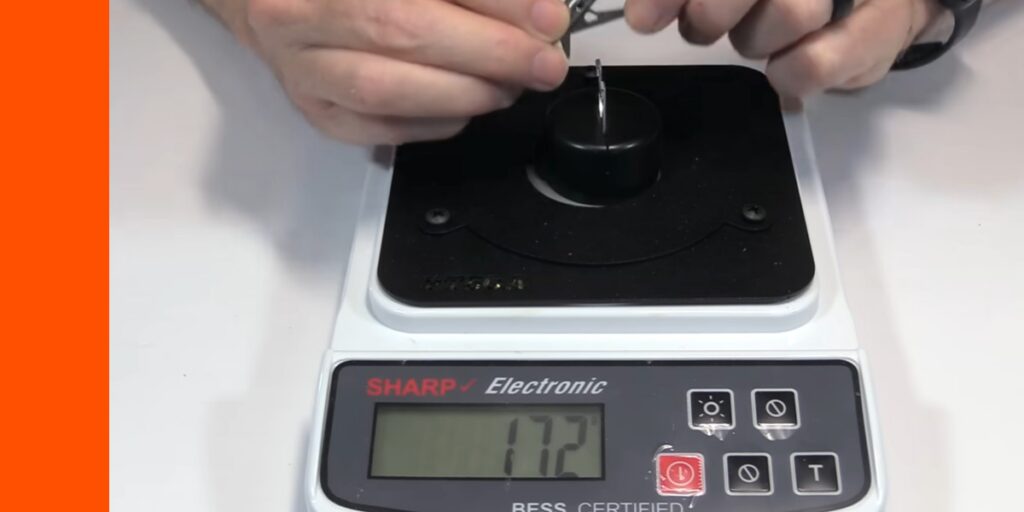
It took 172 grams of force to cut through the wire which is a 10 on a 10-point scale plus a bonus for being under the threshold of 200.
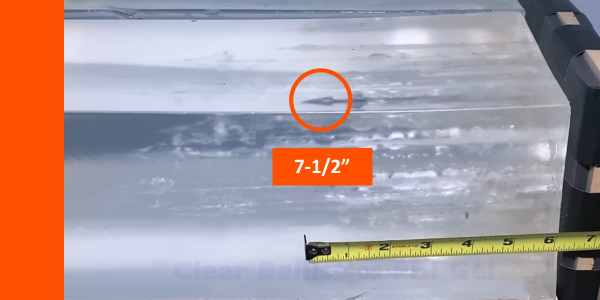
Penetration Test 1 – (2/3″ Rubber Foam Mat, 1/2″ MDF, Clear Ballistics FBI Gel)

The SEVR 2.0 Hybrid penetrated 8″.
And here’s the entrance hole. It reached its full maximum cut of 2 inches upon impact.
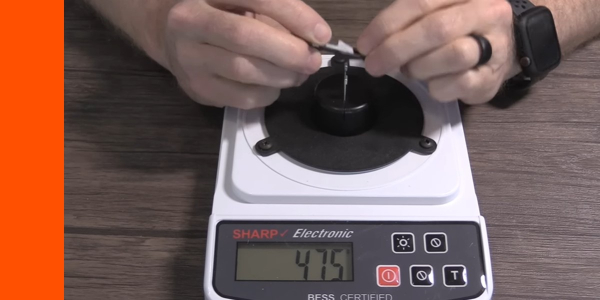
Edge Test 2, Edge Retention Test (Sharpness after Penetration Test 1)
It only took an additional 5 grams of force to cut through the wire, which is a 9.9 on a 10-point scale. And it’s going to get an extra bonus for both the sharpness and the edge retention being under the threshold of 200.
Penetration Test 2 (Layered Cardboard)
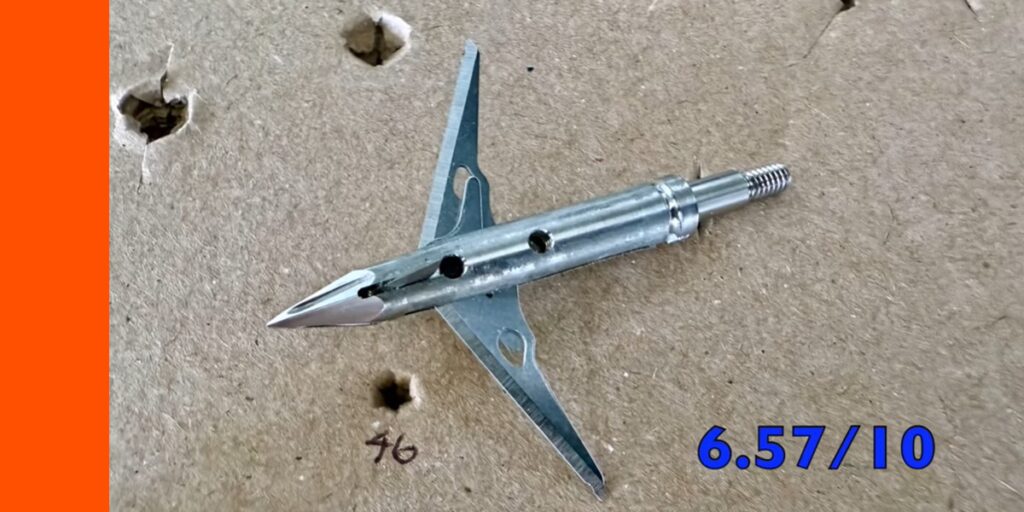
The 2.0 Hybrid penetrated through 46 layers, which is a 6.57 on a 10-point scale but it’s actually really good for this size of a cut.
Durability Test 1 – (3 shots 1/2″ MDF)
The 2.0 Hybrid head is in excellent shape after the 3 shots through the MDF.
Durability Test 2 (2 shots 22 ga Steel Plate):
And here it is after the two shots to the steel plate and still in just fantastic condition. There’s a little bit of edge shatter on the bladed but otherwise in perfect shape. And you can see the nice holes that it made in the steel plate as well.
Durability Test 3 (1 Shot Cinder Block)
So, here’s the SEVR 2.0 after all the durability testing. And man, it just performed like every SEVR I’ve ever tested… just extremely durable through the MDF and through the steel plate. On the steel plate, it got a little bit of edge chatter there, a little more than the 1.75, which is to be expected because it has more resistance in that steel plate because of a little bit wider cut. But, the leading blades are just in excellent shape and even after the cinder block, it’s still pointy and still spins very true. Very impressive durability for any broadhead, let alone for a mechanical.
Final Thoughts On The SEVR 2.0 Hybrid
So what do you think? Man, the 2.0 Hybrid is another high performer and it actually got a little bit higher score than the 1.75, which got a little bit higher score than the 1.5 hybrid. And so, this is to date, the best-scoring mechanical broadhead I’ve ever tested. I mean, really an exceptional broadhead in every way, shape, and form. It just doesn’t have any downside.
So, if you’re going after a smaller animal and you want to inflict a lot of damage or if you have a heavier setup and you’re going after a bigger animal but you’ve got enough momentum that you’re generating to be able to drive this thing deep, man, this is something really worth checking out.

SEVR Broadheads Review Conclusion
When I first heard the SEVR broadheads were hitting the market, I had a lot of hope that they penetrate well and hold up well with the changes made to the new models. These heads have exceeded my expectations.
In terms of flight, I knew they would fly extremely well. And, they fly as good as any mechanical head I’ve ever tested. They are like a field point in flight, flying right up there with the very best.
In terms of penetration, they were excellent, maintain outstanding durability as they were shot into 4 total layers of ½-inch MDF, a steel plate and foam mat.
So the SEVR 1.5 and 1.7-inch, as well as the entire SEVR lineup, are really a good heads for bowhunters to consider for various animals.