In this review, I tested the Cutthroat Broadhead. I really like this company. Everything is made in the USA and they have a great reputation.
Cutthroat broadheads have fans all over the world and I have long considered them to be one of the best two blade, single bevel heads made.
In this review I’ll cover the Cutthroat 2-blade as well as the Cutthroat 3-Blade broadheads.
I tested them for long range flight, penetration, durability, and edge sharpness and retention. And, as always, I shot with my Bowtech SR6 set at 72 pounds with a 27-inch draw length, and I’m using Bishop Archery FOC King Arrows, with a weight of 460 grains.
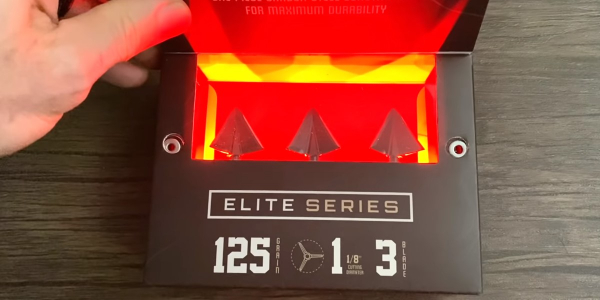
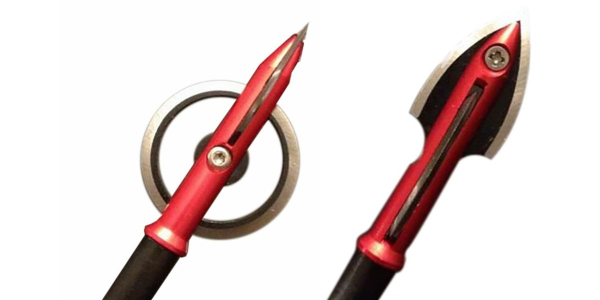
Cutthroat 2-Blade Broadheads specs
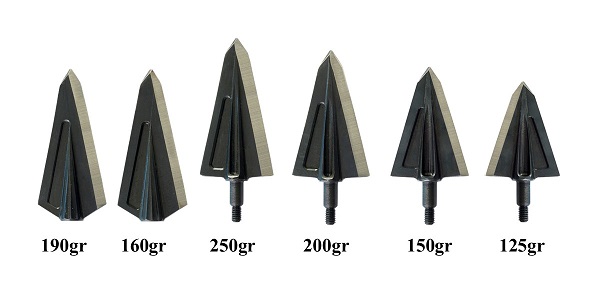
The cutthroat broadheads lineup ranges from 125 grains to 250 grains.
There’s a lot to like about the Cutthroat. In some ways, it’s just a simple 2-blade single-bevel design. But, in other ways, there are some unique things that make it extra special.
First of all, Cutthroat broadheads come in several different weights, ranging from 125 grains to 250 grains (which can be great for higher FOC arrows). In this test, I shot the 125-grain version.
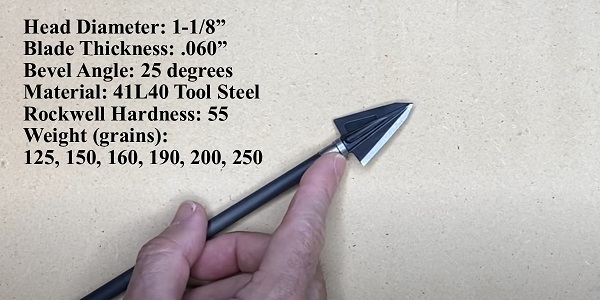
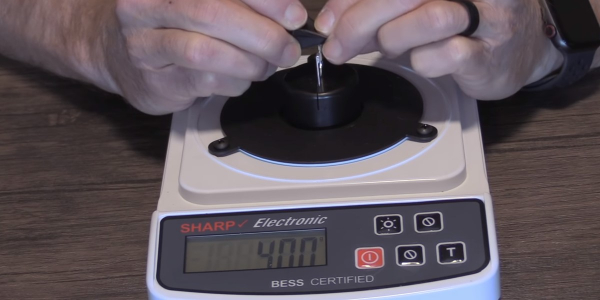
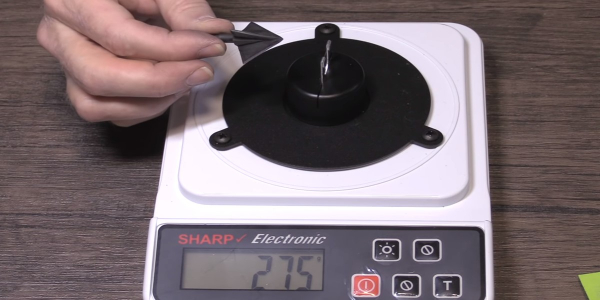
Here, you can see the specs for the Cutthroat Broadhead.
-

N1 Outdoors® N-Tune™ Nock Tuning Reflective Arrow Wraps – Red Dots™
Price range: $18.99 through $27.99 Select options This product has multiple variants. The options may be chosen on the product page -

N1 Outdoors® N-Tune™ Nock Tuning Reflective Arrow Wraps – Double Lunger™
Price range: $18.99 through $27.99 Select options This product has multiple variants. The options may be chosen on the product page -
N1 Outdoors® N-Tune™ Nock Tuning Reflective Arrow Wraps – Speed Spear™
Price range: $18.99 through $27.99 Select options This product has multiple variants. The options may be chosen on the product page
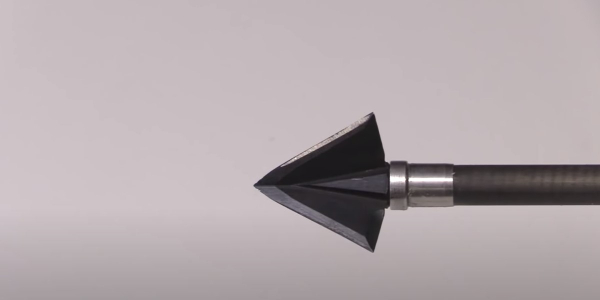
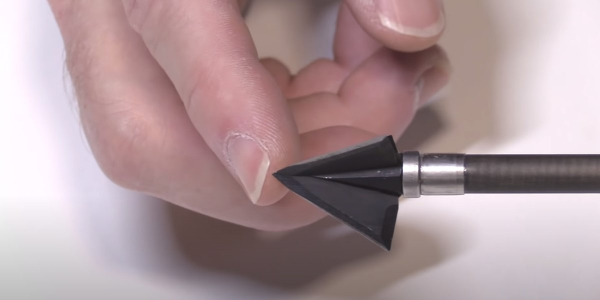
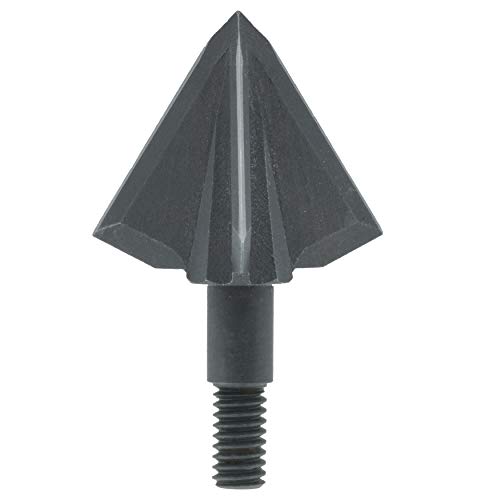
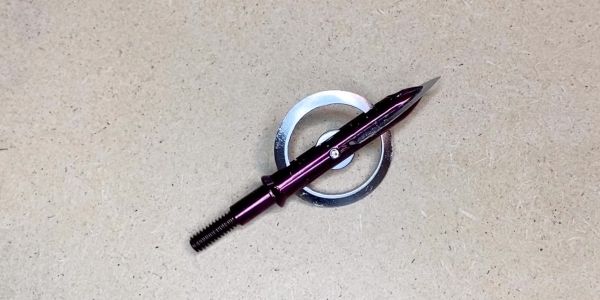
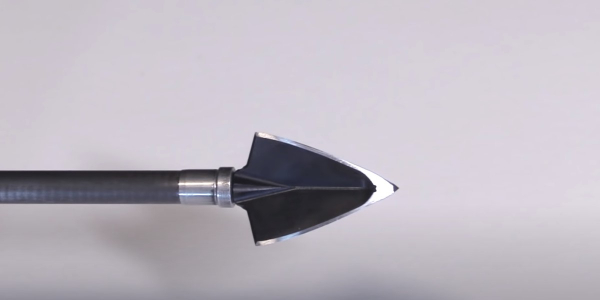
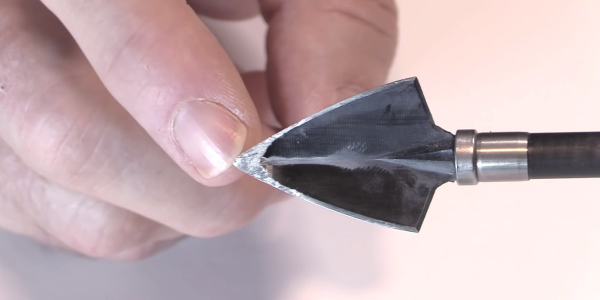
The Cutthroat is machined from a single chunk of 41L40 tool steel, which is really a high quality tool steel. And it’s brought to a Rockwell hardness of 55. It’s a good balance between being soft enough to sharpen and yet tough enough to be able to hold its edge well.
In addition, these broadheads are Teflon coated to protect the blades. It also has a really nice Tanto tip to help prevent blade rollover at the end.
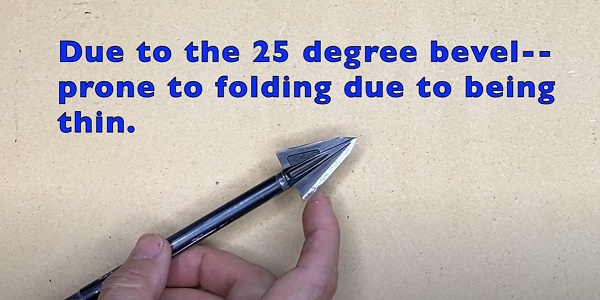
The blades are 0.060 inches thick so a nice good thickness to them. And the single bevel is a 25-degree bevel.
I was eager to put this head to the test and see how it performed.
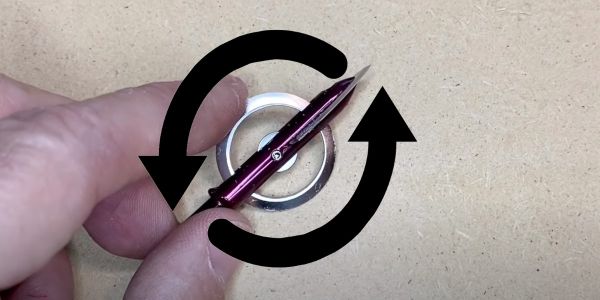
I have found that a 40-degree bevel is superior when it comes to how much a broadhead rotates in flight. So, the rotation of a steeper edge is going to produce a better bone splitting ability and more damage internally. At a 25 degree bevel angle with the .060″ blade thickness, the Cutthroat head should still do fairly well.

Balloon test
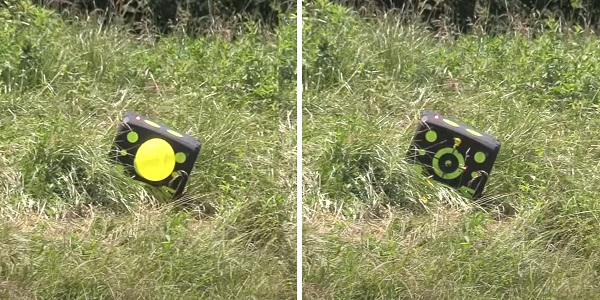
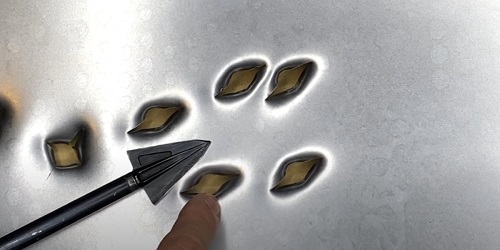
The Cutthroat head was able to pop a balloon from 70 yards out.
-
Sale!
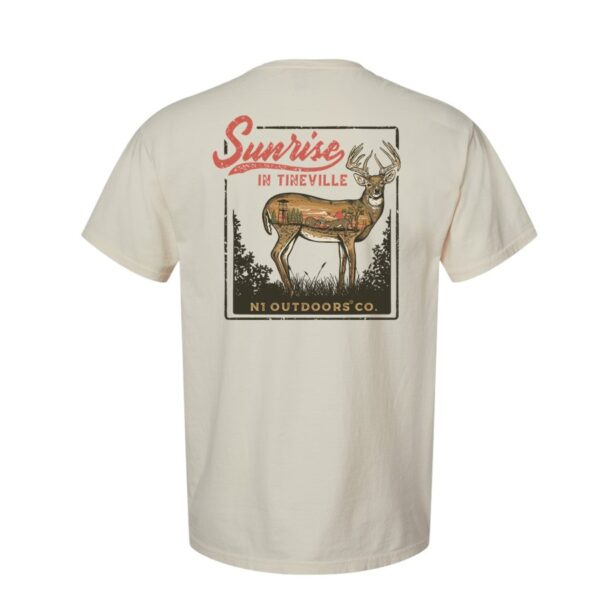
N1 Outdoors® Dominion™ Tee
$19.99 Select options This product has multiple variants. The options may be chosen on the product page -
N1 Outdoors® Tine Lines™ Elk Antler Tee
Price range: $26.99 through $29.99 Select options This product has multiple variants. The options may be chosen on the product page -
N1 Outdoors® Just Pass’N Through™ Broadhead Badge Tee
Price range: $24.99 through $28.99 Select options This product has multiple variants. The options may be chosen on the product page
Out of the box sharpness test
In the out of the box sharpness test, I test how many times a broadhead can still cut through paper after a stroke of an arrow shaft across it. I give 5 points for the first cut and then one point for every cut thereafter.
The Cutthroat broadhead was able to still cut paper after three strokes of the arrow, giving it a total score of 7 points.
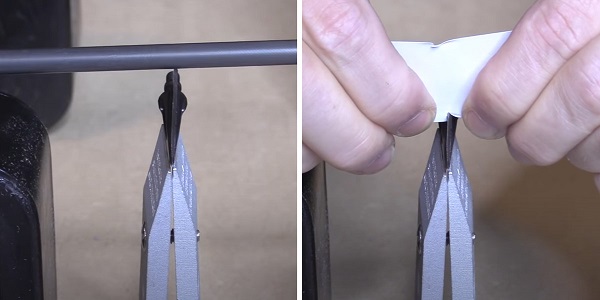
The Cutthroat 2-blade head cut paper after three strokes of the arrow.
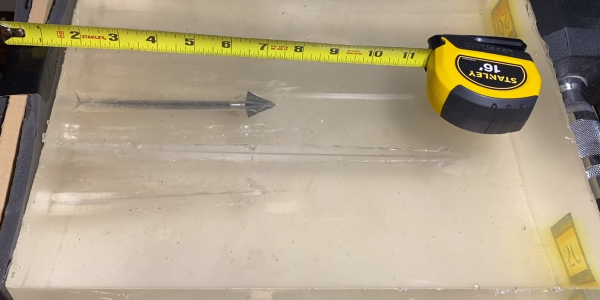
Penetration testing
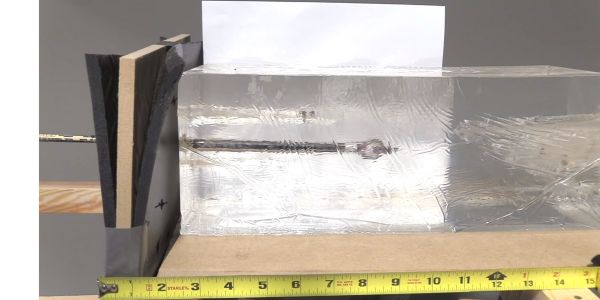
In this penetration test, I shot the Cutthroat into ballistic get that was fronted by 2/3″ rubber mat and 1/2″ MDF board.
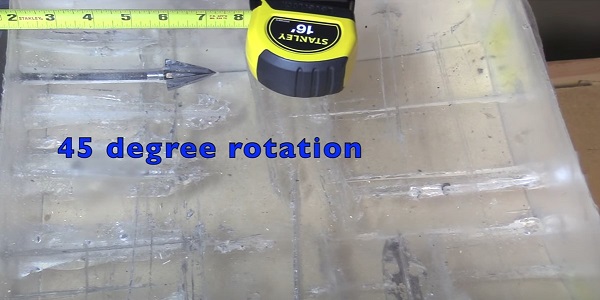
In ballistic gel test, the Cutthroat penetrated 7-1/4″ with 45 degrees of rotation.
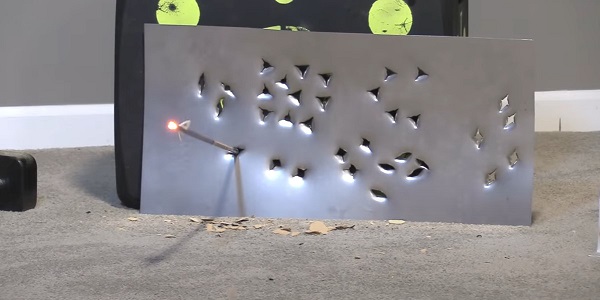
Steel plate test
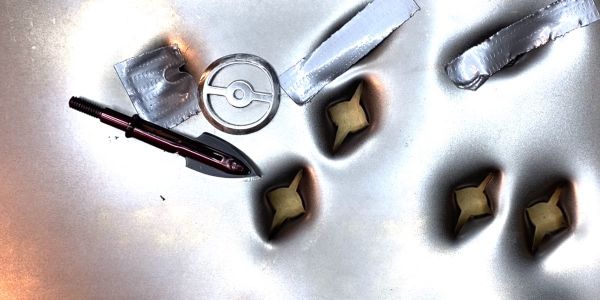
I shot the Cutthroat five times through a .22 gauge steel plate. The head held up very well.
The head did have a bit of edge folding on each side, which would take a little bit of work to sharpen those out. But, overall, the head fared pretty well for five shots through the steel plate.
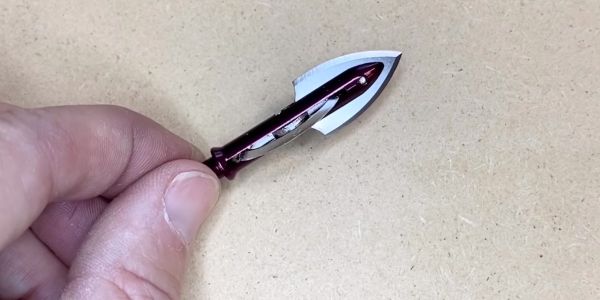
The “S-cut” made by the Cutthroat makes it more difficult for entry wounds to close up on an animal after impact. The S-cut also aids in prying bones apart on big game animals like whitetail, mule deer, elk, etc., to allow an arrow to slide through.
The Cutthroat 2-blade provided a good “S-cut” that you get from a single bevel broadhead.
The Cutthroat 2-blade had some dinged blade edges on each side after the test.
Final Thoughts on Cutthroat 2-Blade Broadheads
So, overall, the Cutthroat is a very nice head. I’ve long considered it to be a great head and putting it through these tests just proves it all the more.
It has a great price point, it’s made in the USA, and it flies super well. It keeps its edge well and is durable.
If you are looking for broadheads that are 2-blade and single bevel, this is definitely worth a look.
Great job, Cutthroat.
Cutthroat 3-Blade Broadheads Review
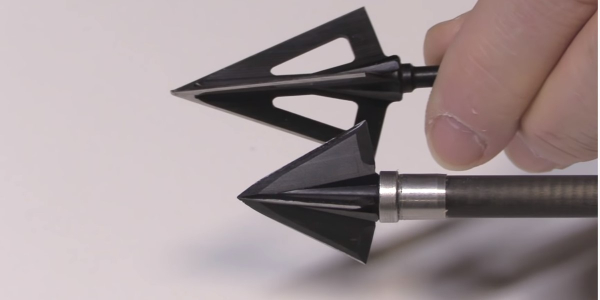
I was also able to test the Cutthroaght 3-Blade from Rocky Mountain Specialty Gear. This is a 3-blade double bevel head.
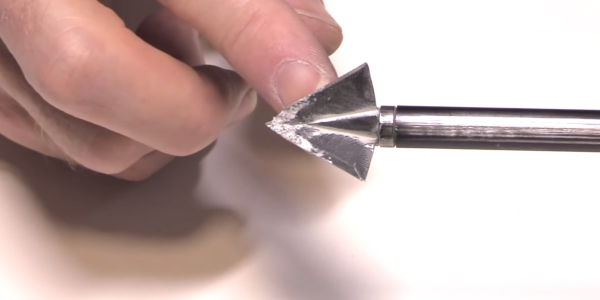
I was excited to see how it performed. But first, let’s take a close up look at it.
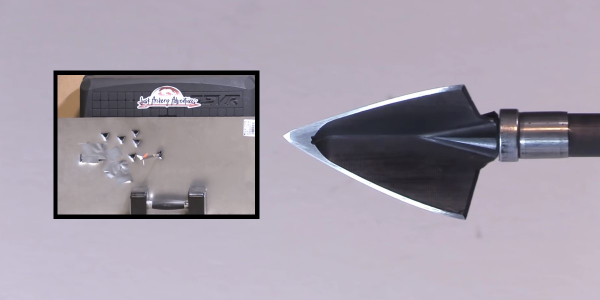
Here’s a good close-up look at the Cutthroat 3-blade. This is a wicked looking broadhead. Notice the convex design to the blades, how they’re curved. You don’t see that in many 3 blades. That’s supposedly going to aid in penetration and the way it cuts the tissue. I was eager to see how that plays out.
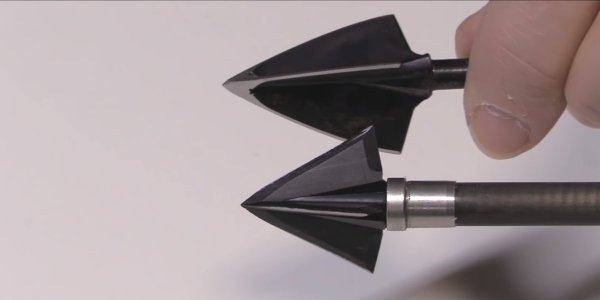
The Cutthroagth 3-Blade head is machined from a solid chunk of 41L40 tool steel, which is a great steel to use in a broadhead application, due to its impact resistance.
The blades are 0.035 inches thick and the cutting diameter is one and one-eighth inches. This is the 125-grain model. So it has got a relatively short overall profile and you notice the tip there is designed for extra reinforcement and durability to prevent curling and rollover.

Sharpness test of Cutthroat 3-blade
I tested the 3-blade on the Edge-On-Up Sharpness tester. Results below:
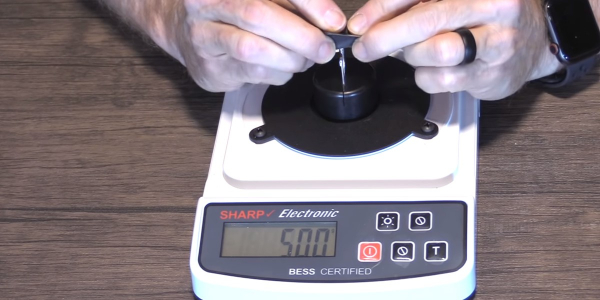
The 3-blade took 500 grams of pressure to break the wire on the sharpness tester.
Ballistic gel penetration test of Cutthroat 3-blade
I shot the 3-blade in the FBI-grade ballistic gel fronted by MDF and a foam rubber mat.
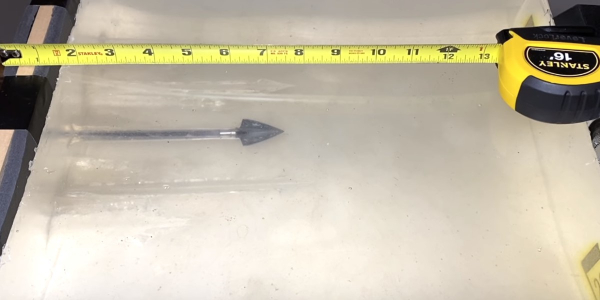
The Cutthroat 3-blade penetrated 7-3/4 inches into the ballistic gel.
Sharpness re-test post-ballistic gel test
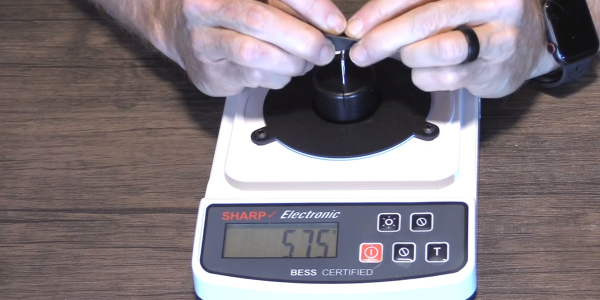
The 3-blade took 575 grams of pressure to break the wire on the sharpness tester after the ballistic gel test.
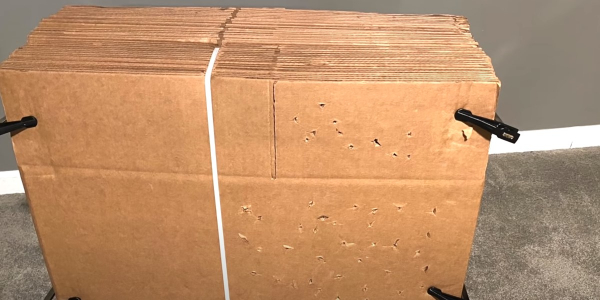
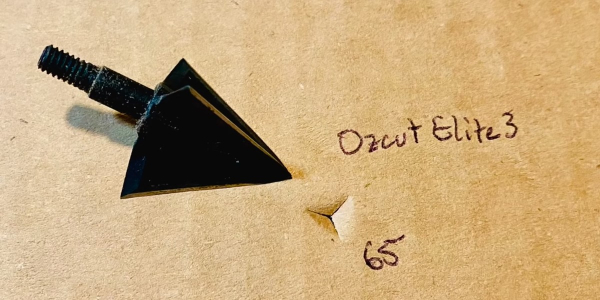
Cardboard Penetration Test with 3-blade

The 3-blade penetrated through 62 layers of cardboard.
Steel plate durability test of 3-blade
Below is the Cutthroat 3-blade head after going through a 22-gauge steel plate five times.
The Cutthroat 3-blade was in perfect condition after shooting it into the steel plate 5-times. You can’t even tell it has been shot other than my fingerprints on the blades. Man, this thing really, really held up well.
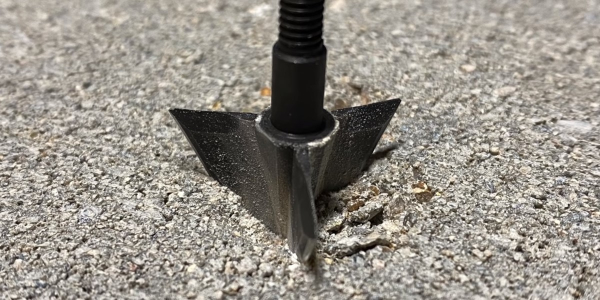
Cinder Block Test of Cutthroat 3-Blade
I shot the 3-blade into a cinder block to see what would happen.
Here is the Cutthroat 3-blade after impacting the cinder block. This was the same head that also went through the steel plate five times. It’s in excellent shape. You can see the discoloration from the concrete and chips of concrete embedded in it. But the edges, even where it went into the concrete, are still in good condition. The tip is still very sharp. No doubt this can be re-sharpened and reused many times over.
Final Thoughts on Cutthroat 3-blade broadhead
So what do you think of the Cutthroat 3 blade? Man, it performed very well.
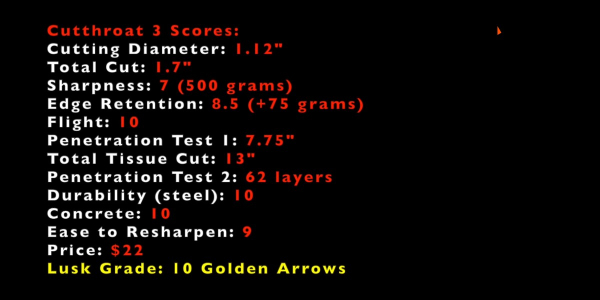
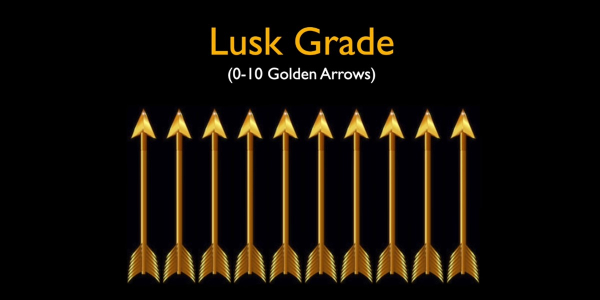
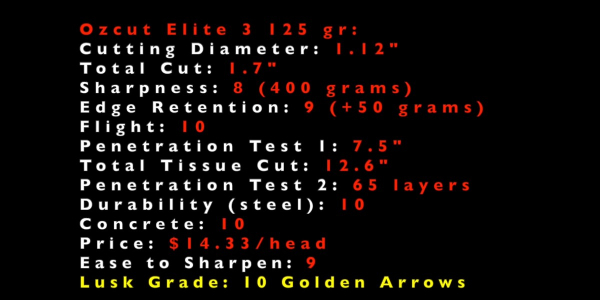
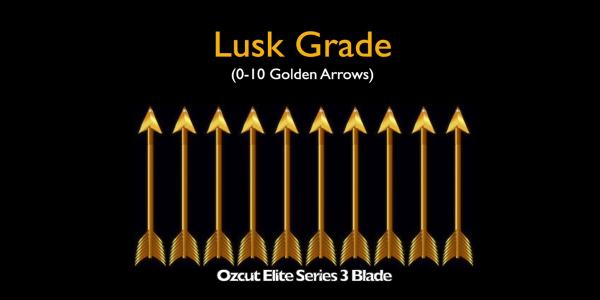
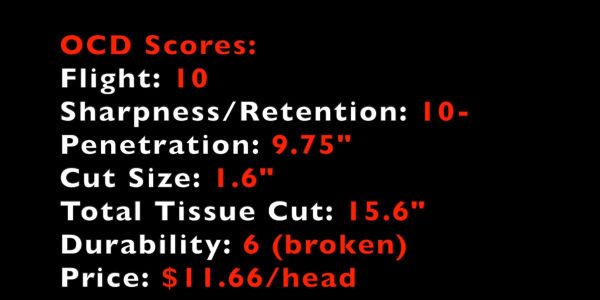
Go through the score sheet below and see how it measured in each of the areas that I tested and compare it to other heads and see how it performed with them.
There are many really good things about it this head. I especially love the durability of that chiseled tip. I also love the steel that they’re using (the 41L40.)
I’m not really sure why they went with a curved convex design, although it looks really cool. Maybe there are reasons that don’t bear out in my testing. The convex design makes it a little bit more challenging to sharpen, because you can’t just lay it flat like you could with a normal 3 blade, 60-degree head and sharpen two edges at a time.
So, overall, I think the 3-blade Cutthroat as well! It’s a great head.