$9.00Select options
This product has multiple variants. The options may be chosen on the product page
When it comes to archery, IBO stands for International Bowhunters Organization.
What is IBO Speed and how is it calculated?
You might have seen where compound bows have an IBO rating.
But, what does that really mean?
Well, the IBO speed of a bow is calculated using a bow with a draw weight of 70 lbs, a draw length of 30 inches, and an arrow weight of 5 grains per pound of draw weight. So, that would mean a 70-lb draw weight would be shooting an arrow that weighs 350 grains (70 x 5 = 350).
That arrow is then shot through that bow through a chronograph, which measures the arrow speed. The average speed becomes known as the IBO rating of that particular bow.
We earn a commission if you make a purchase, at no additional cost to you.
03/12/2026 01:00 pm GMT
The problem with IBO ratings
The problem with IBO ratings, however, is that they are not typical of most hunters’ setups.
For example, a 30-inch draw length is rather long for the average archer. Also, an arrow weight of 350 grains is simply not typical of most hunting setups. And, with high FOC arrows gaining popularity, the arrow’s grains per inch is often significantly greater.
So, when using the arrow speed calculator above, you must understand that the IBO rating you enter is based on this premise. The calculator will give you an estimate of how changing the inputs that make up IBO could affect your arrow speed.
The arrow speed calculator makes the following assumptions:
Every inch of draw length under 30″ will subtract 10 ft per second from the IBO value.
Every inch of draw length above 30″ will add 10 feet per second to the IBO value.
Every 3 grains of total arrow weight above draw weight multiplied by 5, will subtract 1 foot per second from the IBO value.
Every 3 grains of additional weight on the bow string will subtract 1 foot per second from the IBO value.
The arrow weight in grains (includes fletchings, wraps, inserts and also points/broadheads
Total string accessory weights in grains (peep, tube, silencers, etc.). For your reference, an estimated peep only weight is 20 grains, and a peep + tube is 45 total grains.
The effectiveness of shooting depends not only on the design and technical characteristics of the weapon, or the level of training of the shooter. But, it is also dependent on the type of gun sight or scope that is used.
Just as weapons have evolved, sights have as well.
Initially, front sights were the only type used. Then, in the 16th century, rear sights appeared. And, a little later, a circular orthoptic sight.
It wasn’t until the beginning of the 19th century that sighting optics were used.
Types of gun sights
So, let’s take a look at some of the types of gun and rifle sights…
Open sight
The open sight is the simplest in design. Its device is a rear sight and front sight located on the same line (differ in shape and design). The rear sight can have a fixed or fixed bar. To aim the weapon at the target, the shooter needs to visually combine the rear sight, front sight, and the target so that they are on the same line, exactly in the middle of the sight slot.
The advantages of open sights:
Reliability;
Low cost;
Compactness and lightweight;
Ease of maintenance, maintainability;
Simplicity of design;
Mechanical strength;
Unlimited operating temperature range
Disadvantages of open sights:
At long distances, the front sight covers the target;
Low aiming accuracy, limited by vision capabilities;
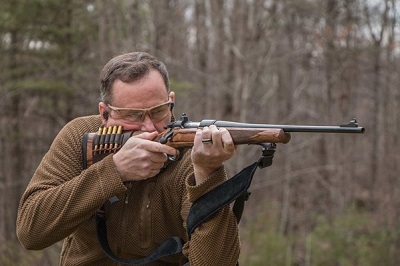
The diopter sight provides the highest accuracy of all mechanical sights, but has very low light transmission. So, it’s not a good option in low light or at dusk.
The Diopter (ring or aperture) sight is easier to use because the shooter needs less effort to aim because it is easier to find the desired position of the eyes, body, and barrel of the weapon.
The design of the diopter sight is a combination of an annular or ordinary front sight with a special hole (a disc with a small hole 0.5 – 1 mm in diameter). This hole is scientifically called a diopter or aperture.
We earn a commission if you make a purchase, at no additional cost to you.
03/12/2026 10:04 am GMT
The rear sight disc serves as an obstacle that completely blocks the light flux in the direction of the target, and the aperture hole serves as a diaphragm. Through it, a contrasting image is projected into the lens.
The shooter is forced to position the pupil exactly on the target line. This is the only possible position in which it will be visible. Aiming is intuitive.
Diopter sights are typically used with small-bore or air rifles.
Main advantages of diopter sights:
High accuracy;
Simplicity, reliability, mechanical strength;
Low cost;
compact and lightweight
Disadvantages of diopter sights:
Narrow field of view;
Poor low-light transmission;
Covers the target (except for the point of impact).
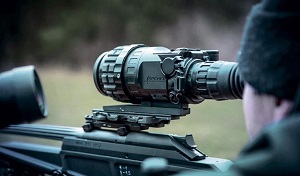
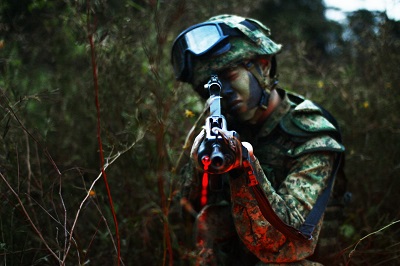
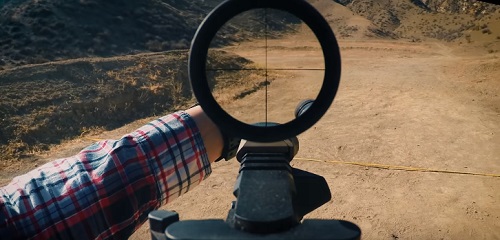
An optical sight is basically like a telescope with a reticle that simplifies the aiming process and increases accuracy and chances of a successful shot.
The tubular metal housing of optical sights contain the lens and eyepiece. These two lenses have a reticle installed in one of the focal planes. To obtain a straight, non-inverted image, an inverting system is used.
The sight is rigidly mounted on the weapon, and the precise adjustment of the reticle position is performed by the ballistic correction mechanism. Many optic sights have LED lighting for hunting at dusk.
Advantages of optic sights:
Highly accurate;
Ability to see the target at long distances;
Convenience, simplicity, and speed of guidance;
Simple and reliable design
Disadvantages of optic sights:
Small viewing angle;
Increases weight and dimensions of the weapon;
Overlaps the open sight: Inability to take a shot at close range (except for enclosures)
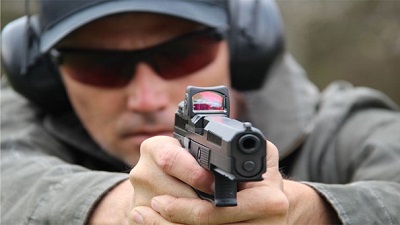
A laser sight is not a weapon sight in the literal sense of the word, but rather an auxiliary sighting device that has a limited range and accuracy.
A laser range finding rifle scope is a compact device that forms a light spot on the target that coincides with the midpoint of impact. This makes it possible to increase the effectiveness of the weapon at close ranges, as well as the speed of guidance, and the accuracy of fire. The range finder feature give the distance to the target.
We earn a commission if you make a purchase, at no additional cost to you.
03/12/2026 09:00 am GMT
A laser sight provides a single pinpoint dot rather than the wide beam of light like you’d get from a flashlight. A well-zeroed laser sight gives you a precise location of where the muzzle of the gun is pointing, allowing for quick aiming.
Benefits of Laser sights:
Simplicity and high speed of aiming;
Minimal weight and dimensions;
Simplicity and reliability of design
Disadvantages of laser sights:
Dependent on battery power;
Light spot of the radiation source can be difficult to see at long ranges;
Bright sunlight can make mark difficult to see
Laser light shoots straight but bullet trajectories are not; therefore works best at shorter ranges
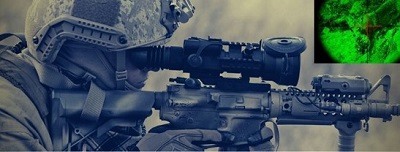
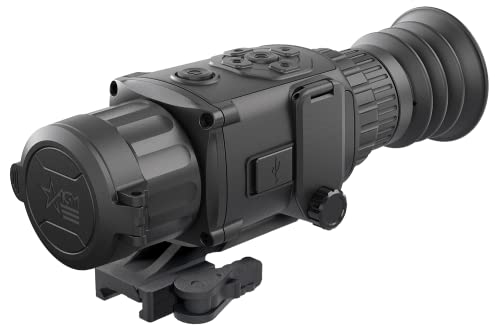
A thermal imaging sight is a device that visualizes the target’s thermal radiation. It does not need external light sources, allowing you to aim the weapon in complete darkness. This uses data on the temperature of the object itself in comparison with the surrounding space.
Hopefully this has provided you with some helpful information so you can choose a sight/scope wisely. So, from diopter sights to night vision equipment and every sight in between, consider the pros and cons of each before choosing.
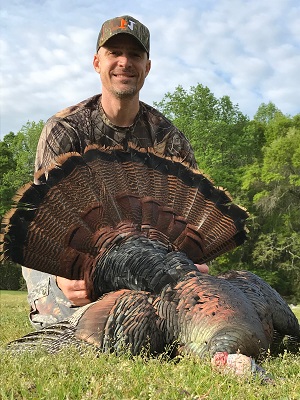
Turkeys are a very popular animal to hunt, but even with the wild turkey’s rise in popularity, it still remains a very challenging animal for even the most experienced hunters to bag.
But even so, this guide should help beginner turkey hunters get on the path to bagging their first tom.
Turkeys can be an extremely tough animal to harvest, even for the seasoned hunter. Be committed to learning as much as you can before you go and in the seasons to come.
Turkey Hunting (before you go…)
Before we get to some basic turkey hunting tips, lets cover a few other important things first…
Know and Play By the Rules
Before you even bother with packing your hunting gear, take time to learn your state’s regulations on wild turkey hunting.
Can you shoot before sunrise?
Can you shoot after sunset?
Knowing the hunting regulations in your state, like whether you can shoot before sunrise and after sunset, are important to know before you go turkey hunting.
If so, how long before sunrise and after sunset are you allowed to shoot?
Hunting seasons and bag limits in the state you are going to be hunting is also something to be aware of.
Each state declares its own seasons and bag limits for each game species. The state agency bases those decisions on science and harvest totals, as well as other factors.
Additionally, a hunter safety education may be required to buy hunting licenses, depending on the hunter’s age.
Apprentice licenses may be offered to first-time hunters in place of hunter safety education, but the new hunter must be accompanied by a properly licensed hunter before hitting the woods.
All of this type information should be answered by checking out your state’s department of natural resources website.
Bottom line… always know the laws before you hit the woods!
Wild turkeys have keen eyesight, so you will want to conceal your movements as much as possible while out hunting.
A good camo pattern for the terrain you are hunting is essential. So, make sure that whatever you wear conceals your hands, neck, and face, because a turkeys spook at the slightest movements.
Staying concealed on your turkey hunts is critical when turkey hunting and could be the difference between bagging a tom or coming home empty-handed.
Of course, unless you’re Chuck Norris, you won’t be bagging that turkey with your bare hands. So, you’ll need to have and be proficient with a bow or shotgun before heading to the turkey woods.
If you choose a bow, whether it be a compound, recurve, crossbow, or even a traditional archery bow, make your choice something you are comfortable shooting from a seated position, as most turkey hunts happen from the ground.
Even if you have become an expert at harvesting trophy deer or other animals, you must realize that turkeys can still be a difficult animal to hunt and kill. Heading out on a scouting trip before the big hunt can be crucial to your success.
So when it comes to scouting, knowing what to look for can help you determine if turkeys are frequenting your property and if so, where they are the most active.
Knowing what turkey sign looks like is a great start for determining if turkeys are active on the property you will be hunting. After all, you can wear camo from head to toe, put on face paint, and be as still as a statue, but if you don’t have turkeys on the land you’re hunting, well, at least you enjoyed being outside.
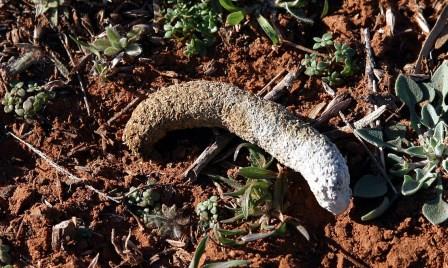
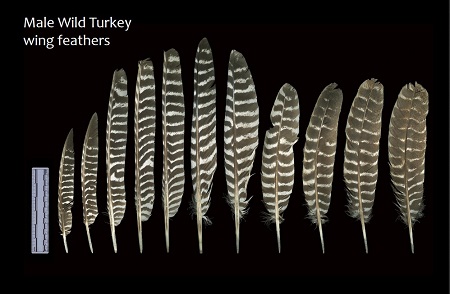
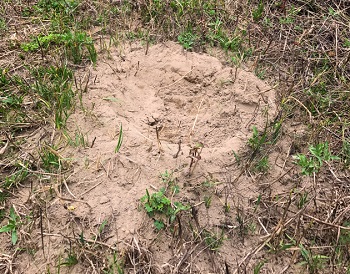
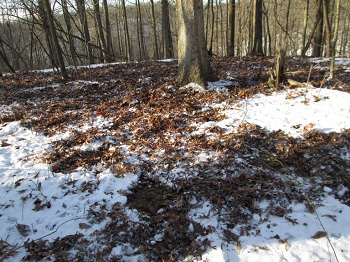
photo credit: canadianoffthegrid.comphoto credit: NWTF.orgphoto credit: msgfeather.comphoto credit: NWTF.orgphoto credit: retrieverman.netTurkey scat, tracks, feathers, dusting areas and scratch marks are all clues as the whether turkeys are frequenting your property. Familiarize yourself with each when scouting your hunting property.Walk the edges of fields and logging roads to look for these.
Here are some types of sign to look for when scouting for turkeys:
Turkey tracks: Tracks can certainly help you identify where a turkey has been, but you also want to figure out where it went and when, so hopefully you can intercept one on the next trip there.
Feathers: It might seem obvious, but turkey feathers are a great indicator that there are, or have been, turkeys in the vicinity. So keep an eye out for the feathers, especially if roosting trees are in the vicinity. You may have turkeys nearby.
Turkey droppings: Turkey droppings can be J-shaped (often a tom) or in a spiral shape or a “blob” (usually indicating a hen) in a variety of . But, if you find fresh droppings, that’s a good sign that a turkey is nearby.
Scratching: Be sure to pay close attention to the ground as you walk through wooded areas, as turkeys will scratch the ground. They do this to look for insects as well as other types of food, like acorns. Scratching can be a great clue to whether turkeys are frequenting and feeding in wooded areas on the property you will be hunting.
Dusting Areas: Turkeys like to roll belly down in loose soil or sand to clean their feathers and will leave behind distinct areas of disturbed terrain along logging roads or under standing pines.
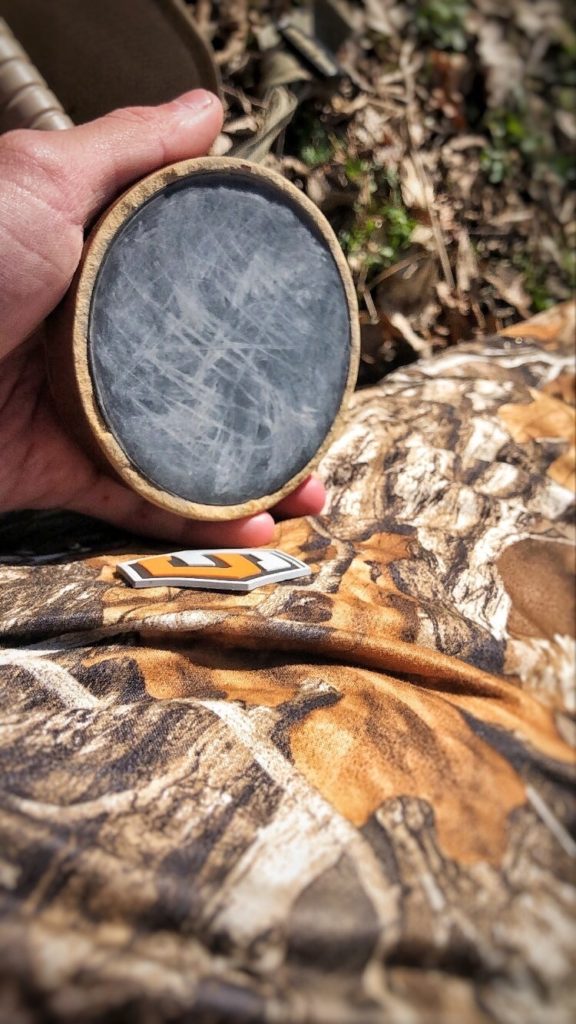
To be successful in turkey hunting, many hunters rely on calling to help bring the birds within shooting range.
Calls work by replicating a wild turkey’s natural vocalization. Turkeys of all ages and genders produce various types of yelps and calls.
Box, slate, mouth, diaphragm, and locator calls (like crow and owl calls) are all different options a hunter can choose from. However, beginners usually find a box calls as one of the easier ones to get consistent sounds.
Mouth calls, box calls and slate calls are some of the many types of calls you can use when turkey hunting.
A box call is used by scraping a paddle bottom along the side of the box panel’s lip. The hollow inside chamber provides a distinct note that appeals to the birds.
Here are a few tips to remember when calling turkeys:
Practice, practice, practice: As a new turkey hunter, it’s important to learn basic calls like the cluck, cut and the yelp. Learn all you can about making these turkey vocalizations as life-like as possible.
Get real: Turkeys aren’t all that different from people in that they don’t always sound exactly the same. Mix in some varying cadences in your calling. There’s nothing more unnatural (or annoying) than a “turkey” that makes the exact same sound for the same amount of time, every single time it calls. Turkeys can be extremely wary, so don’t let your calling be one of the reasons. Mix things up.
Keep it short: Keep your call series brief. You won’t be able to hear a tom gobble in response in you are yelping your head off! Listening is as important as calling, so keep thing short and stayed tuned in.
That’s it, nice and soft: If you notice that you have a tom’s attention with your calling, don’t keep calling at the same volume. Change your calling to softer clucks and purrs and see if you can smooth-talk him into range.
Sometimes less is more: Turkeys will be wary if you call too much, so make sure not to call too often. Sometimes the best thing to do after calling is not to call again. A tom may get worried that his mate-in-waiting has decided to leave and he’ll want to find her!
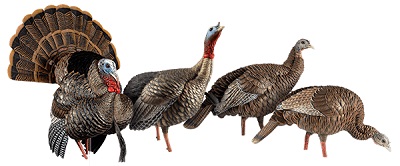
Another way to attract turkeys is by using a decoy. Turkeys are territorial, so if a gobbler happens to see a hen decoy or another jake or tom infringing on their territory, he is sure to take notice.
There are many price ranges of turkey hunting decoys on the market. Spend the extra money to get the most realistic ones you can afford.
When turkey hunting with decoys, here are a few tips that are helpful to know:
Decoy transportation: Be sure to carry your decoys head down in a bag. In the event another hunter is in your area and thinks the decoys are real turkeys, it could lead to a terrible injury or even death. Safety first!
Use a hen and a jake decoy: A gobbler will be attracted to a hen, (and mad if it sees a young male turkey trying to steal his girl!)
Close but not too close: Be sure your decoys are close enough so that if a tom gets hung up on the far side of them, he is still close enough to shoot and kill. But, they also need to be far enough away so that your gun’s shot pattern can open up. Setting up decoys at about 15 yards is a good rule of thumb.
Placement is key: When setting up your decoys, ask yourself, “could a turkey see these from a long way off?” If the answer is no, then consider repositioning. The last thing you want is to call and have a tom come in and not see what he was looking for and leave… heartbreak city! Setting up your decoys in the open will also allow other hunters to identify them as decoys, so that they don’t attempt to shoot in your direction.
Don’t skimp: If you’ve walked the hunting aisles at your local sporting good store, you have probably noticed that there are are many different brands of turkey decoys (and several price points). Get the most realistic you can for your money. A life-like decoy could be the difference between getting that tom in close enough to shoot and watching him run off to be hunted another day. Spend the money and get good decoys.
There is more than one method of hunting for turkeys. Let’s briefly cover those.
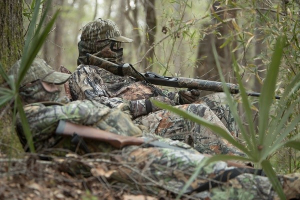
Camp out at the base of a tree
If you have the ability to be very still, you might try sitting at the base of a tree as you wait for Mr. Tom Turkey to pay you a visit.
If so, try to find a large tree that is larger than shoulder width. A wider tree base will help conceal your shape better than a thinner tree.
Believe it or not, you don’t have to hunt from a blind for turkeys. But, you do need to be concealed well with camo and natural cover and be able to stay very still.
Also, be sure you have appropriate camo for the area/habitat you are hunting. Wear a face mask as well. Turkeys can see very well, so take the extra effort to sit still and stay concealed.
If you are fairly certain of a tom’s presence in the area, and have an idea of where he is going to be, and you want to sit moderately comfortably while you wait, a blind may be a good option.
Ground blind hunting can work well in clearings, field edges and ridges and is a good option if hunting with youngsters.
Turkey blinds are also a good option if you are hunting with kids. It’s a little easier to get away with movement if you are in a blind. So, if you or the youngsters are a little fidgety, a blind might be a good option.
Even if you are hunting from a blind, it’s still a good idea to wear dark clothing and a mask or face paint that will blend into the darkness of the inside of the blind.
You can set up your blind on a field edge or ridge. Blinds can work great when using decoys as well.
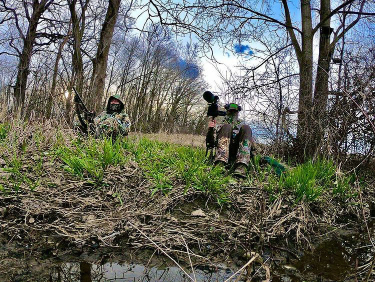
When it comes to turkey hunting, “running and gunning” can be a very exciting and effective way to bag a gobbler.
Basically, it means that a hunter will not be stationary, as if he/she were in a blind or sitting at the base of a tree. Rather, the hunter will try to locate turkeys by walking short distances, watching, calling, and listening for turkeys.
So, if the hunter calls and hears a gobble, the next step is to try and pinpoint the location of the tom and get as close as possible and get set-up in order (at the base of a tree, for example) to make a good shot on the bird.
“Running and gunning” for turkeys is quite the rush, but can leave you scrambling to find adequate cover that is close enough to get a shot on a tom.
Much like hunting from the base of a tree, you need to use the available natural cover and also be sure to wear as much camo clothing as possible, including face mask/paint, camo shoes/boots, etc.
Once you have located a tom, be sure to set up where you will have a shooting lane toward the bird’s expected travel path. It’s important to always be sure of where you are aiming and shooting.
If you cannot clearly identify the bird, do not shoot. Never shoot into brush or an area where you cannot clearly see the target. Safety first!